Defender, Chapter 2: The Controls
This book is devoted almost entirely to the strategy and tactics of good Defender playing. There is, however, another side to playing Defender well – the physical side, the use of the controls. You must master the controls before you will be able to effectively carry out the maneuvers in Chapters 3 through 8. Although using the controls should be intuitive, with no conscious thought involved, it pays to think about them a little at first so you don’t develop bad habits that are hard to break.
The controls in Defender are so hard to master that some players assume that’s all there is to the game – fast fingers and good hand-eye coordination will automatically make you a good Defender player. This is not true. There’s no denying that fast hands can help your Defender playing, but they aren’t terribly important – I’ve even played to a million points while wearing heavy wool mittens. Just try to get comfortable with the controls at first, and concentrate on proper strategy rather than fancy fingerwork.
Layout of the controls
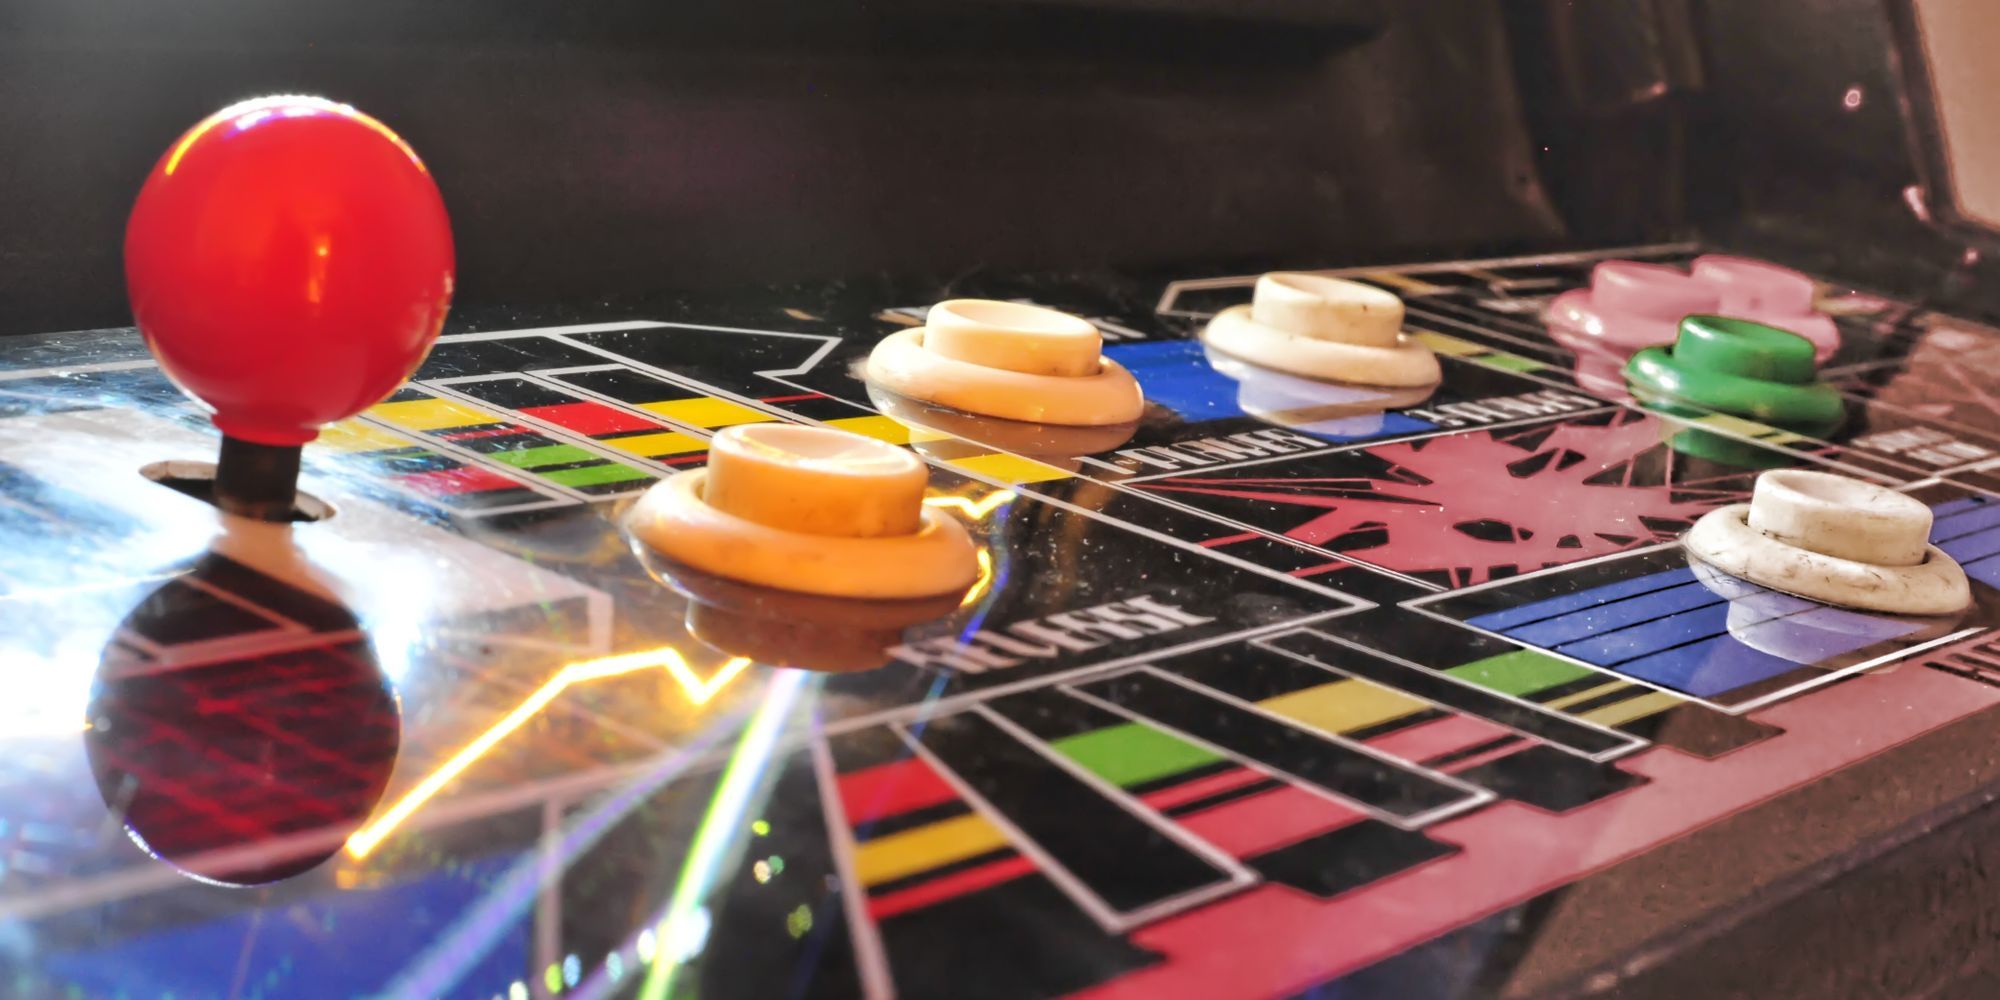
Defender has six different controls: an altitude (up-down) lever, reverse button, hyperspace, smart bomb button, thrust control, and fire button. The layout of these controls is pictured on the next page.
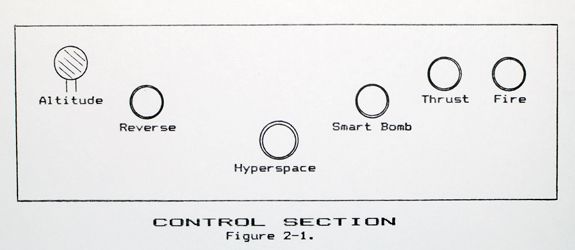
Understanding the effect of all of these controls is the first challenge in learning to play Defender. Because Defender has more controls than most video games, it is very important that their position and function be memorized. The player who has to look at the controls while playing will not be able to react quickly enough to keep up with the game as it progresses.
Altitude lever
The first control on the left is the altitude lever. This is a knob that looks like a miniature automobile stick shift, and is used to move your ship up and down. The altitude lever is connected to a three position switch. In the center position, the ship will stay at the same altitude on the screen. If the lever is held above center, the ship accelerates upward. Holding the lever below center will make the ship accelerate downward. Whenever the altitude lever is release, it snaps back to center position, and the ship’s vertical motion slowly stops.
Note that the altitude lever controls vertical acceleration, rather than actual position. This subtle feature allows precise control of your altitude in tight situation, because you can apply short bursts of upward or downward acceleration as need. After practicing for a while, you’ll be able to confidently fly your Defender ship at high speed through small gaps between mines or bullets.
Reverse button
The button immediately to the right of the altitude lever is the reverse button. This button changes the direction your ship is pointing. Each time the reverse button is depressed, the ship changes direction. To change back to your original direction of travel, the reverse button must be depressed, released, and depressed again. A side effect of the reverse button is that the position of the ship on the screen changes. When the ship is pointing to the right, it is positioned left of center on the main screen; when pointing to the left, it is positioned to the right of center. This provides you with more visibility in front of the ship when while it’s moving. Due to a small oversight by Defender’s designers, there is slightly less forward visibility when moving left than right. (This difference isn’t big enough to account for most players’ inability to fly to the left, however – that’s just a result of favoring flying to the right.)
When the machine is very busy (for example, right after a smart bomb or when there are many objects on the screen), it cannot monitor the status of all the controls as quickly as it normally does. For this reason, the reverse button may not respond immediately. There’s nothing you can do about this problem other than be aware of it, so try to provide a greater margin of error in your maneuvers when the machine is busy – just after detonating a smart bomb, when opponents (landers or baiters) are beaming in, or when there are many opponents (particularly bombers) on the main screen.
Hyperspace button
The next control is the hyperspace button, located in the center of the playing surface. Many video games have a hyperspace button, and they all do approximately the same thing – randomly reposition your ship, in the hope that you’ll wind up in a better spot. Defender is no exception. When hyperspace is used in Defender, four things are affected. First and most obvious is that the position of the ship relative to the terrain at the bottom of the screen is changed. Second, your altitude is randomly changed. Third, the direction the ship is pointing maybe be changed. (Since these are all random changes, there is a 50% chance that the ship will still be pointing in the same direction.) The fourth thing that is affected by hyperspace is the ship’s speed – the ship is always stopped when it reappears.
As in other video games, hyperspacing in Defender entails taking a risk. There is a chance (around 25%) that your ship will be destroyed by it. Hyperspace should only be used, then, when you’re in a predicament you believe you have less than a 75% chance of surviving. In these situations, you have nothing to lose.
Also be aware that there are situations where hyperspace can’t help you, even if you survive. This happens when all of the remaining opponents in a wave are on the main screen and a few baiters are giving you a hard time; since you’ll have to finish the wave anyway, stay where the action is.
An important consideration about hyperspace is the time it requires to take effect. Approximately one second will elapse between the time when you strike the hyperspace button and when your ship reappears. During this time, the landers continue picking up men, baiters may appear, and your own shots continue moving across the screen – though you will not be able to see these things happening.
Smart bomb button
Now we come to the three controls on the right side of the playing surface. The first one of these is the smart bomb. When this button is depressed, all opponents on the main screen are destroyed. Their bullets or mines, however, are not destroyed. If an opponent has fired at you, and you destroy him with a smart bomb, your ship can still be destroyed by his bullet, so get out of the way.
The smart bomb cannot be used indiscriminately. You can only use smart bombs when you have one or more bombs accumulated in the bomb display register, located to the right of your score at the top of the screen. If there are no bombs displayed there, the smart bomb button has no effect. You’re given three bombs at the start of the game, and an additional bomb is awarded for each 10,000 points scored. Smart bombs don’t harm the men on the planet’s surface. In fact, that’s how smart bombs got their name – they’re smart enough to distinguish friends from foes. In many games of Defender this makes smart bombs the most intelligent participant.
Thrust control
The next button to the right is the thrust control. This button controls your ship’s forward acceleration. Holding the thrust control down causes the ship to accelerate up to top speed, which is reached in about four seconds. After the ship is traveling at top speed, the thrust button must constantly be held down or the ship will start slowing down. Forward momentum is always preserved, so your ship can be brought to a stop most quickly by reversing while hold the thrust down, creating a power brake. To travel at any constant speed other than full throttle, the thrust control must be fluttered, or pressed and released at a steady rate. Good fluttering technique will allow you to travel at your own most comfortable flying speed, rather than the built-in top speed of the machine.
If you’ve played Asteroids, you’ll notice that the thrust, fire, and hyperspace buttons are in the same places on the Defender control board as they are in Asteroids. This is more than a coincidence. At the time Defender was being designed, Asteroids was the most popular video game in the world. Defender’s designers intentionally made the controls as similar to Asteroids as possible, so Asteroids players could easily adapt to them.
Fire button
The last button on the right is the fire button. Like most video games, Defender allows a limited number of shots on the screen at a single time. In Defender, the limit is four; once you have fired four times, you can’t fire again until one of those shots has hit something or passed off the edge of the screen. But unless you have exceptionally fast fingers you won’t notice this limit, since your shots travel so fast that the first one is almost always off the screen before you’ve hit the fire button four more times.
Your shots, or laser bursts, are displayed as beams of colored light with a small white tip, traveling from the front of the ship to the edge of the main screen. Shots are only effective until they hit the edge of the screen. It’s possible to shoot an opponent that is slightly beyond the edge of the screen, however, when you’re moving forward. This is because the shot is still alive until it overtakes the front edge of the screen, which is moving forward. Also, note that only the white tip of a shot is effective; opponents can (and will) pass through the colored section unharmed.
When the machine is very busy, your shots will travel so slowly that opponents may move out of the way before your shots get to them. When this happens, be prepared to dodge objects that you thought you’d destroyed – they’ll still be there.
Fingering
Correct positioning of the hands and fingers is very important. Your hands should rest comfortably on the playing surface, with your wrists straight. All control should come from the fingers and fingertips – in particular, don’t bounce your right wrist up and down while firing.
The altitude lever should be gripped with the first two or three fingers of the left hand, leaving the left thumb free to operate the reverse switch. In order to control small adjustments in the altitude lever, some part of your left hand should be resting on the playing surface next to the altitude lever. This provides a point of reference for the motion of the lever, and is the source of “Defender calluses” on the left hand of many players. The calluses are caused by your hand rubbing against the playing surface when you move the altitude lever. These calluses will begin to disappear after you gain enough confidence to relax and not press so hard against the lever.
Your right hand should be positioned with your thumb over the smart bomb, index finger on the thrust control, and middle or ring finger on the fire button. I prefer to use my ring finger for firing because it is more independent of the motion of the index finger. This independence not only provides better control, but gives your fingers more endurance in longer games because the adjacent muscles of the first and second finger are not working against one another.
The only control that will not always be under your fingertips is the hyperspace button. To strike the hyperspace button, you must release the controls under either your right or left hand. Either approach has some merit, so you’ll have to make a choice. Using your right hand doesn’t interrupt control of the altitude lever, so you can still dodge objects during the time it takes to reach the hyperspace button. Also, the right hand will seem most natural to Asteroids players. The left hand is good because it can be returned to the correct position quickly by just grabbing the altitude lever; this allows you to keep your eyes on the screen to quickly determine where your ship reappears. Another advantage to the left hand is that you’ll never accidentally blow off a smart bomb when bringing your hand back to the controls.
The importance of trigger independence with in your right hand cannot be overemphasized – if you release the thrust while firing rapidly or stop firing while depressing and releasing the thrust, the maneuvers discussed in later chapters will be difficult, if not impossible. As musicians have known for thousands of years, the best way to practice finger independence is with a loose, straight wrist (so there is no tension in the muscles in the back of the hand), and with your fingers curved slightly. Look at your fingers right now – that’s the way they should look when you play. By curving your fingers, the flexor tendons in them have more leverage and can pull more quickly than if your fingers are held straight. Some players hold their fingers completely straight and flutter the middle finger up and down on the fire button, but this is an inherently limited approach, a rhythmic trick that can only be turned on or off. Different situations in Defender require many different firing speeds, so get used to playing with your fingertips and thinking of each shot as an individual decision, no matter how rapidly you may be firing.
Stance
The last part of the physical side of playing Defender is your stance. You should stand at the machine in a way that keeps your eyes level with the main screen, to take full advantage of your peripheral vision. If you’re over 5’8″ tall, this will mean either bending over or spreading your feet apart. Bending over can get uncomfortable after awhile, so you’ll probably prefer to spread your feet. If there’s room, spreading them to the sides is preferable to spreading them our forward, because it lets you stay close to the screen. Of course, if the machine you’re playing has a stool of the right height in front of it, you won’t need to worry about stance.
Other considerations
Before we leave the physical side of Defender playing, there are a few more things to consider when you get ready to play a game. First and most important is the subject of cold drinks. If you’re drinking something cold while playing (well, between turns), hold it in your left hand so that your thrust and fire fingers don’t get cold and slow. During your turn you can set your drink down between the ONE PLAYER and TWO PLAYER buttons, the only place where it won’t slide off the playing surface. This will obscure a small part of the bottom of the screen, but the bottom of the screen is a dangerous place anyway, and having that drink sitting in the way gives you a great excuse for getting in trouble down there. (Depending on what you’re drinking, you may already have an excuse.)
Another thing to think about is proper footwear. If you stand with your feet apart while playing, you’ll want something that gives your ankles good support. And if the floor in front of the Defender machine is tile or wood, wear shoes that will grip well enough to prevent you from inadvertently doing the splits, a frustrating experience when it happens in the middle of the game. (High-top basketball shoes fulfill both of these requirements admirably.)
Playing Defender can get a lot of adrenaline flowing in your body, enough to make you sweat on even cold days. For this reason, layered clothing is a good idea; you can dress down as you warm up. On hot summer days, cutoffs and T-shirts are great if the place you play allows them. For one week in the summer of 1981, when I was practicing Defender many hours a day, the temperature reached 90 degrees almost every day. (This is very unusual for Seattle.) The arcade where I played Defender had a black roof, and the heat inside was almost unbearable until I found a solution: Lake Union. I would jump in the lake on the way to the arcade, and dripping wet I could play comfortably for hours.
- About this book
- Introduction
- Chapter 1: Getting Started
- Chapter 2: The Controls
- Chapter 3: Landers
- Chapter 4: Mutants
- Chapter 5: Swarmers
- Chapter 6: Bombers
- Chapter 7: Baiters
- Chapter 8: Catching Humanoids
- Chapter 9: Free Space
- Chapter 10: Strategy
- Chapter 11: Miscellaneous
- Chapter 12: Stargate
- Chapter 13: Attitude
- Acknowledgments