Building a Workbench
Another long blog post. TL;DR version: I built a workbench, it was fun and I learned a lot, and now I've started using it.
When I retired in July of this year, woodworking was high on the list of things I was looking forward to spending my time on. Both for the fun and satisfaction of learning some new things, and also because we had so many things we wanted to build for our house: new nightstands in the bedroom, builtin shelves in the library (the room formerly known as my office), a nice hardwood bar for the parlor, a new closet for the bedroom, and so on.
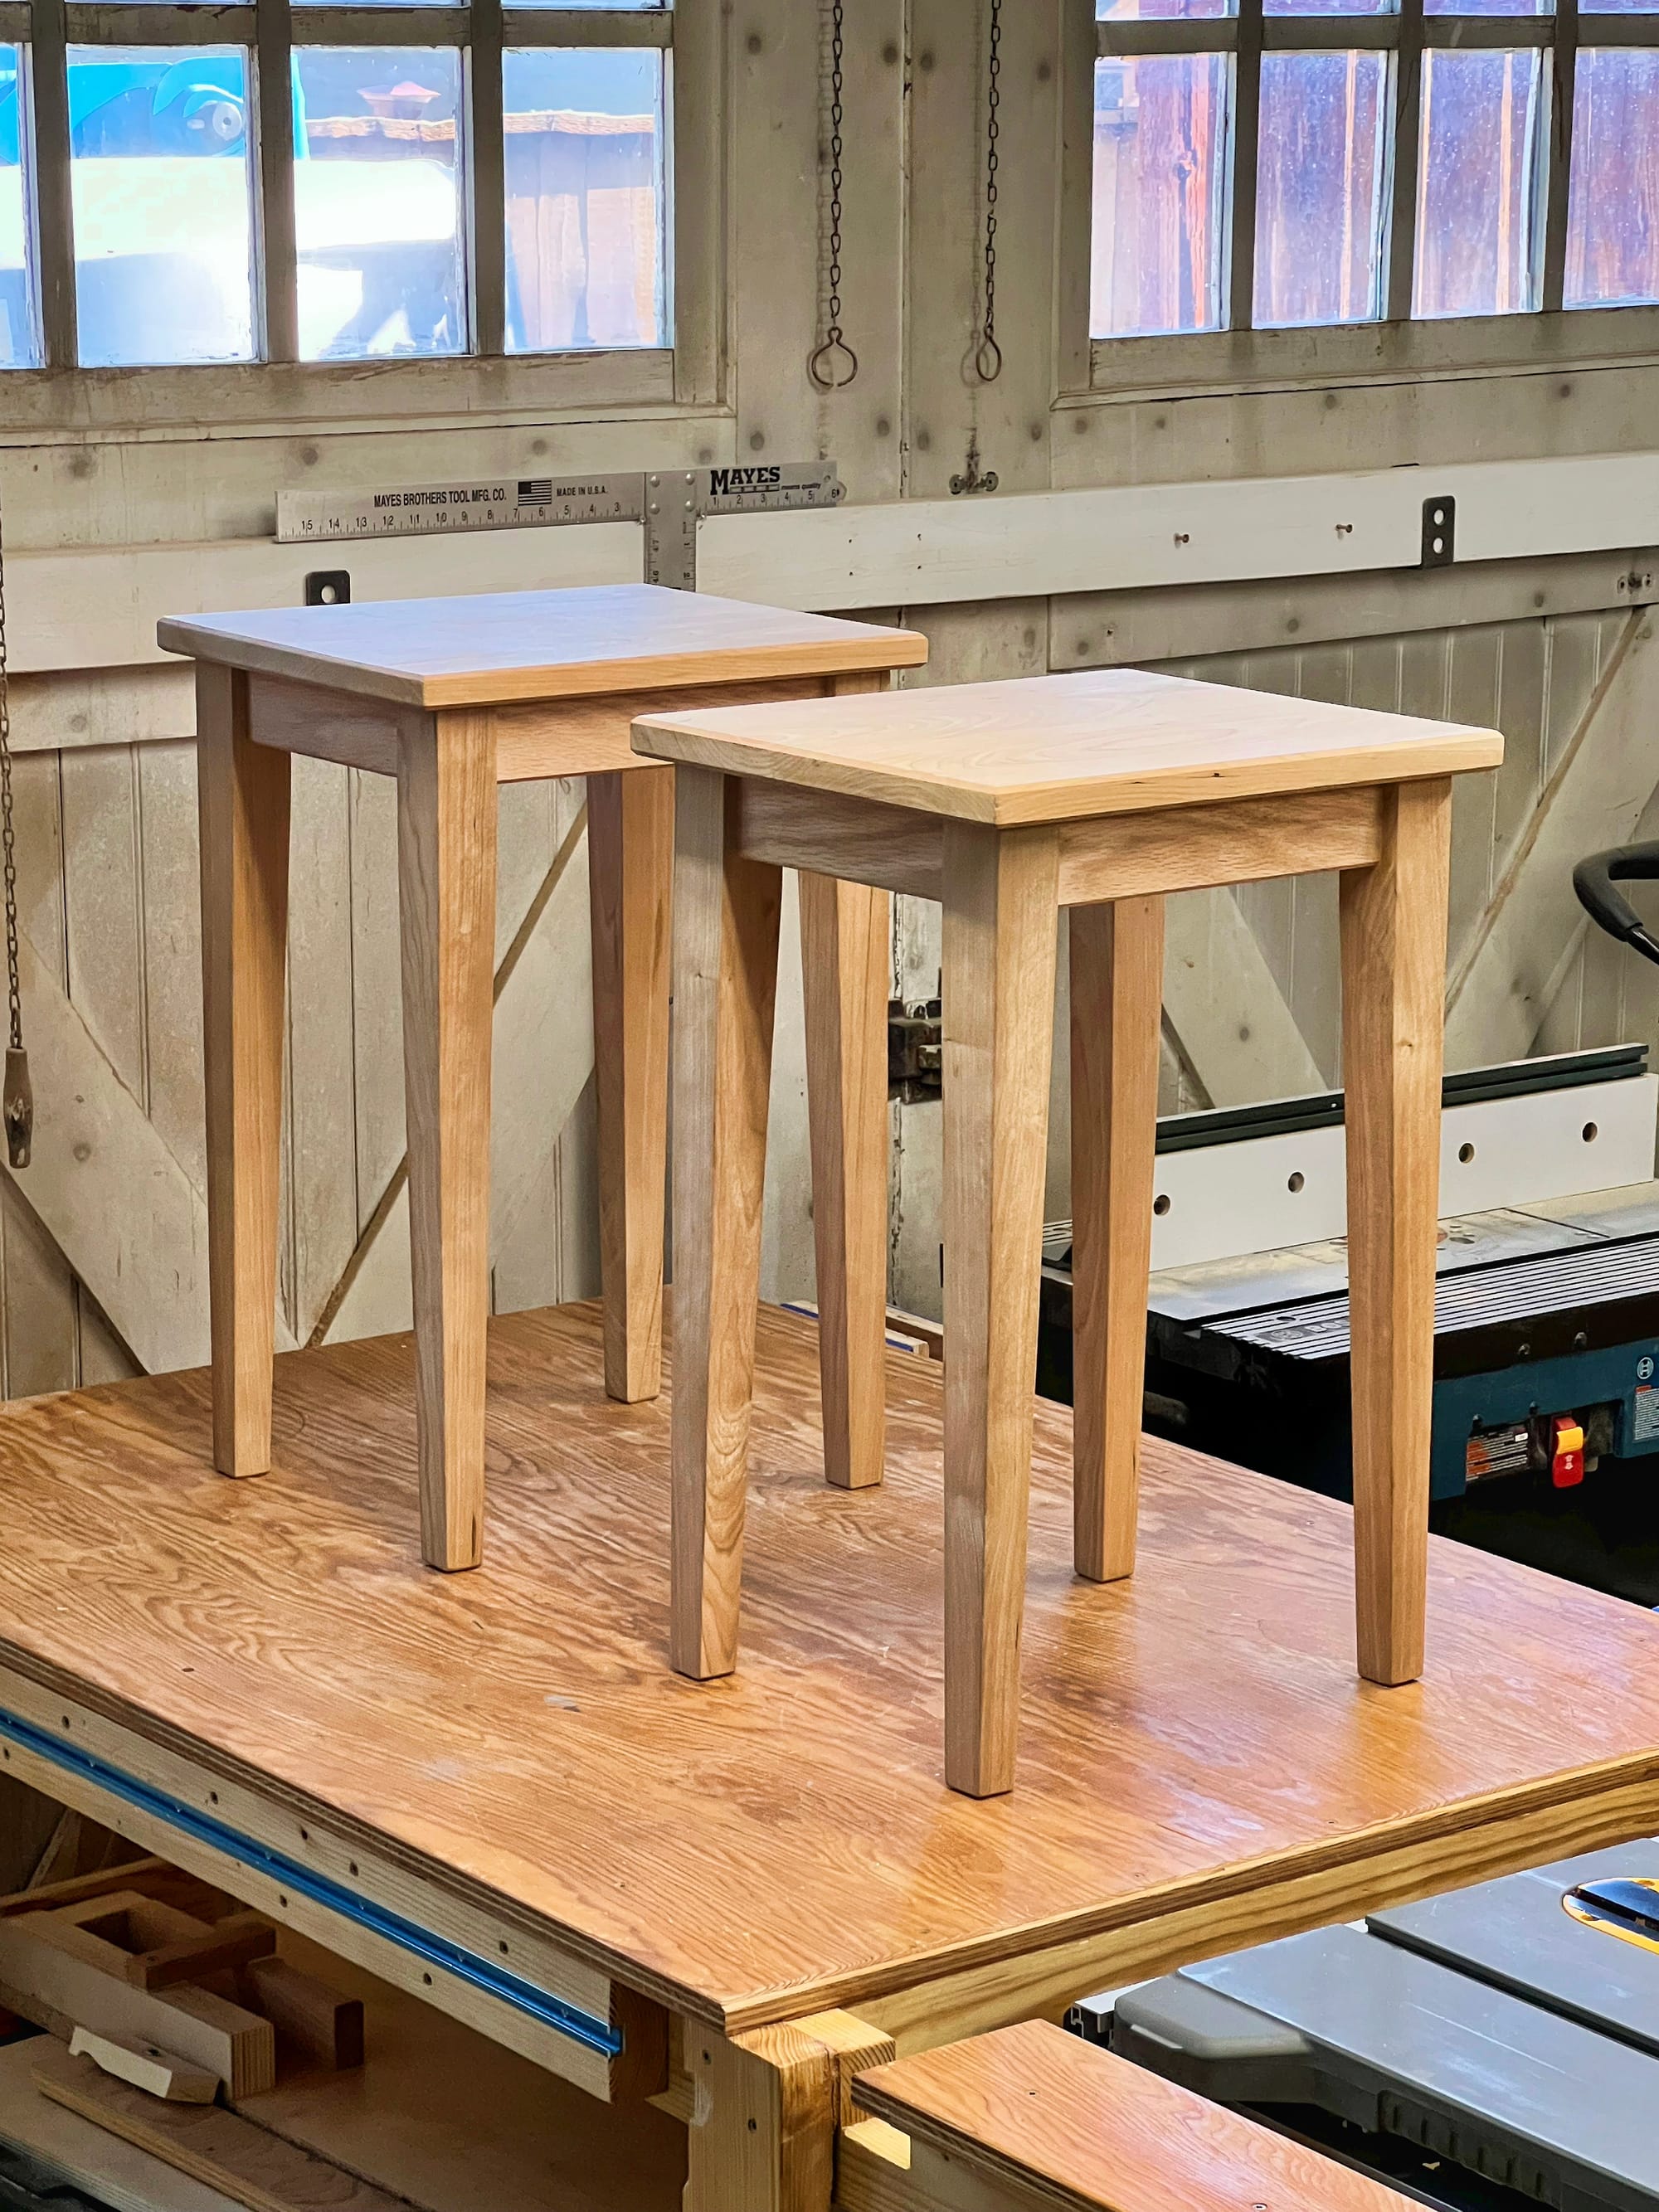
The first thing I tackled last summer was to make two simple Shaker style end tables for out on the deck. I learned a lot making those, and one thing I learned was that I didn't have a good solid place to hold lumber while working with chisels and handsaws. When I clamped the legs and aprons of those deck tables to any of the work surfaces I had at the time, they would wobble and shake while I chiseled and sawed. Not good.
So I started doing some research on options for a much heavier workbench with better workholding options. One option is to just buy one, and for a while I was lusting after a $3600 workbench made by Sjobergs. Sjobergs is a Swedish company that's been building workbenches for over a century, and they're now the world's leading manufacturer of craft and woodworking workbenches.
But a retired guy can't be spending that kind of money on toys (at least this retired guy, anyway), and also I couldn't find a Sjobergs model that was exactly what I wanted, in terms of its size and configuration.
So I started thinking about what it would take to build my own workbench. I learned that Chris Schwarz, the former editor of Popular Woodworking Magazine, had written a comprehensive book called Workbenches: From Design & Theory to Construction & Use, so I bought a copy and read it carefully. The book includes technical diagrams for building many different styles of workbench, but more importantly it teaches you how to think about designing and building a workbench. For example, I love the respect for the past embodied in this quote from the introduction: “If you can see in your mind’s eye a workbench device that no one has ever invented before, and you think you need, them I caution you. Chances are that someone has come up with a way to do what you want to do, and they used simple technology to do it.”
After reading about the history of workbenches, from sit-down Roman benches through German woodworking benches of the 17th century, the English Nicholson bench, the French Roubo bench, and many others, I came across a reference to a workbench design that the author has been refining for many years, and I immediately knew that was the bench for me: The Anarchist's Workbench. It's a design for a simple sturdy timber-framed bench that can be built from inexpensive lumber that's readily available anywhere in the US from Home Depot or Lowe's. (Well, some places don't have a Home Depot or Lowe's – Butte, for example – but I have a pickup and love to drive.)
I downloaded the 323-page PDF and printed a copy and spiral bound it, and over the next few months that printed copy was with me constantly. I had it in the shop while working on the bench, it sat on my nightstand in case I needed to re-review something that occurred to me late at night, and it was my reading material on flights to Brussels and Palm Springs this fall. The bench was finally complete today in late November, roughly four months after I started, and I'm expecting it to live up to Chris Schwarz's advice to build a bench “capable of doing things you might not be ready to do yet. And when you are ready, your bench will be willing and waiting.”
The rest of this post goes through the process of building the bench. Few people will be interested in all of these details, but if you're one of them, enjoy!
Buying Lumber
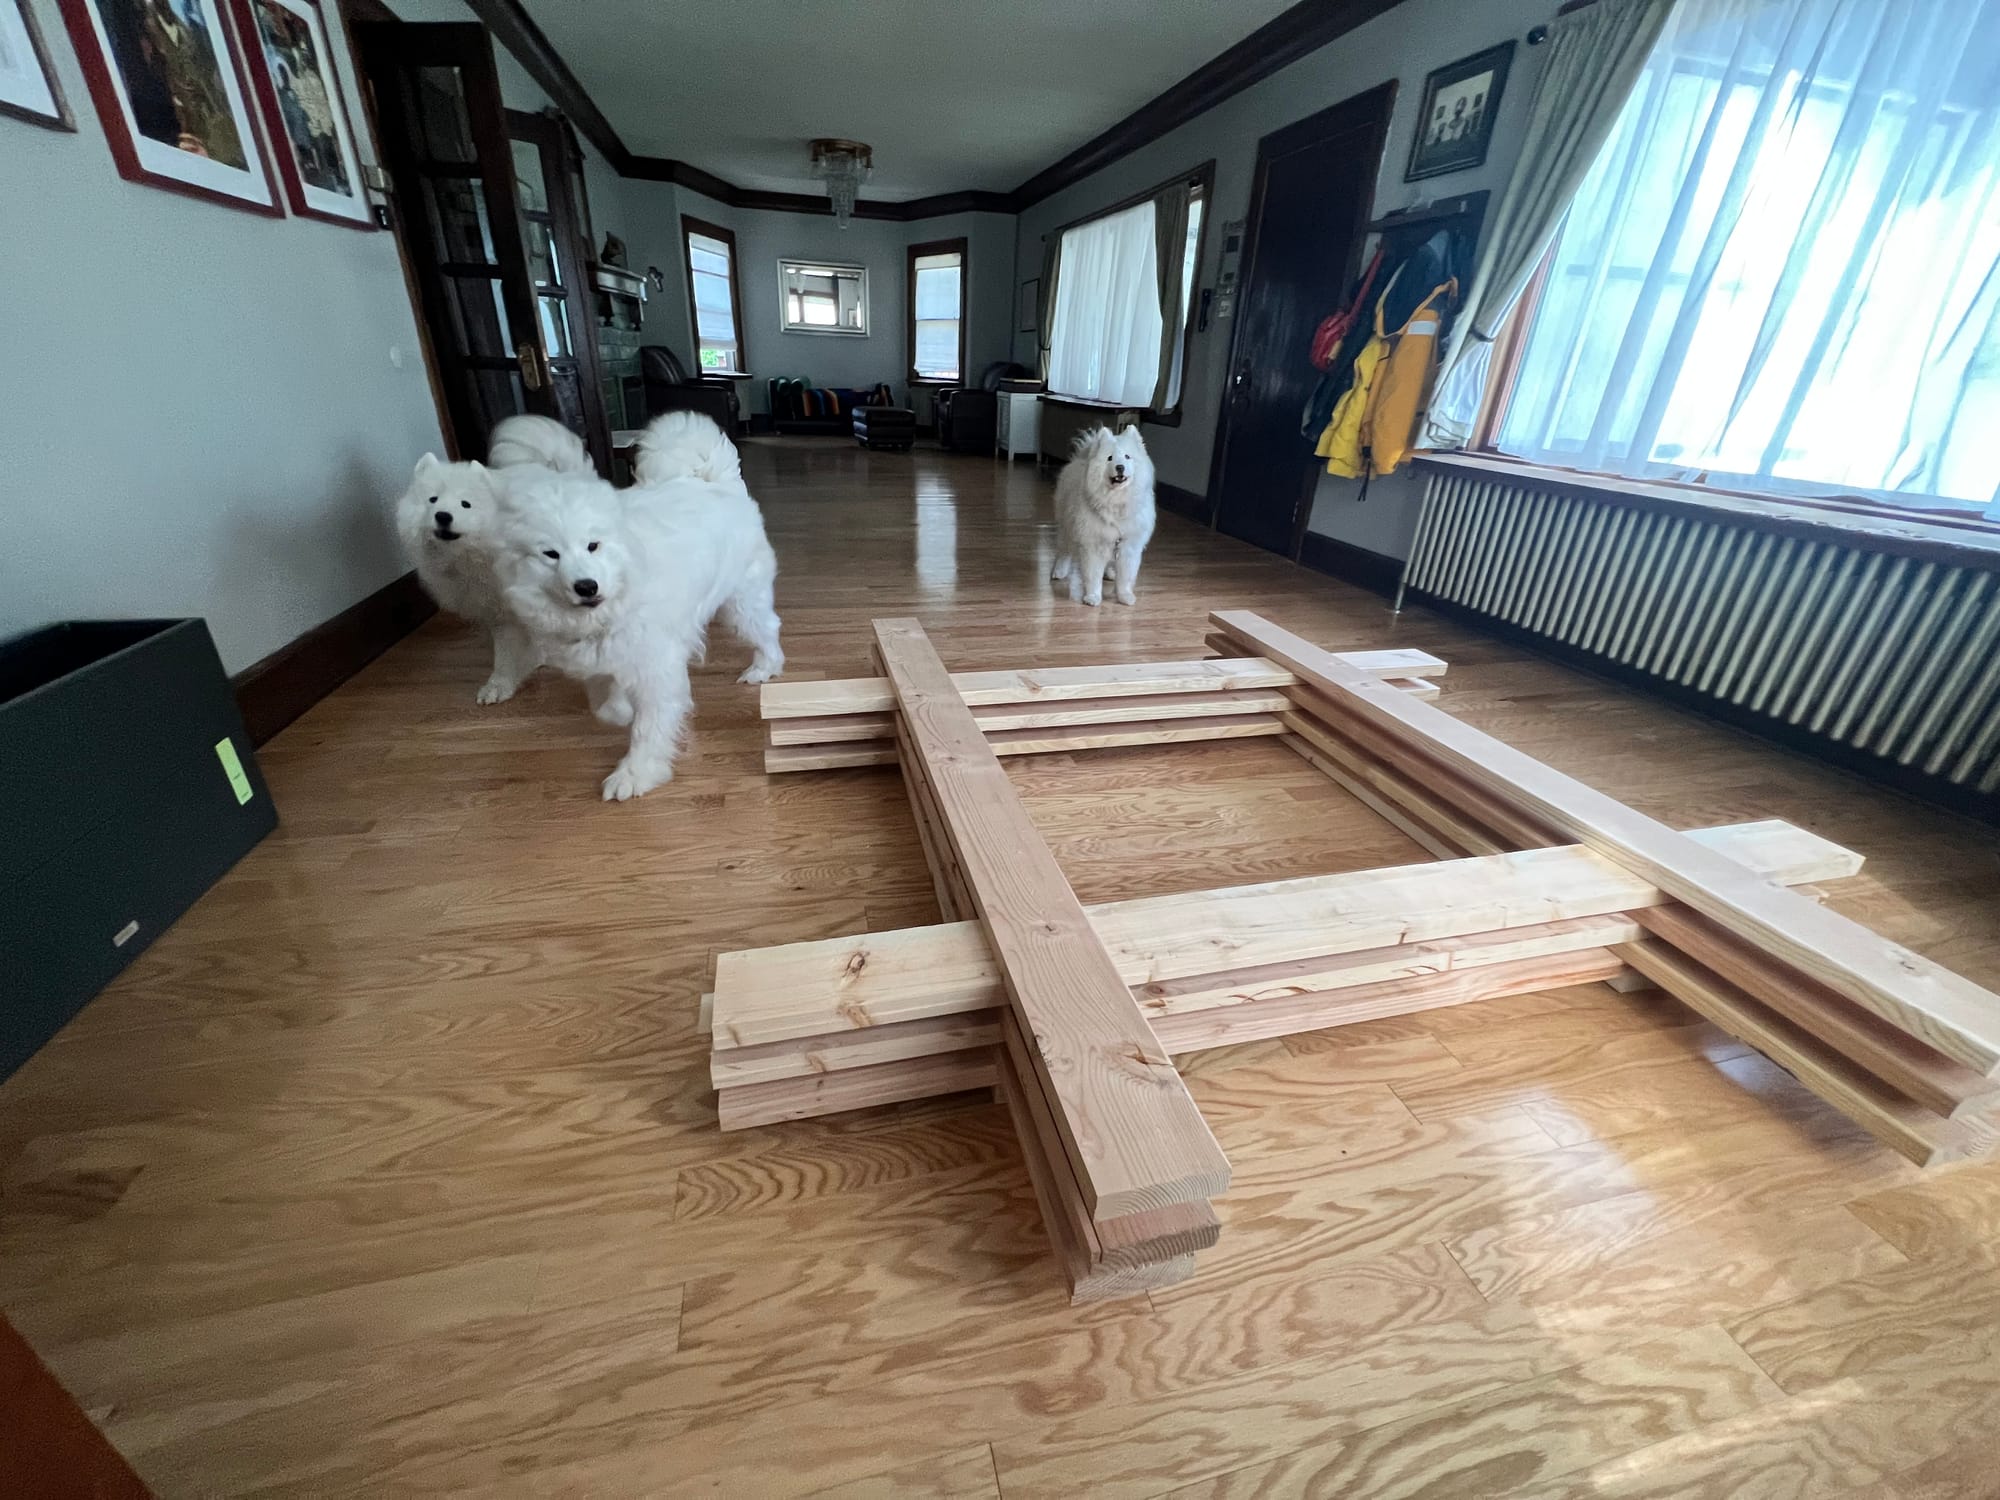
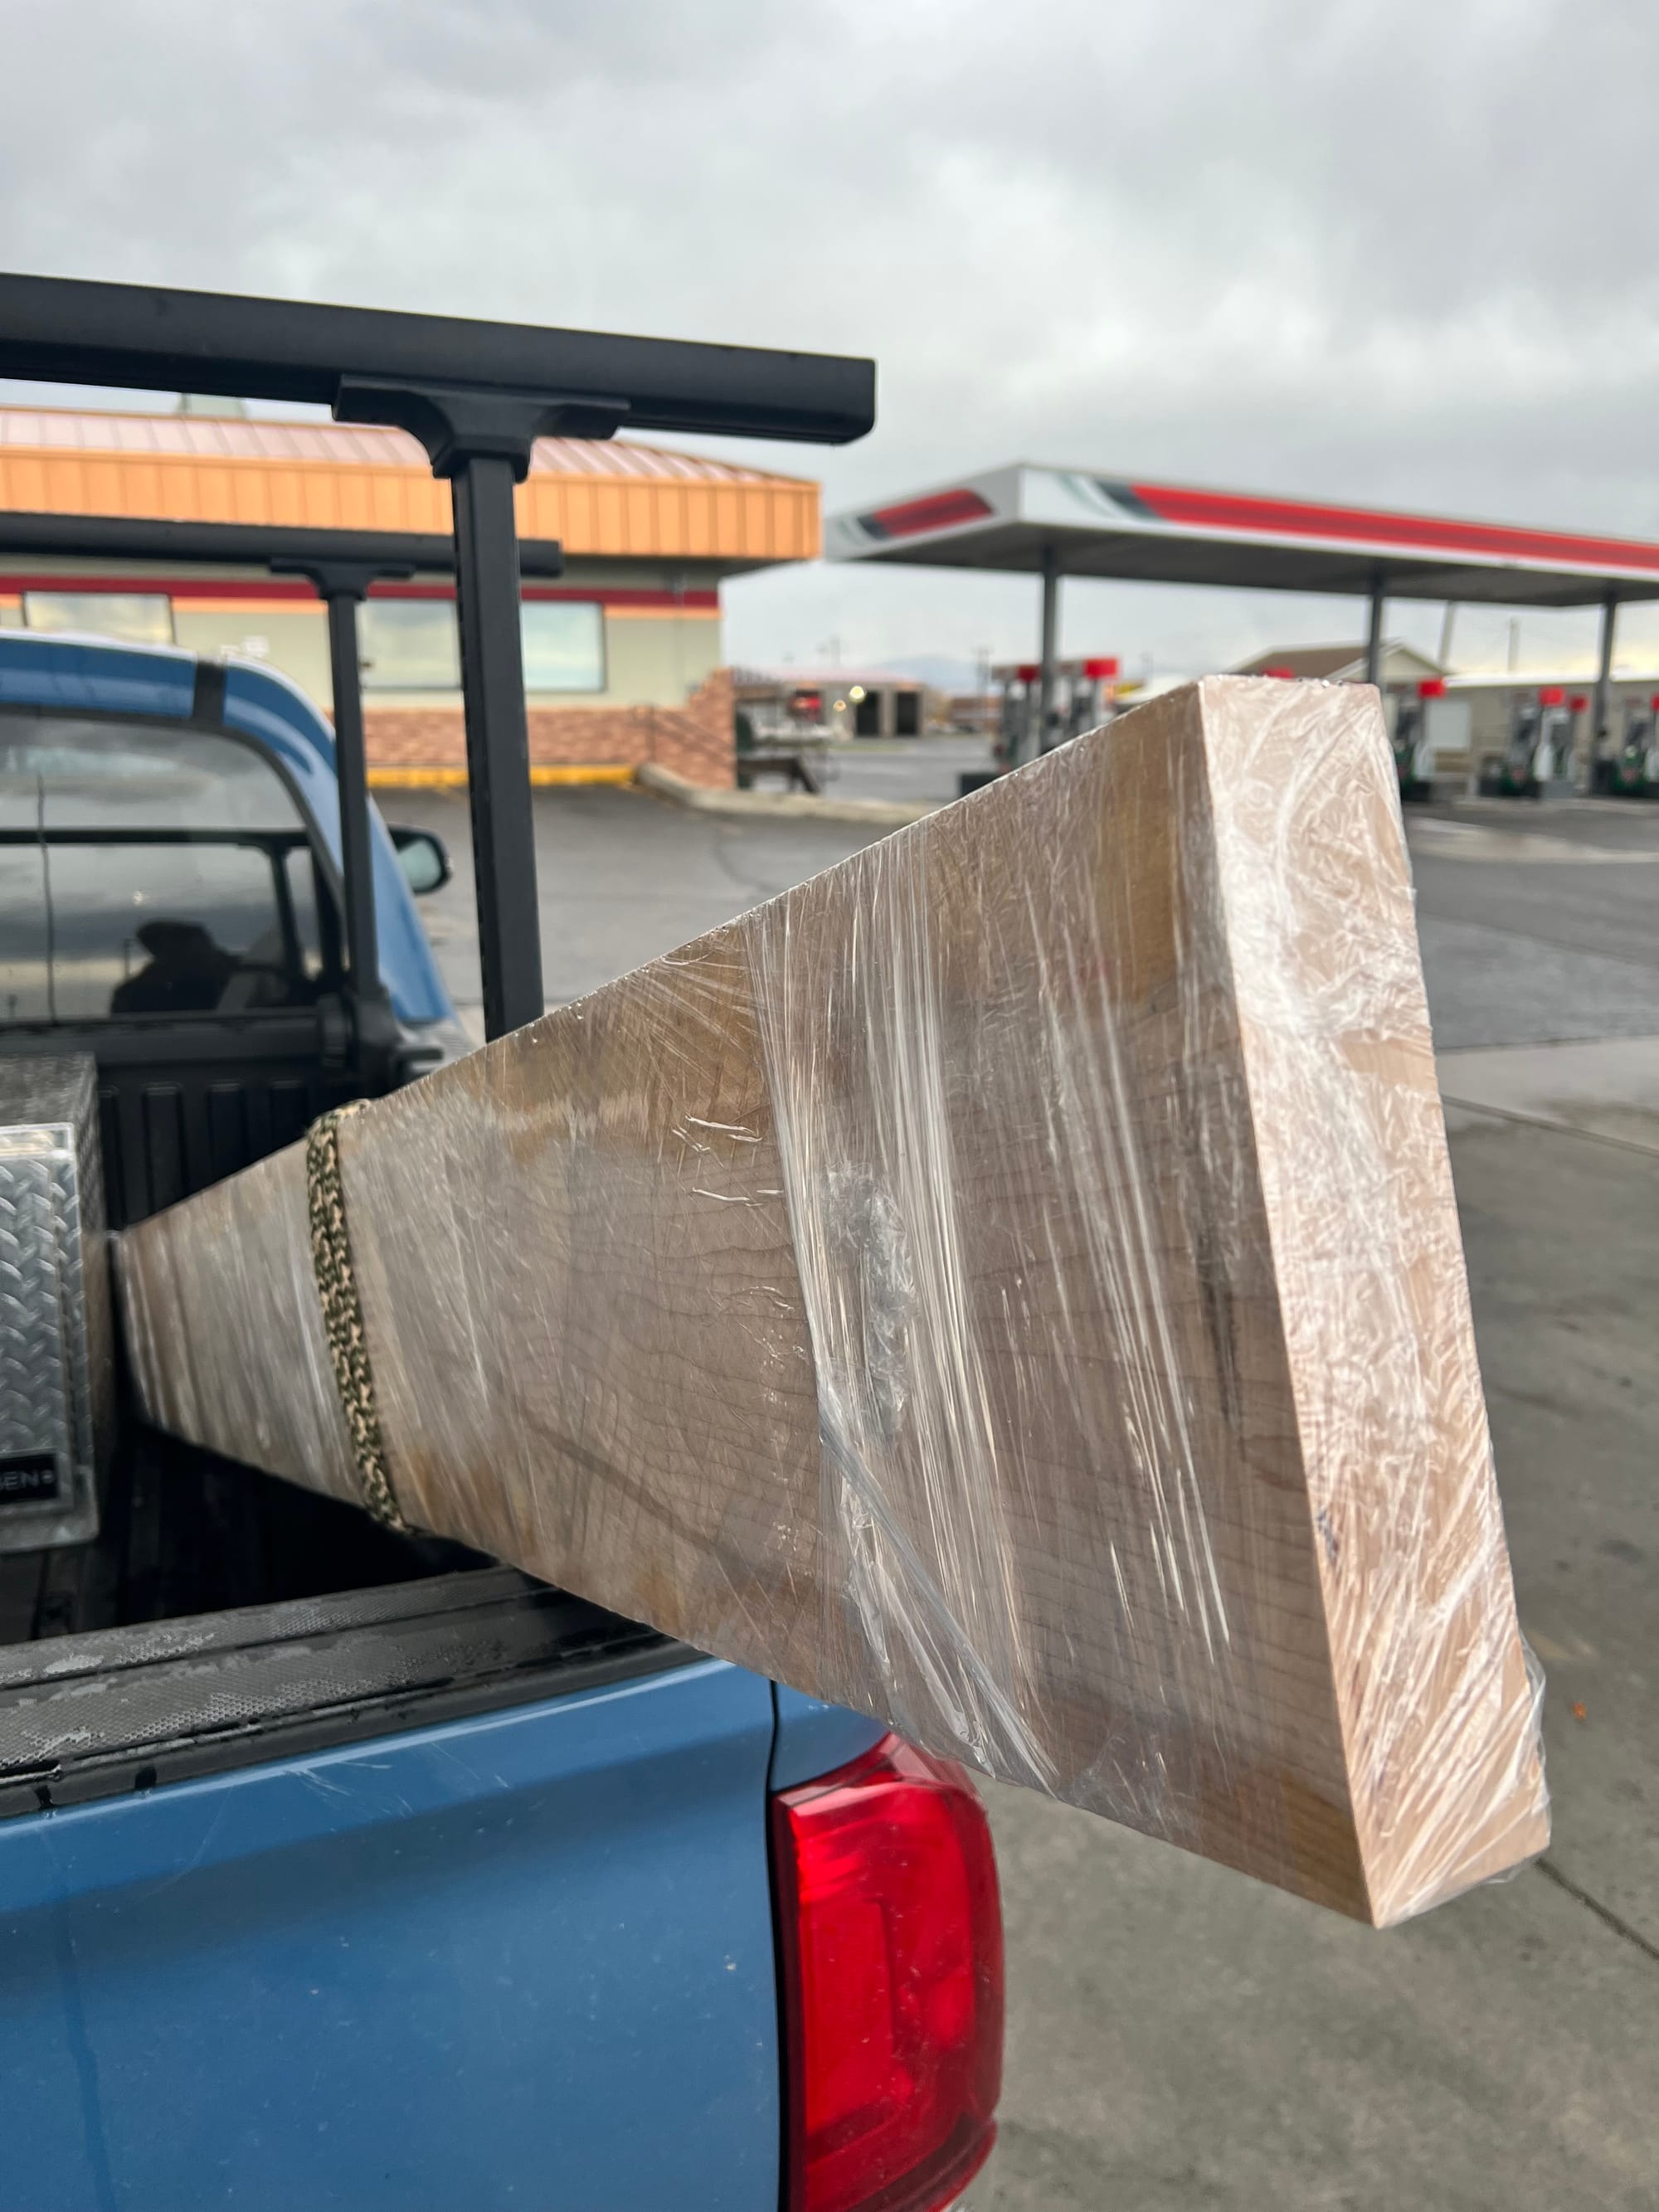
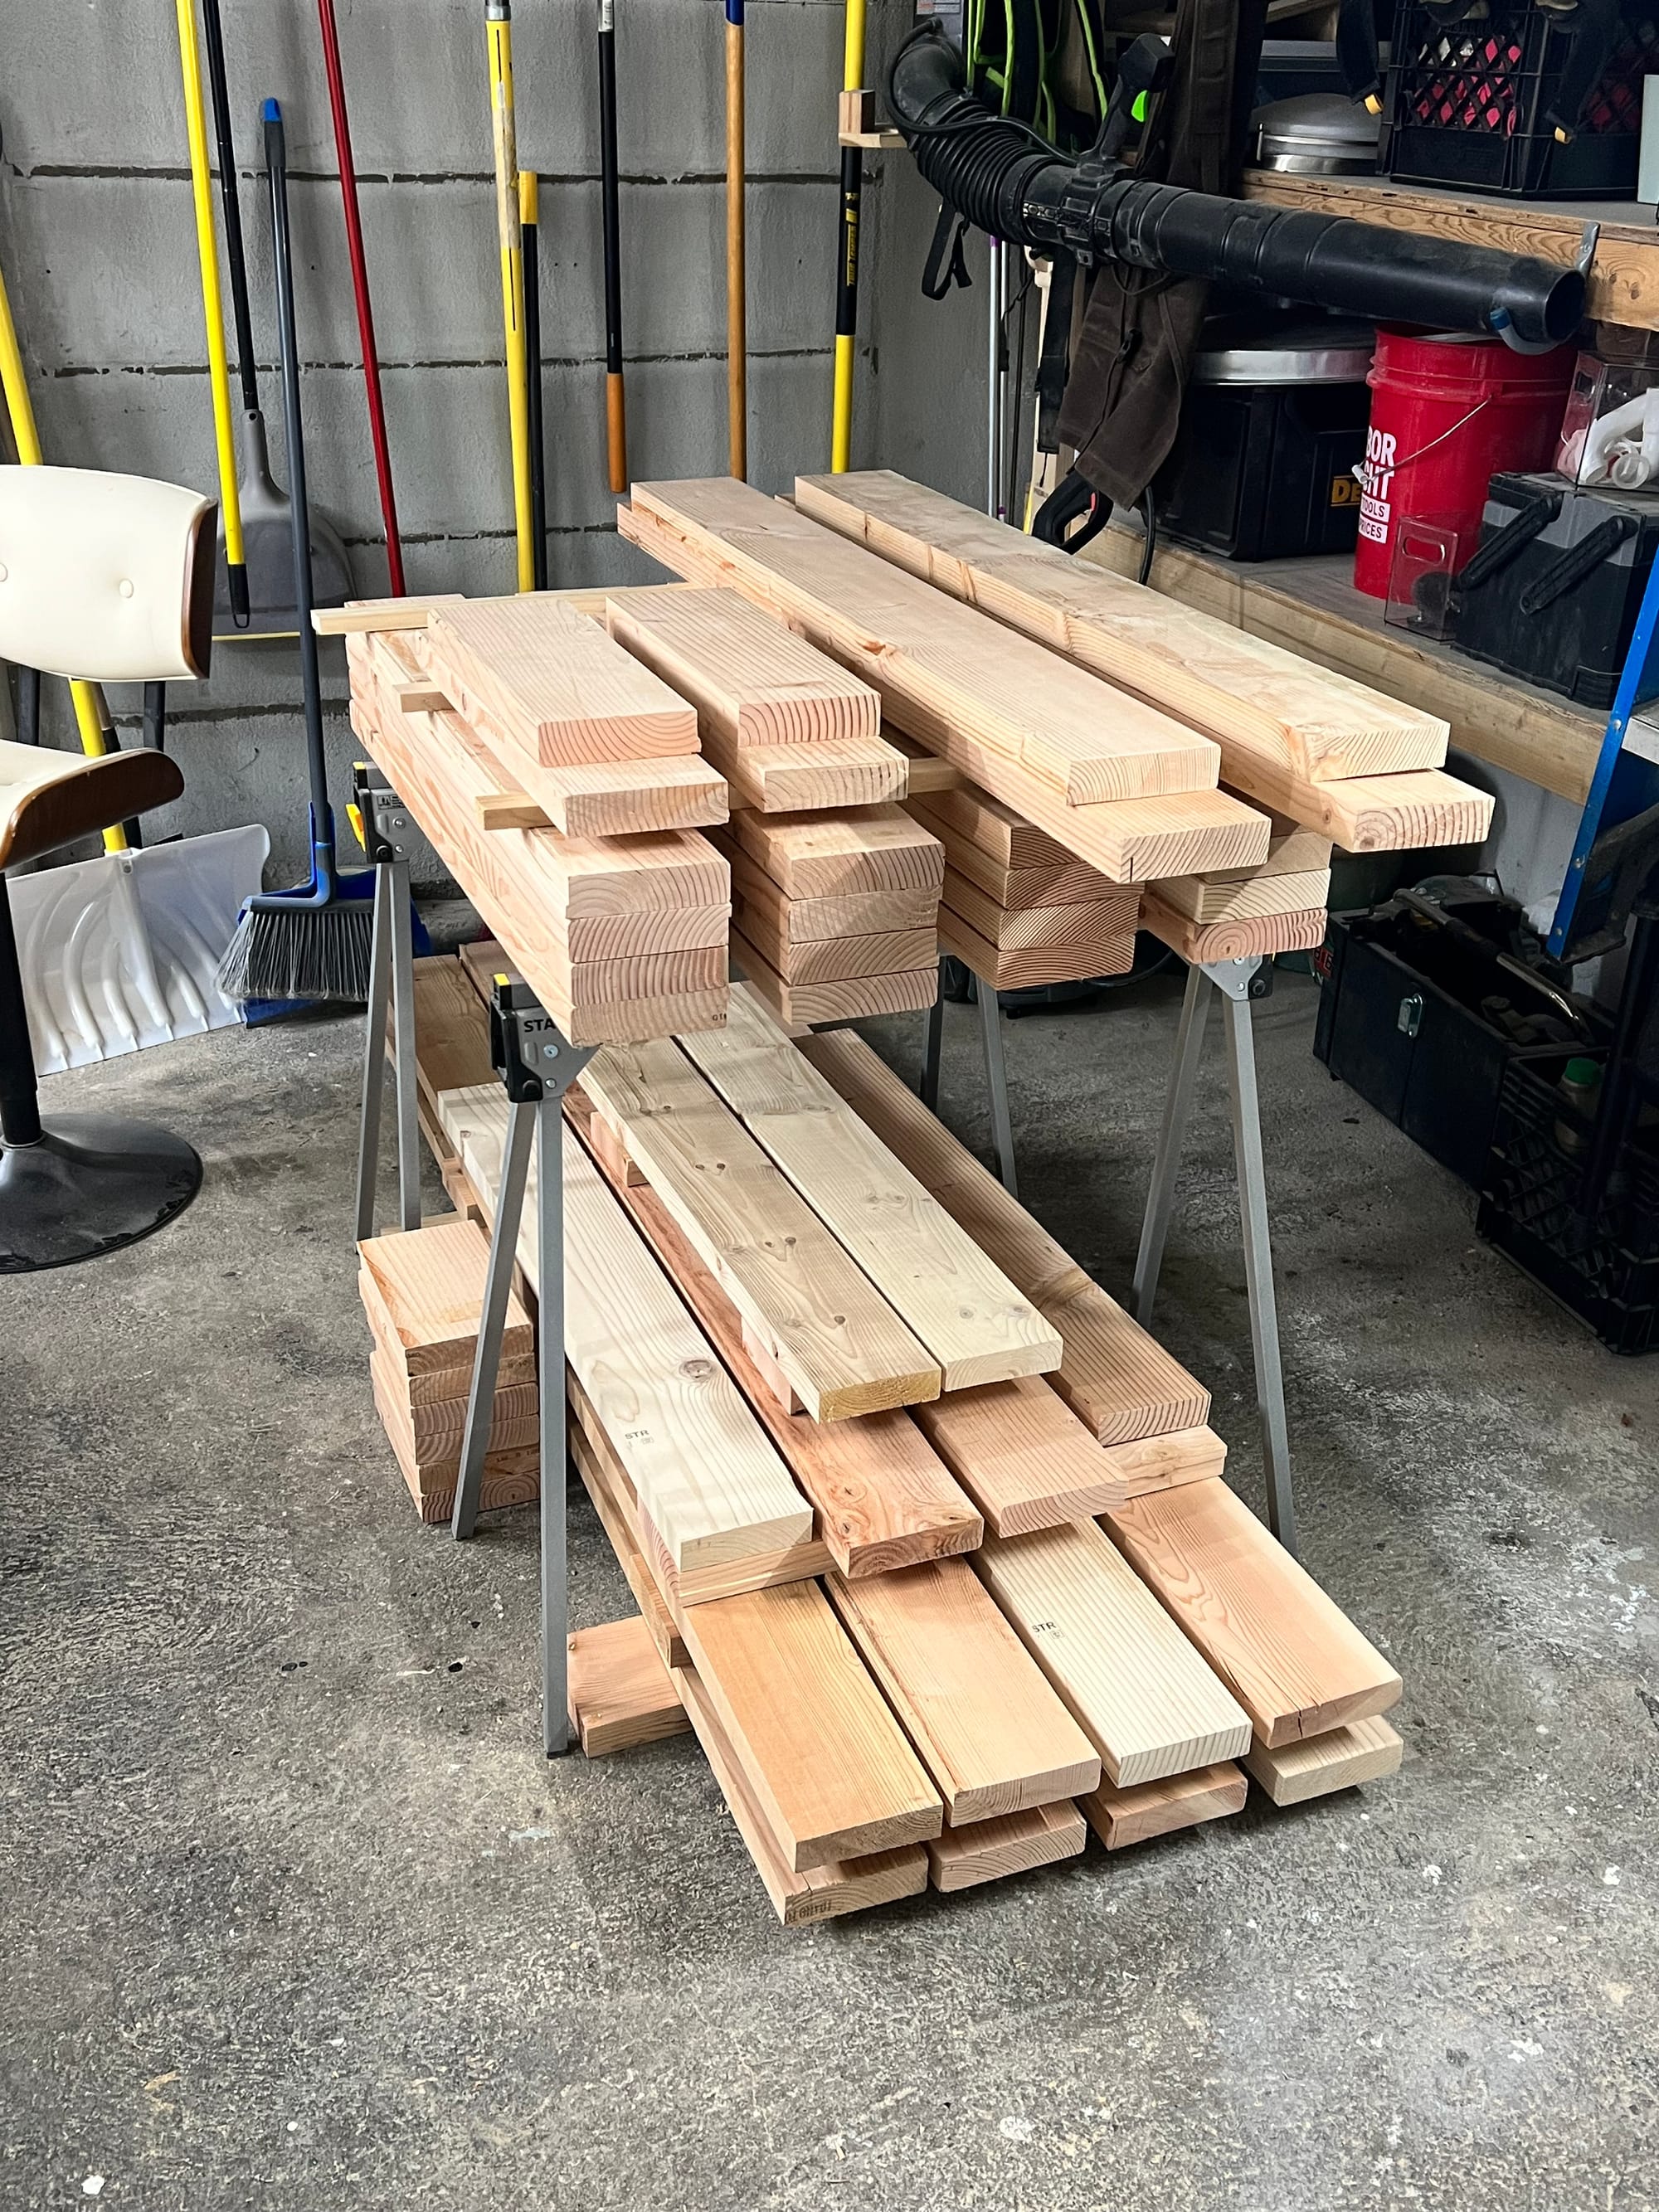
The first step in building the Anarchist's Workbench is to purchase a bunch of 2x12 lumber from the big box stores. Big 2x12s are generally cut from better wood that 2x4s, with fewer knots and straighter grain that makes them less likely to warp while drying. So by cherry-picking the best 2x12s you can get some pretty good quality lumber at low big-box store prices.
From late July through early October, I picked up some 2x12s whenever I was near a Home Depot or Lowe's. I took a couple of trips to visit my Mom during that time, and I made stops at Home Depot or Lowe's stores in the Seattle area, Spokane, Missoula, Helena, and Bozeman.
Building the benchtop
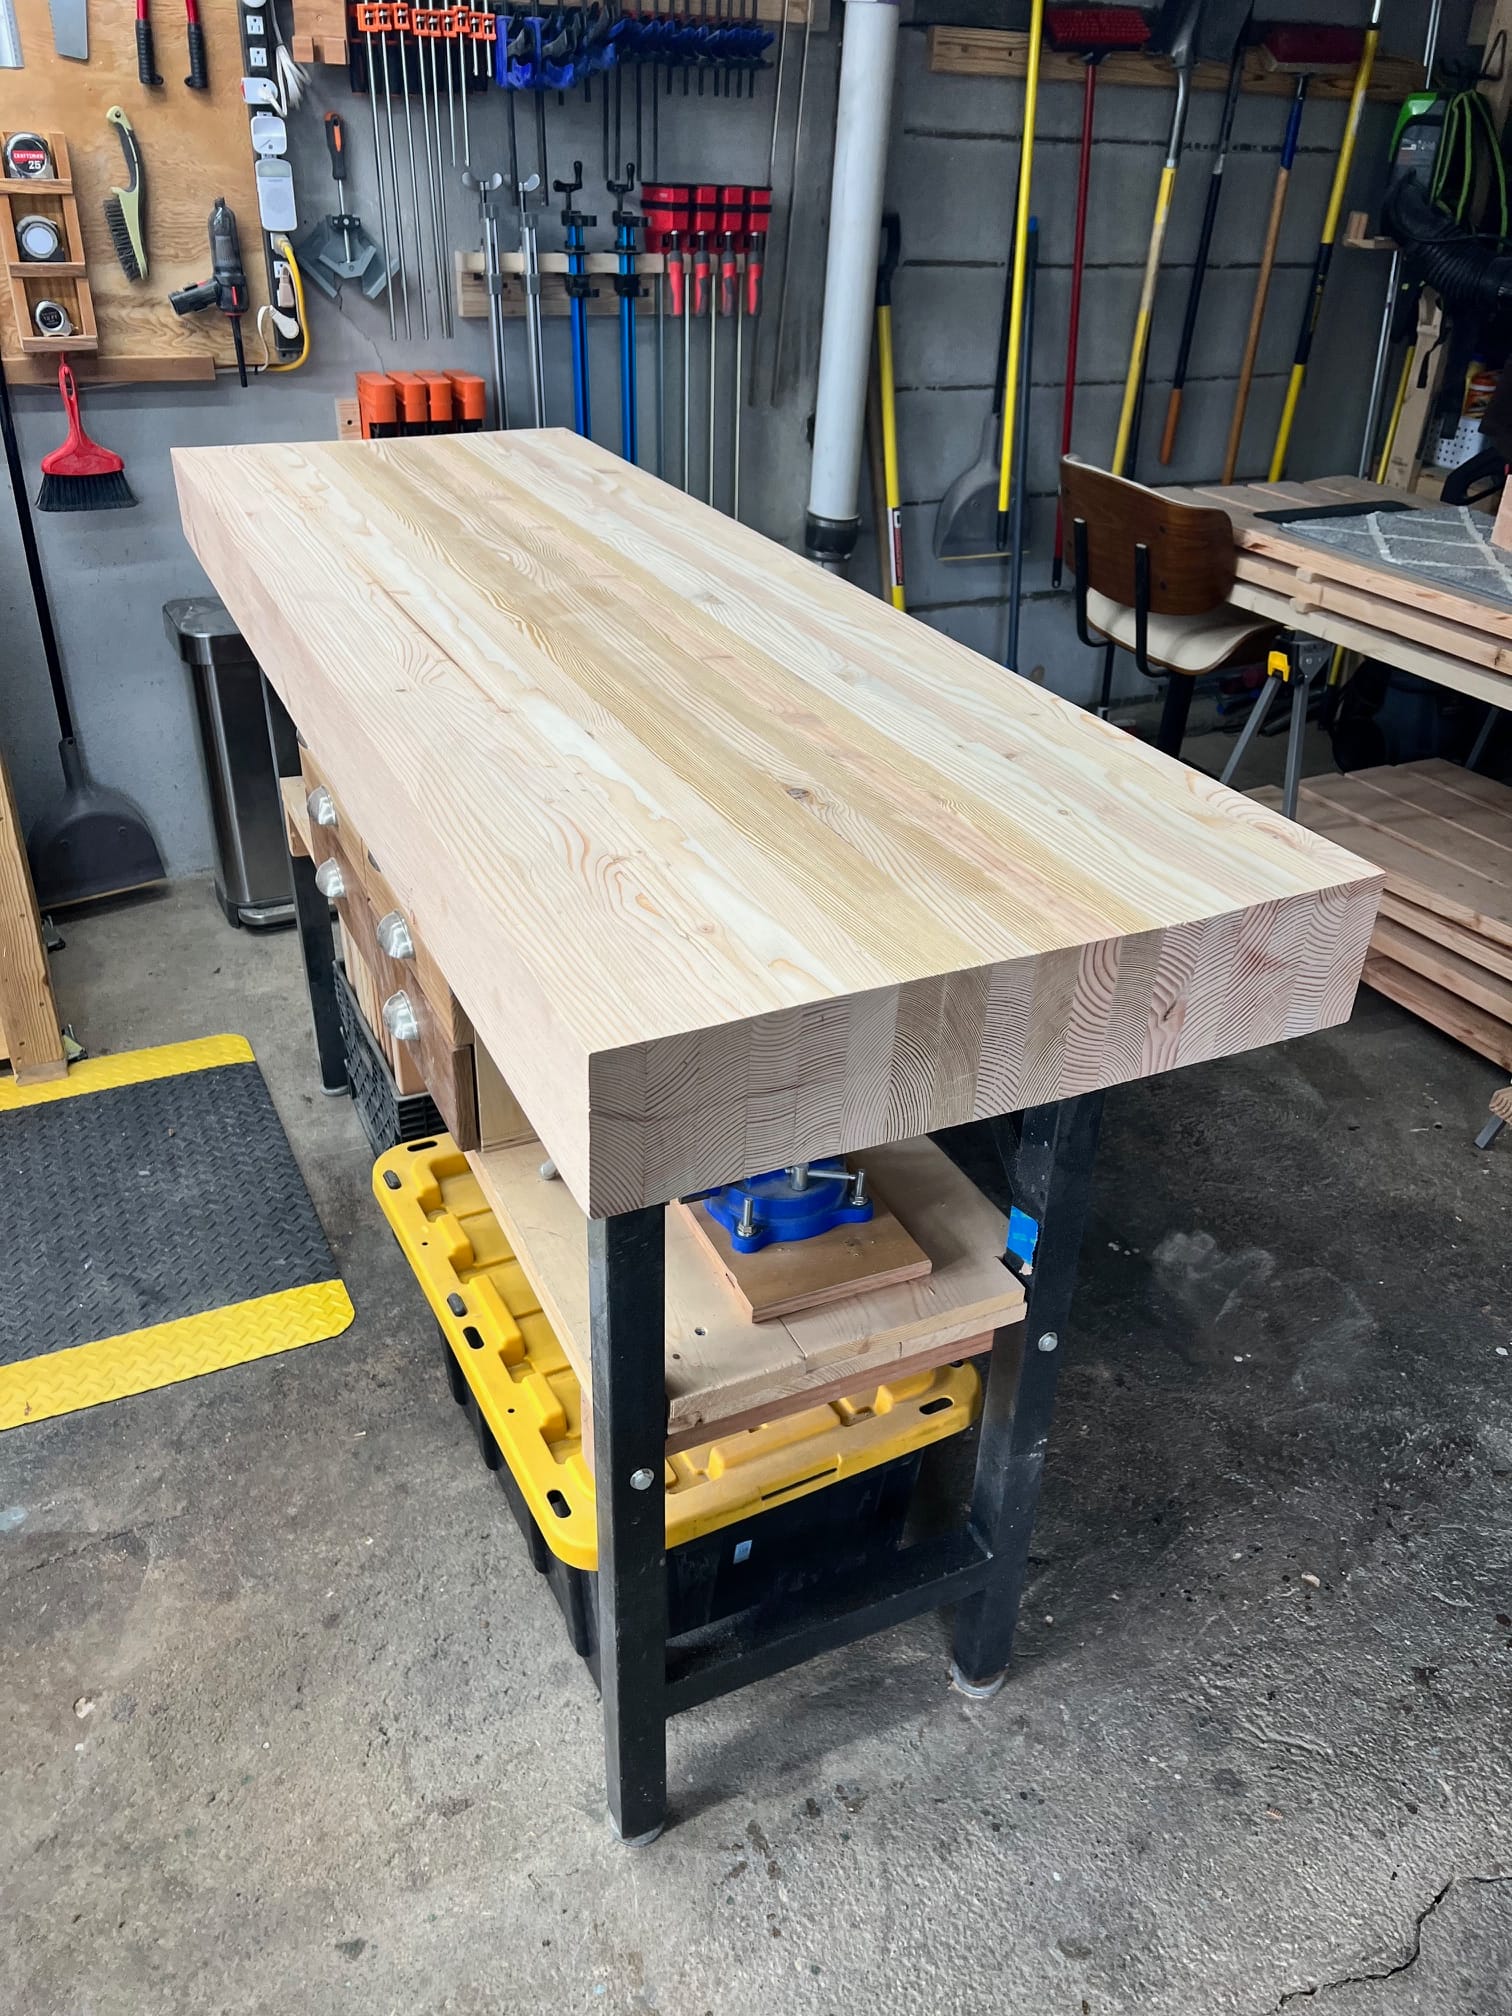
After the lumber was relatively dry, the first step in assembling the workbench was to mill the pieces to make the 5 inch thick benchtop. And in order to do that, I needed to get some new equipment.
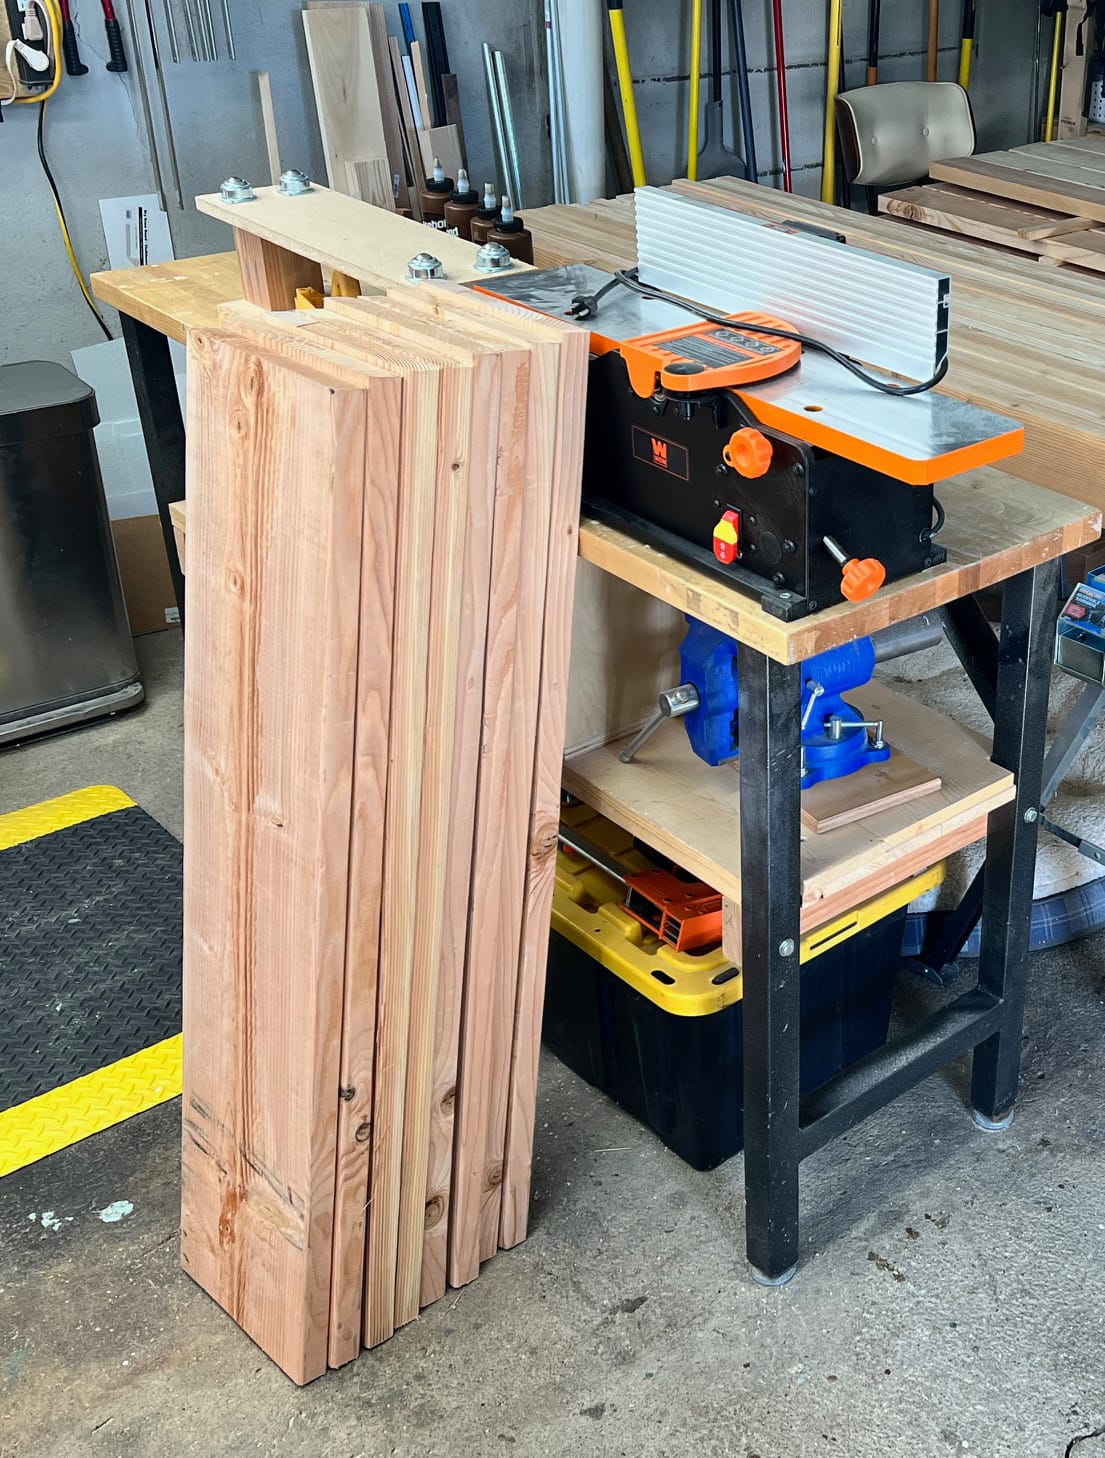
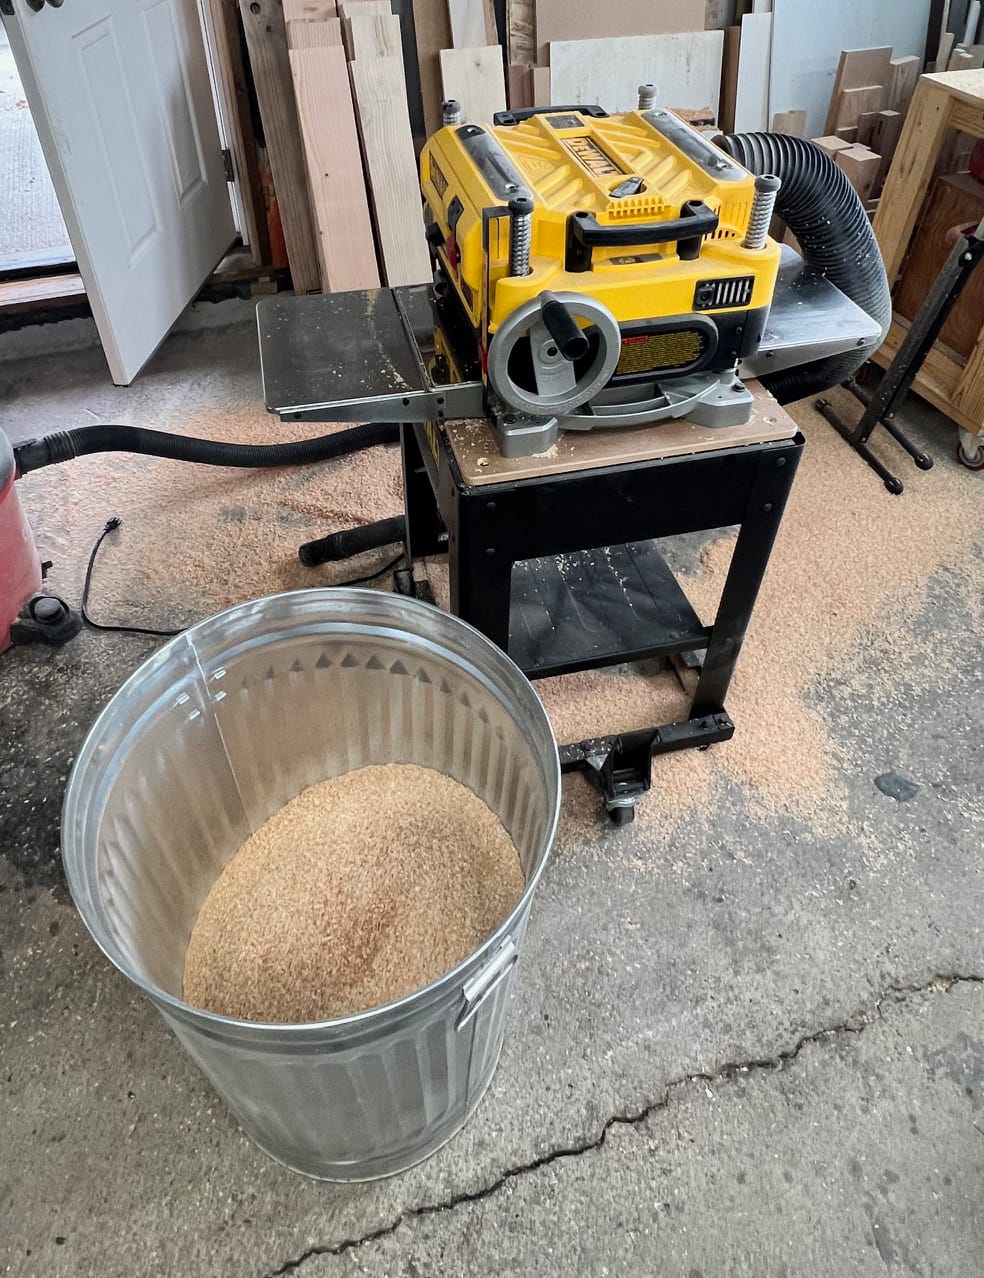
In order to mill the lumber to make straight and square pieces for the benchtop, legs, and stretchers, I needed a jointer and a thickness planer. I went with the Wen 6-inch jointer on the left (made in China, sturdy and inexpensive but not cool), and the DeWALT 735X planer on the right (definitely cool, the best-selling planer of the last decade). These are great tools for generating sawdust. I have no idea how many trash bags full of sawdust I hauled to the landfill during this project, but it was a lot.


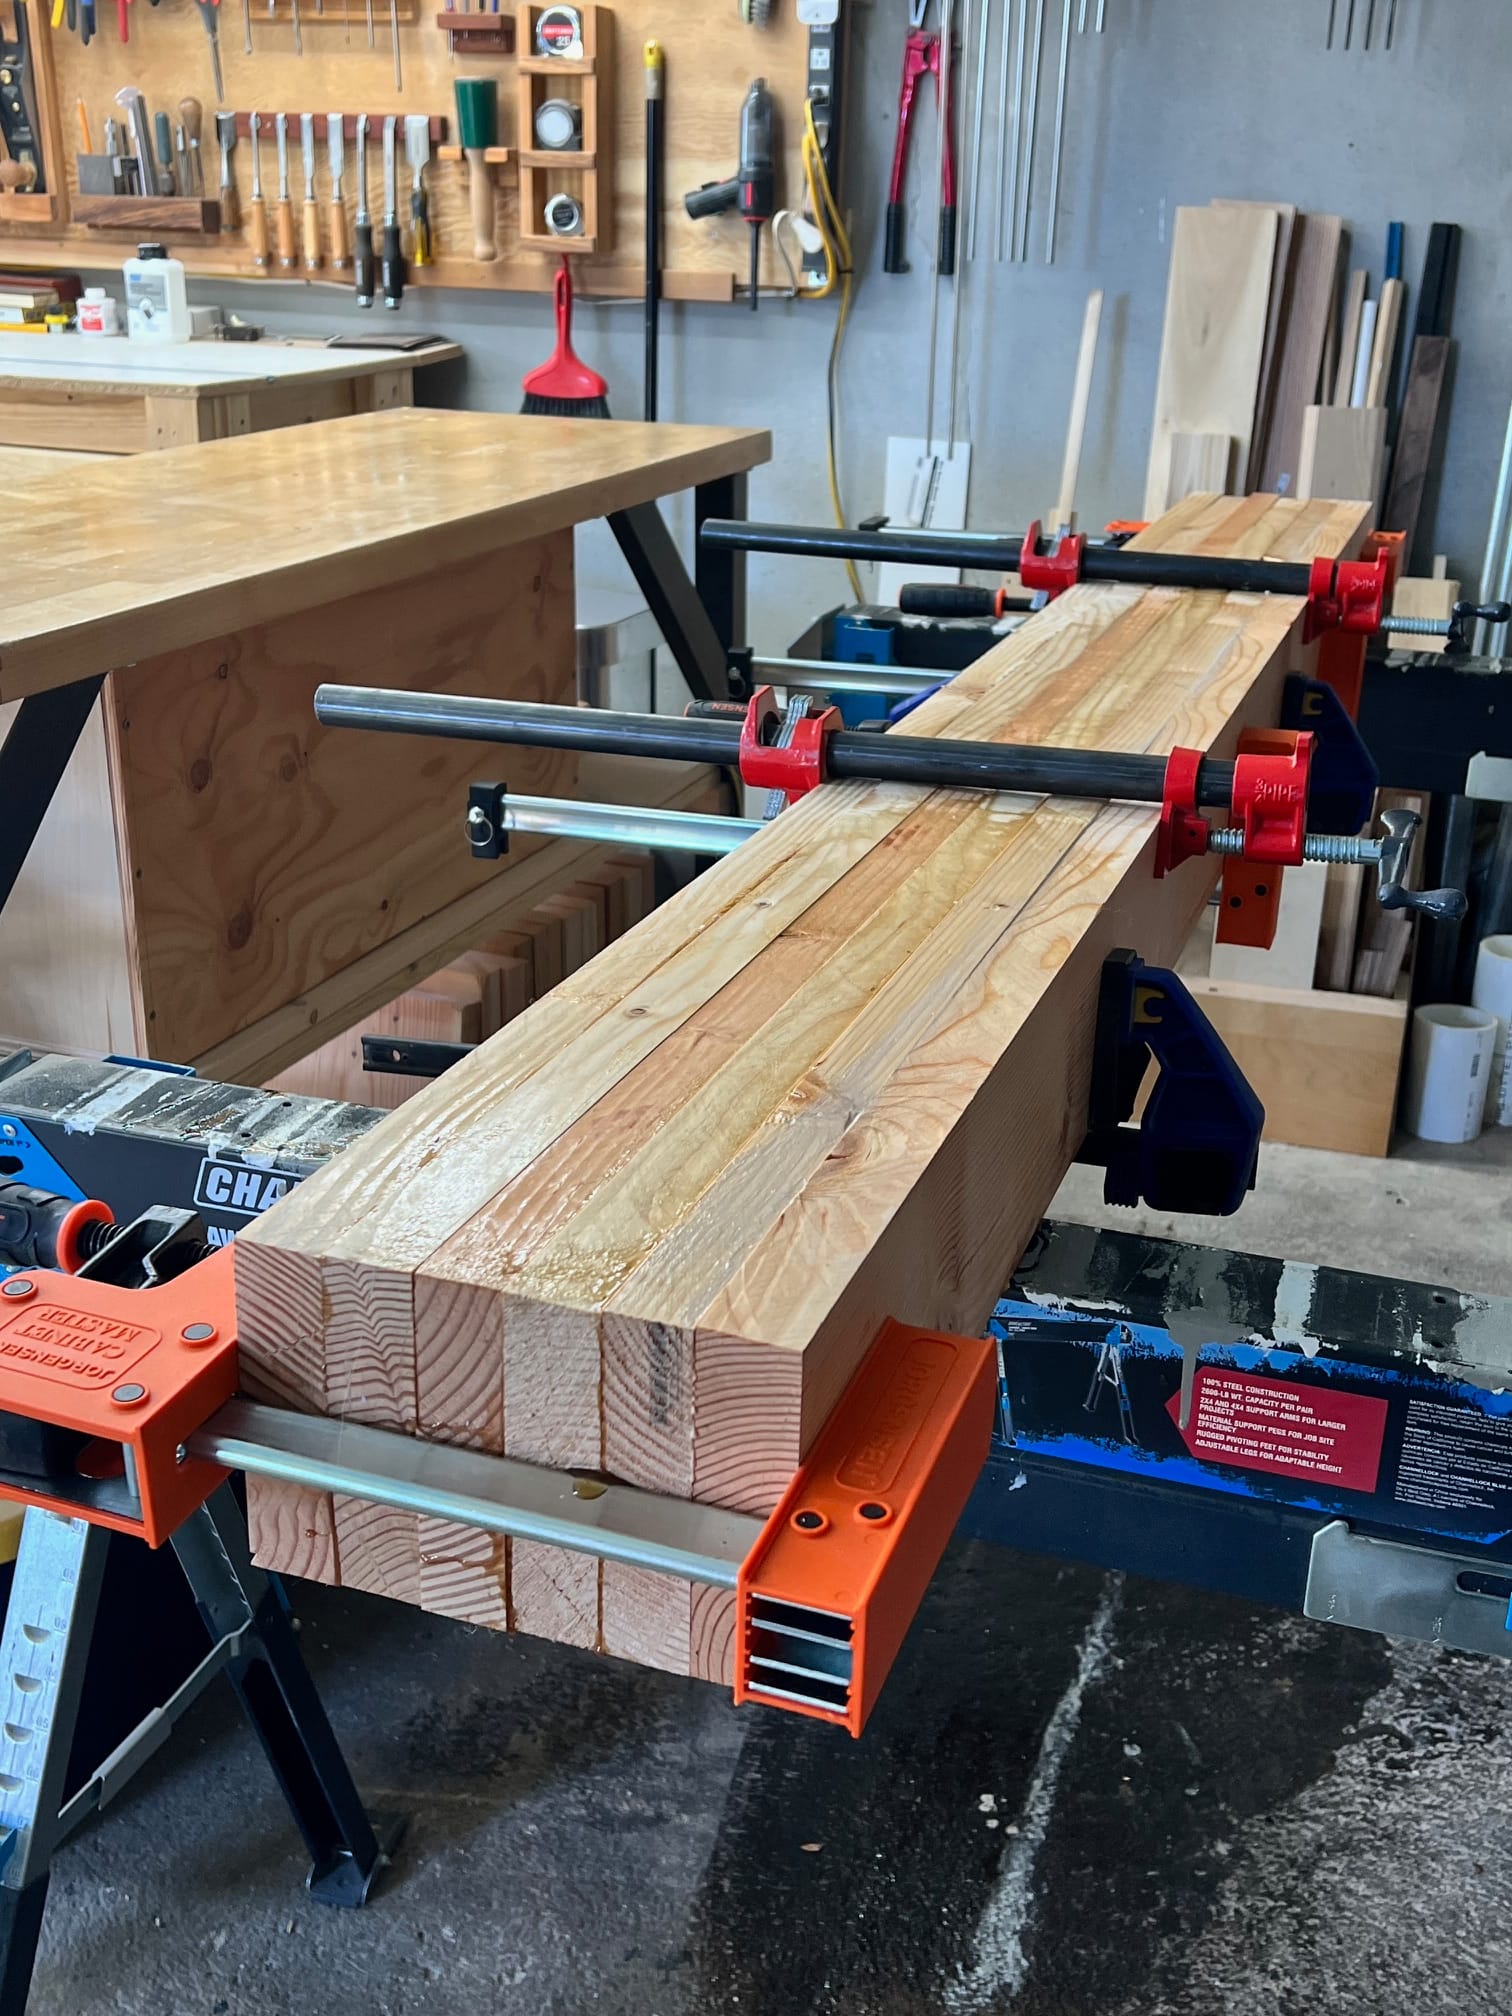
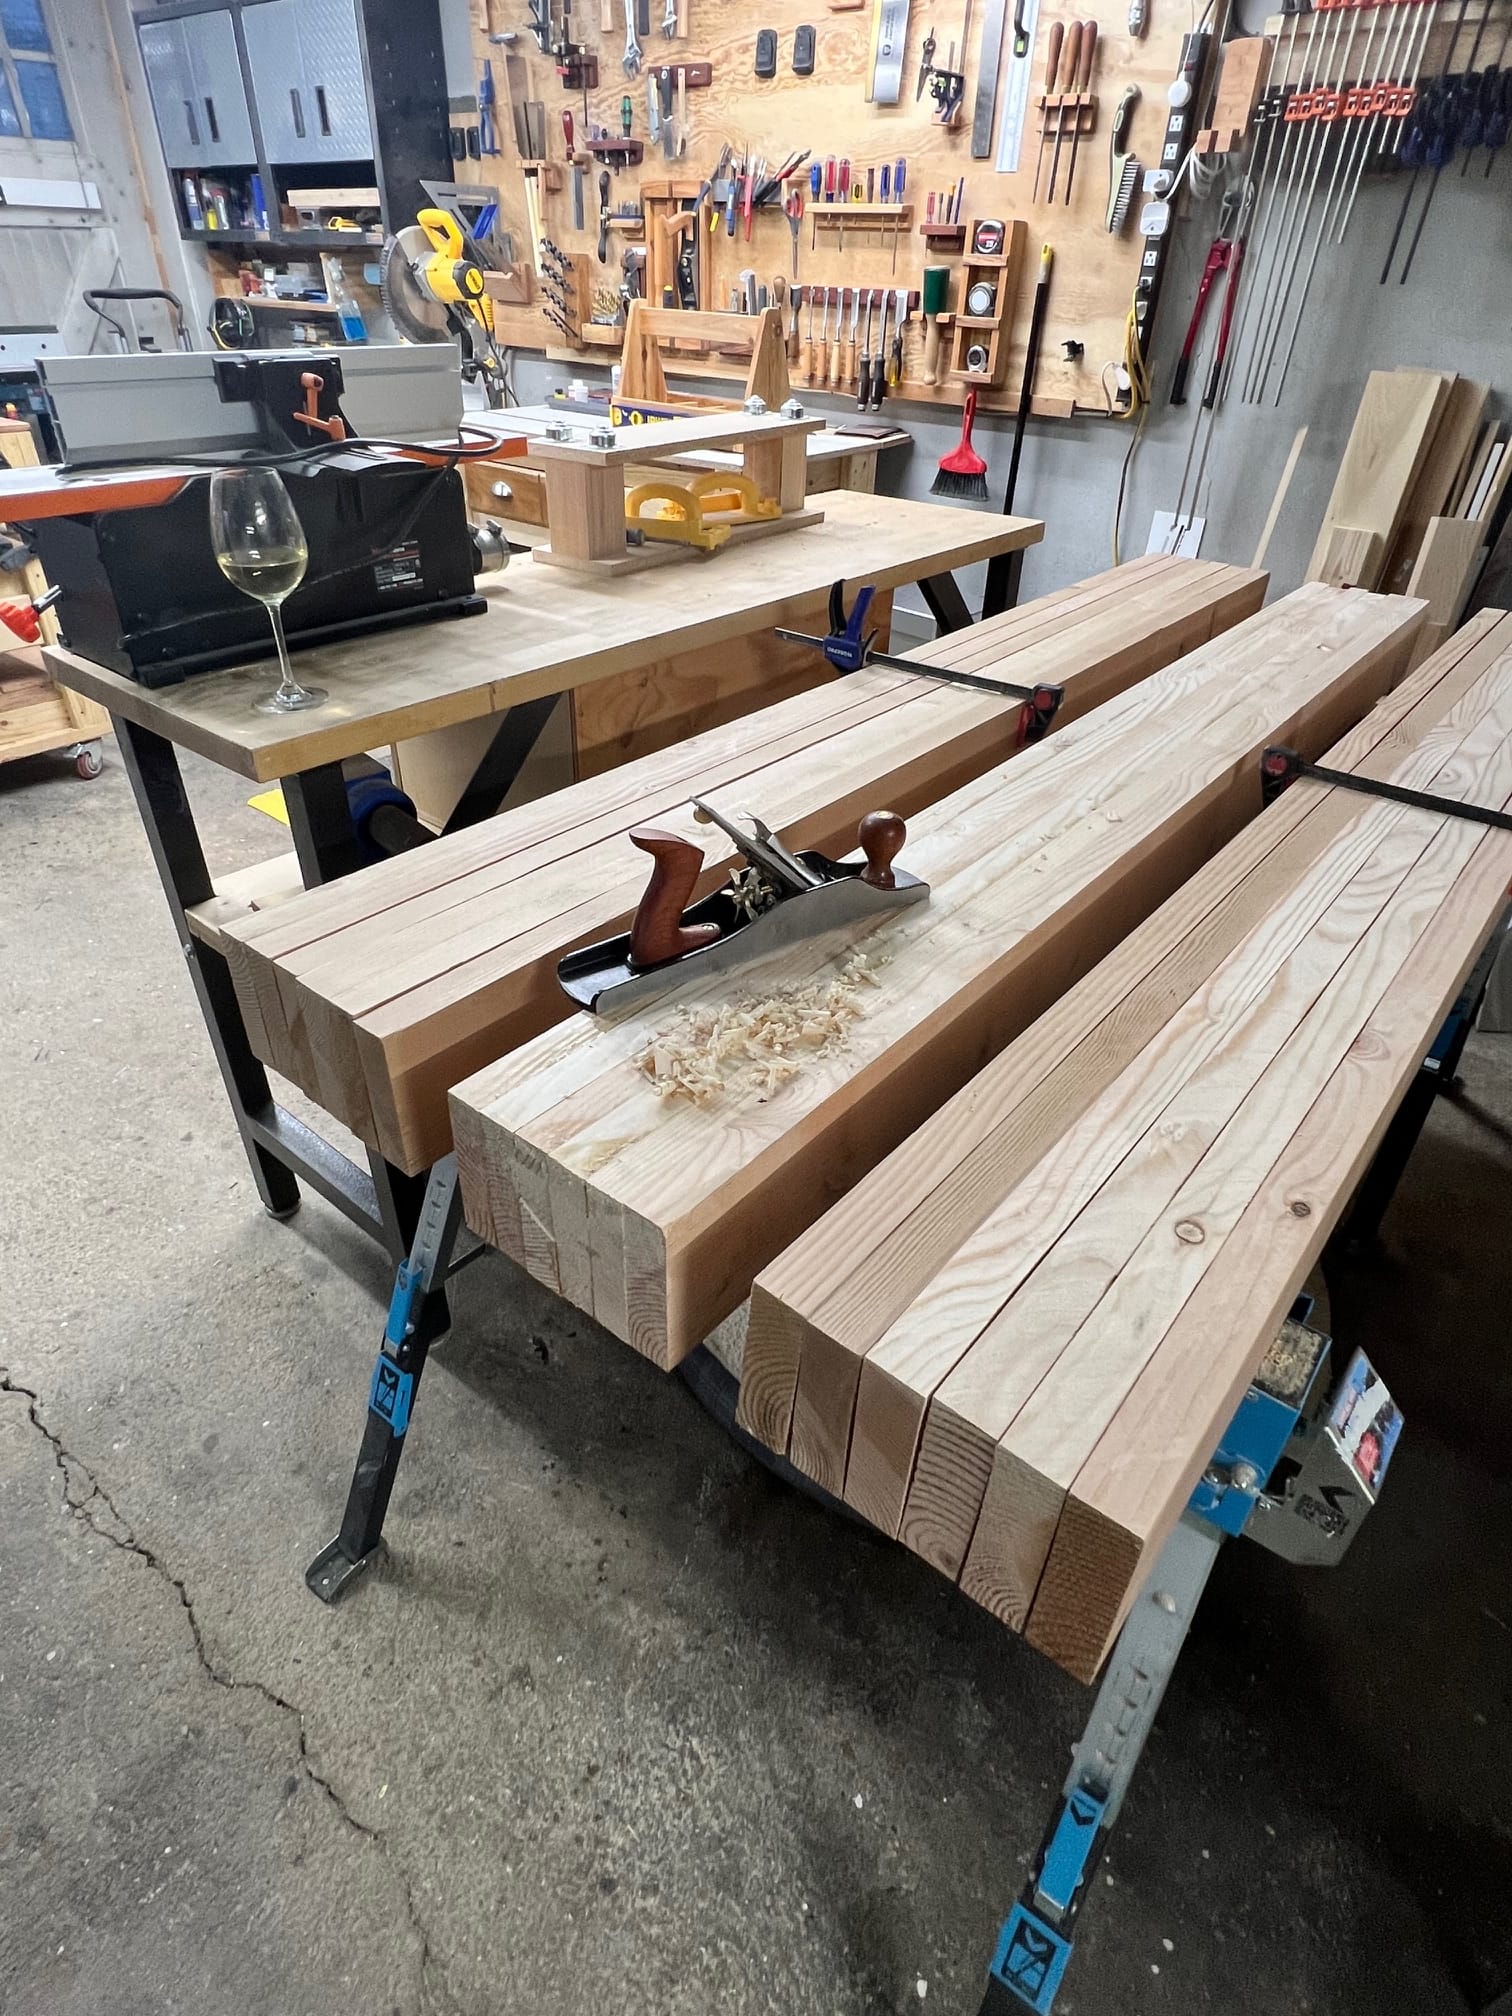
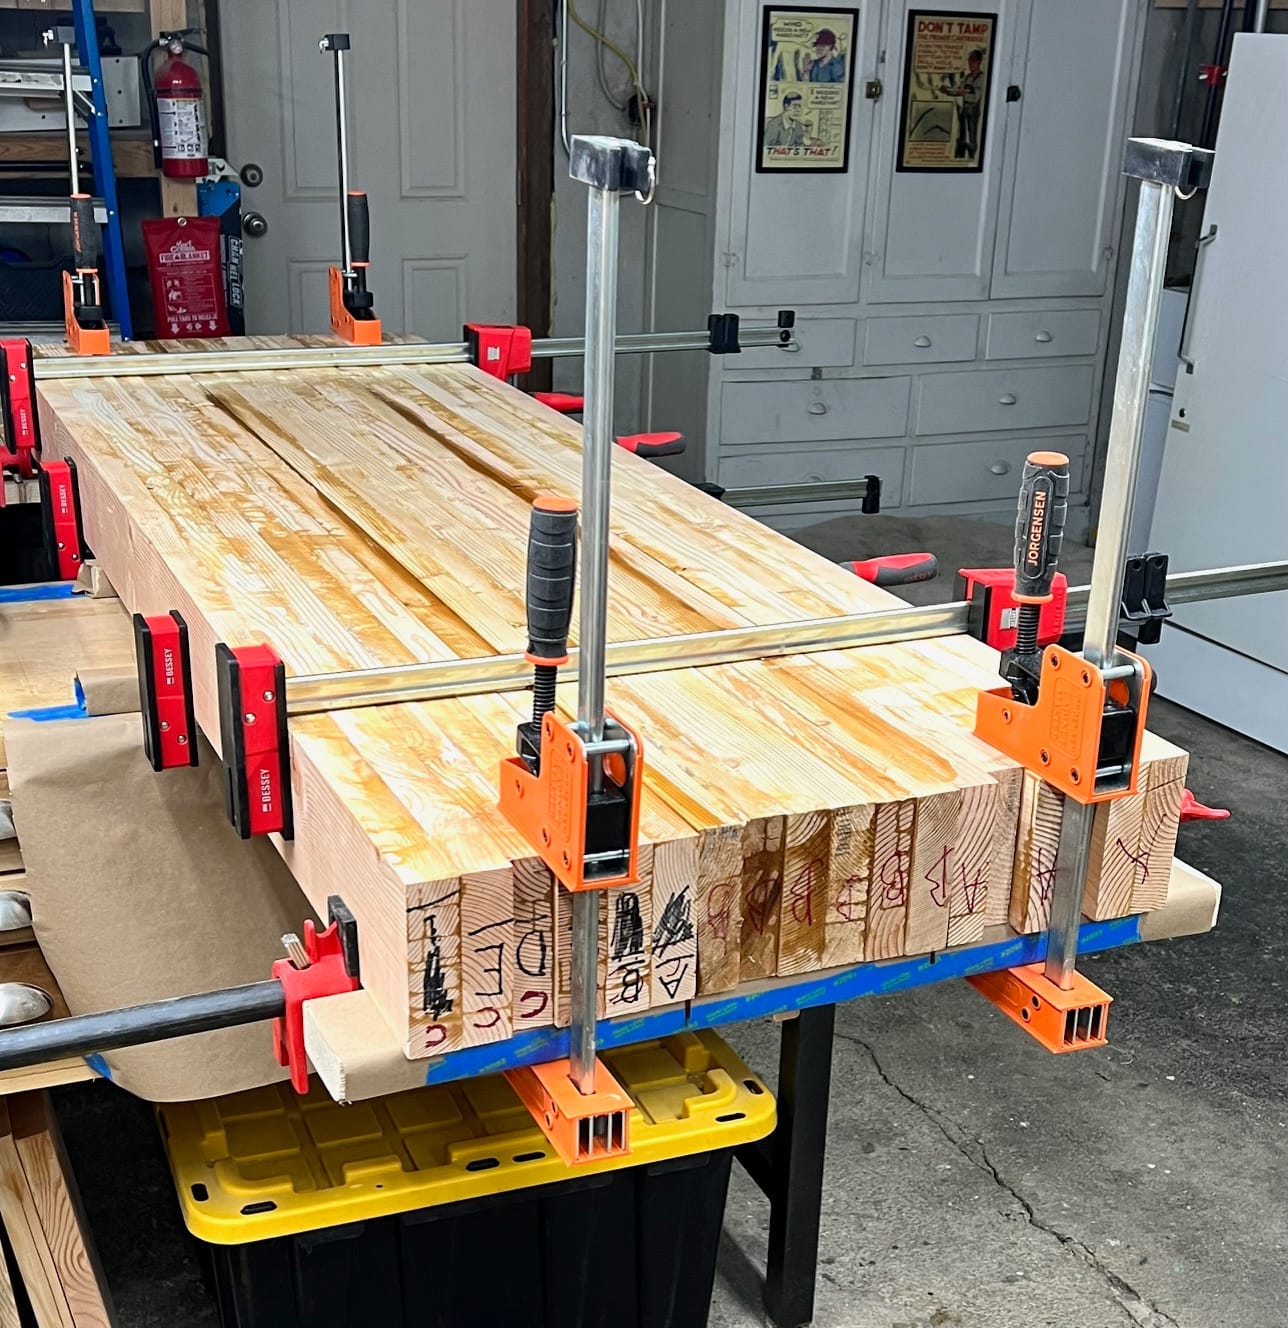
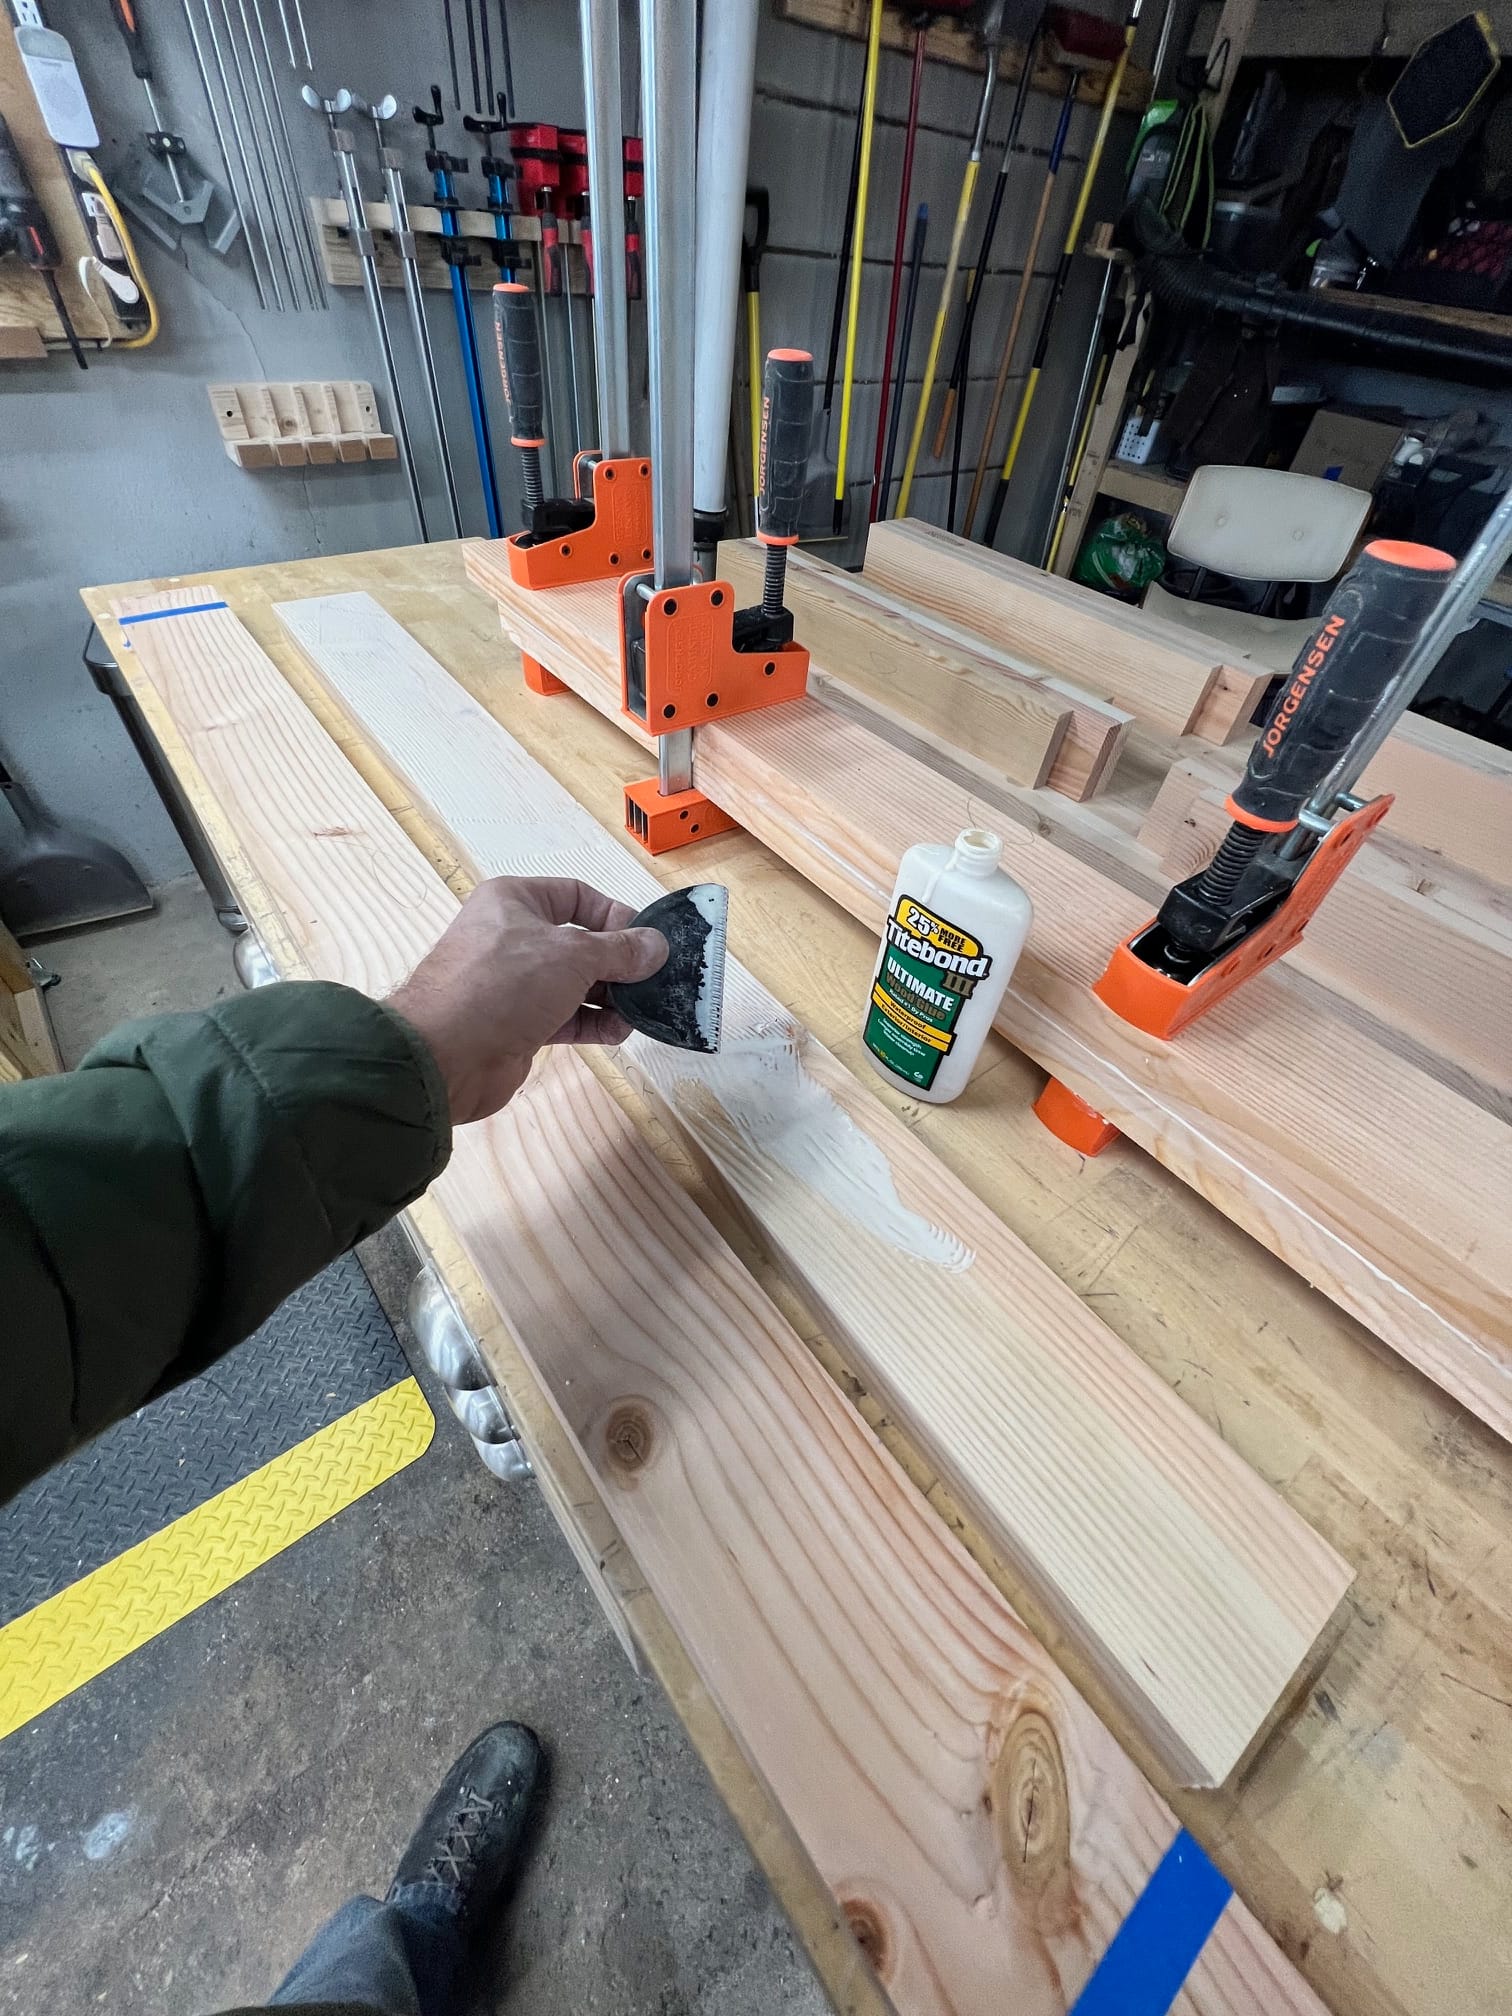
There are 18 boards in the benchtop. Glueing up that many big heavy boards all at once is asking for trouble, so I followed the guidance in the Anarchist's Workbench and built three 6-board sub-assemblies, then glued those together.
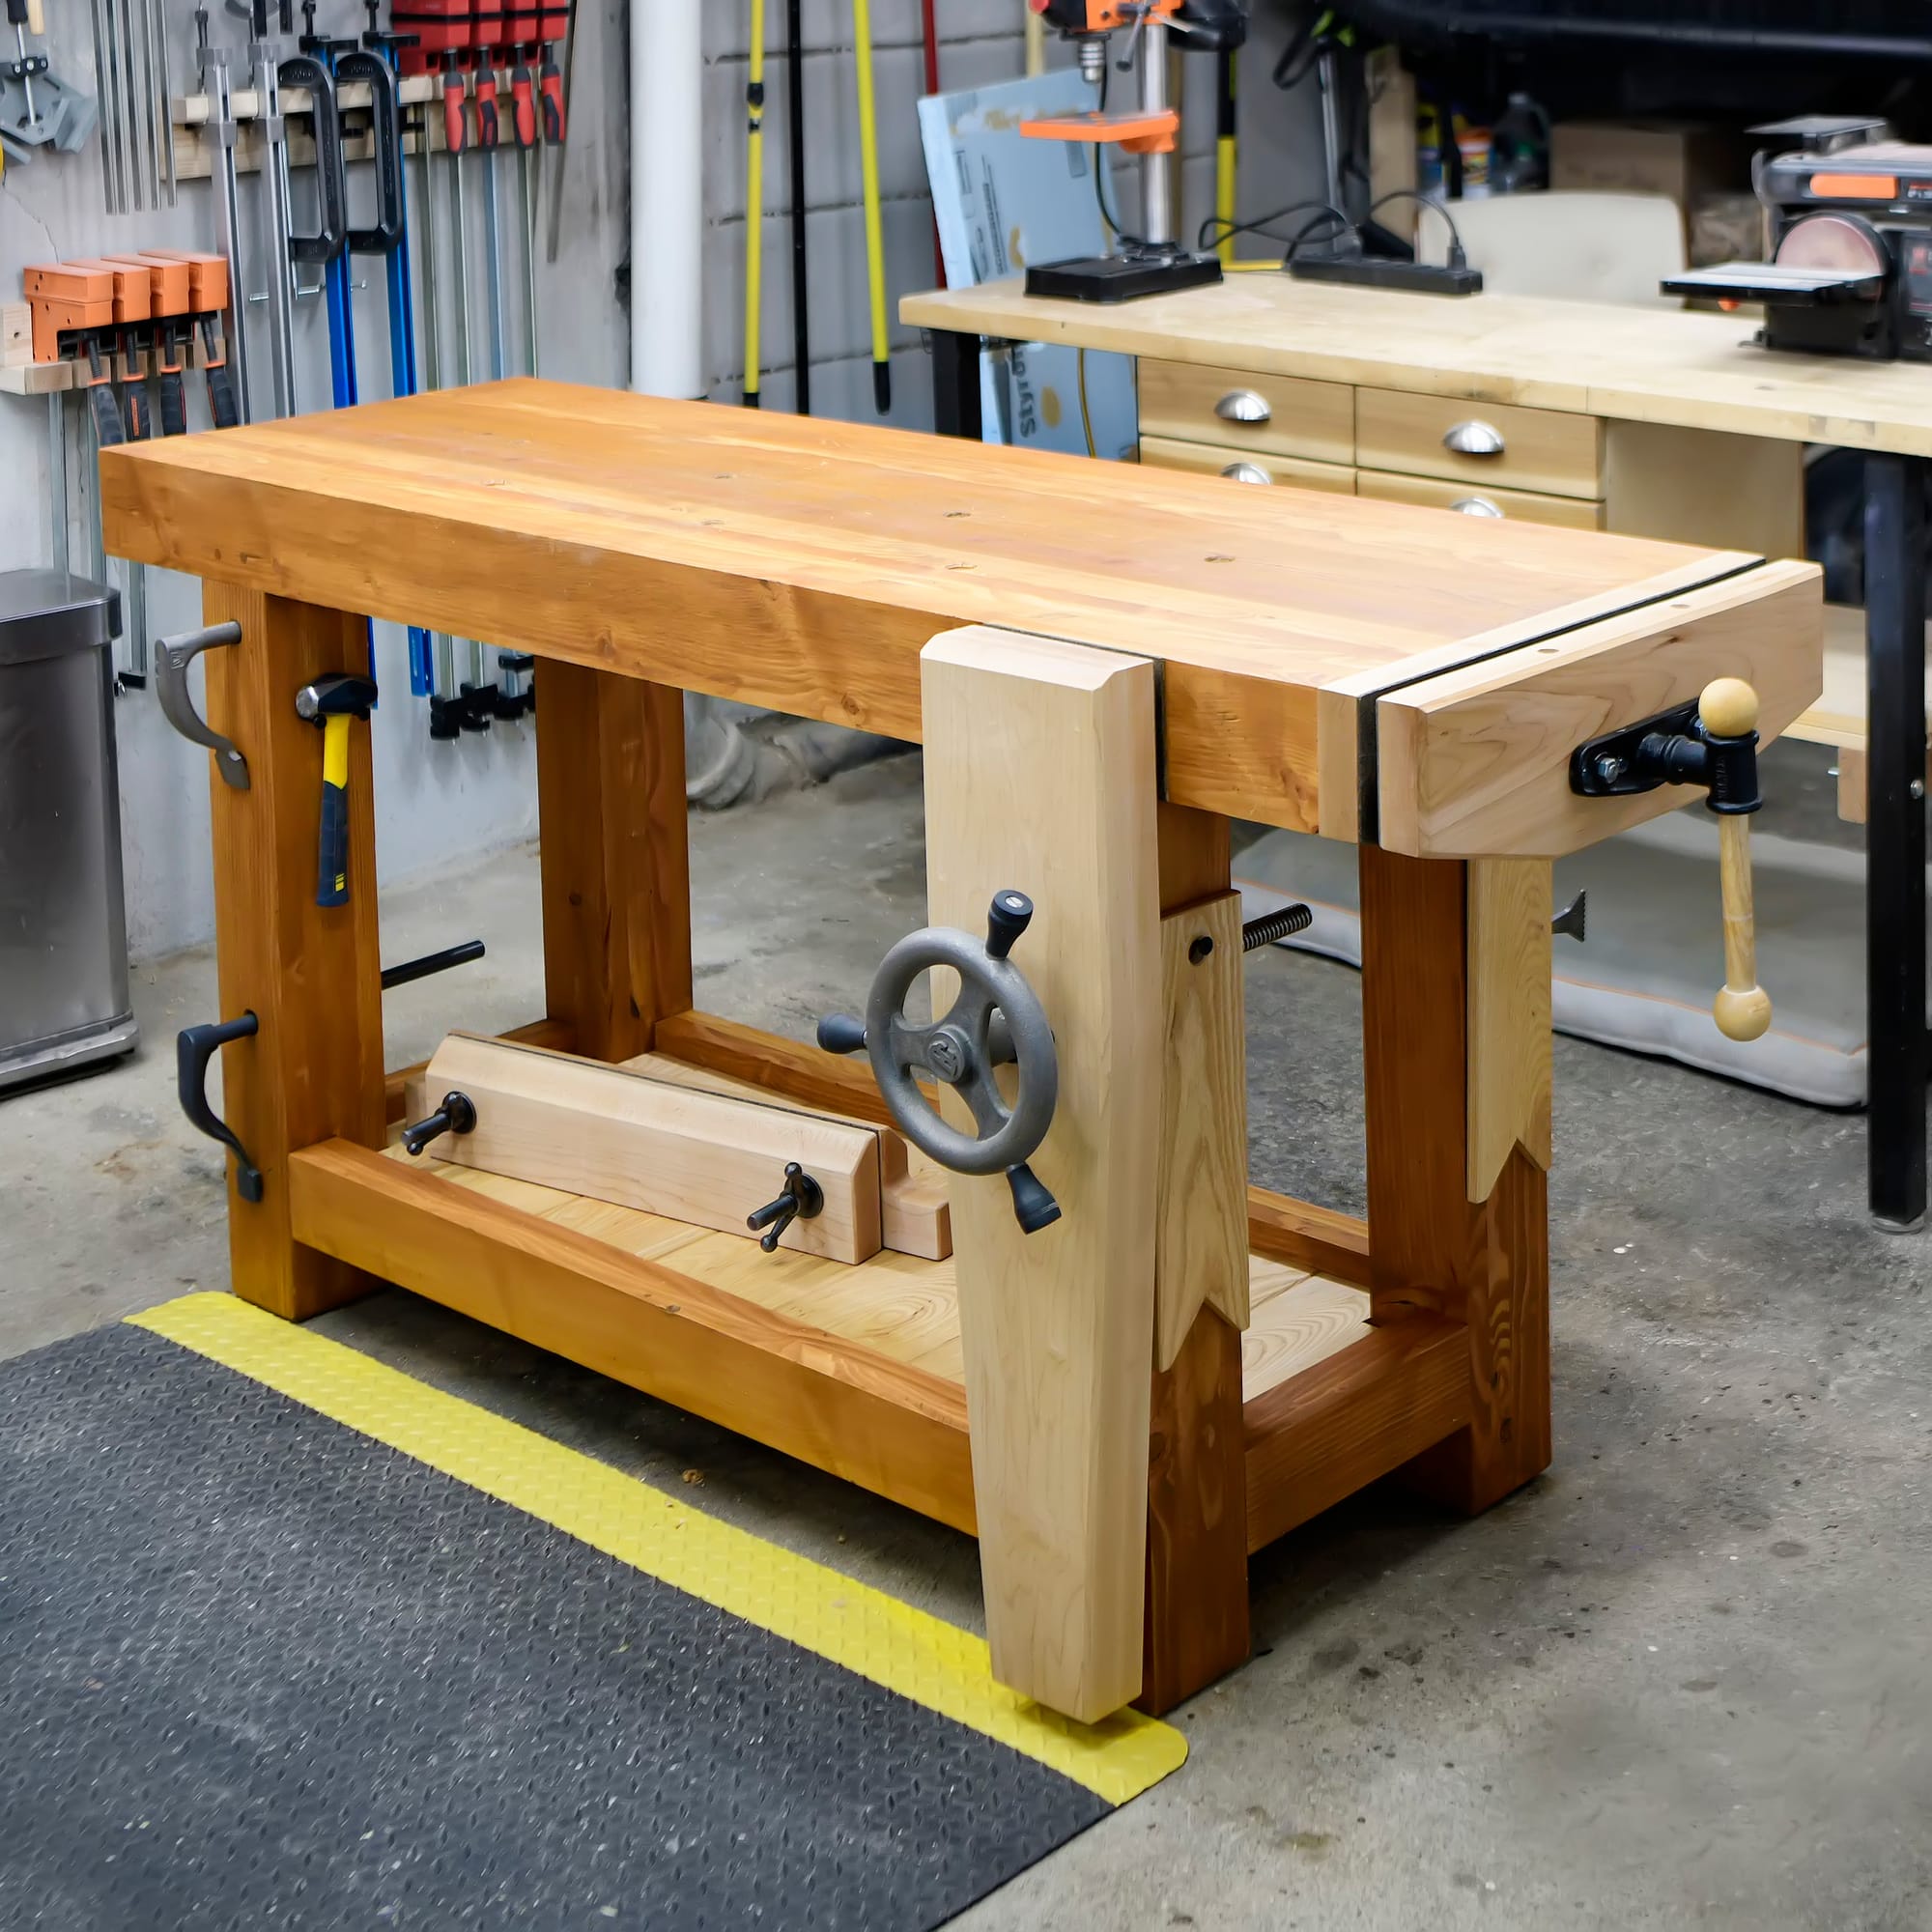
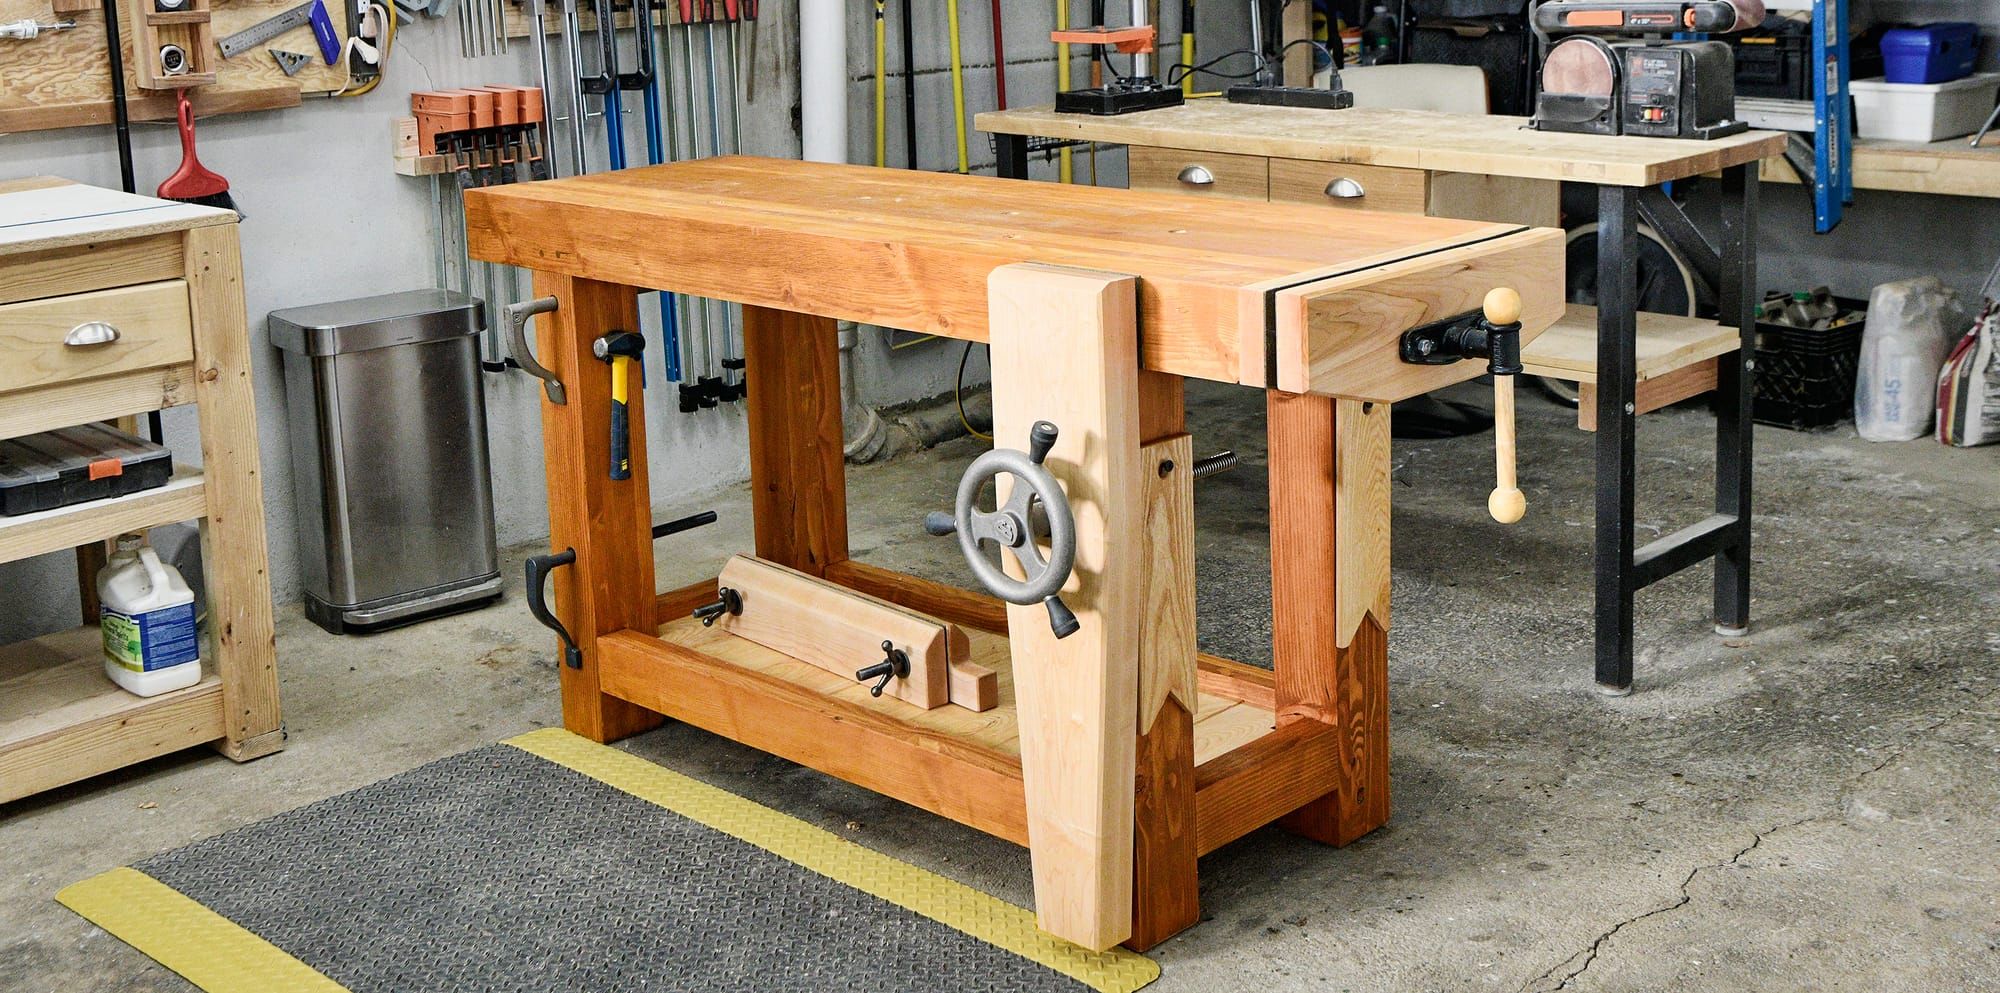
The end vise
I planned to put a tail vise on the end of the bench, and that required cutting out an area for mounting the hardware on the underside of the bench. This task would be very hard to do once the bench is upright, so I turned the benchtop upside down and sharpened my chisels and got to work on getting the vise hardware mounted. It was fun to be working on the benchtop – even though it was just sitting on two sawhorses, it was so heavy that it was the sturdiest bench I've ever worked on.
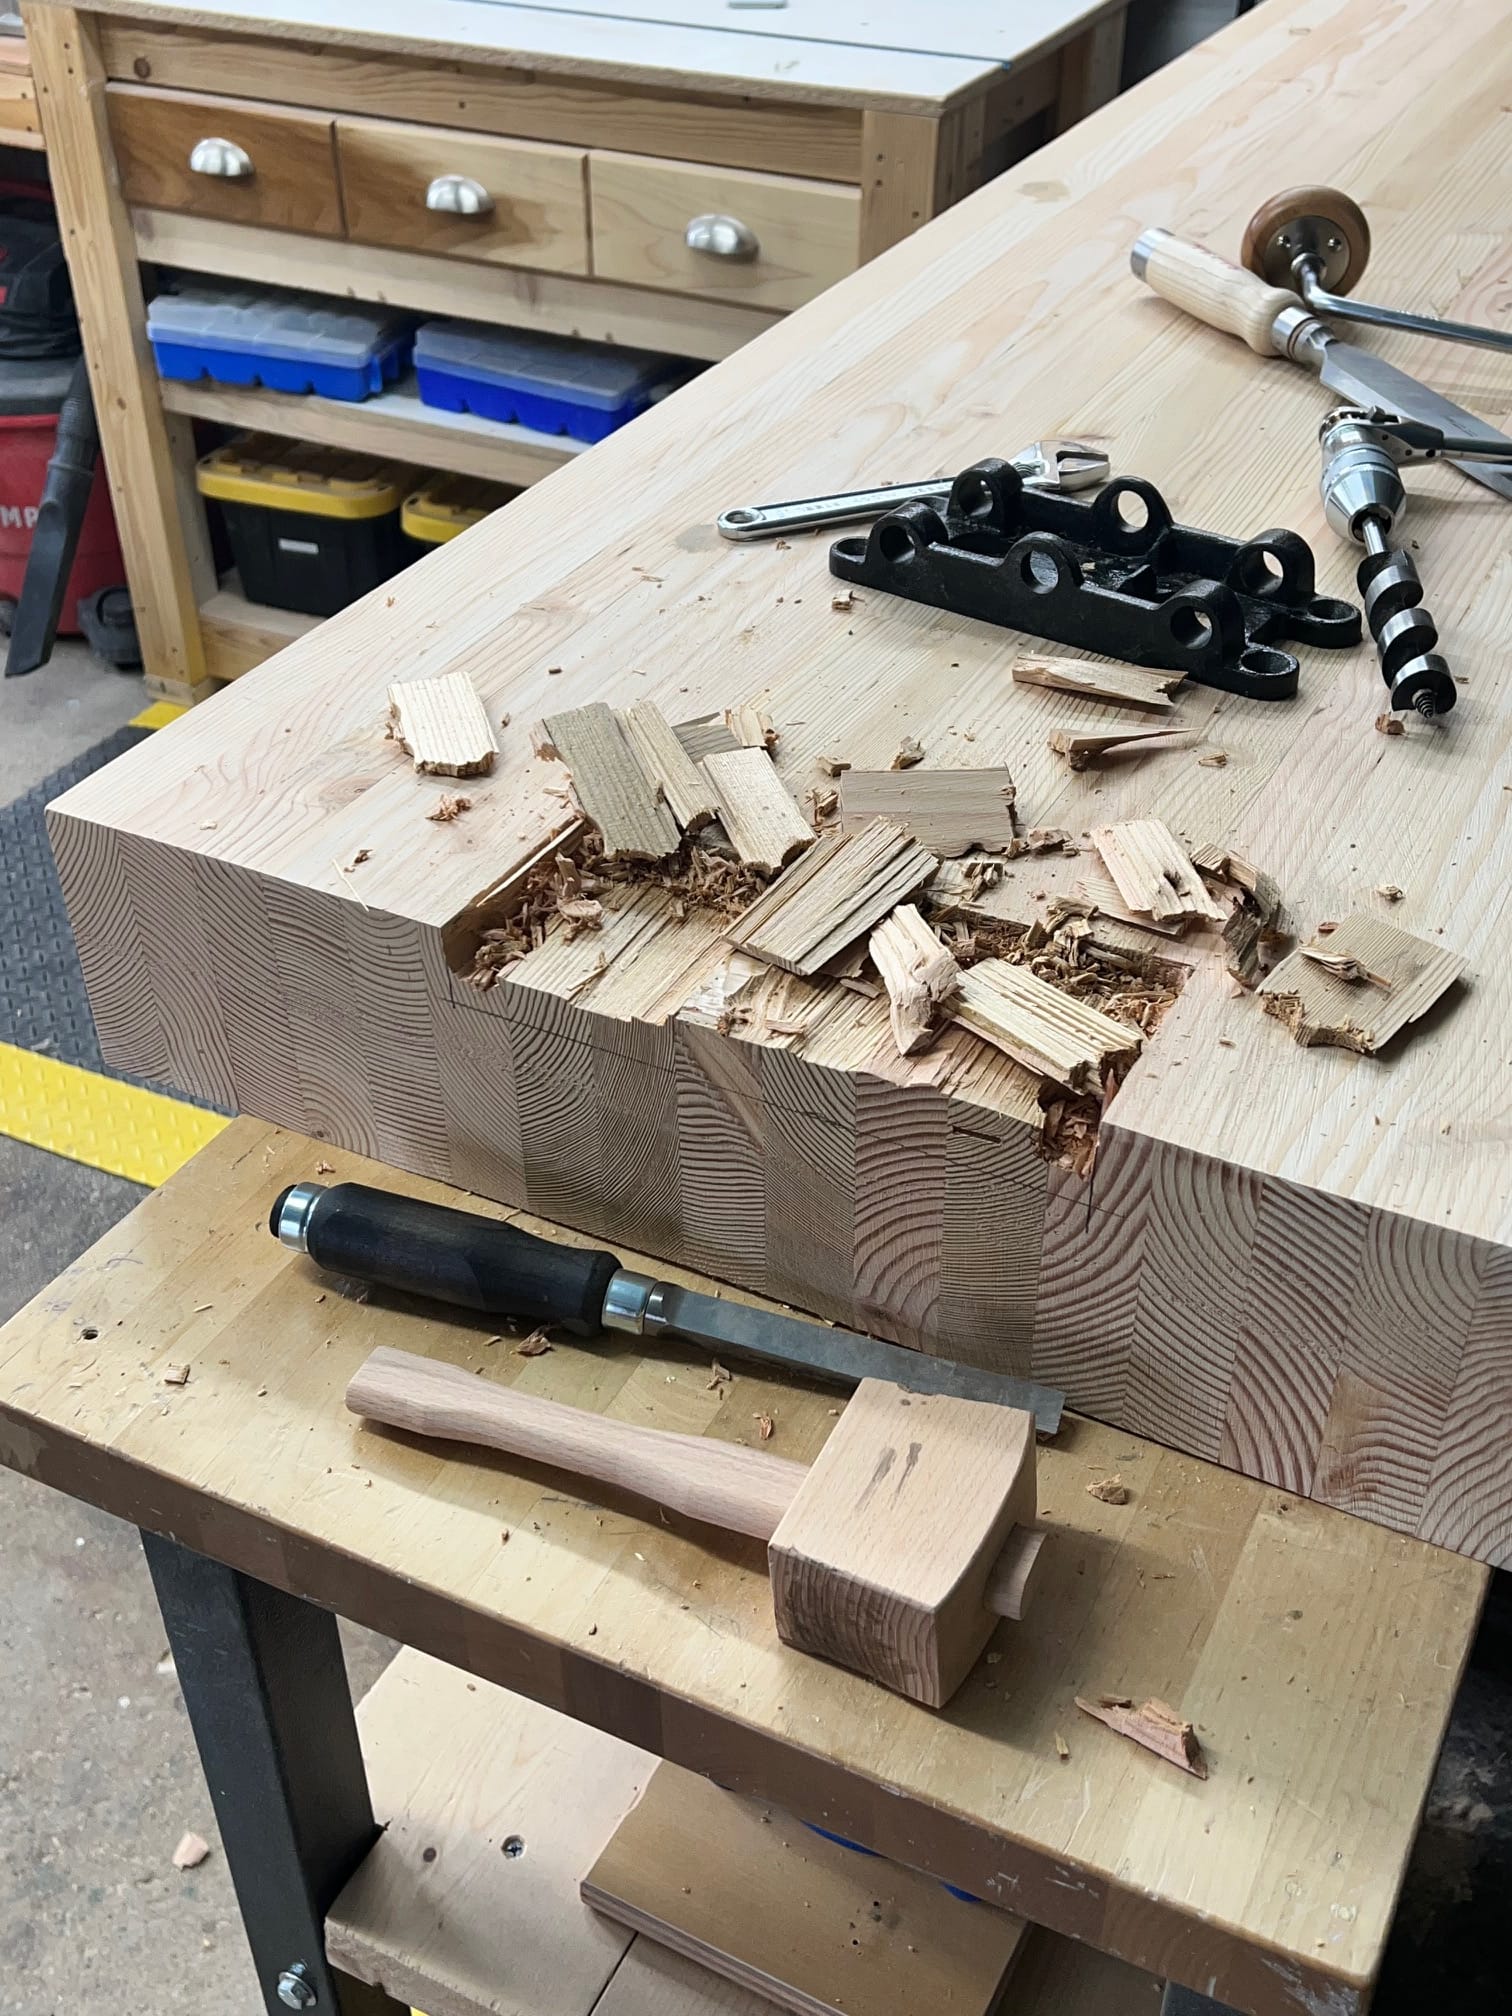
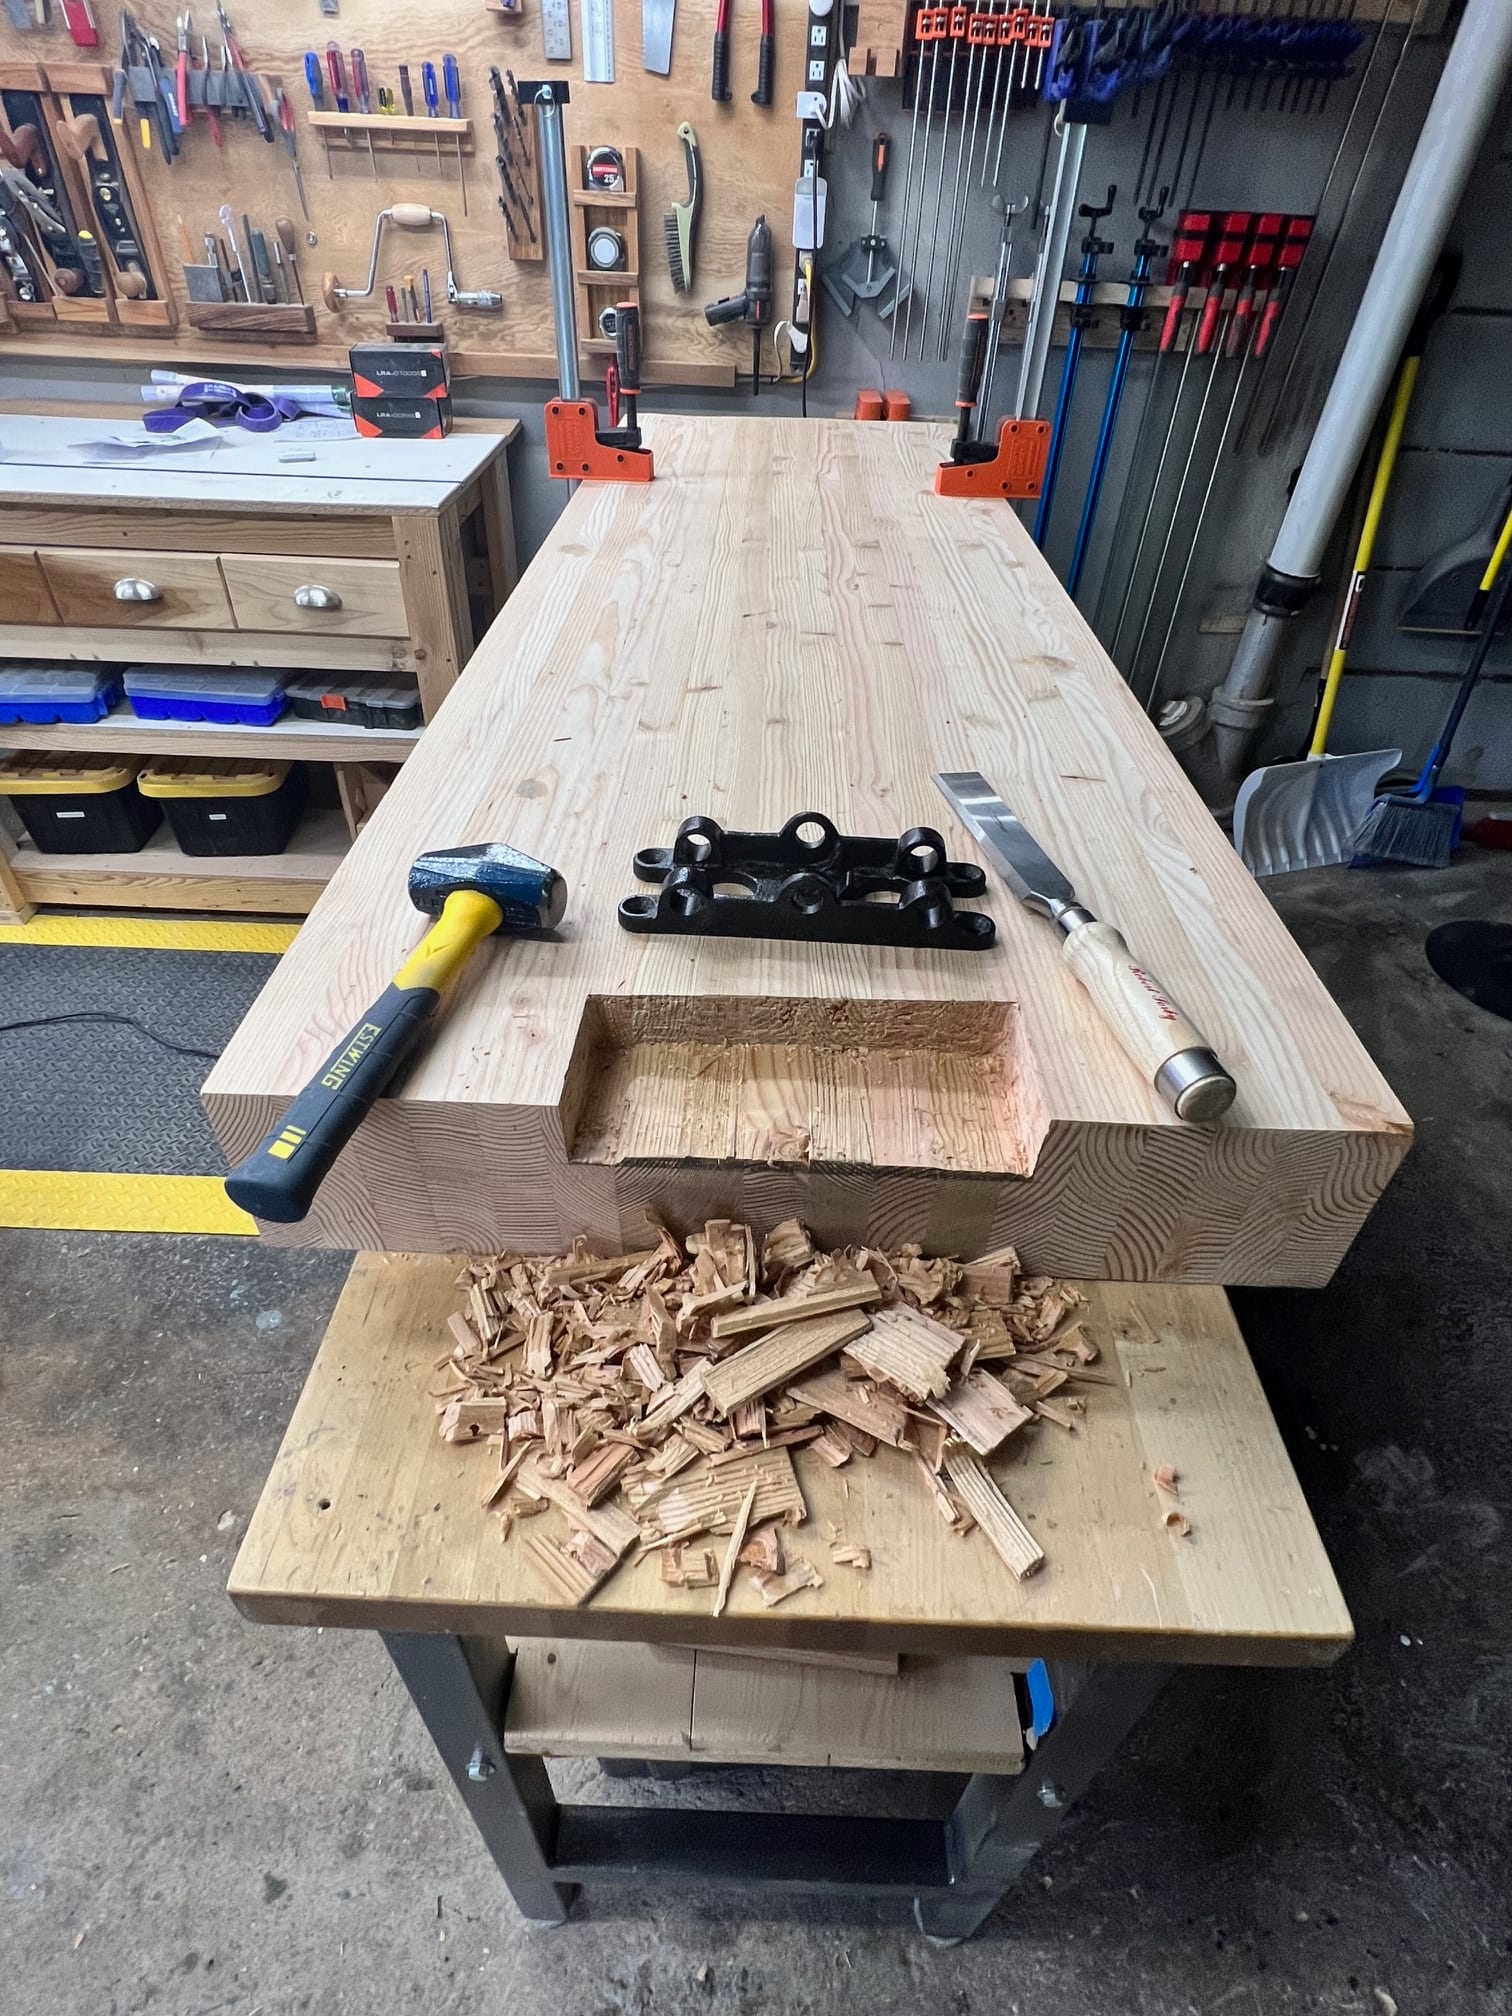
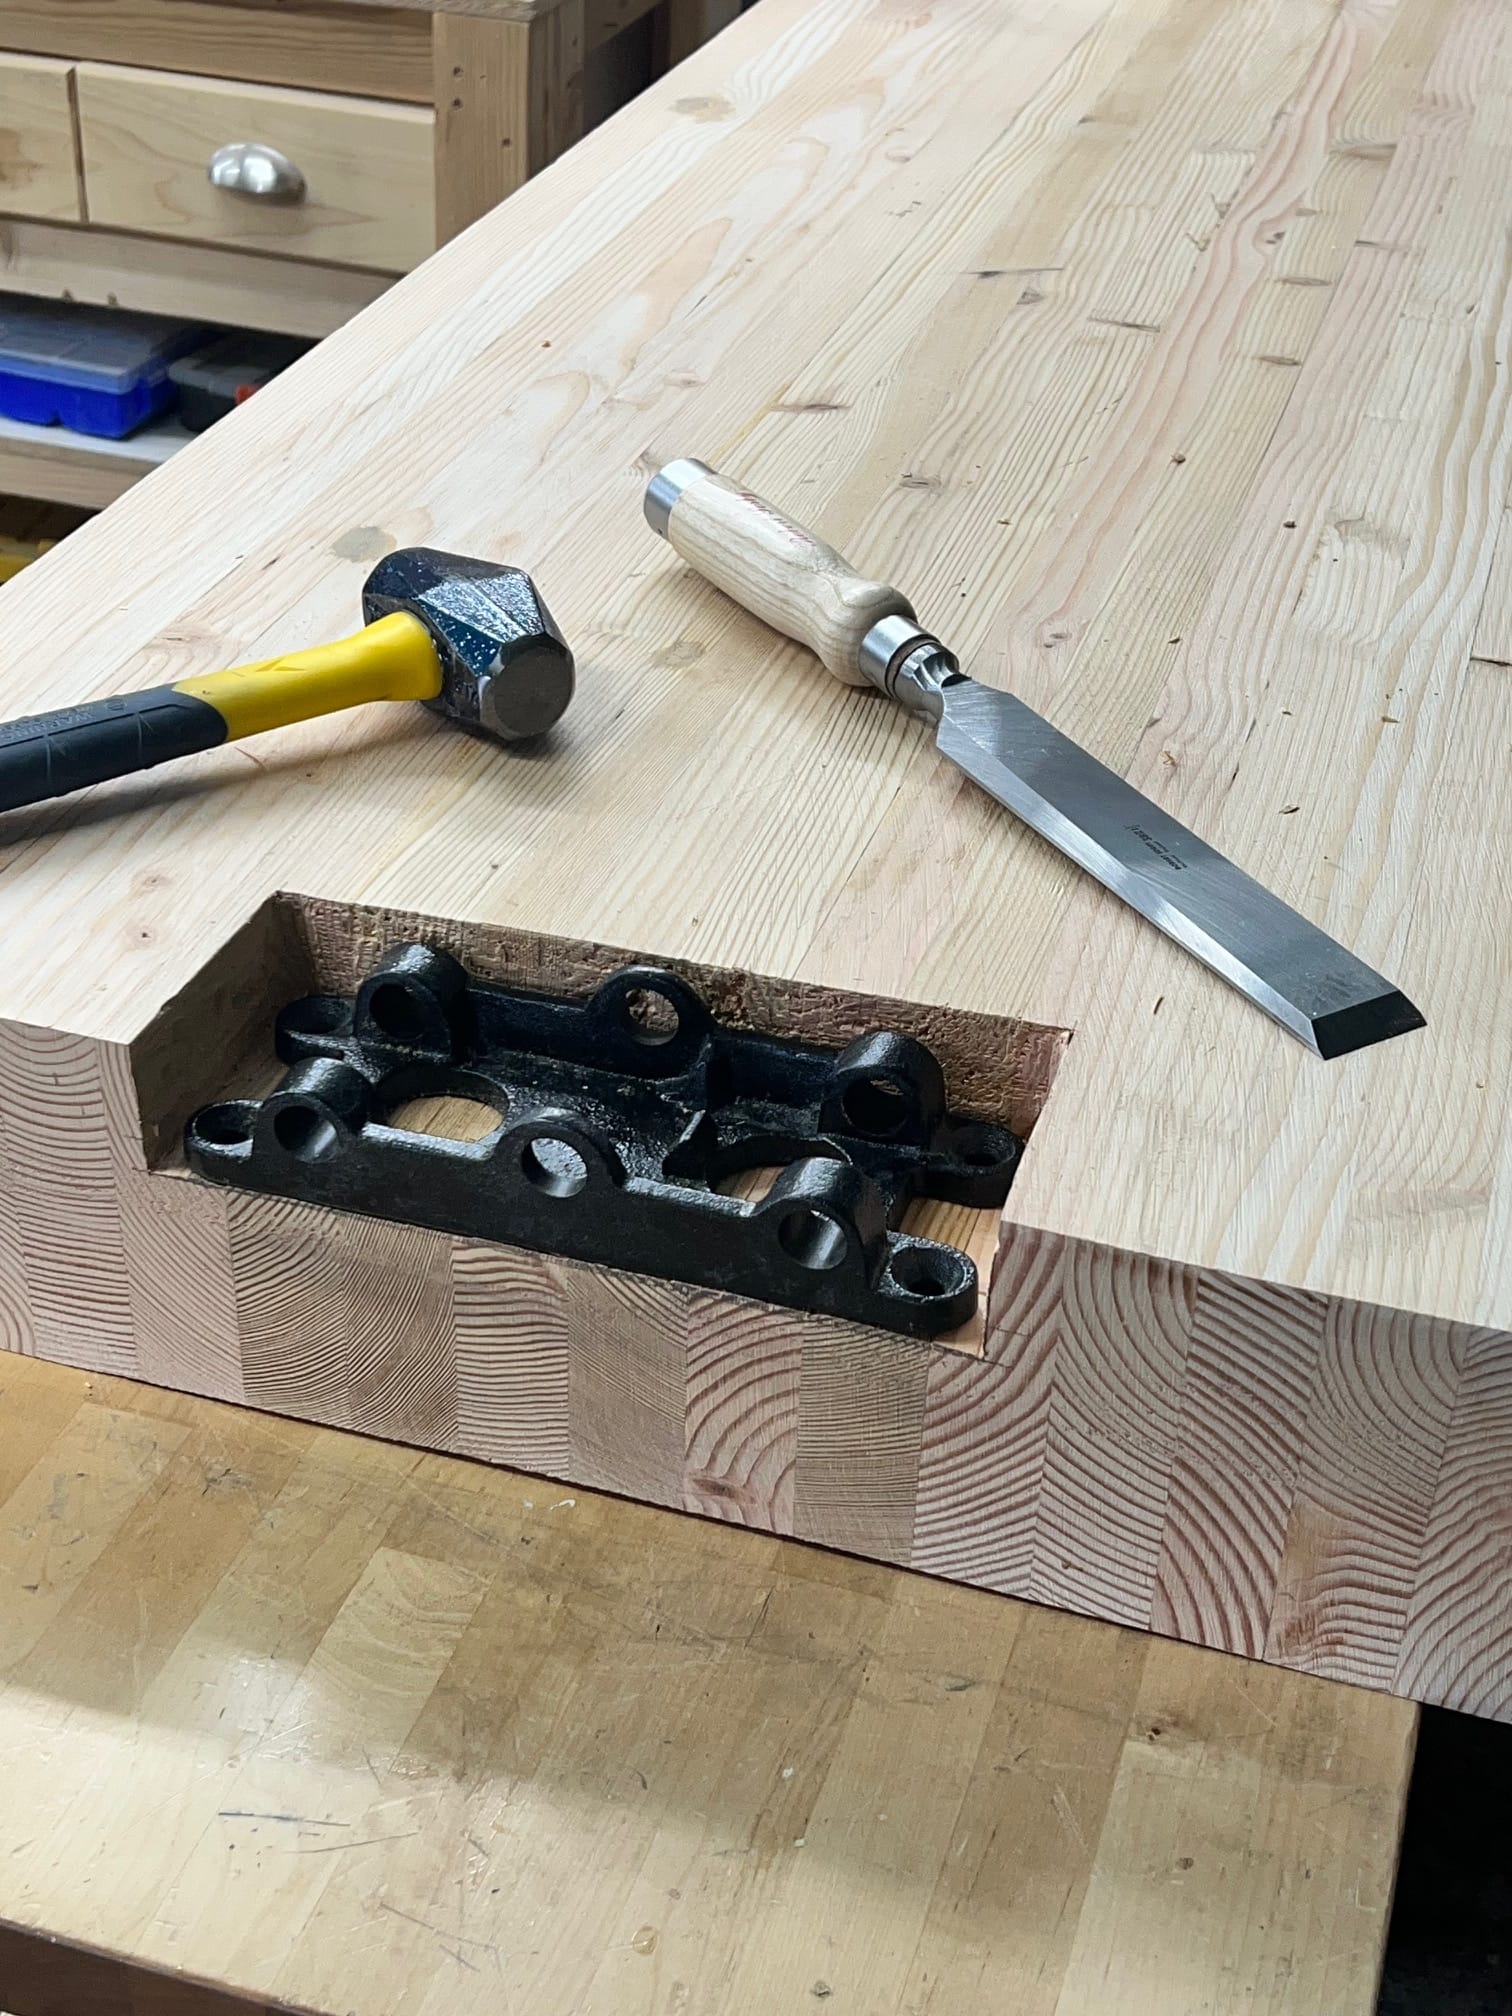
Mounting the tail vise hardware.
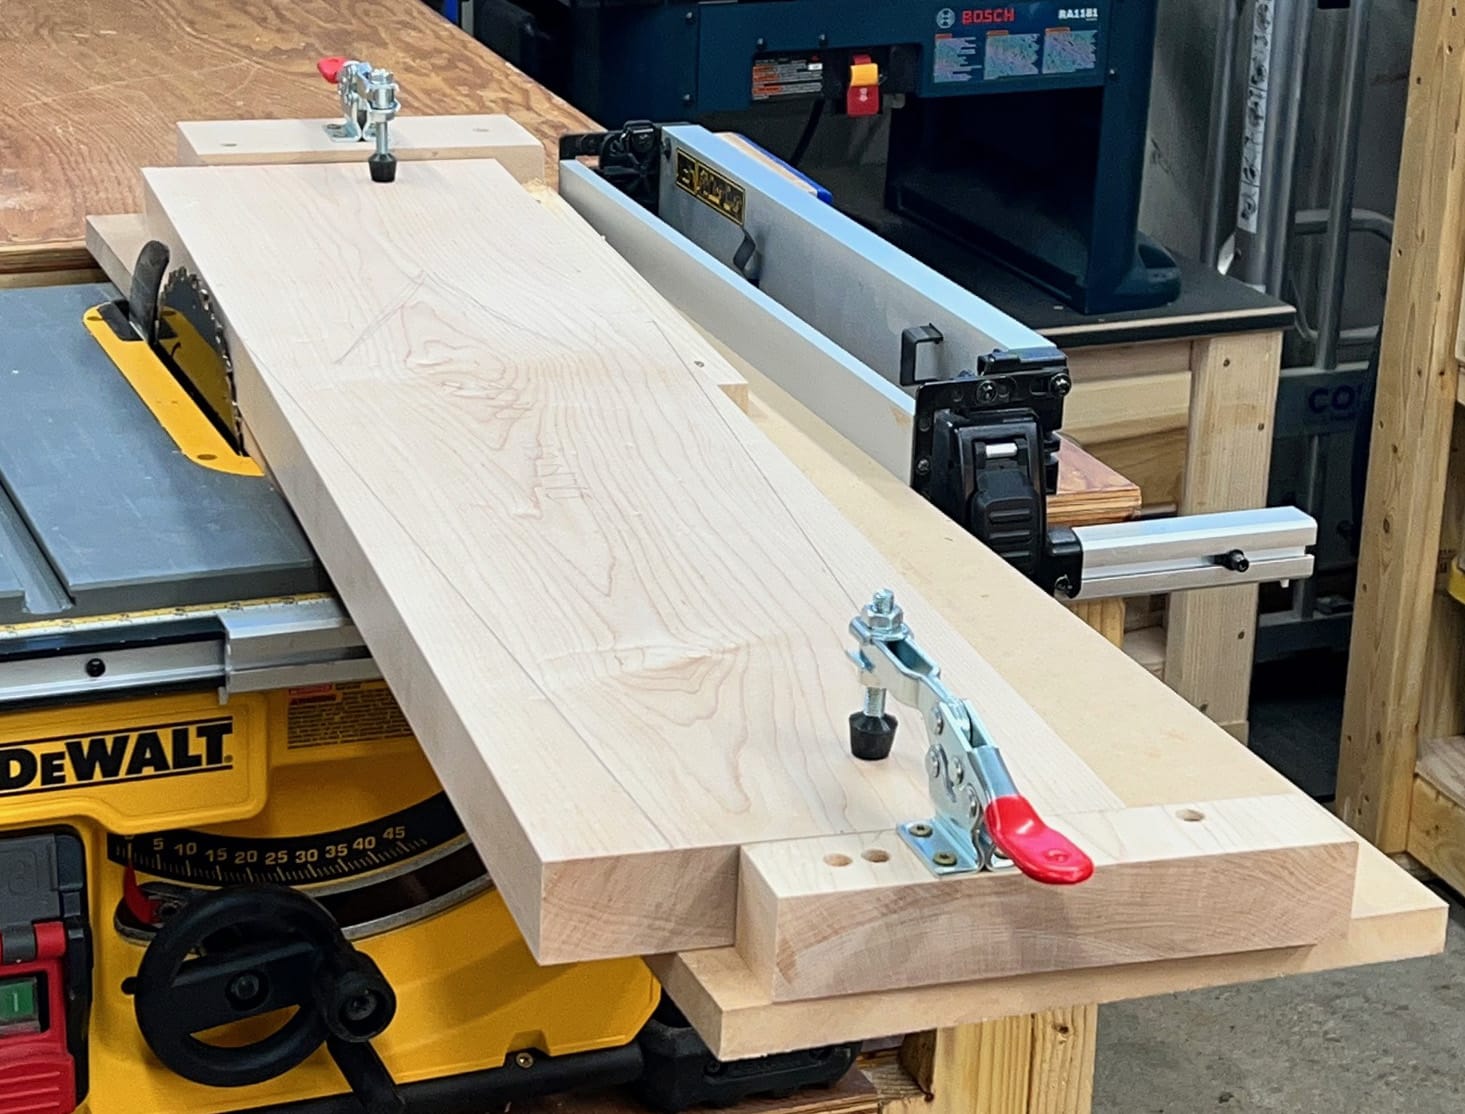
To finish the tail vise, I needed some hard maple for the vise faces. A quick trip to Helena Hardwoods (an hour away through the mountains, our nearest hardwood dealer) and I had what I needed. I've never worked with maple before and it's wonderfully dense and consistent, almost like working with a synthetic material compared to the pine and cedar I'm more familiar with.
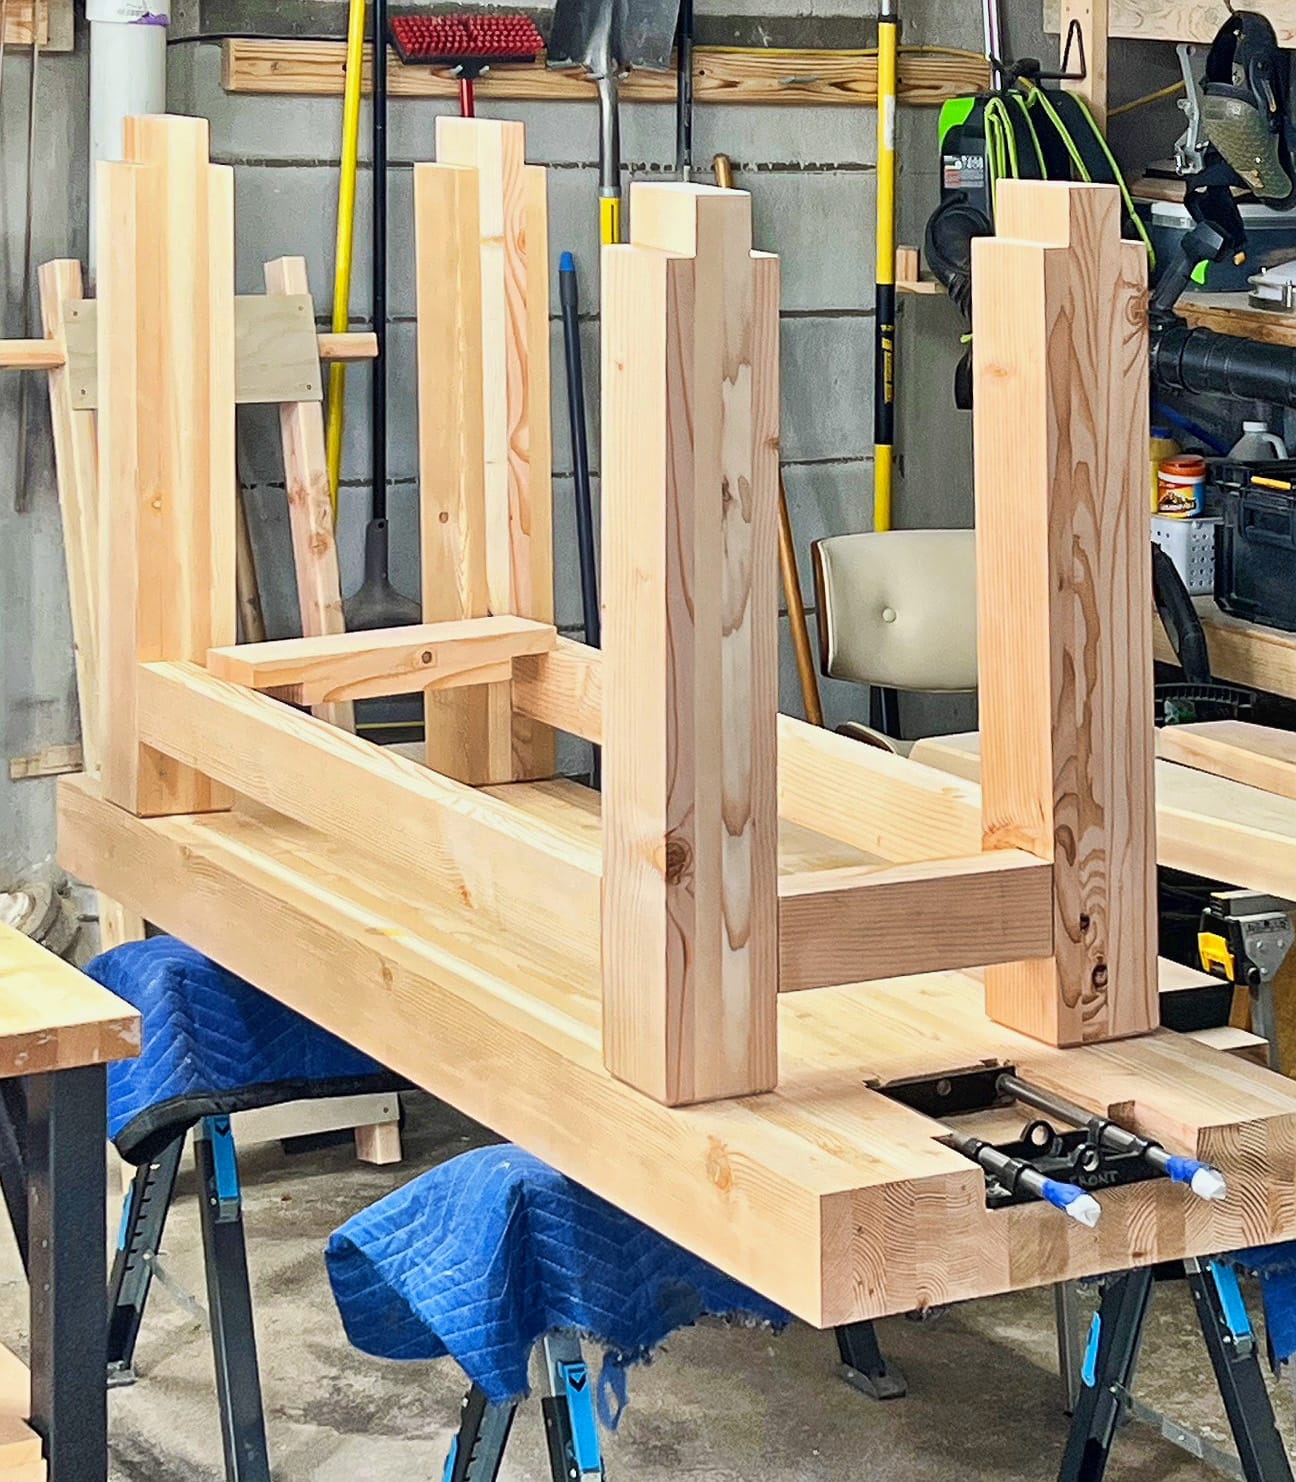
Legs and stretchers
Next was the construction of the four legs and the long and short stretchers that go between them a few inches off the ground.
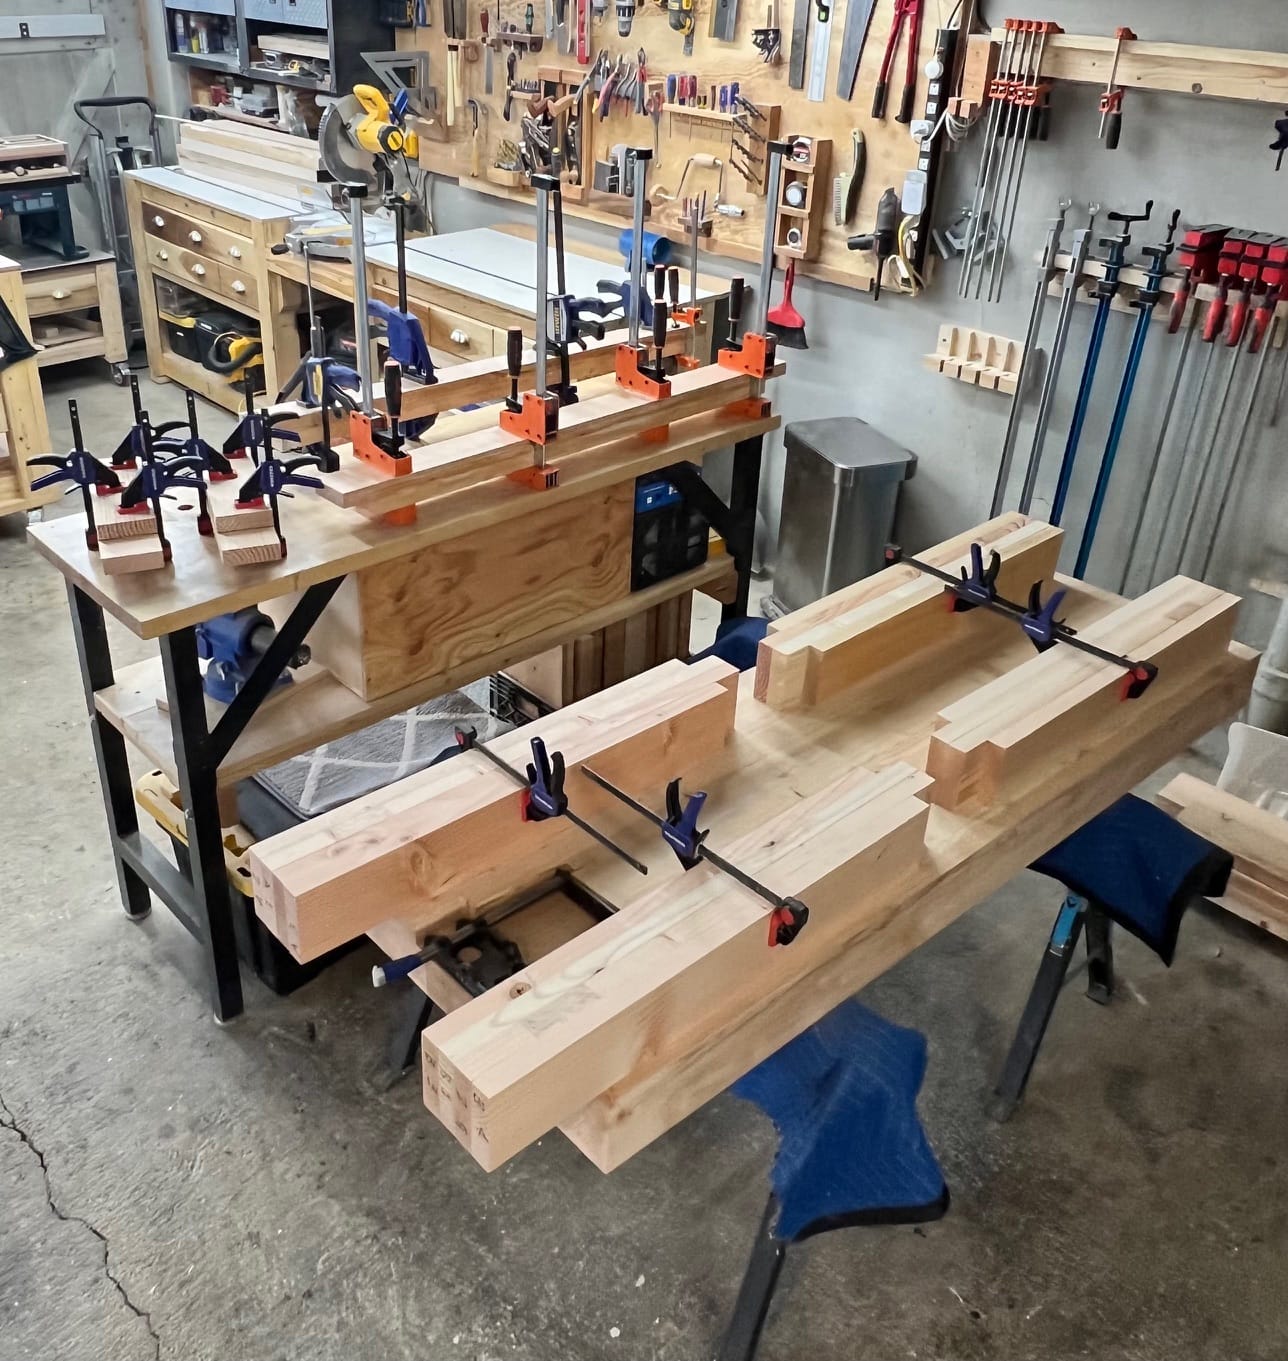
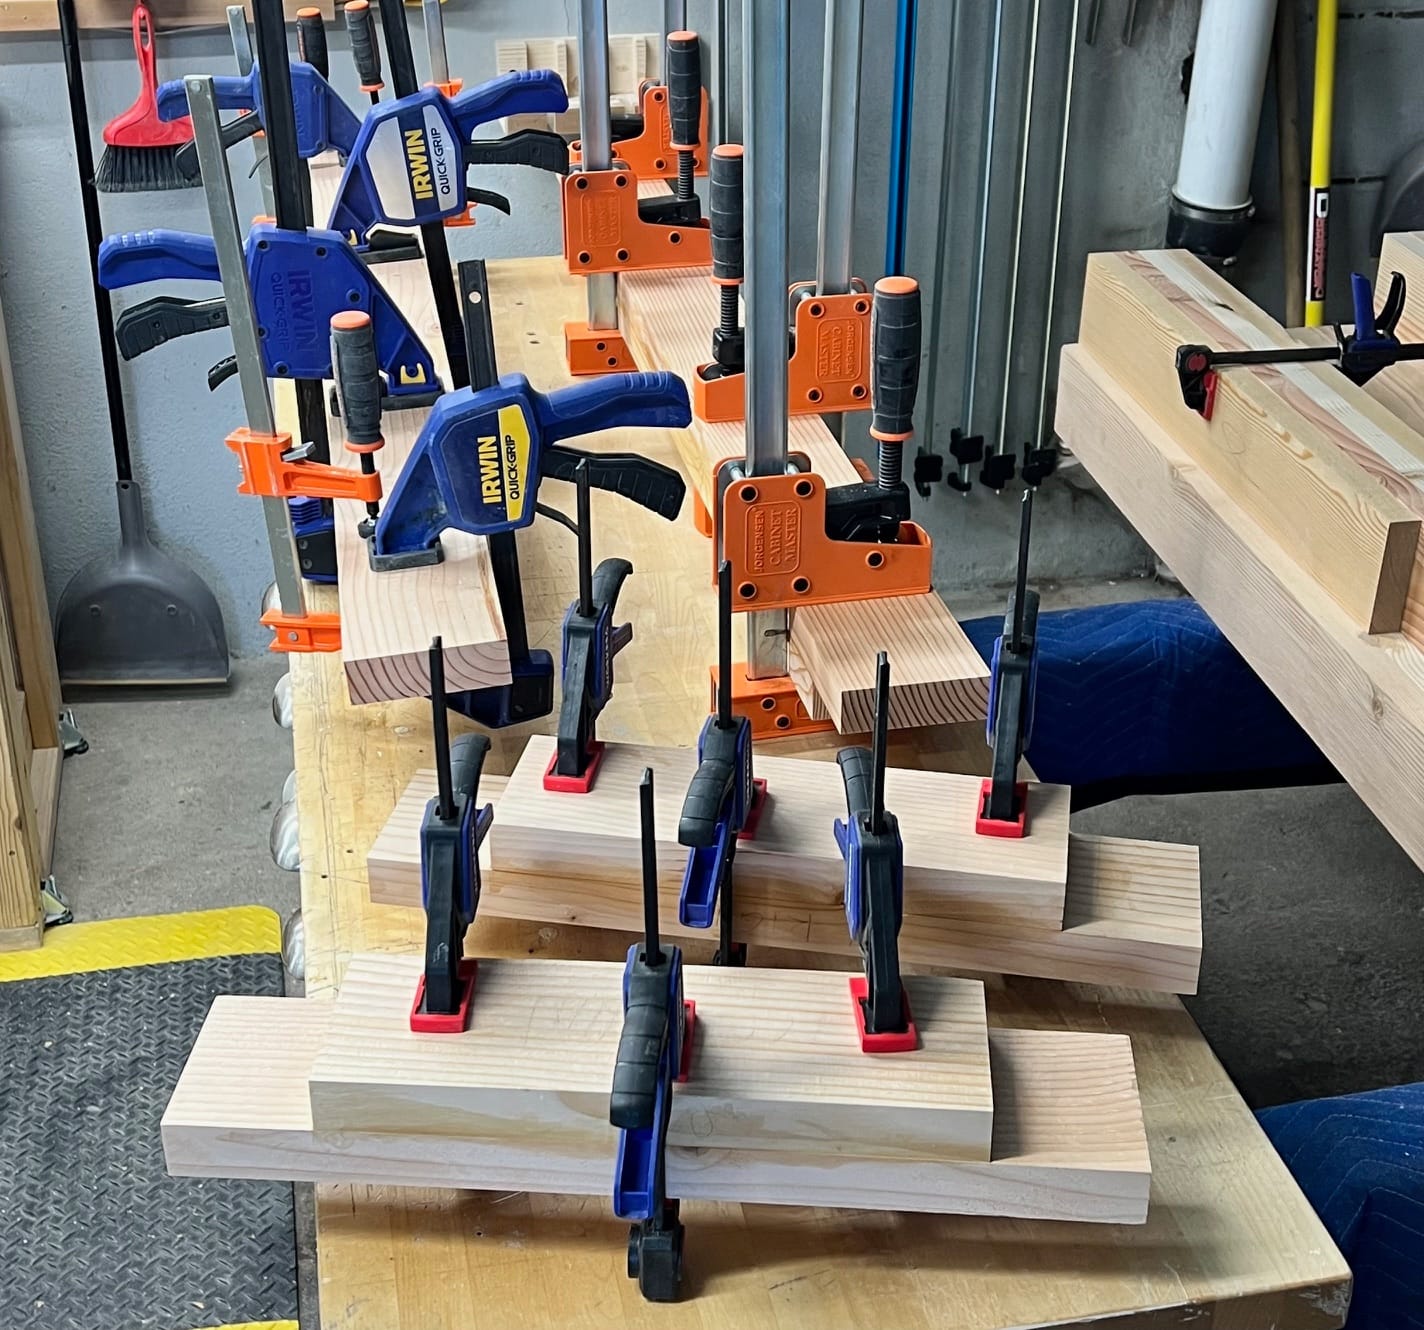
Milling the pieces for the legs and stretchers and then glueing them up. As the old saying goes, you can't have too many clamps! One nice detail in glueing up the legs was that the mortises for the long stretchers could be cut out of one of the four pieces that went into each leg.
The leg vise
This was probably the most satisfying piece of the puzzle, for me. I've seen many leg vises in videos but had never seen or used one in person, and at first I was intimidated by the thought of building one. But the more I thought about it, the more I wanted to try.
A leg vise typically has a thick board (called the chop) that can be moved in and out by spinning a massive threaded screw. Some leg vises use a wooden screw, others use a steel Acme screw. I went with the Glide model from Benchcrafted, and I also installed their Crisscross mechanism, which is a ressurection of a French design from the 19th century. The crisscross automatically holds the chop vertical throughout its range of motion, eliminating the need for the cumbersome "guide and pin" approach.
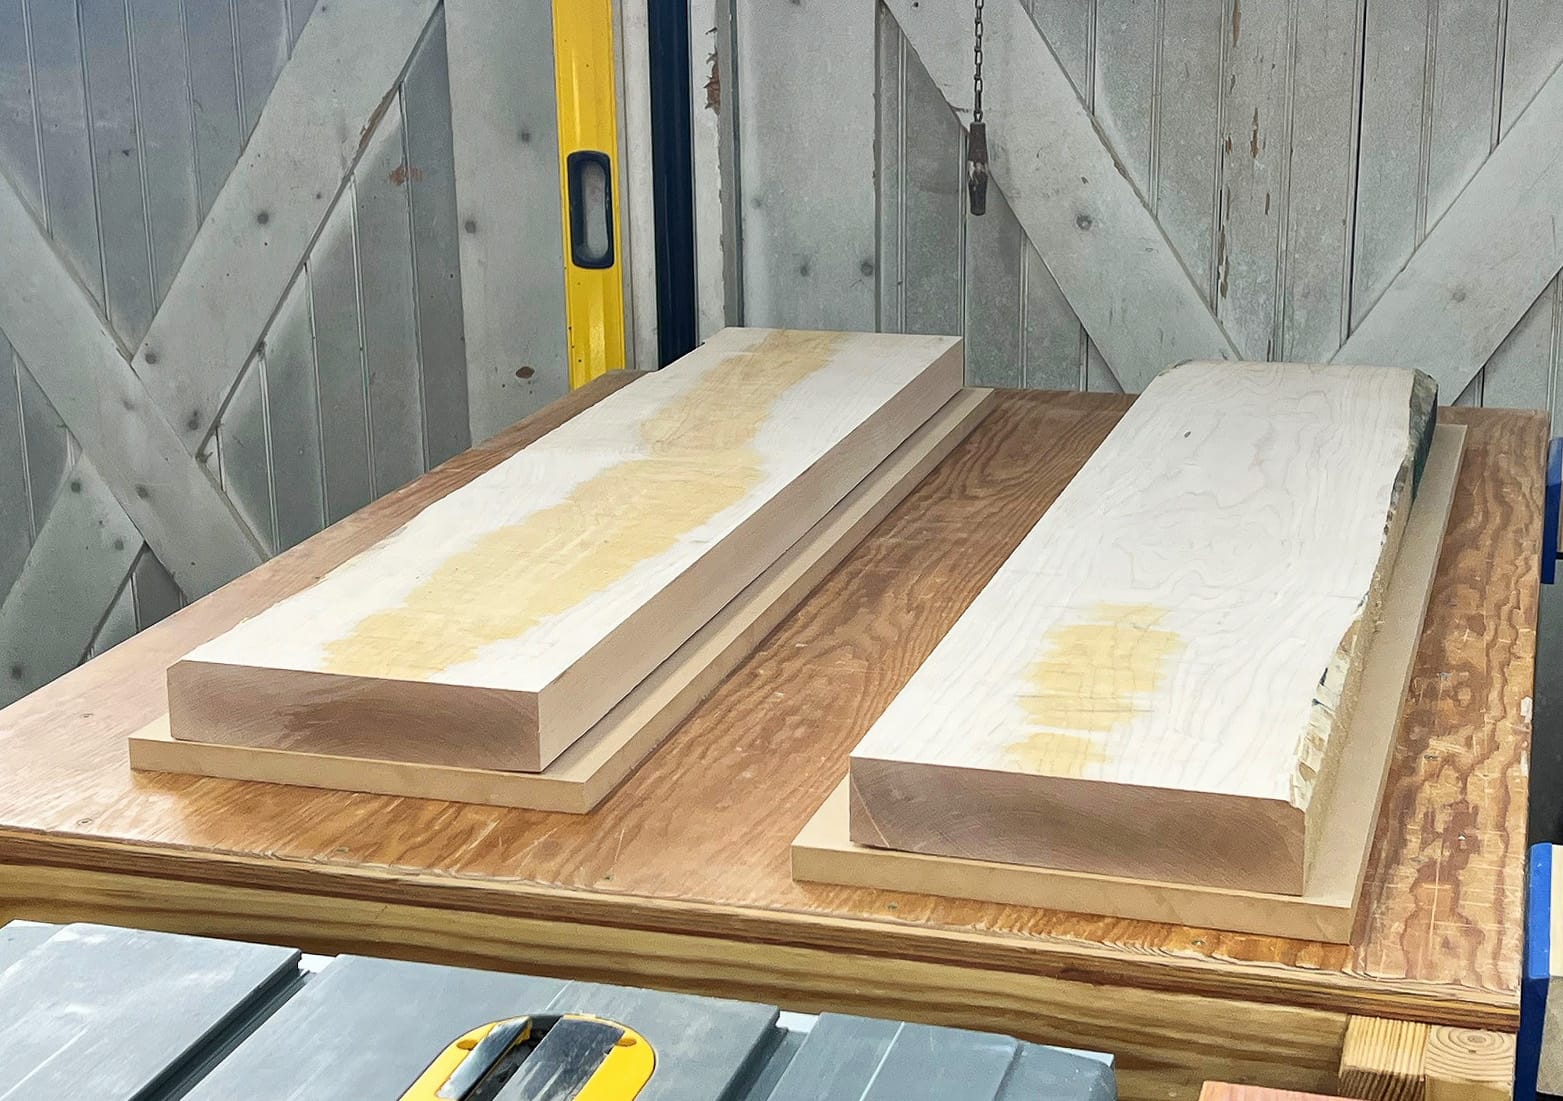
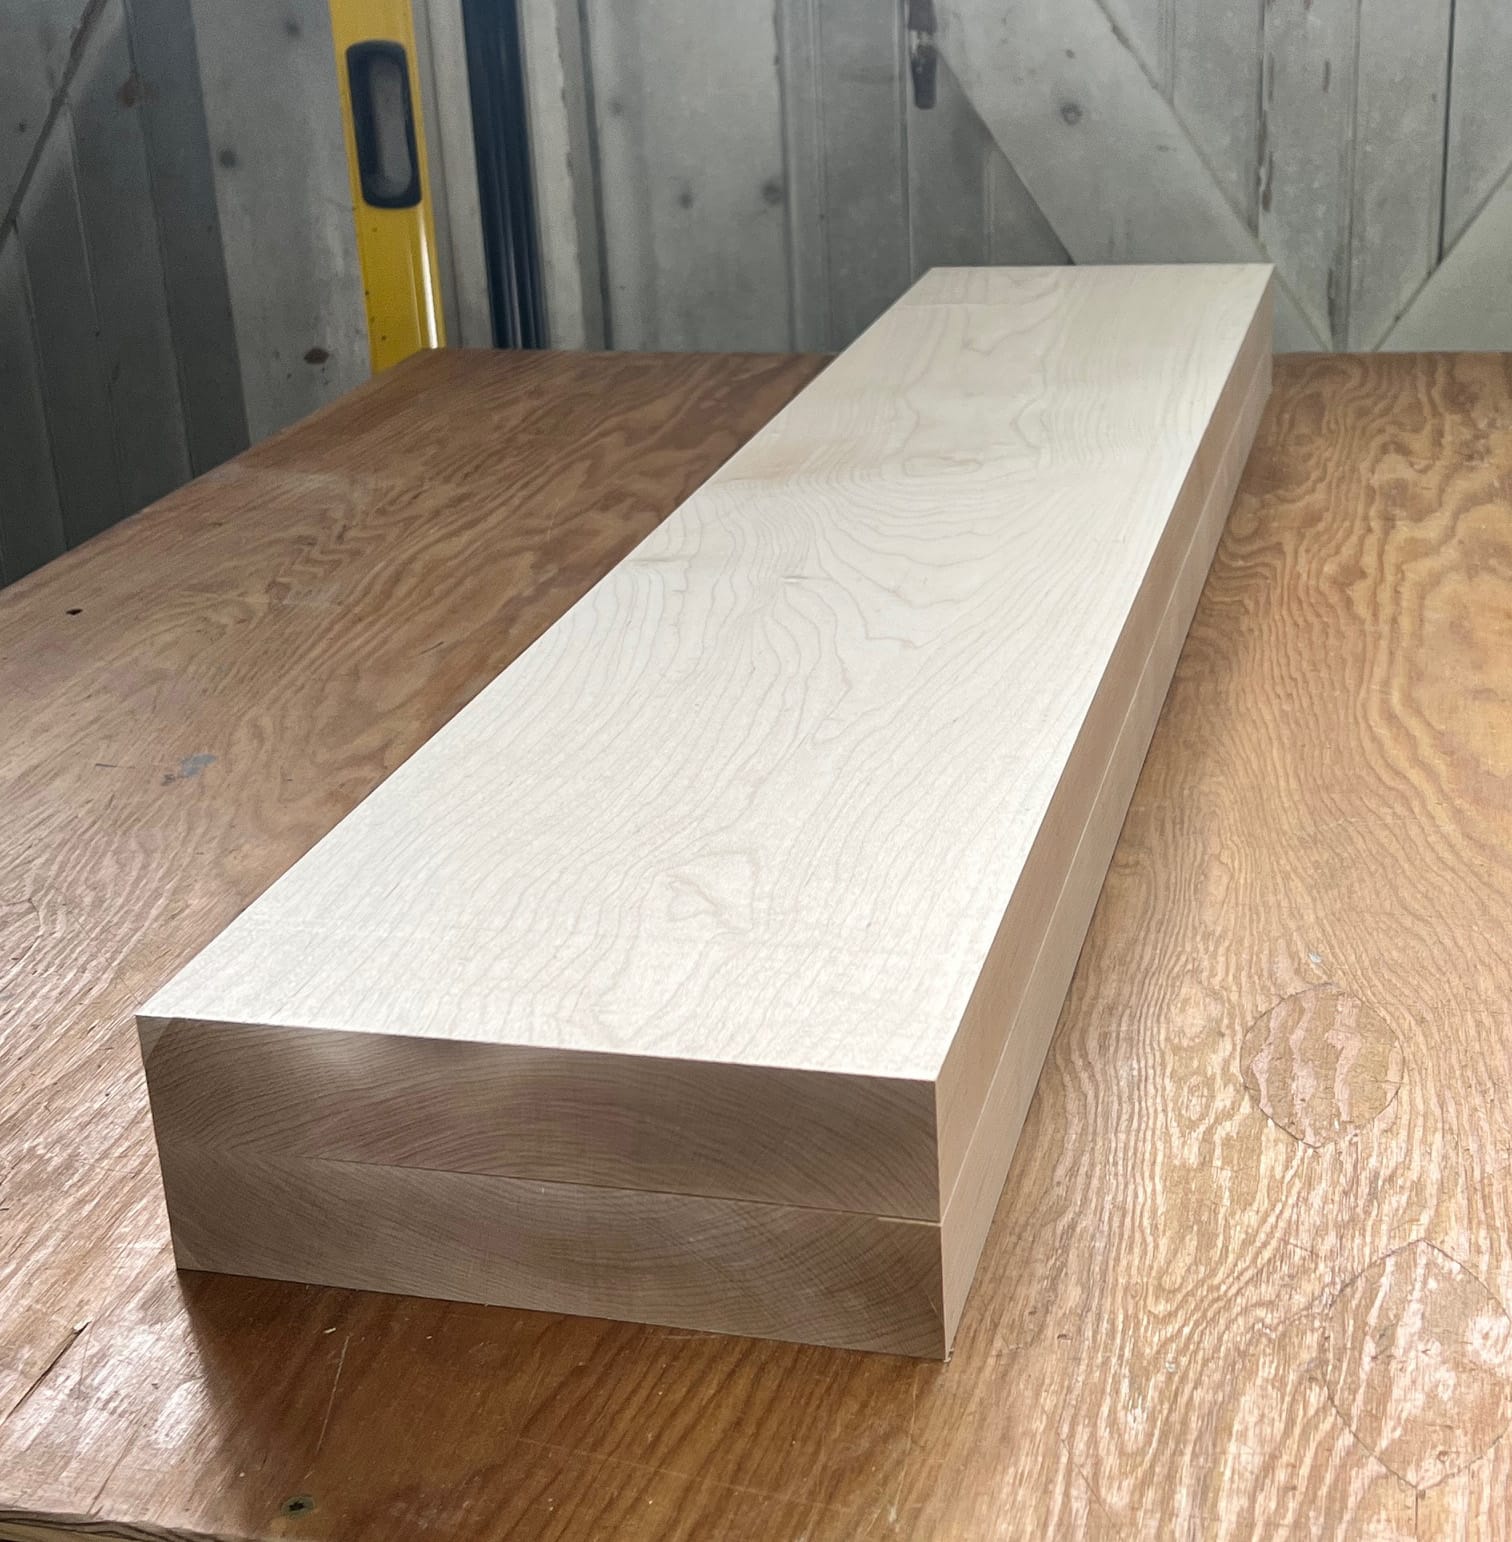
Building the leg vise chop was a complicated project unto itself. I selected Eastern Hard Maple, and the first step was to flatten and square up the rough 2" thick boards I picked up at Helena Hardwoods. I made MDF "sleds" for the boards and hot-glued the boards to them to run through my planer, then after one face was flat I removed the sleds, flipped the pieces over, and planed the other face to be flat and parallel. Then I used a similar technique to square the edges on the table saw and cut everything to rough width and length.
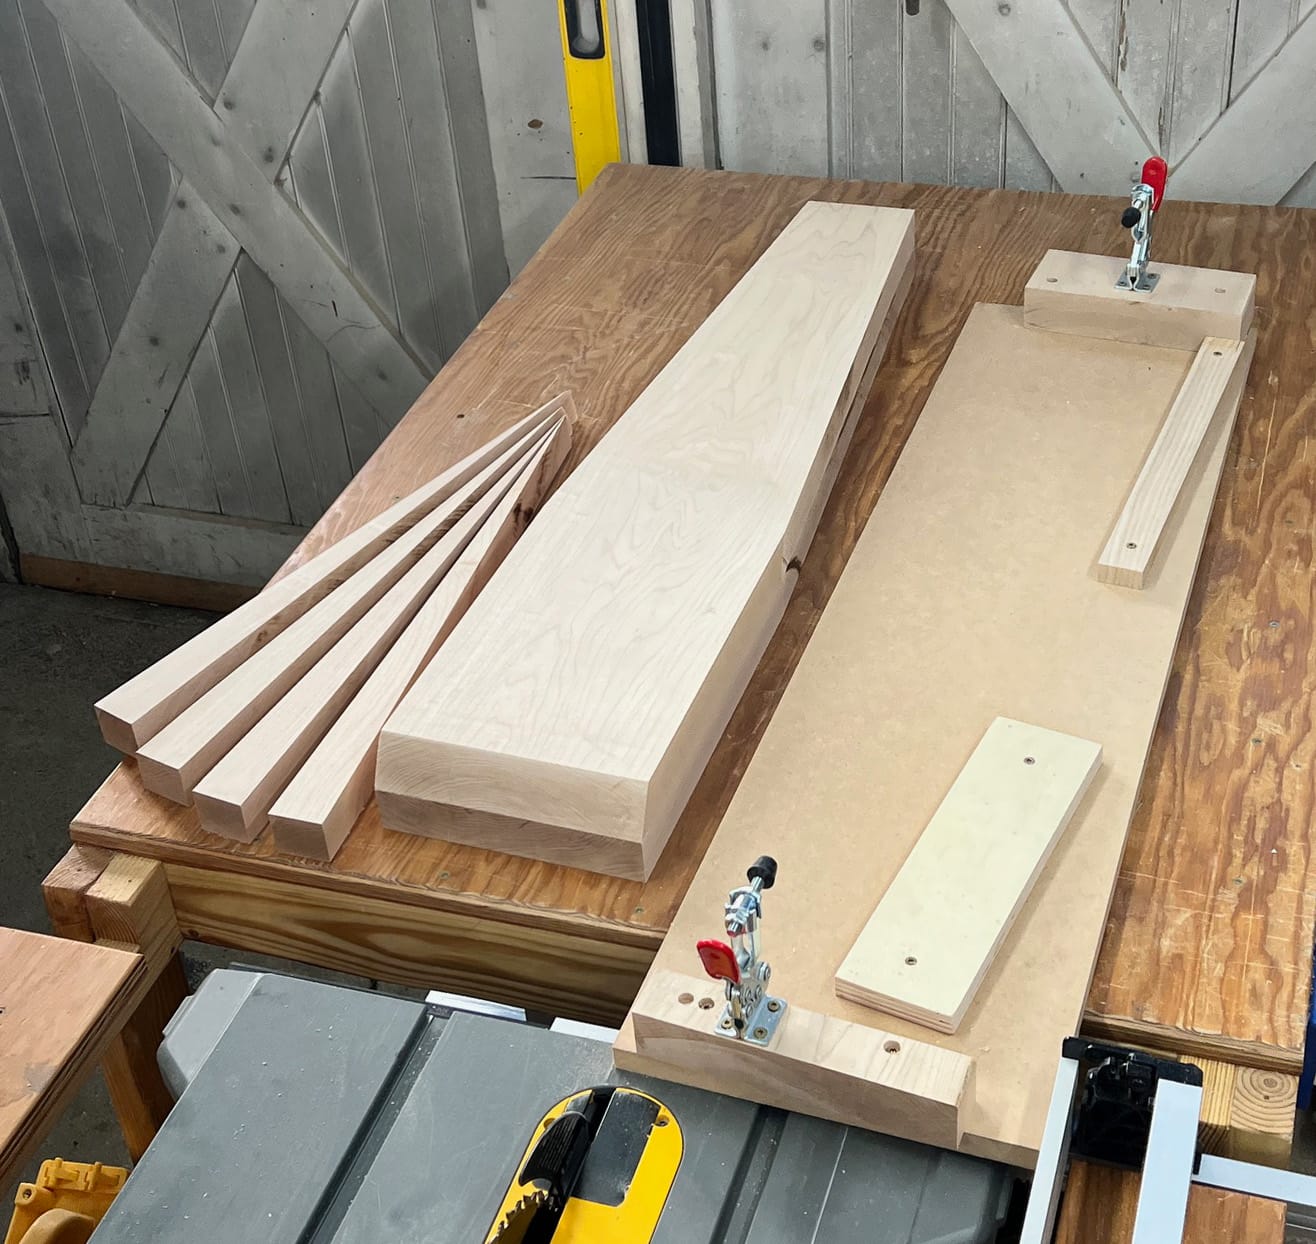
I decided to go with a tapered shape for the job, so I built a jig to taper the sides of the boards on my table saw.
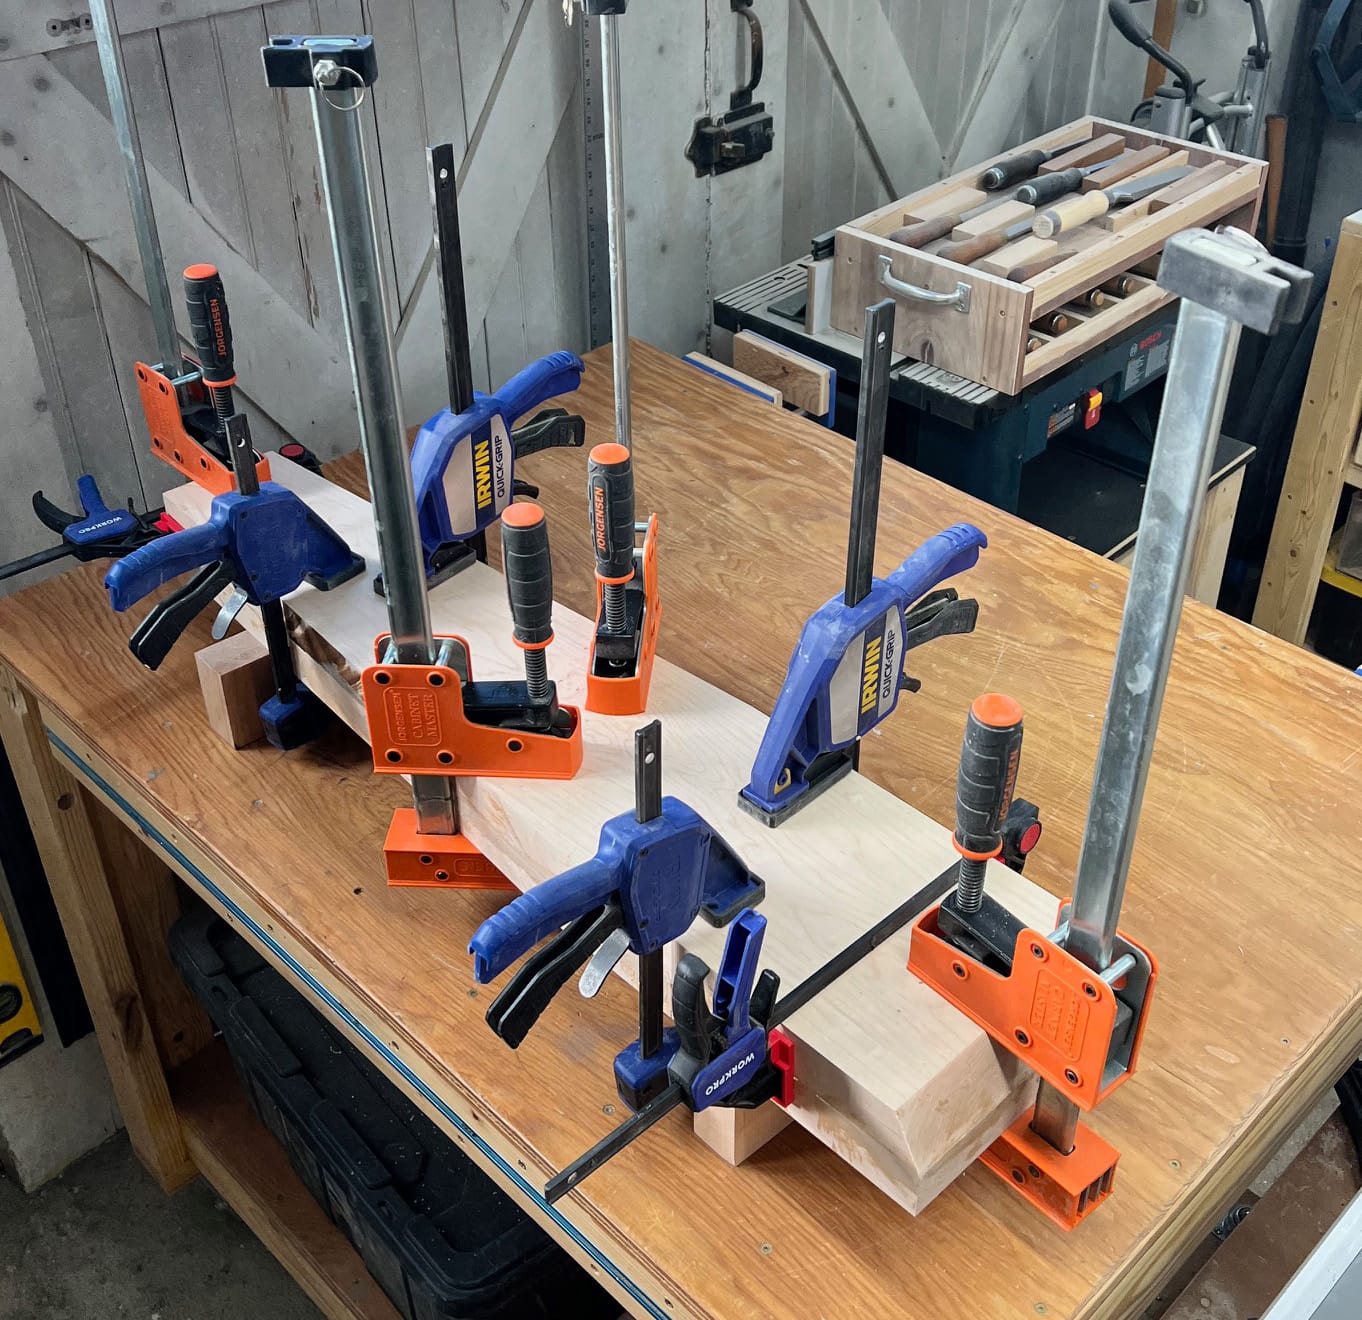
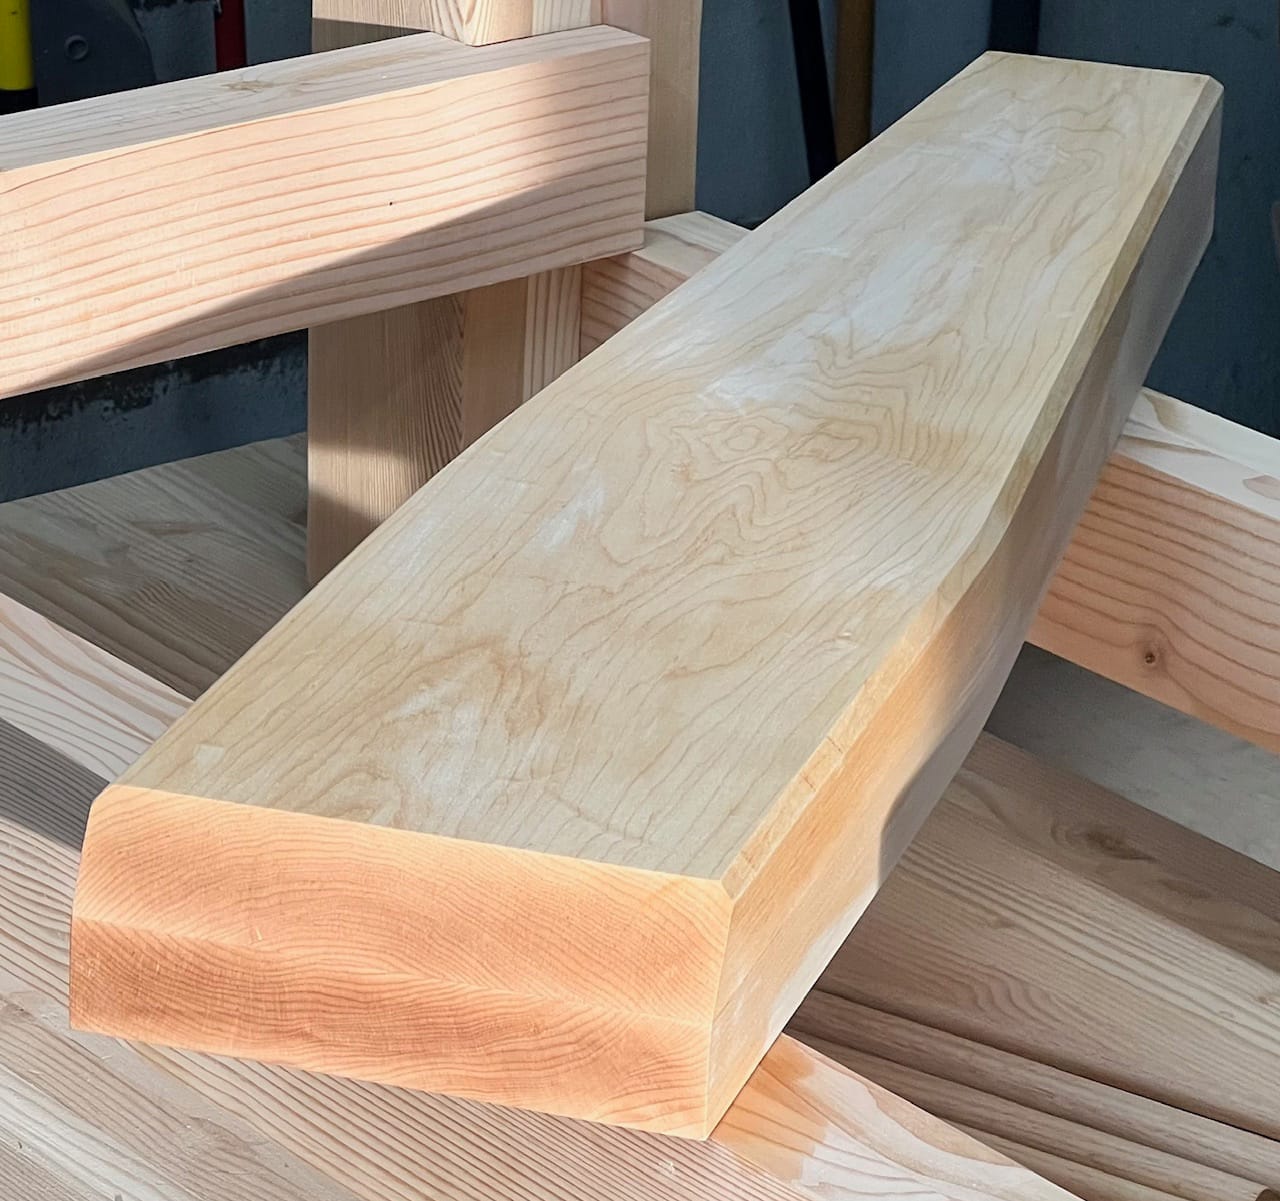
Final step in assembling the chop was glue-up. It was still warm enough to do glue-ups in my unheated shop at this point (early October).
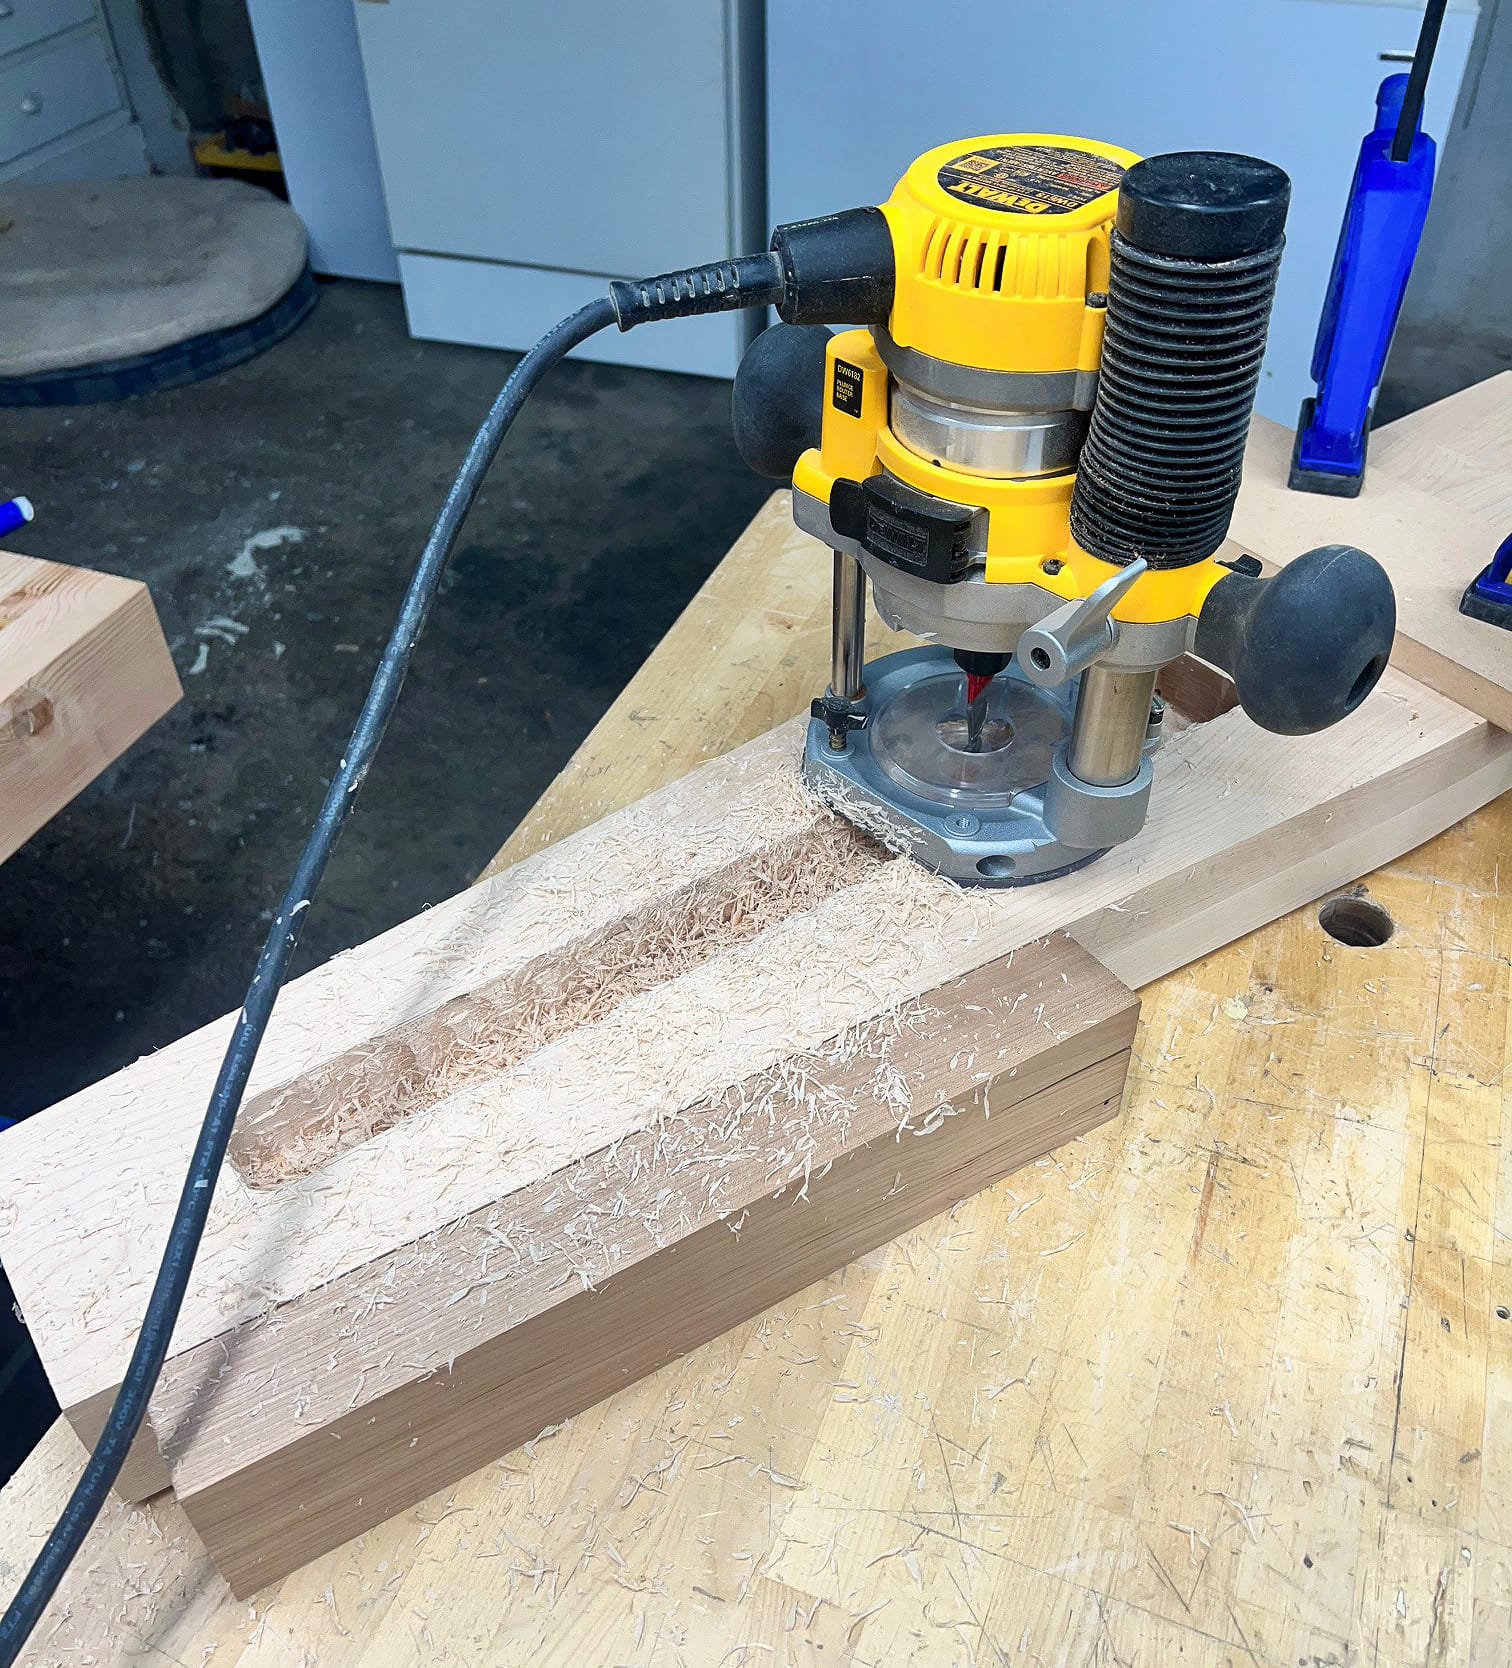
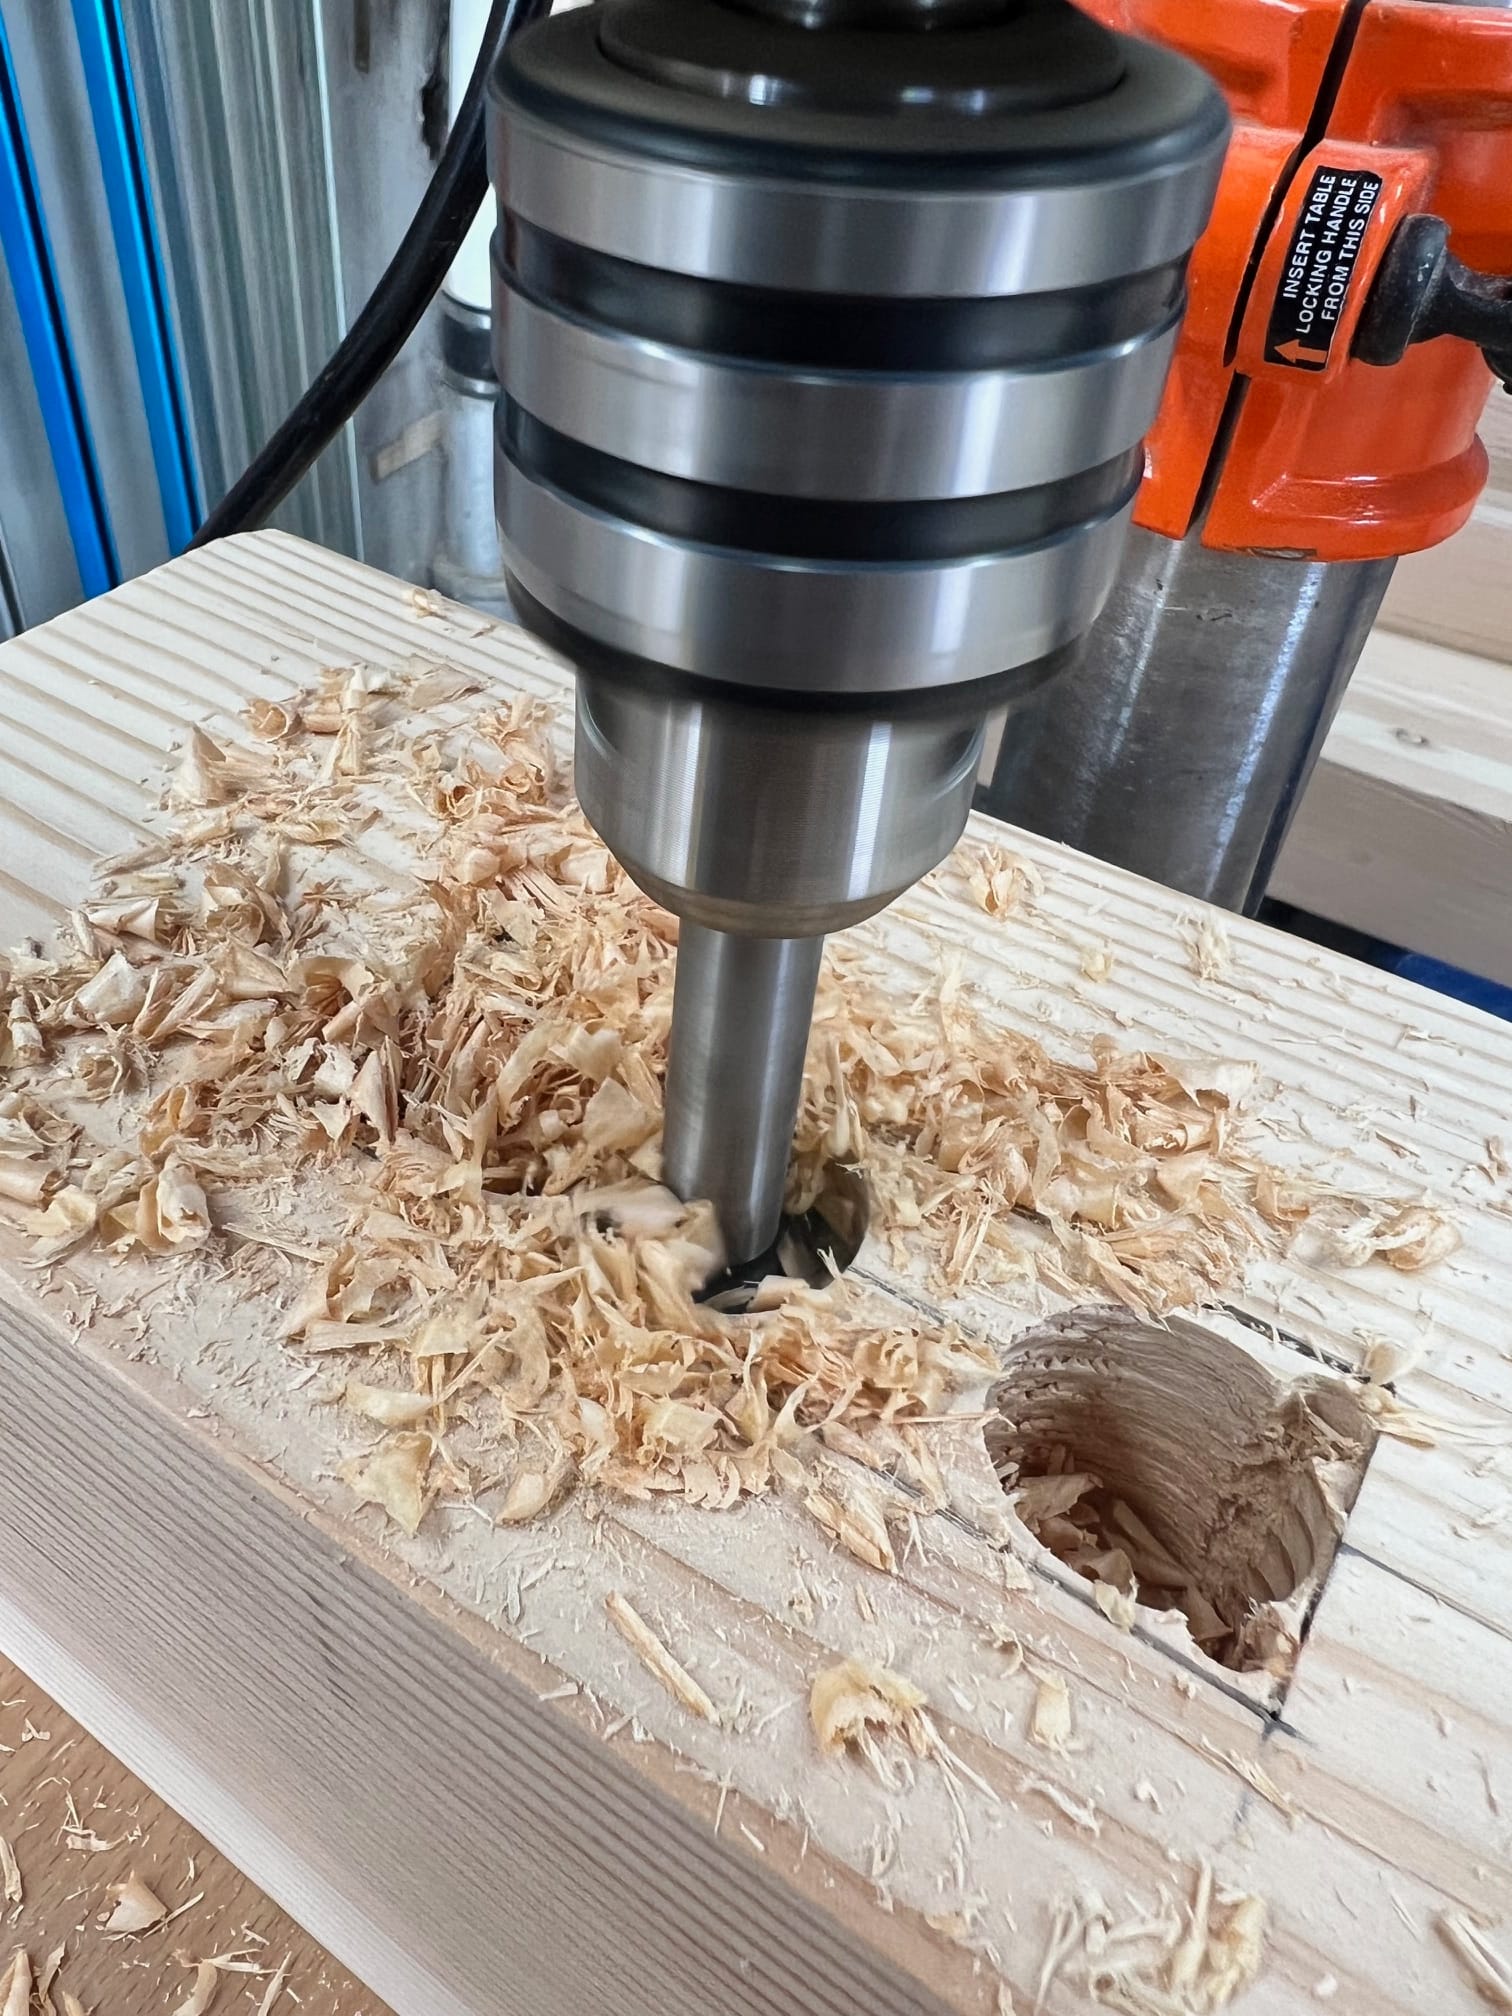
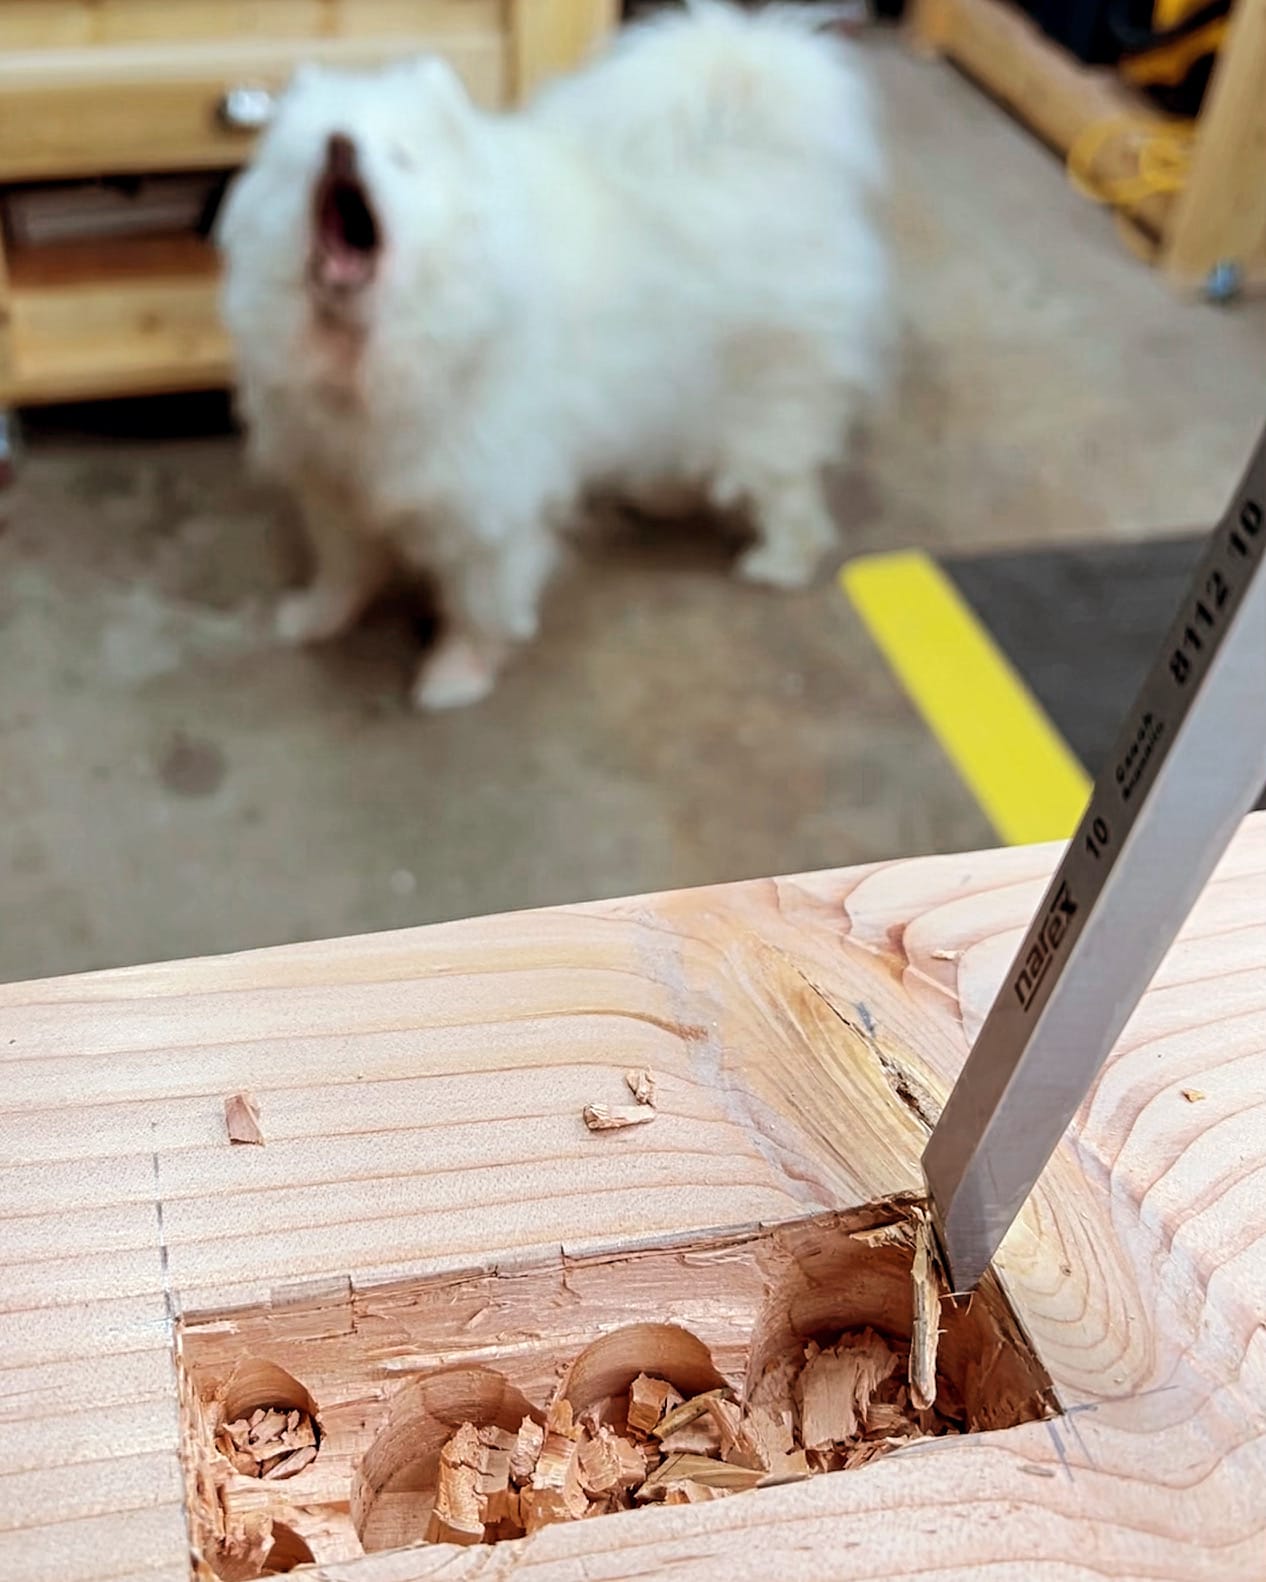
Next step was to cut the large openings for mounting the crisscross mechanism in the chop and the front right leg of the bench. (Front right because I'm left-handed.) I drilled out most of the material with Forstner bits on the drill press, then used a router to straighten the edges and chisels for the final touches. This was the point in the workbench project where I started sharpening my chisel every day.
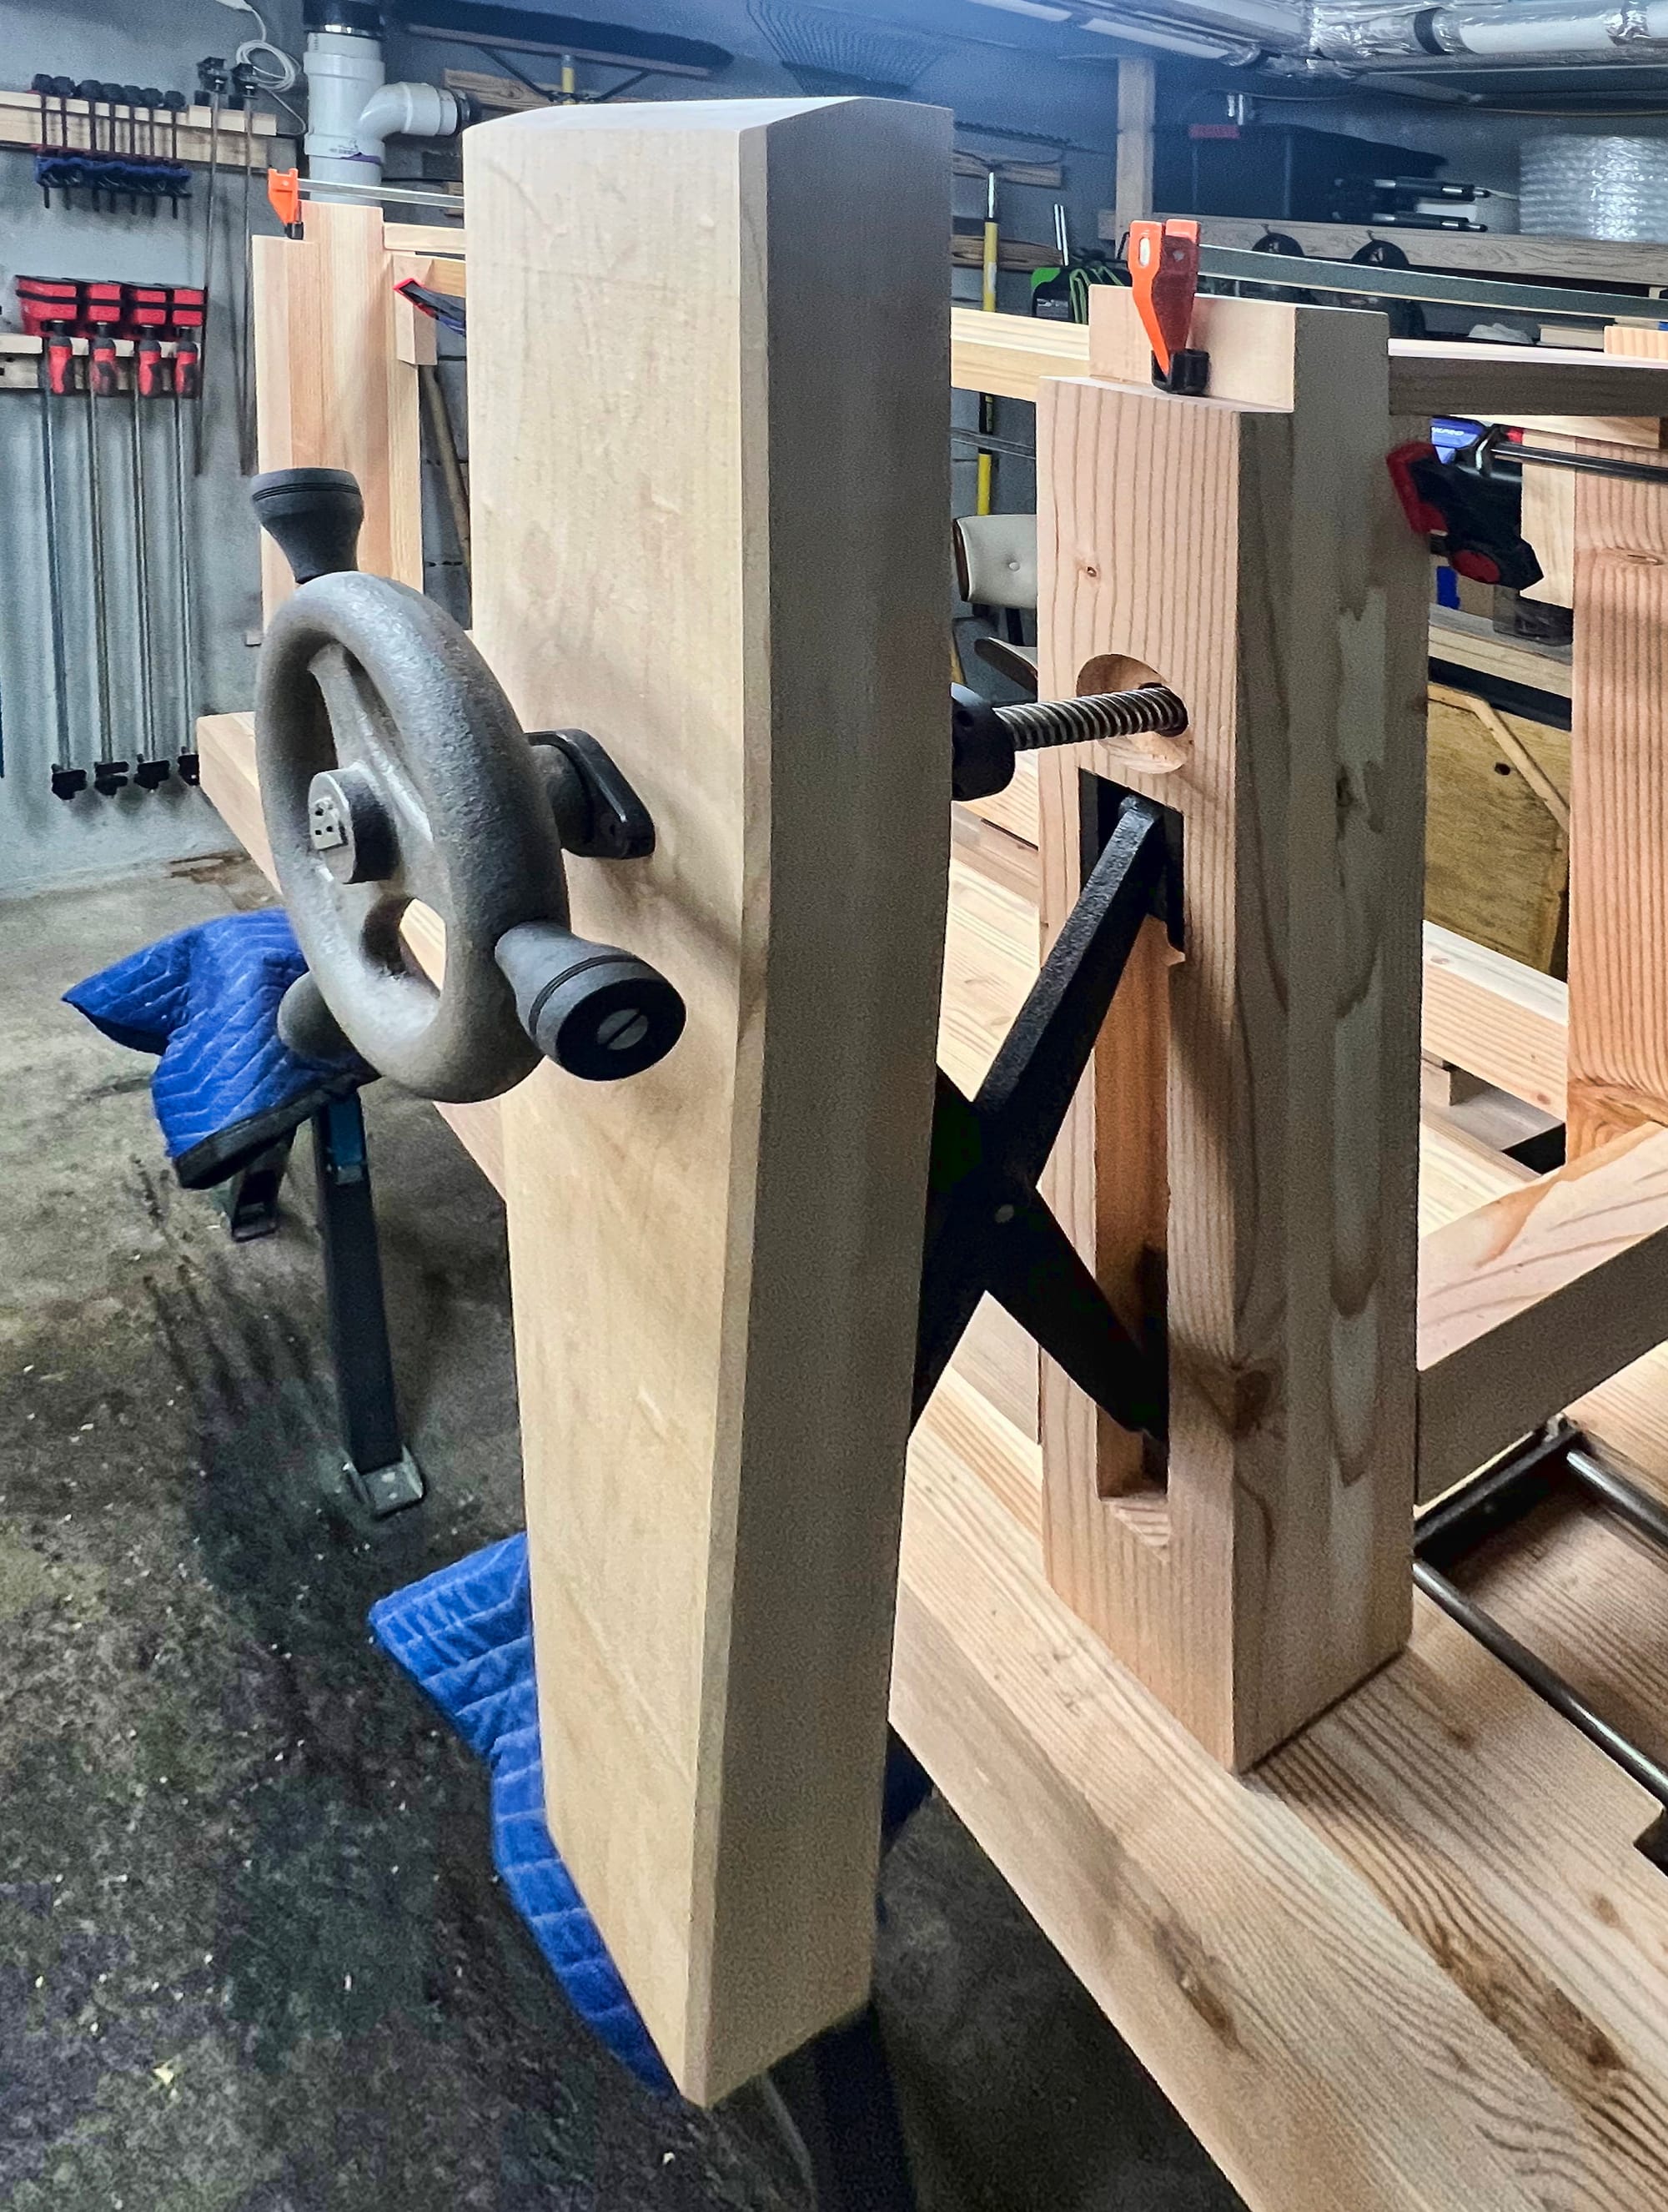
It was very satisfying to finally have it done and working. Here's an Instagram video showing how smoothly it operated once everything was installed.
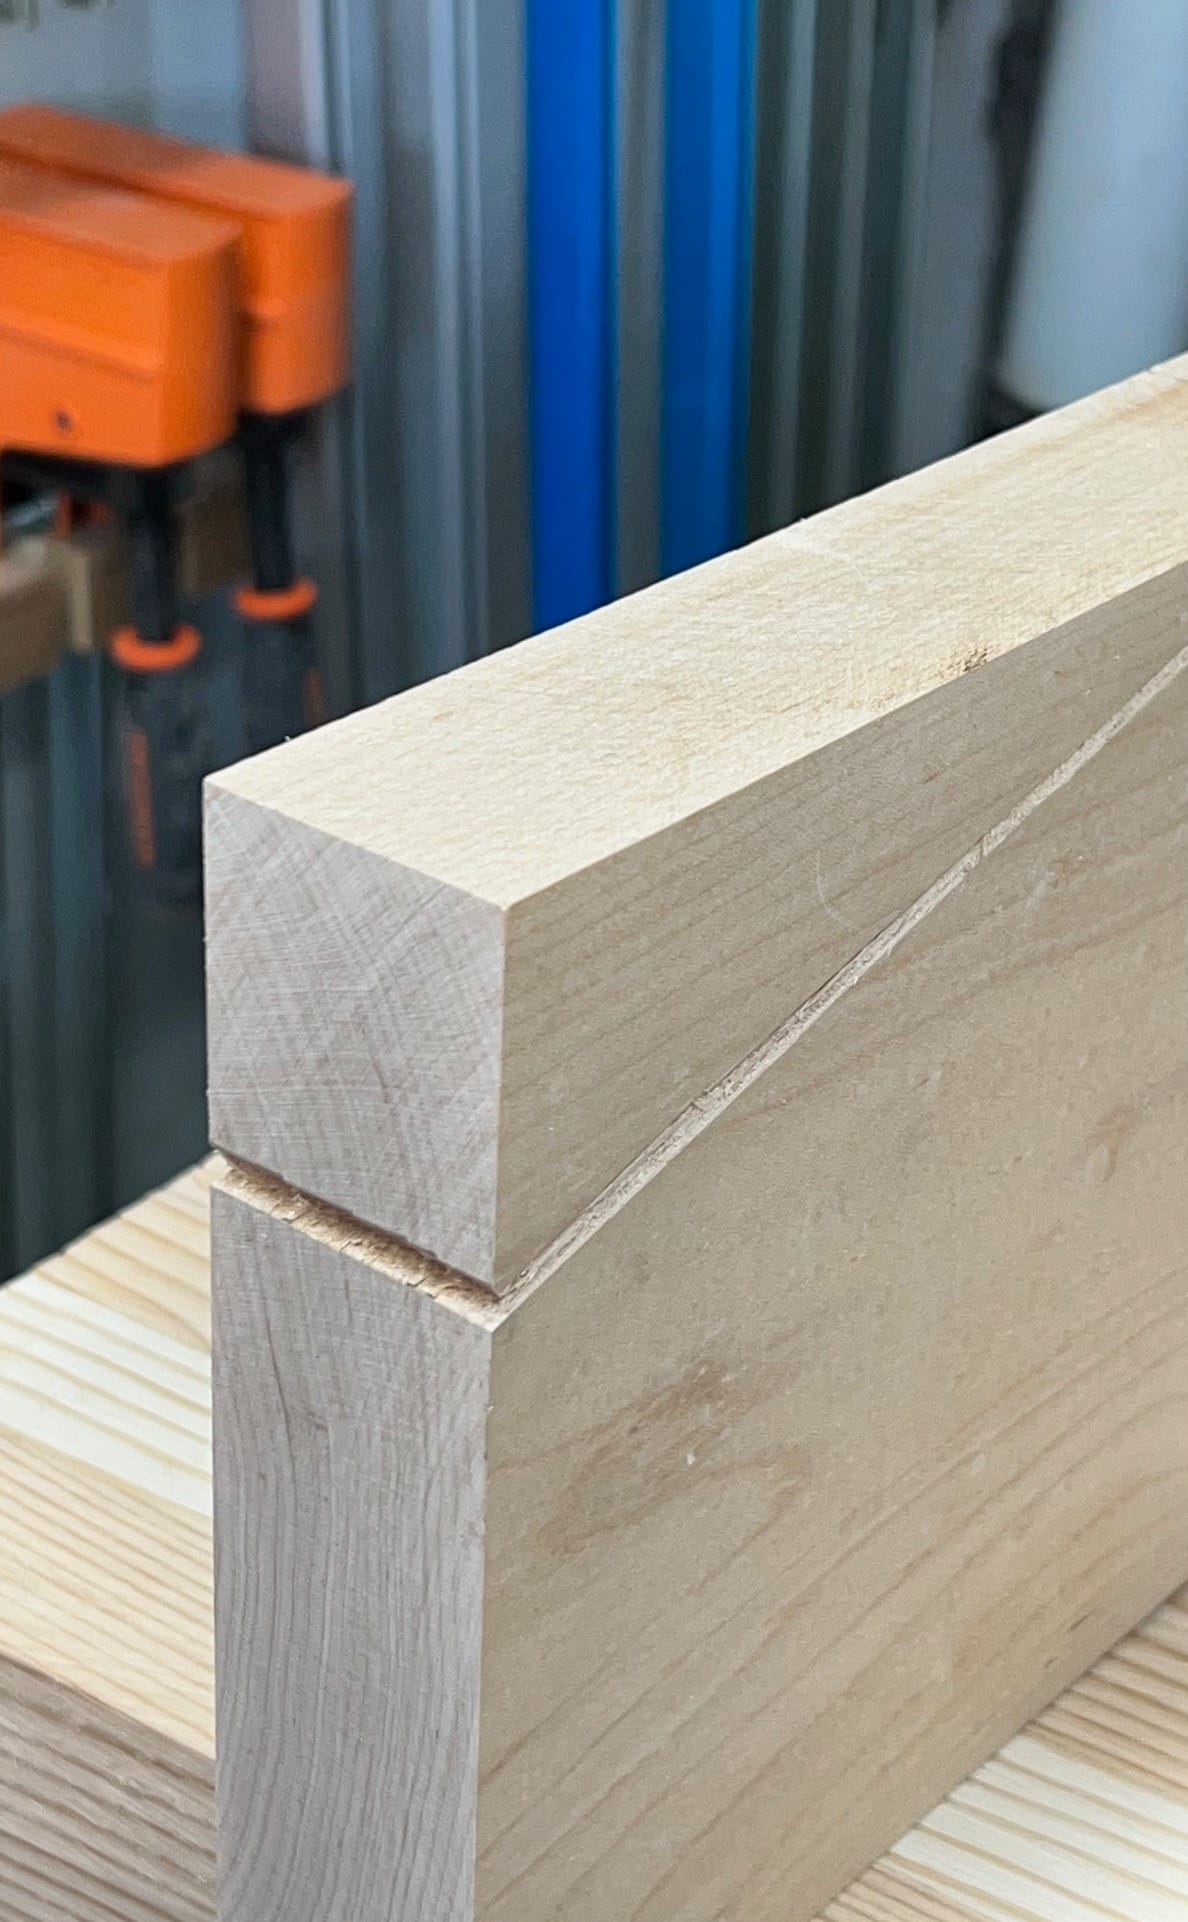
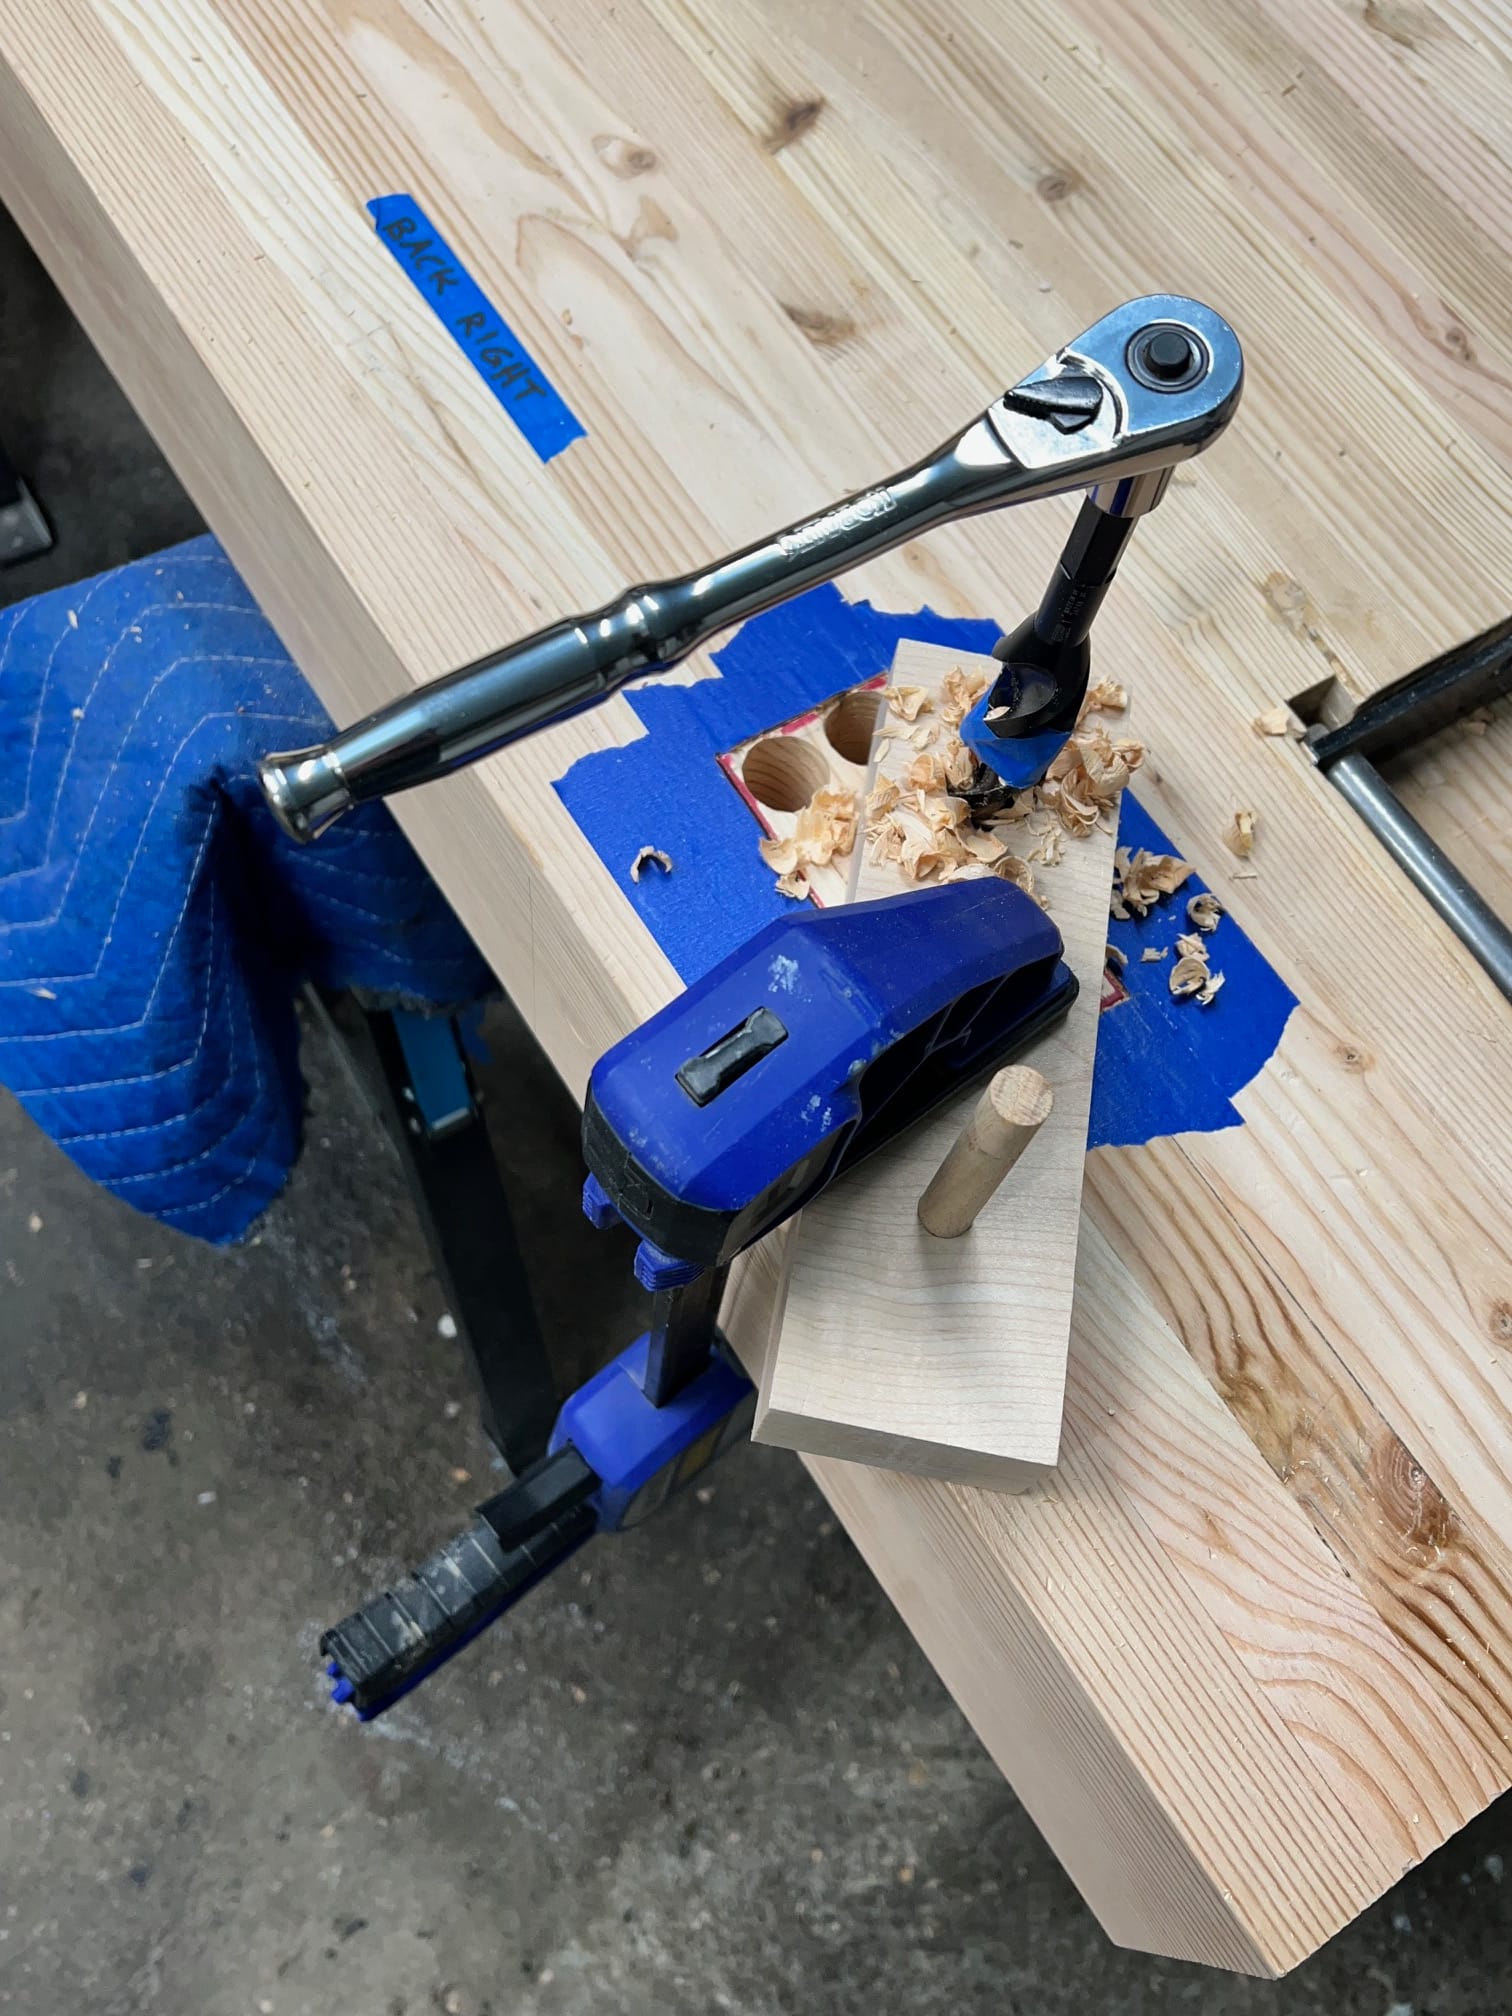
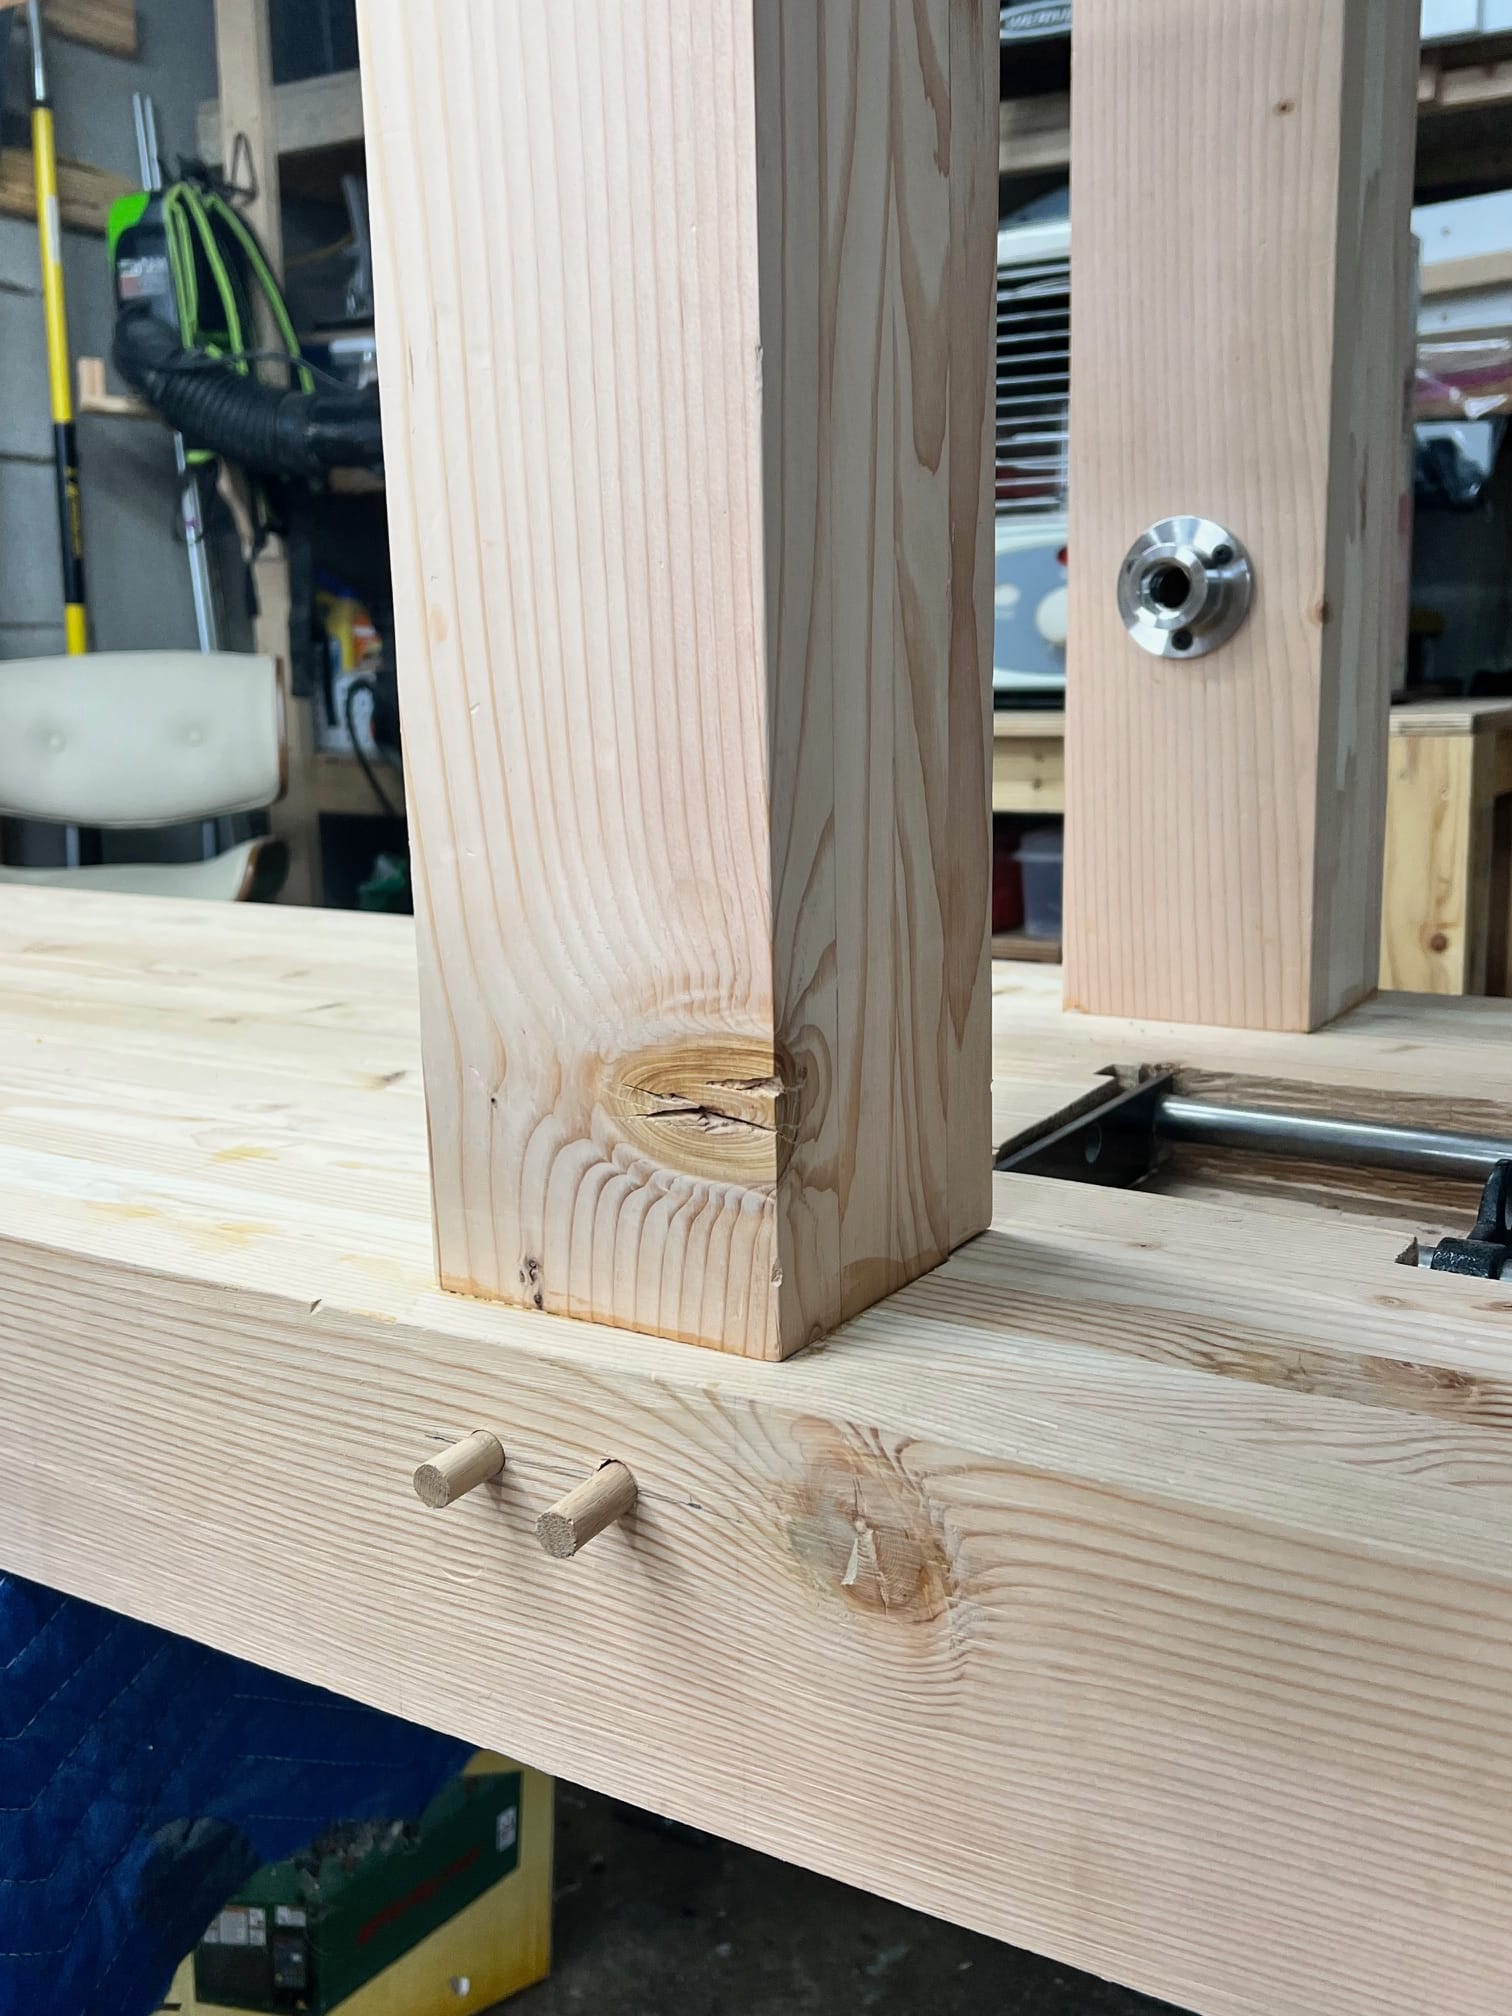
Mortises for the legs
Now that the leg vise and end vise were done, I disassembled those and set all the pieces aside, and then got to work on making the legs, stretchers, and benchtop all fit together.
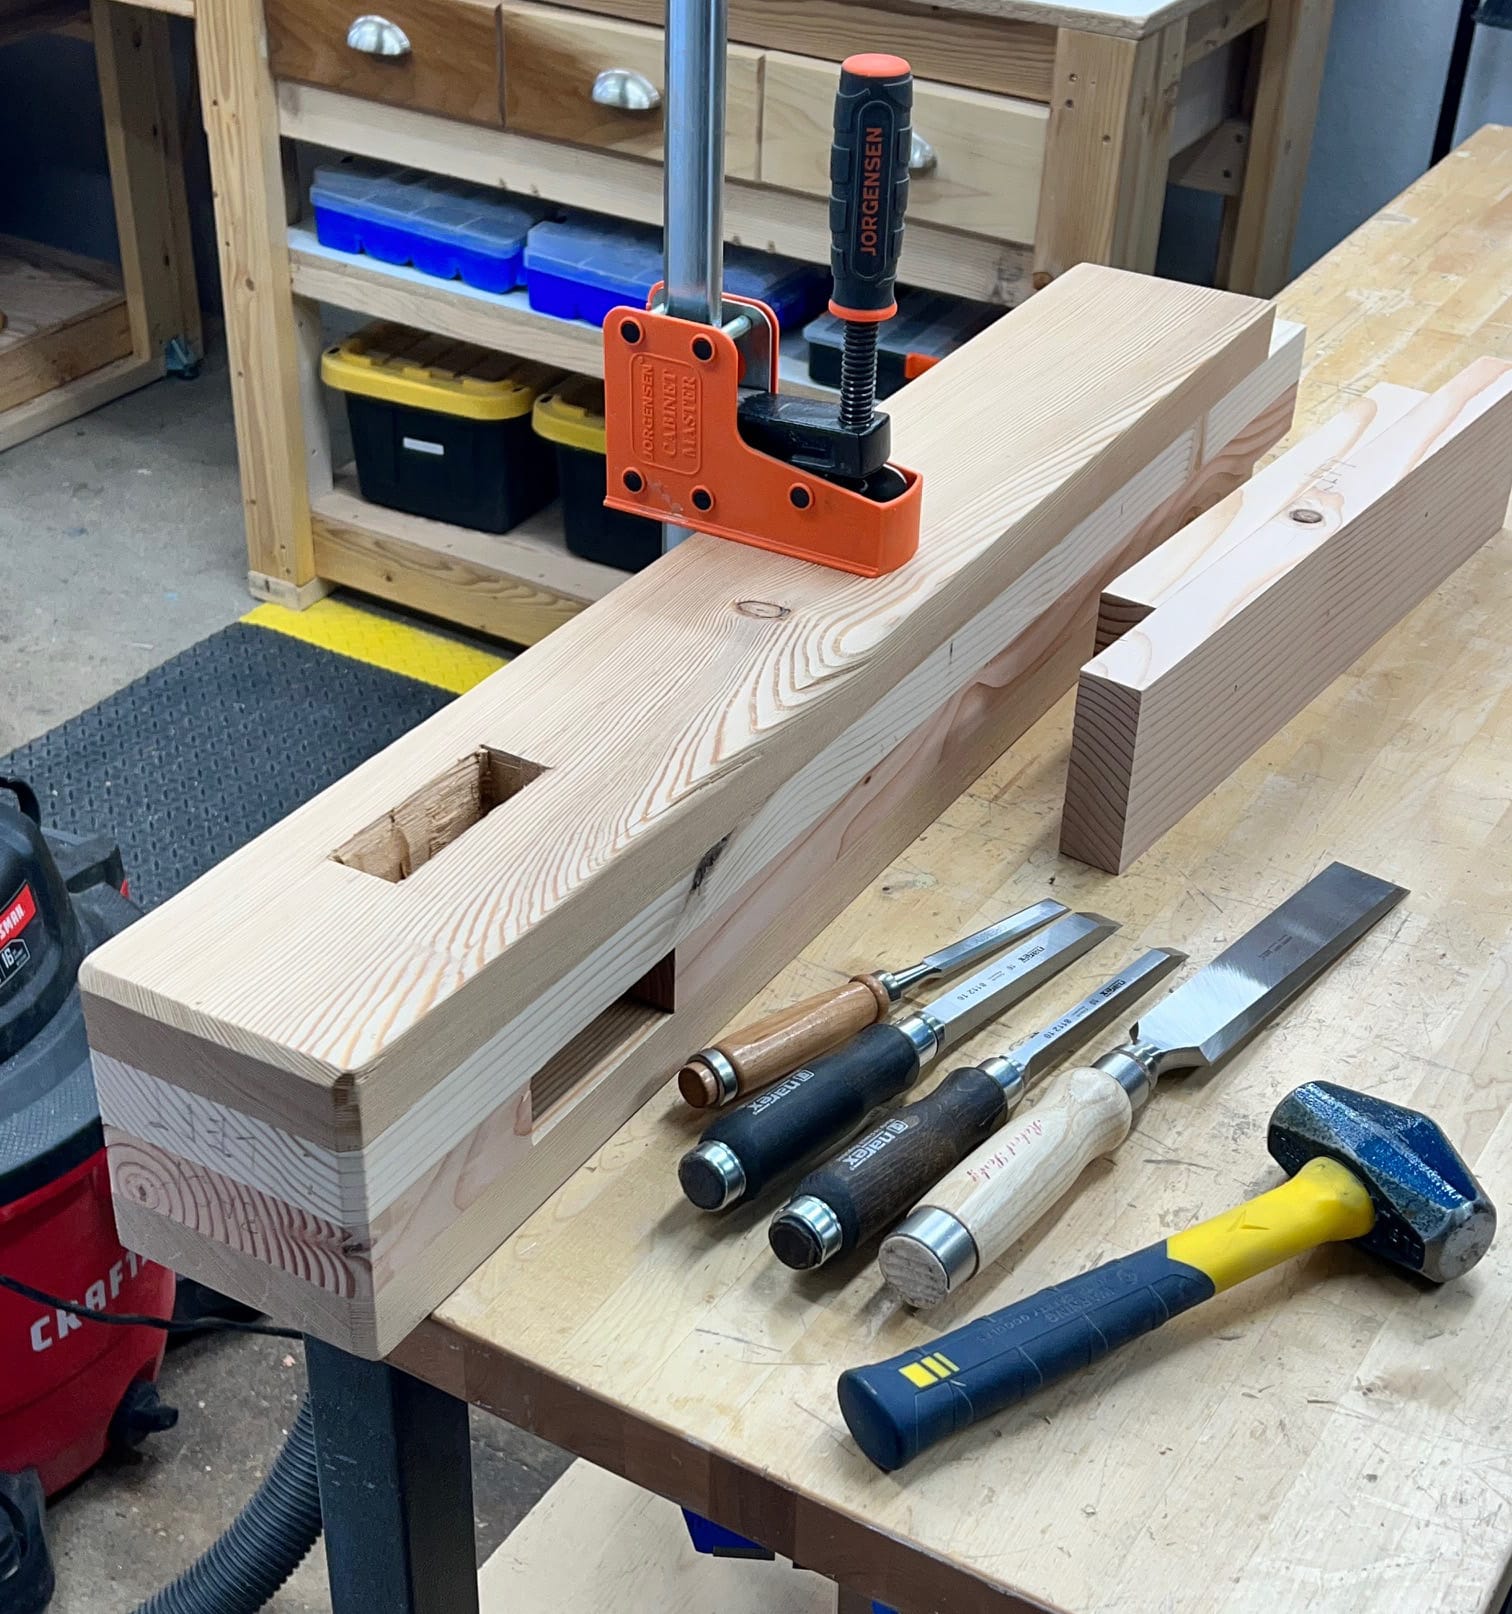
Cutting the stretcher mortises in the legs.
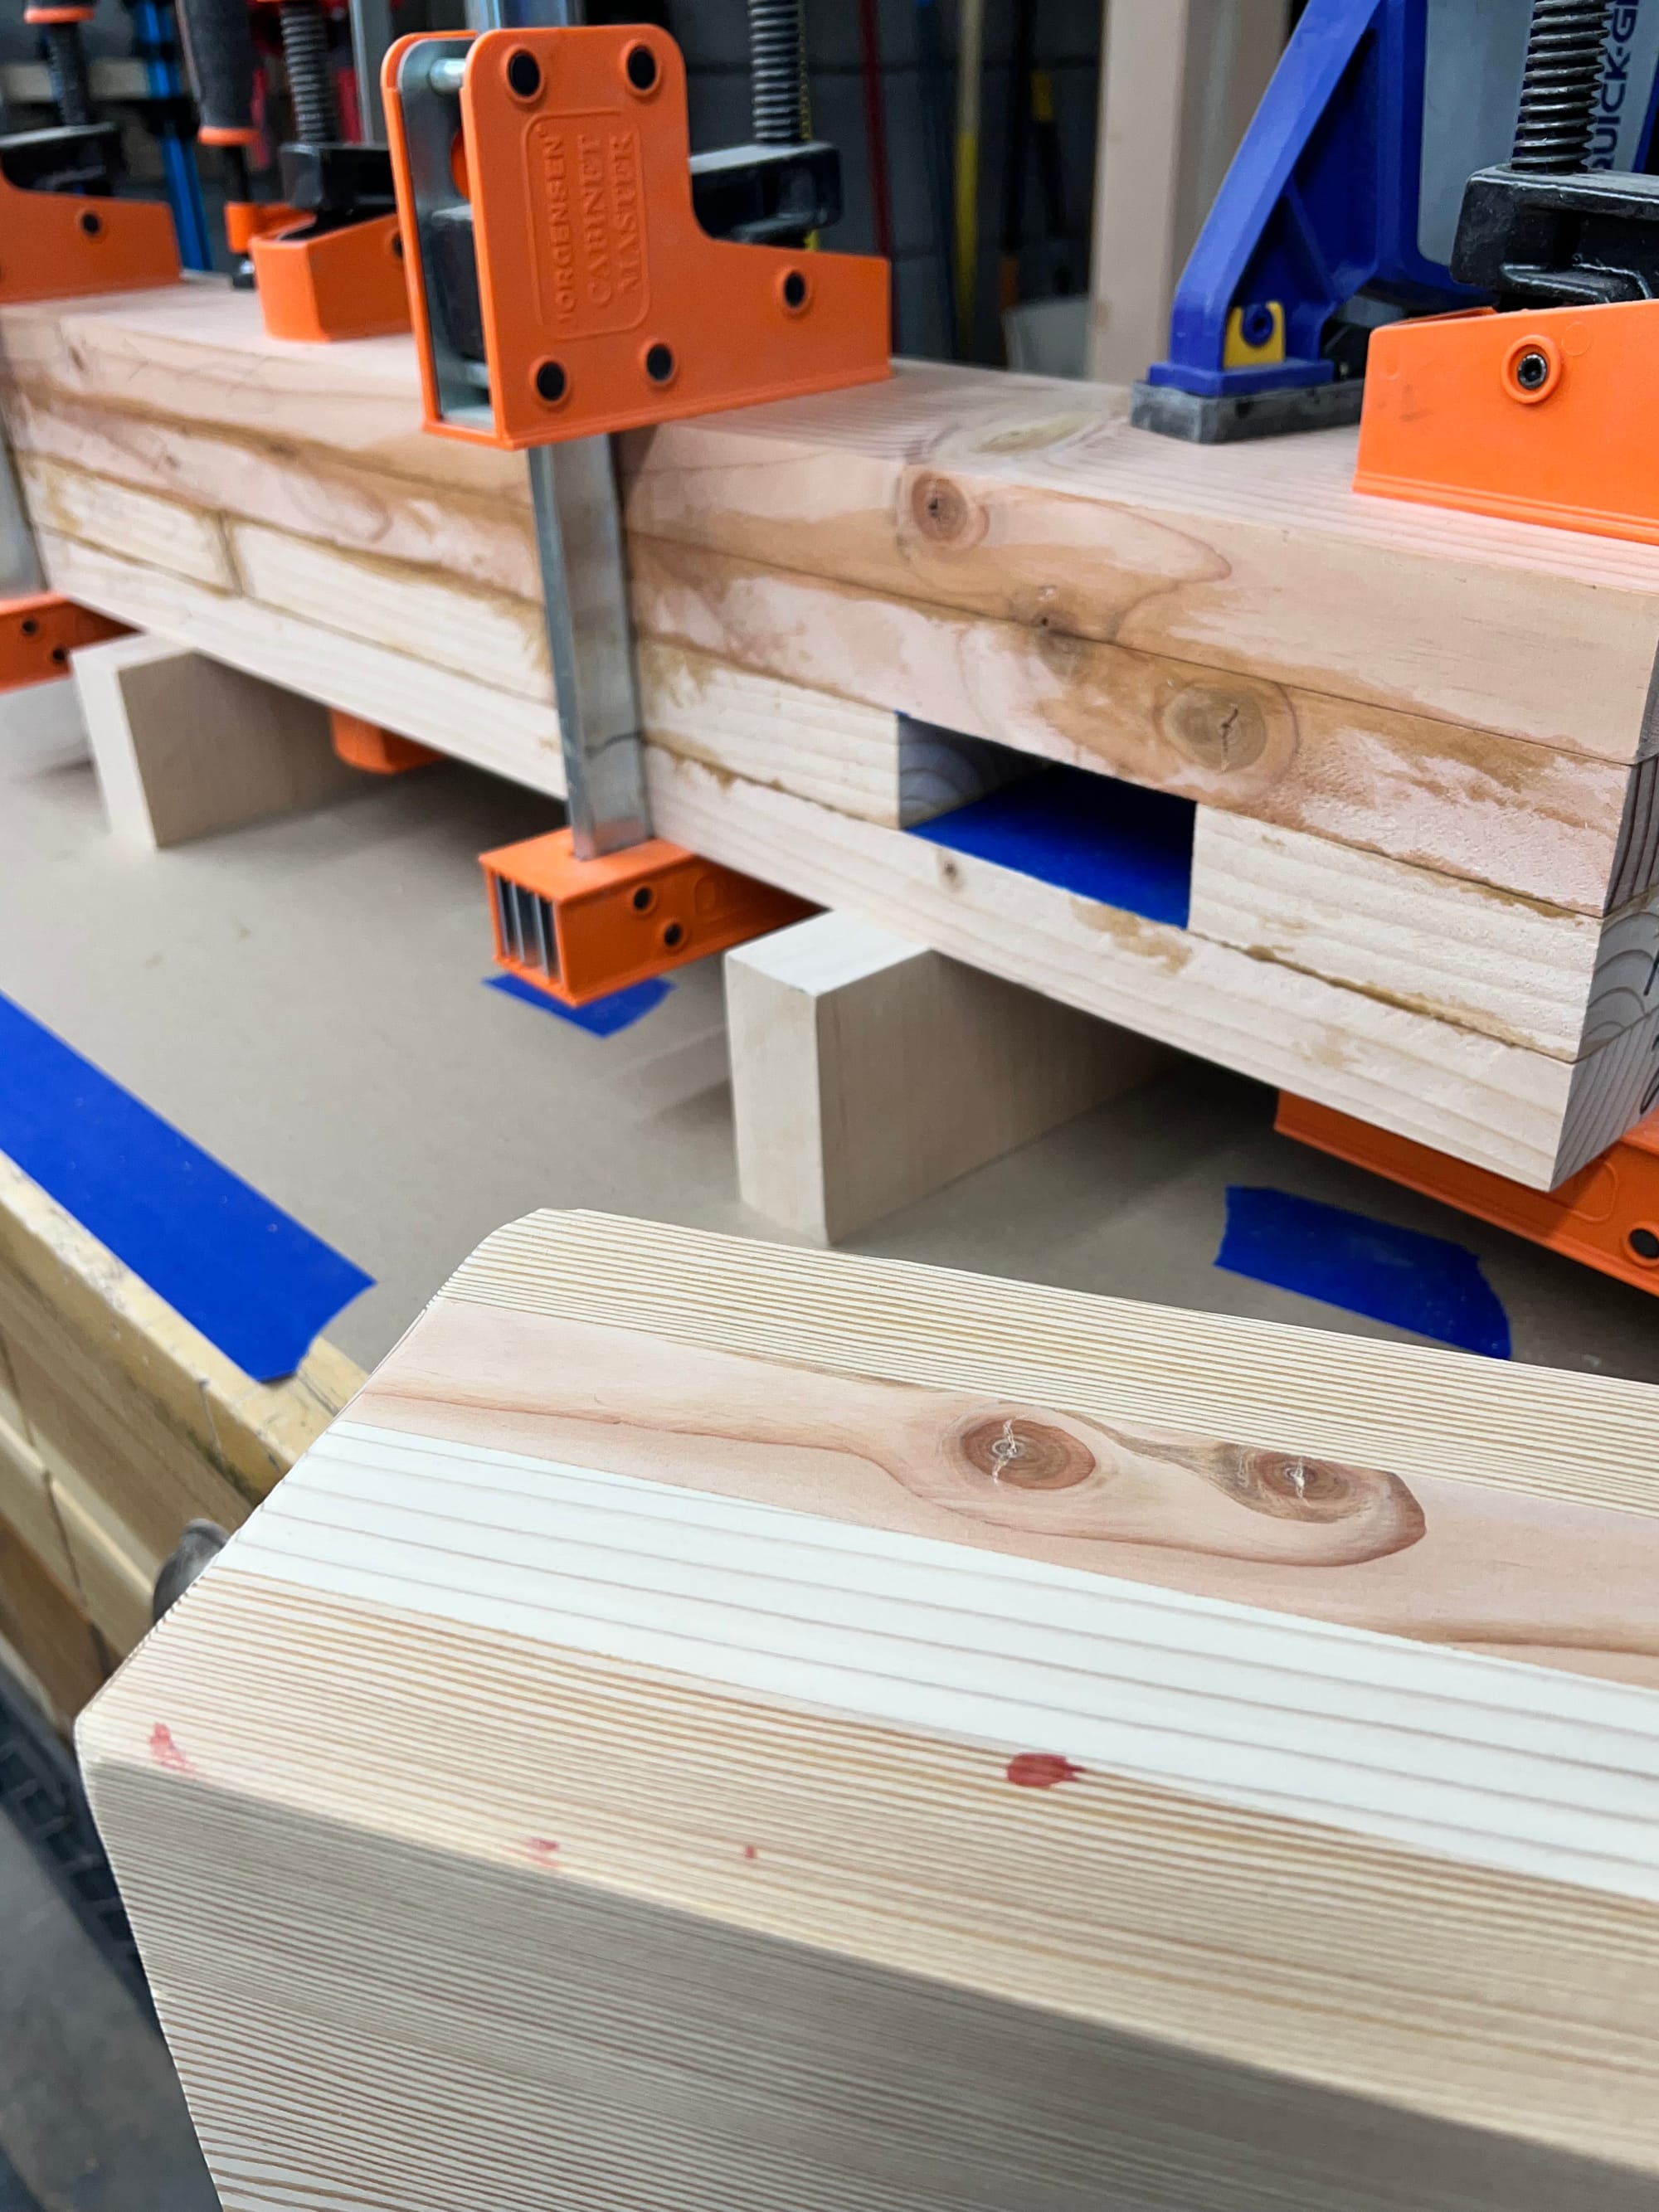
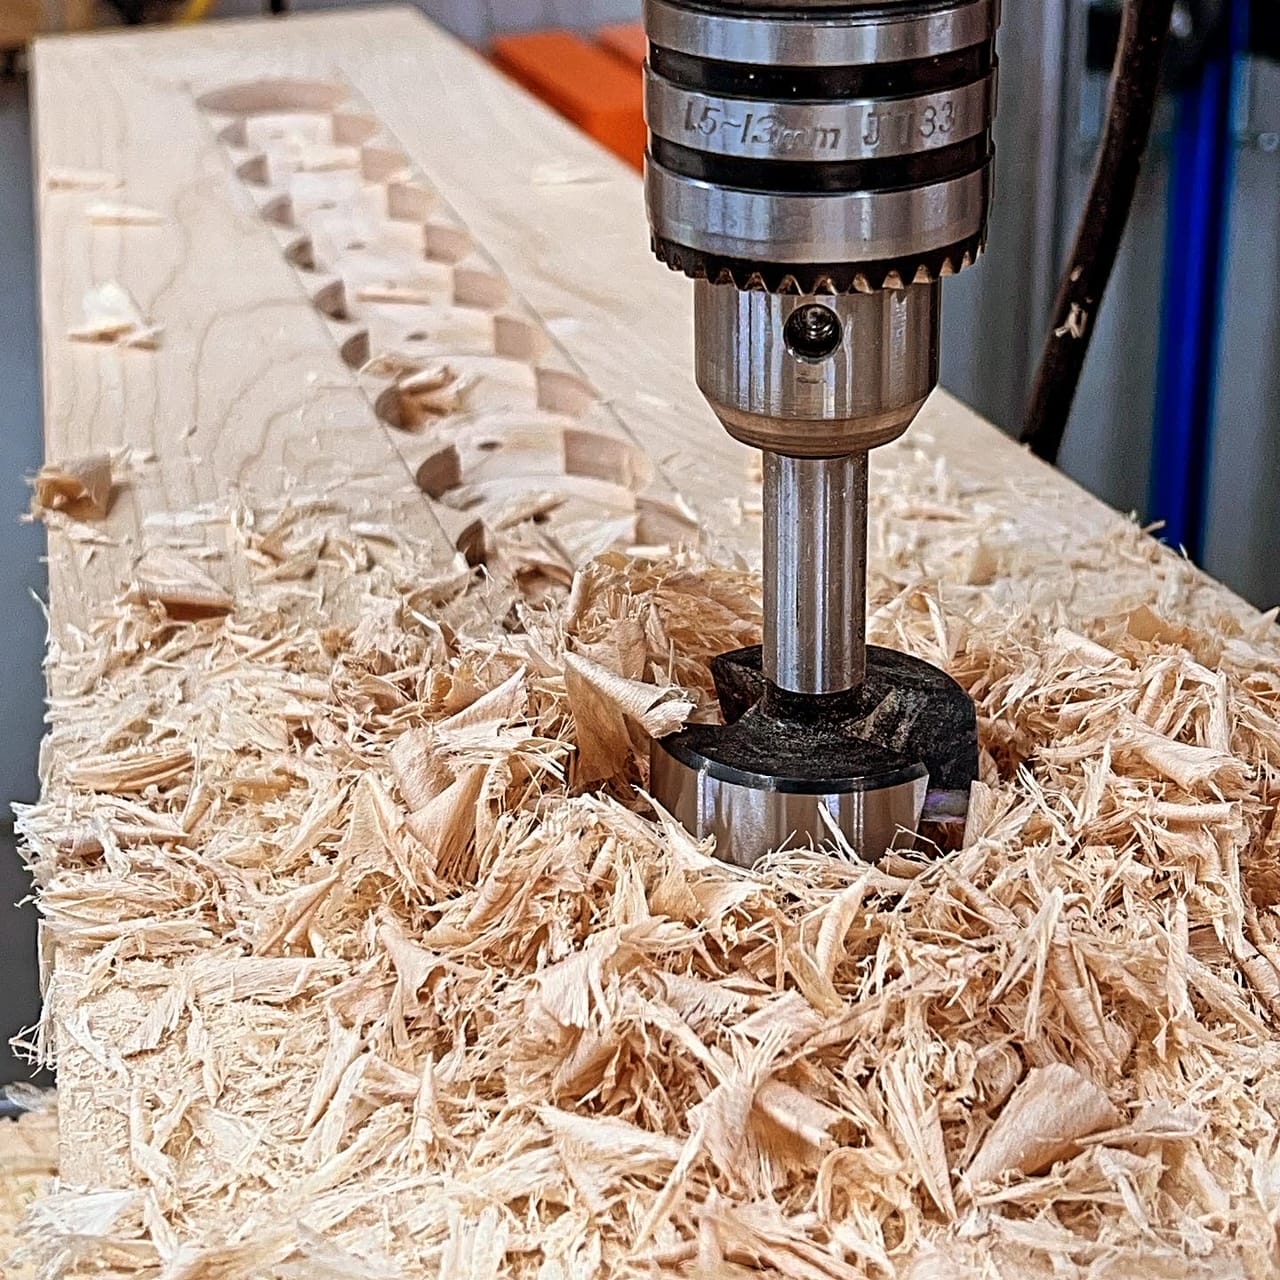
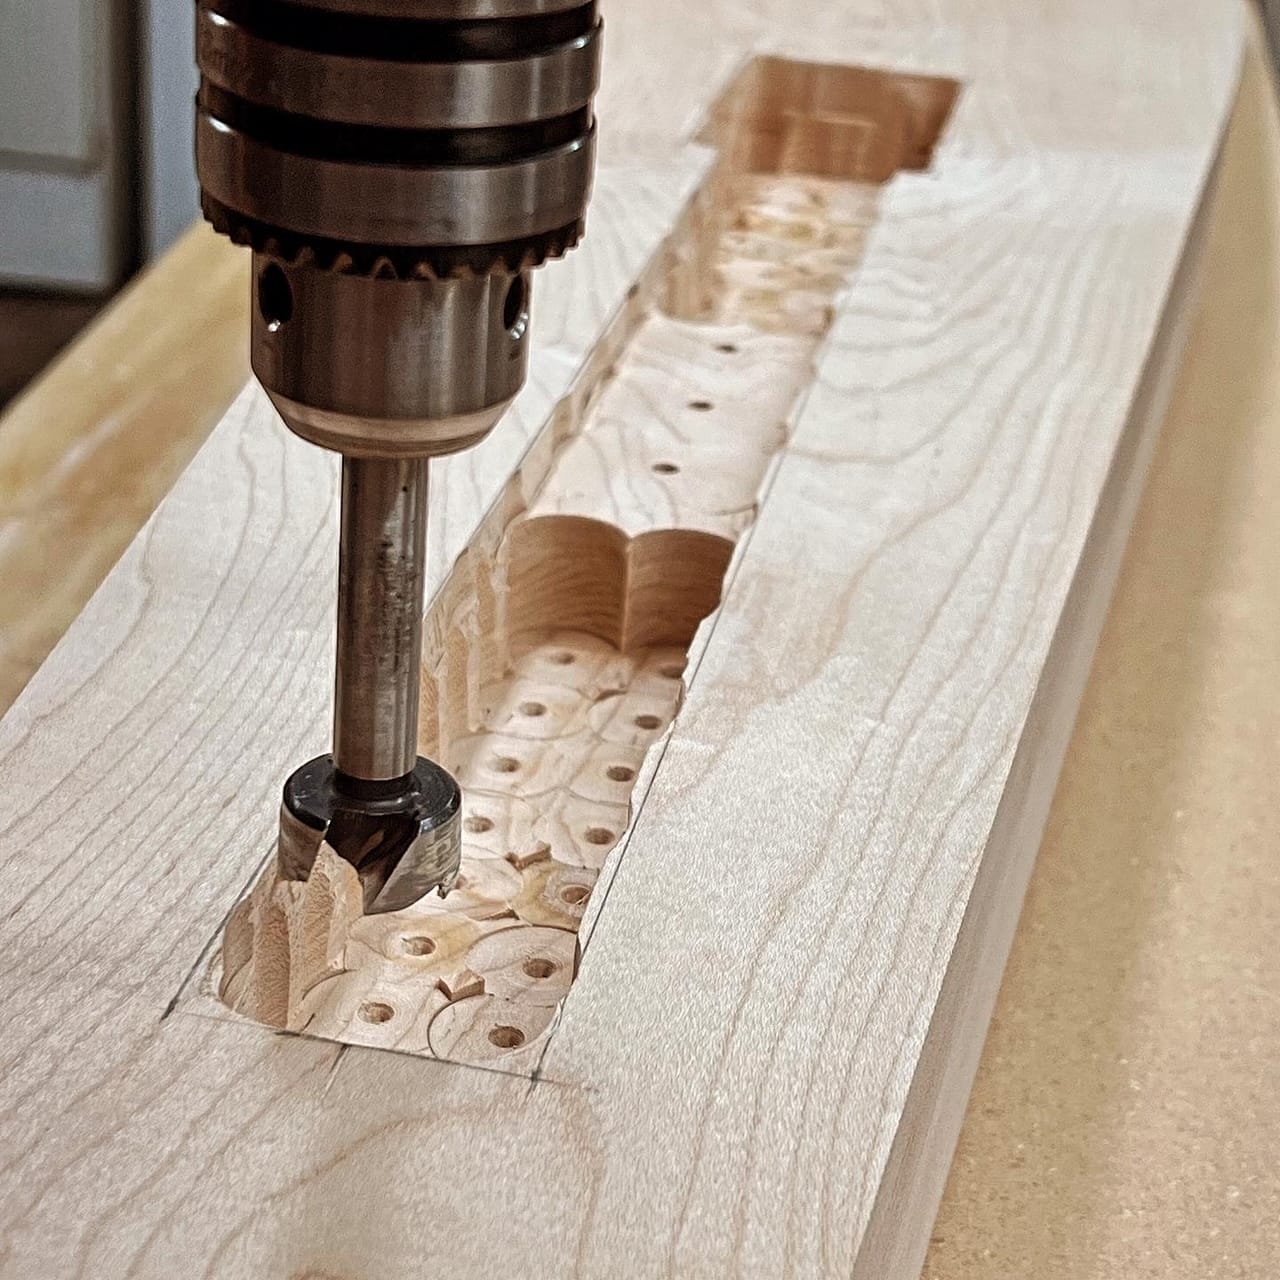
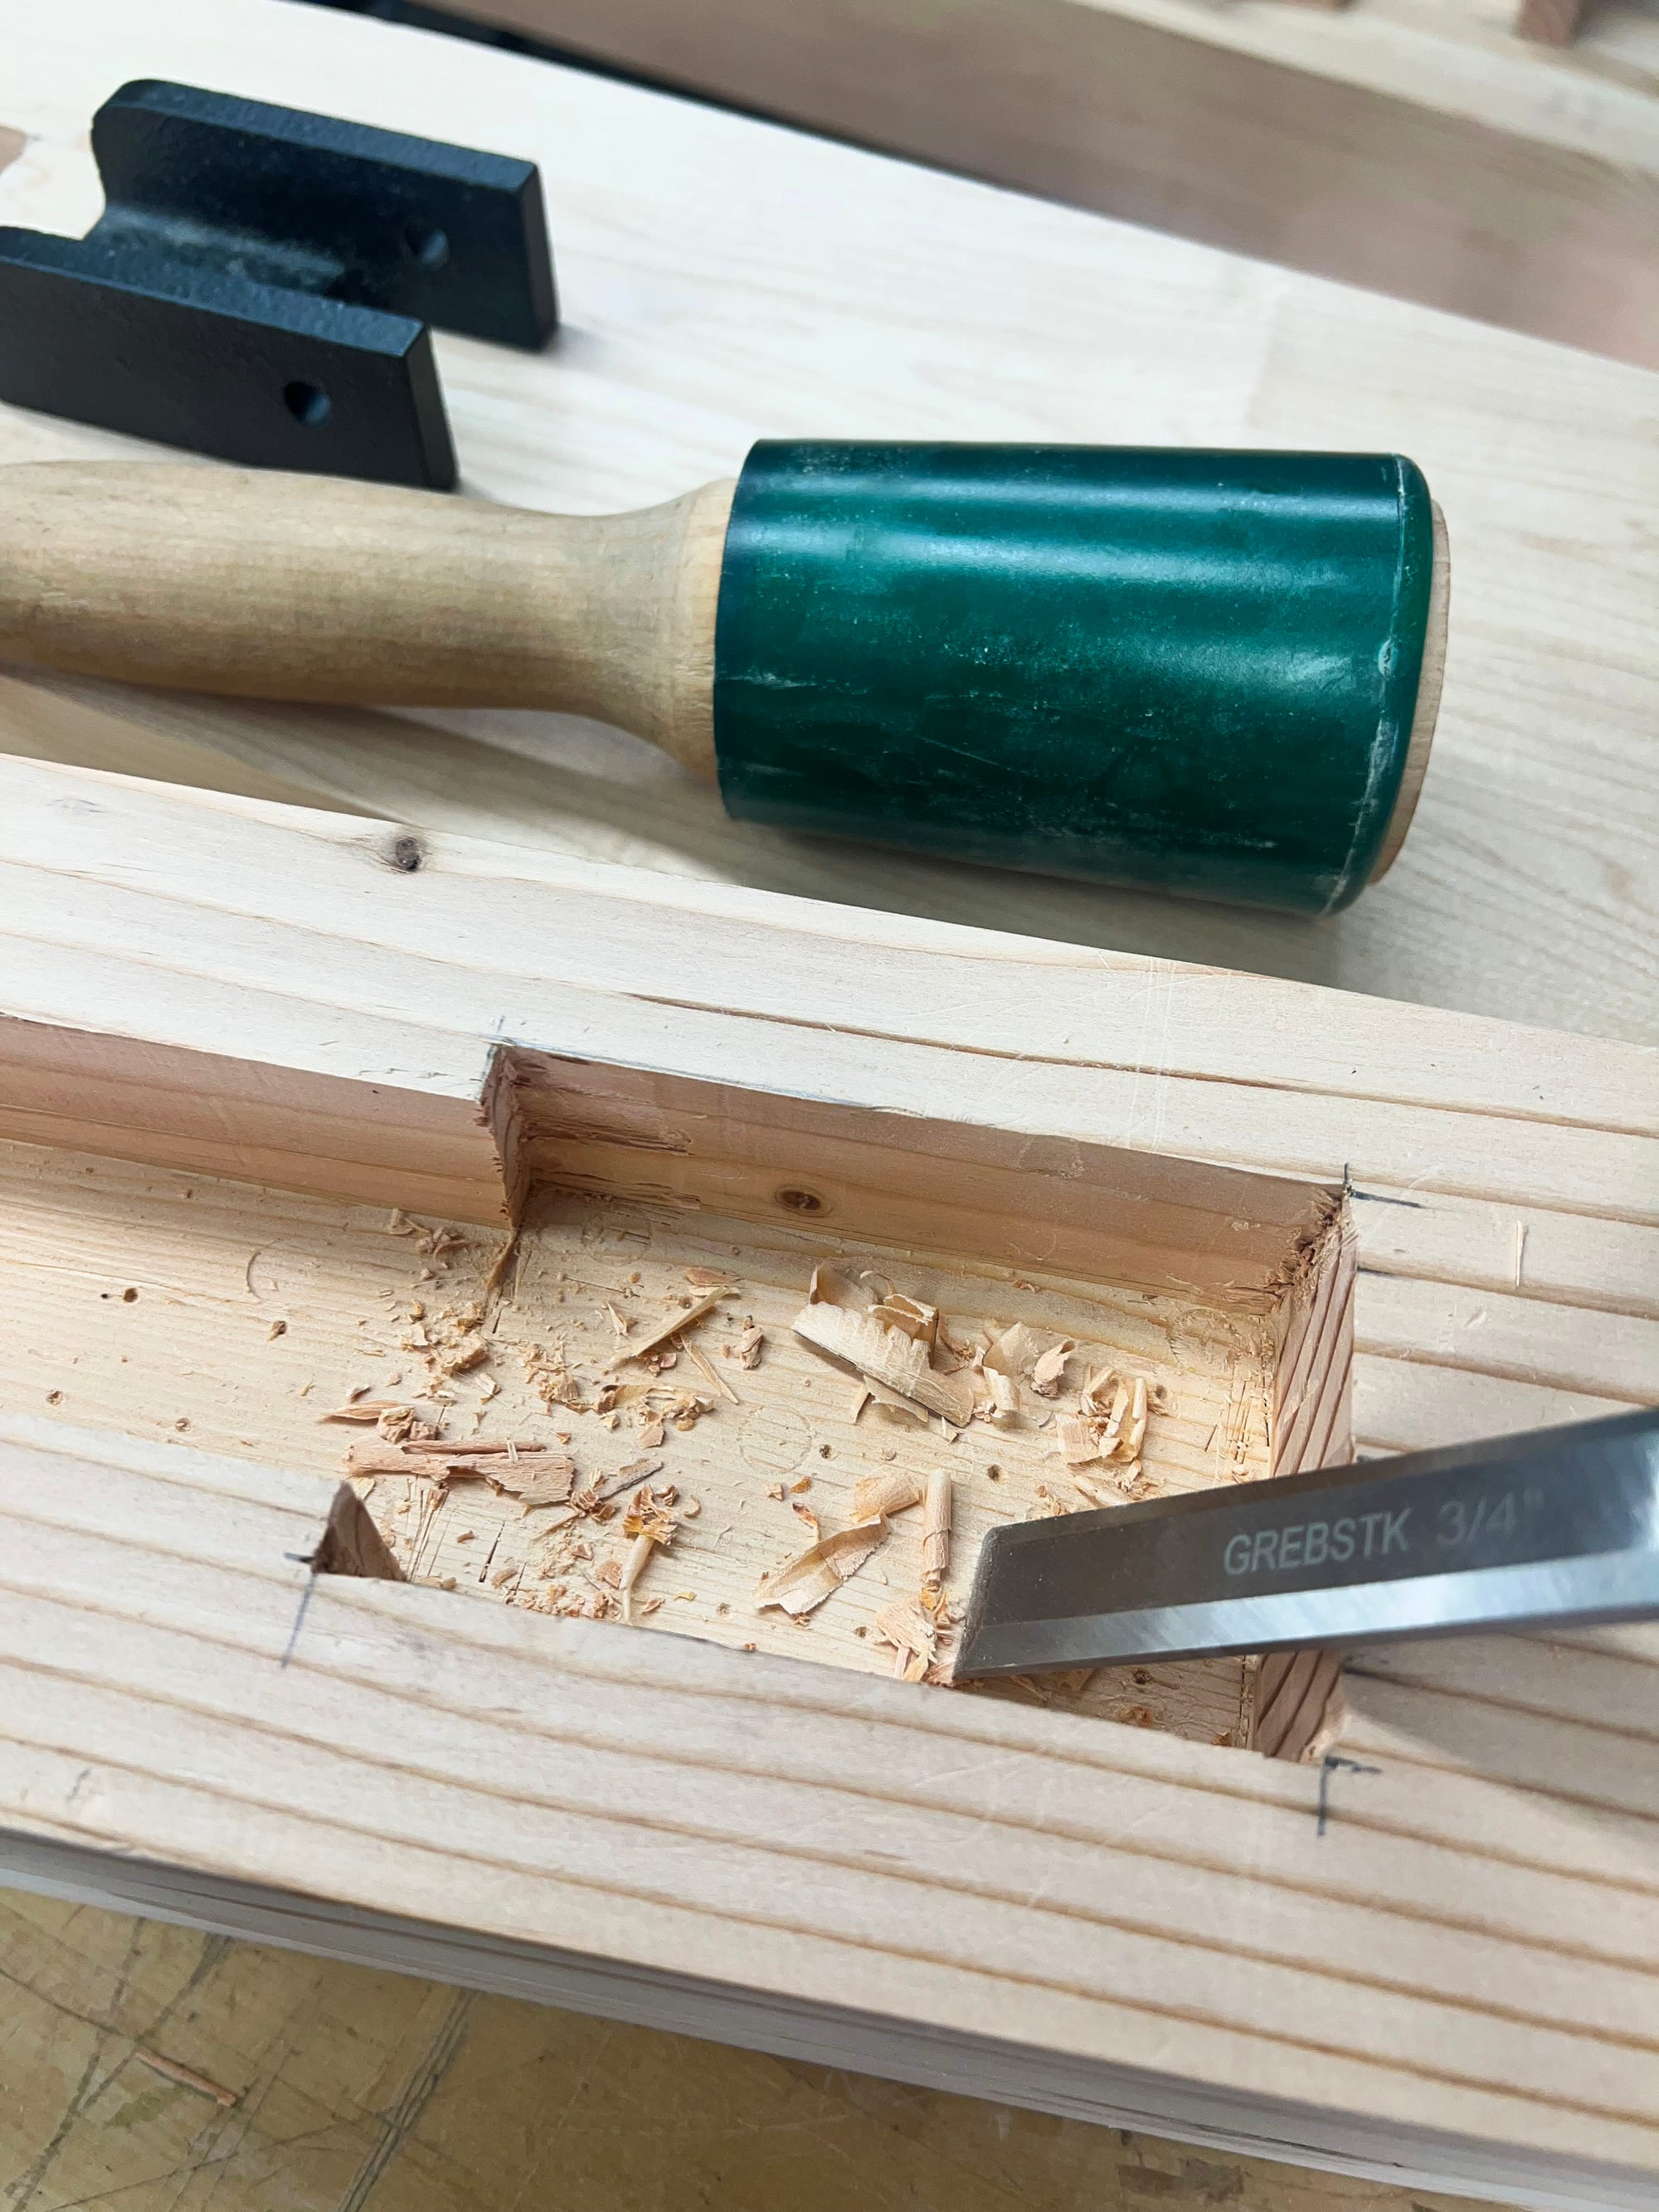
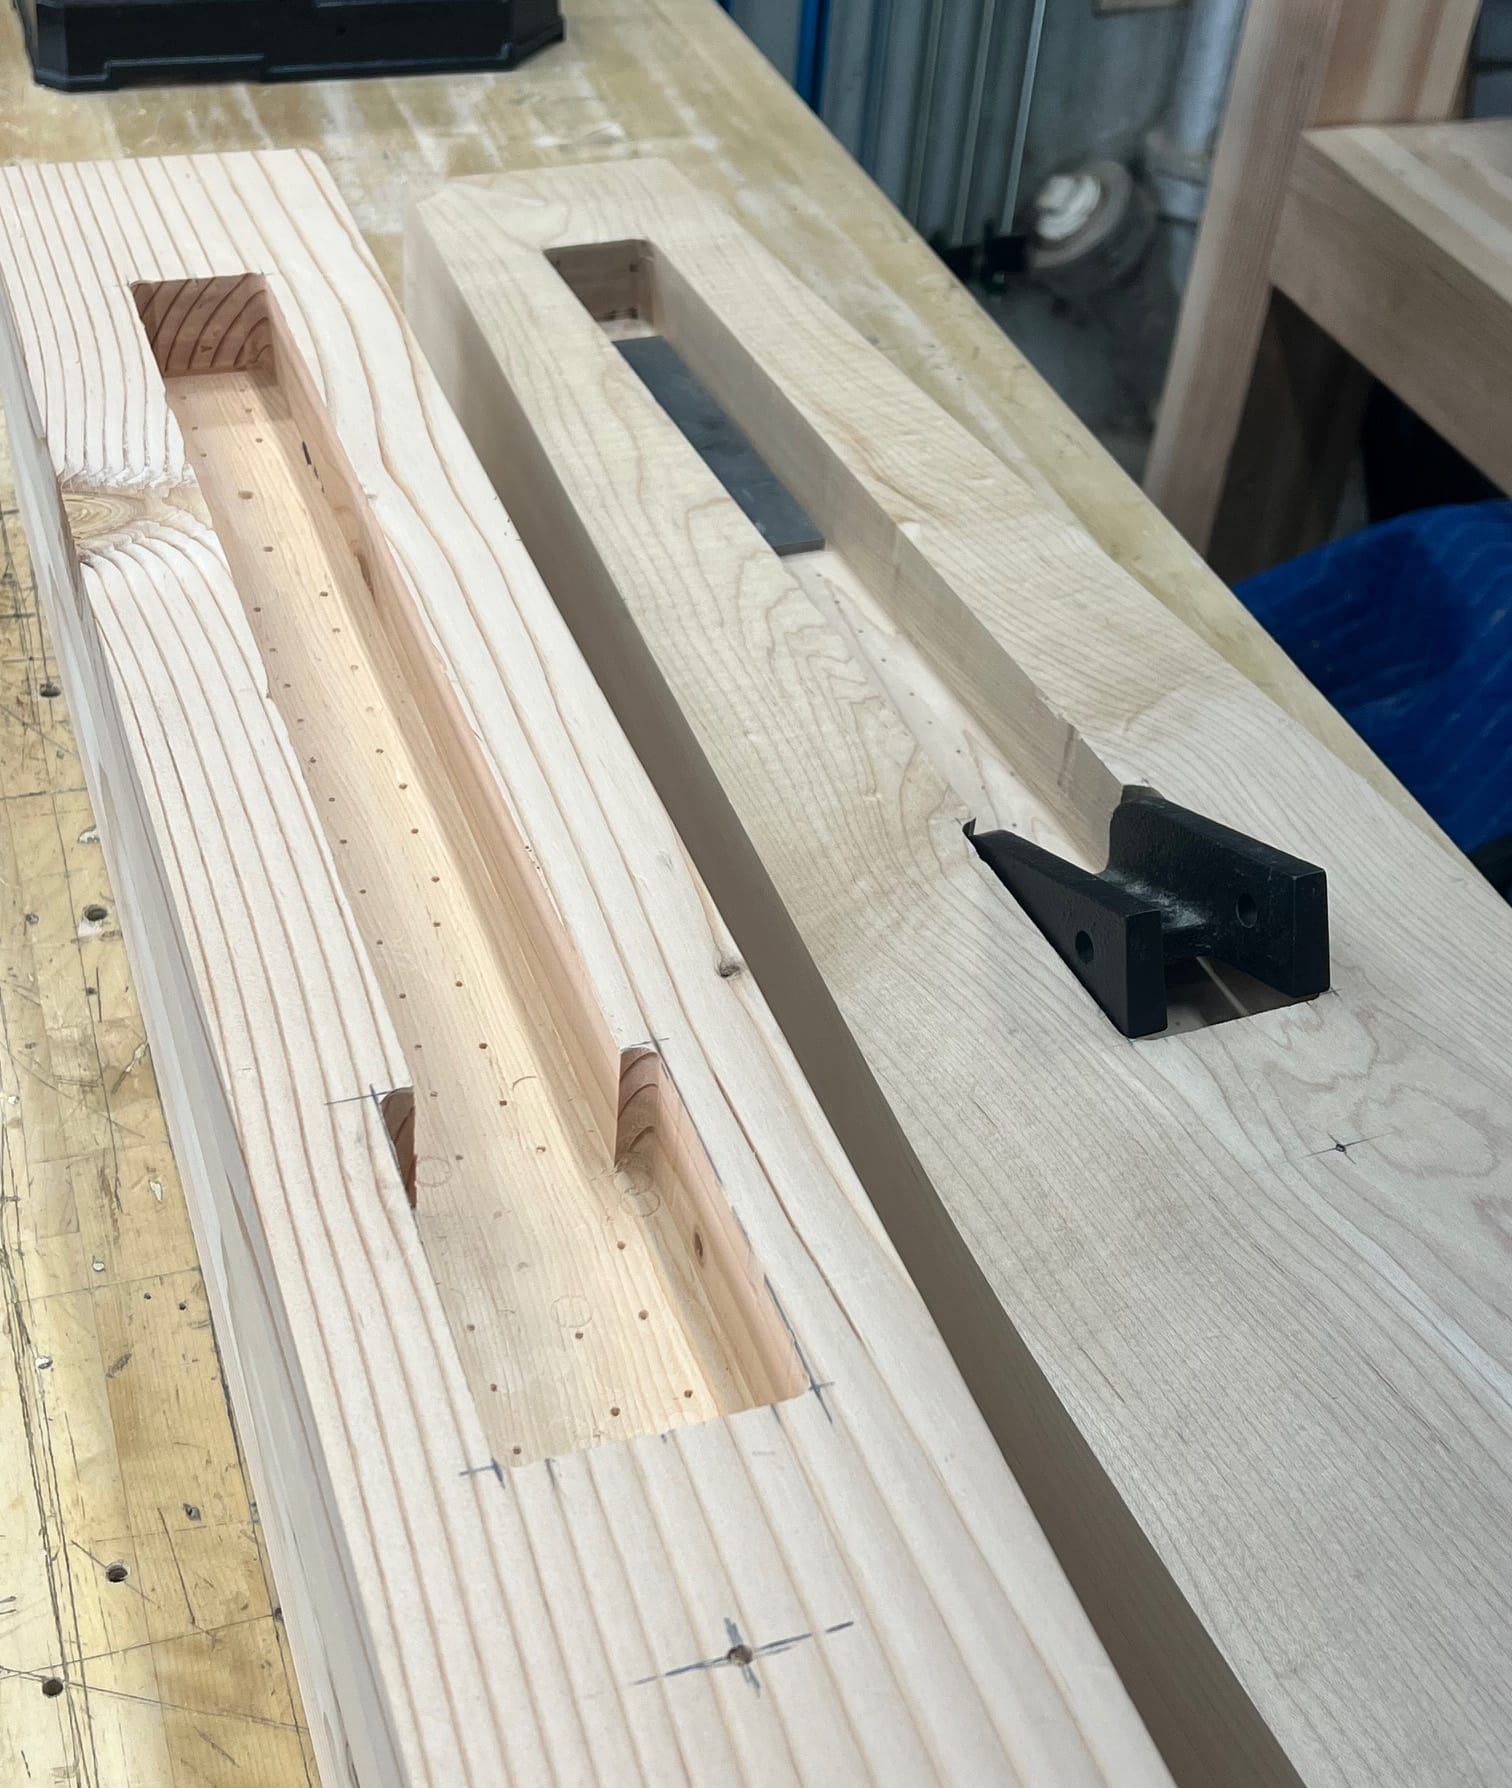
And then, finally, it was time to cut the big mortises in the benchtop to mount the legs. Each mortises was 3 inches deep and roughly 2.5 inches wide and 5 inches long, and they had to be positioned precisely so that the legs and stretchers could all come together at 90 degree angles with no gaps.
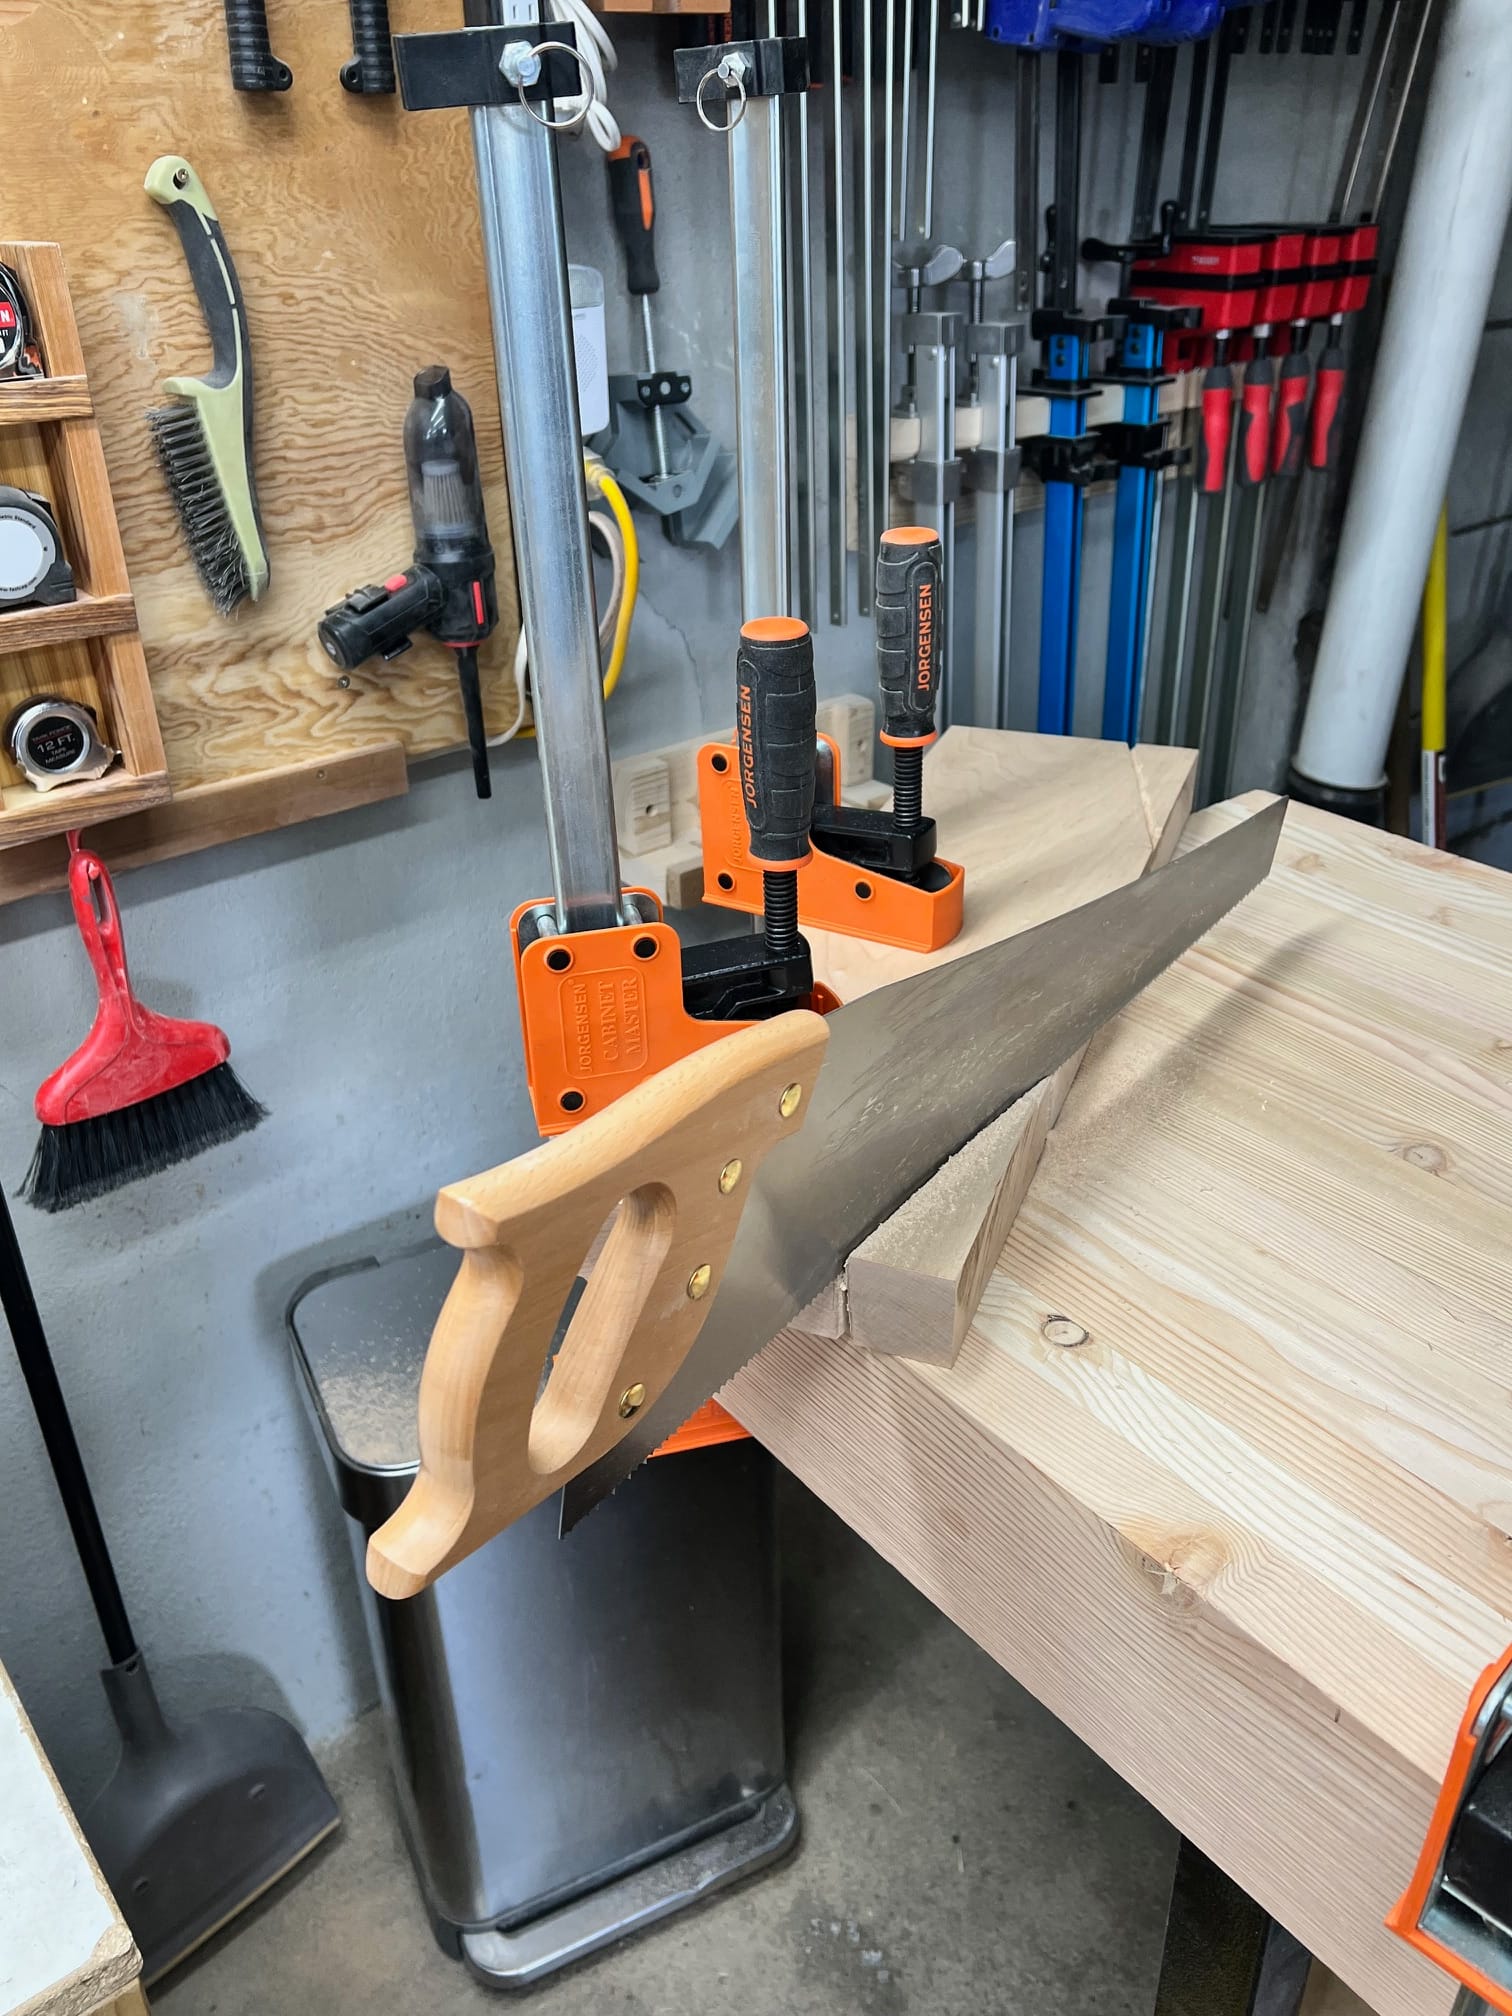
I decided my smallish Grebstk and Narex chisels weren't up to the task, so I picked up a massive Robert Sorby timber framing chisel and got to work.
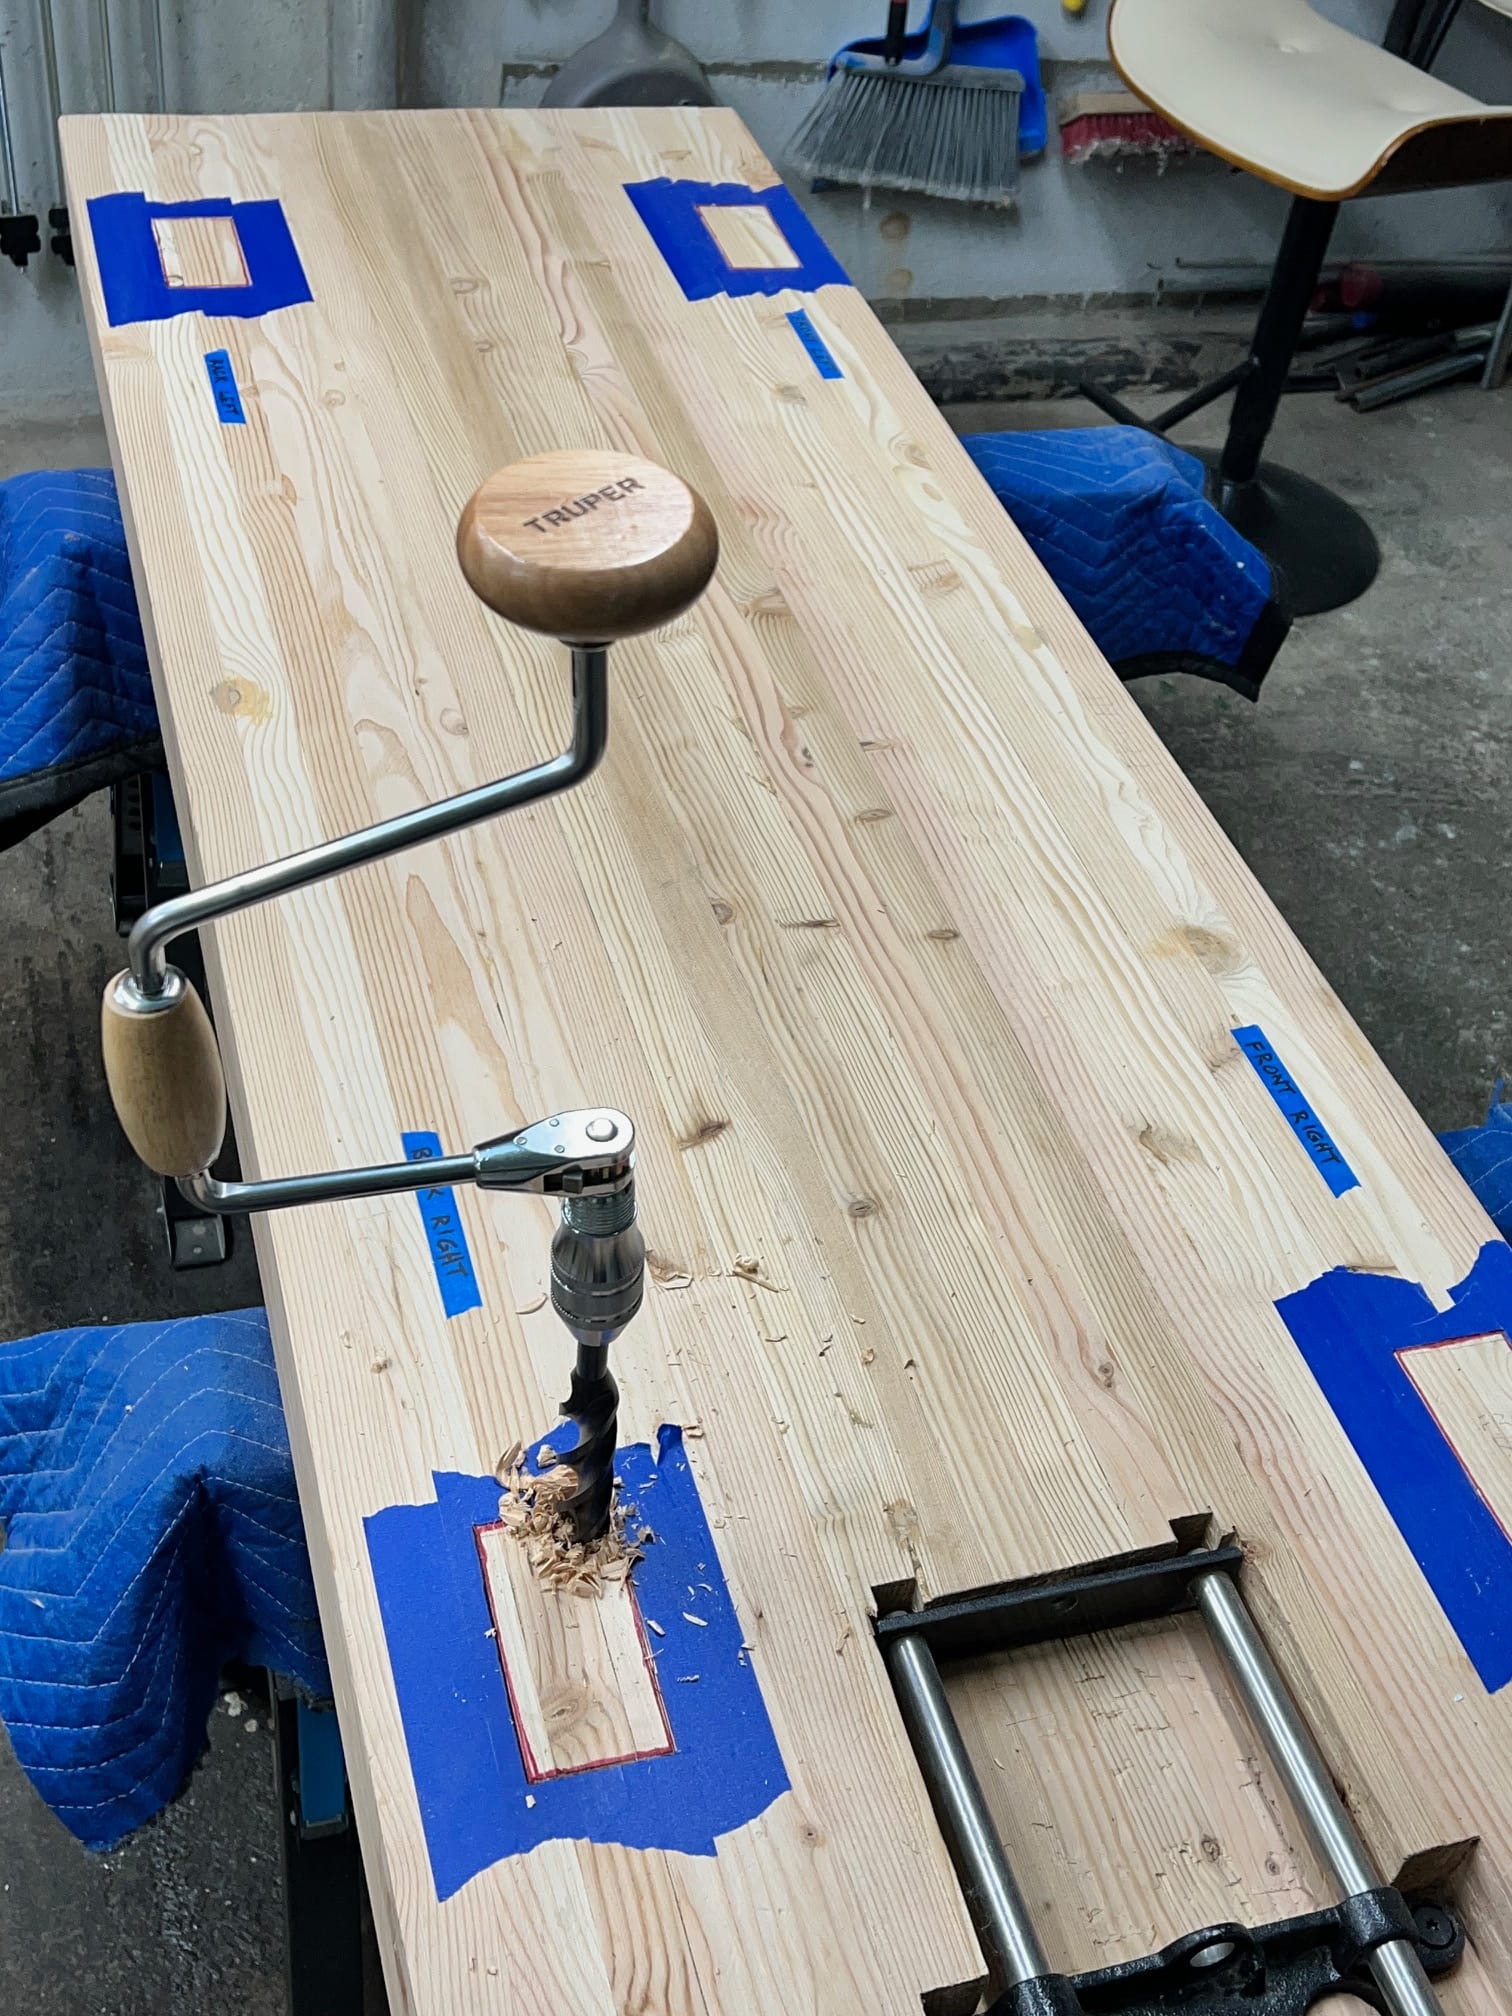

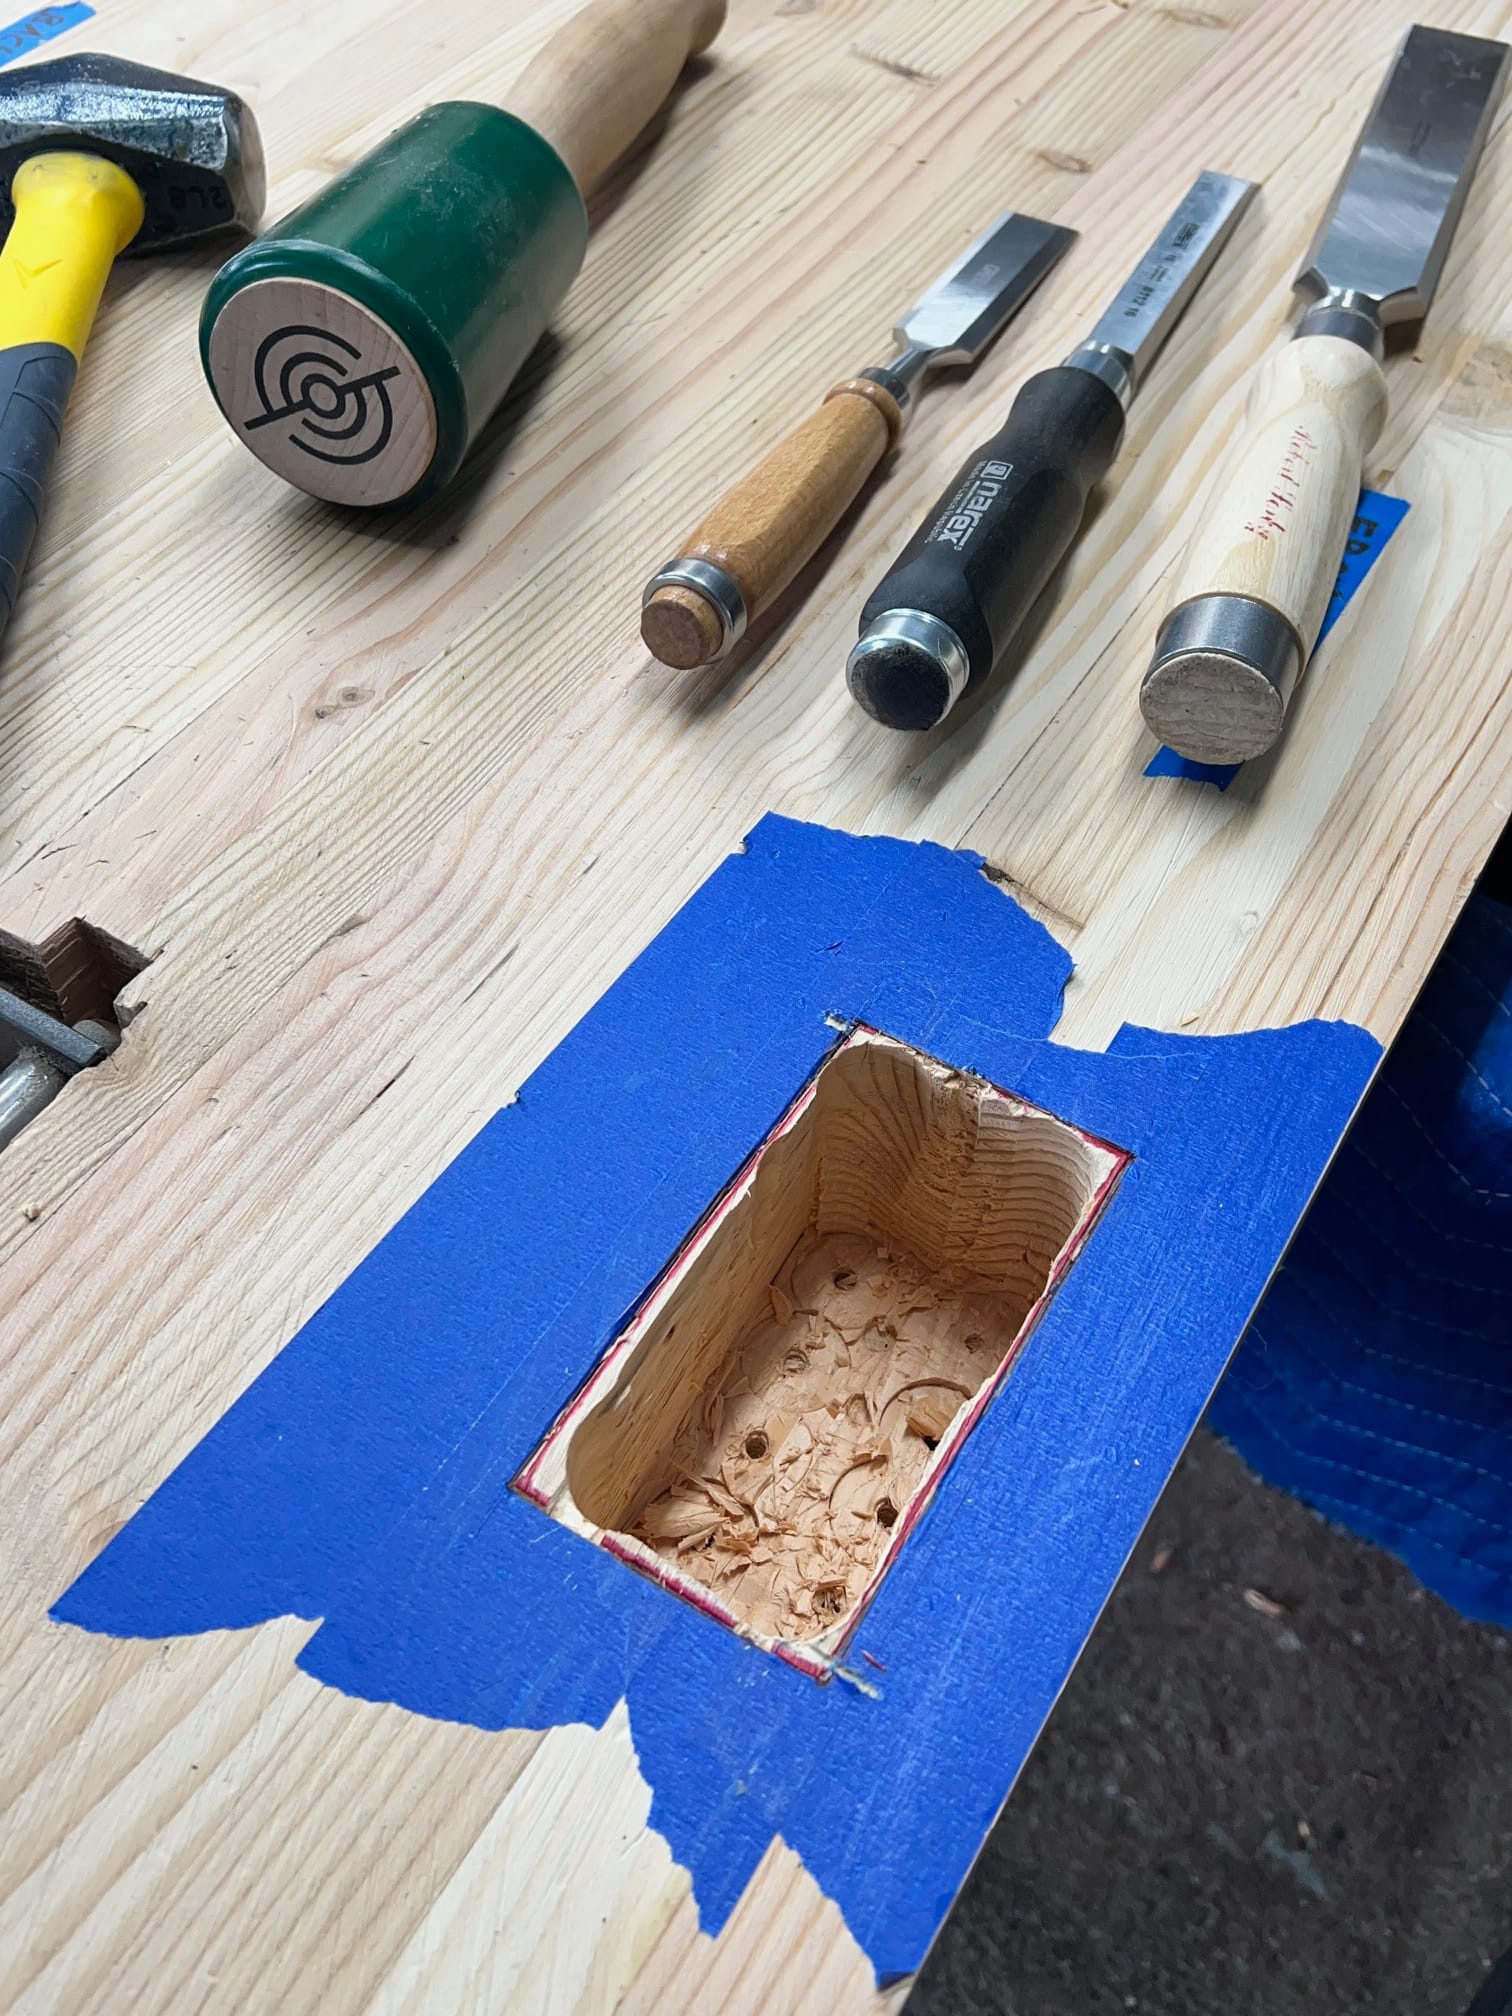
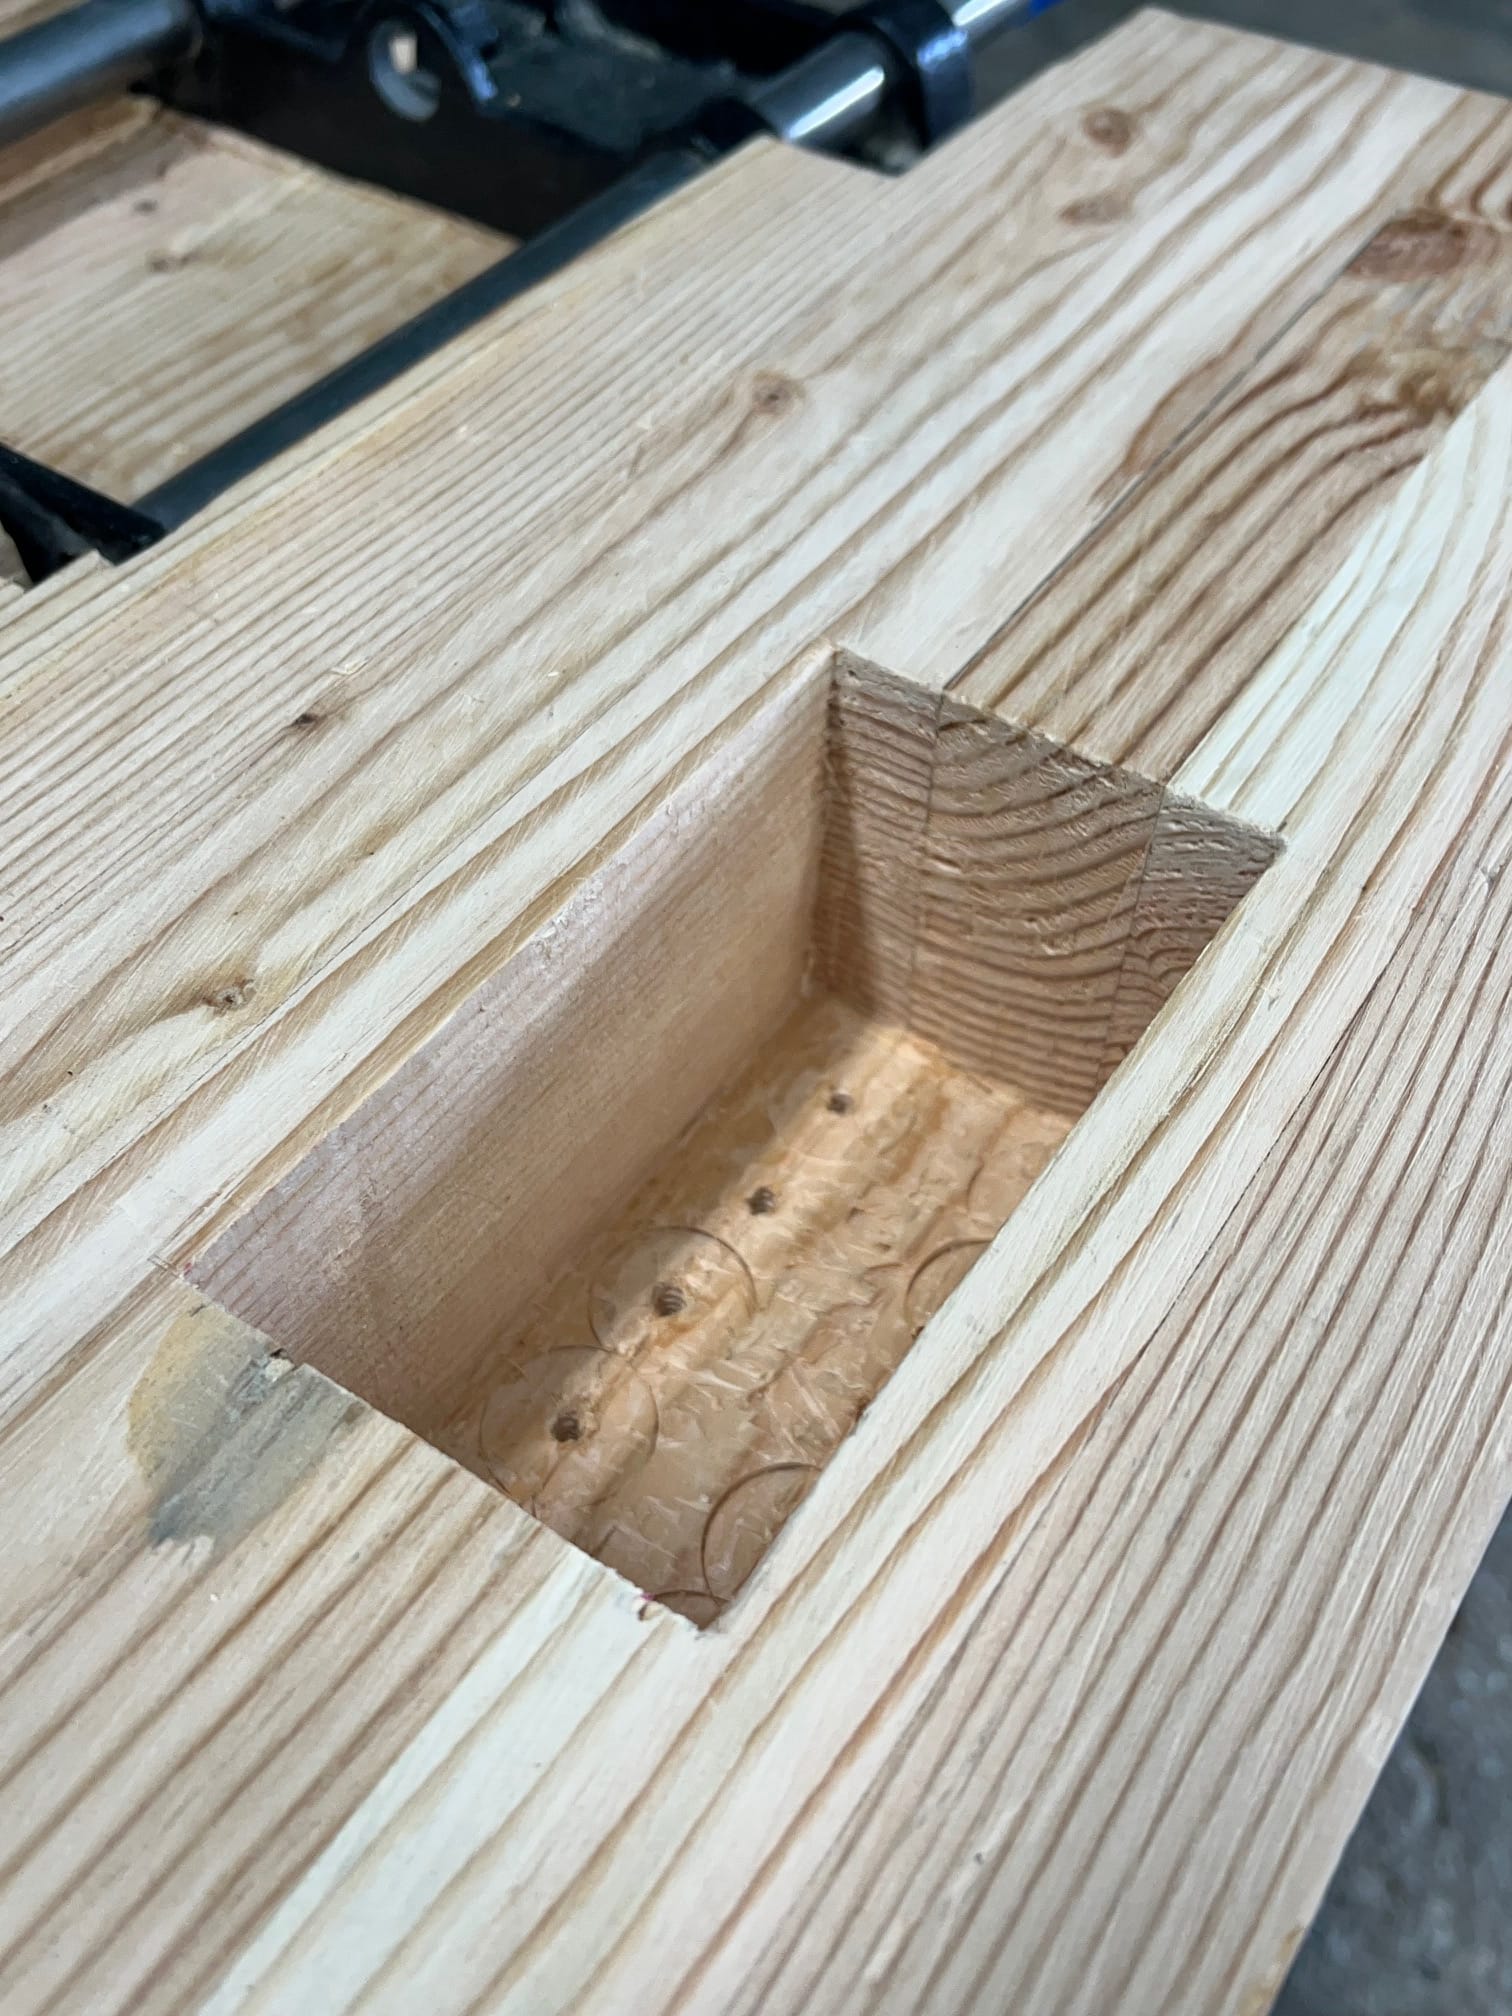
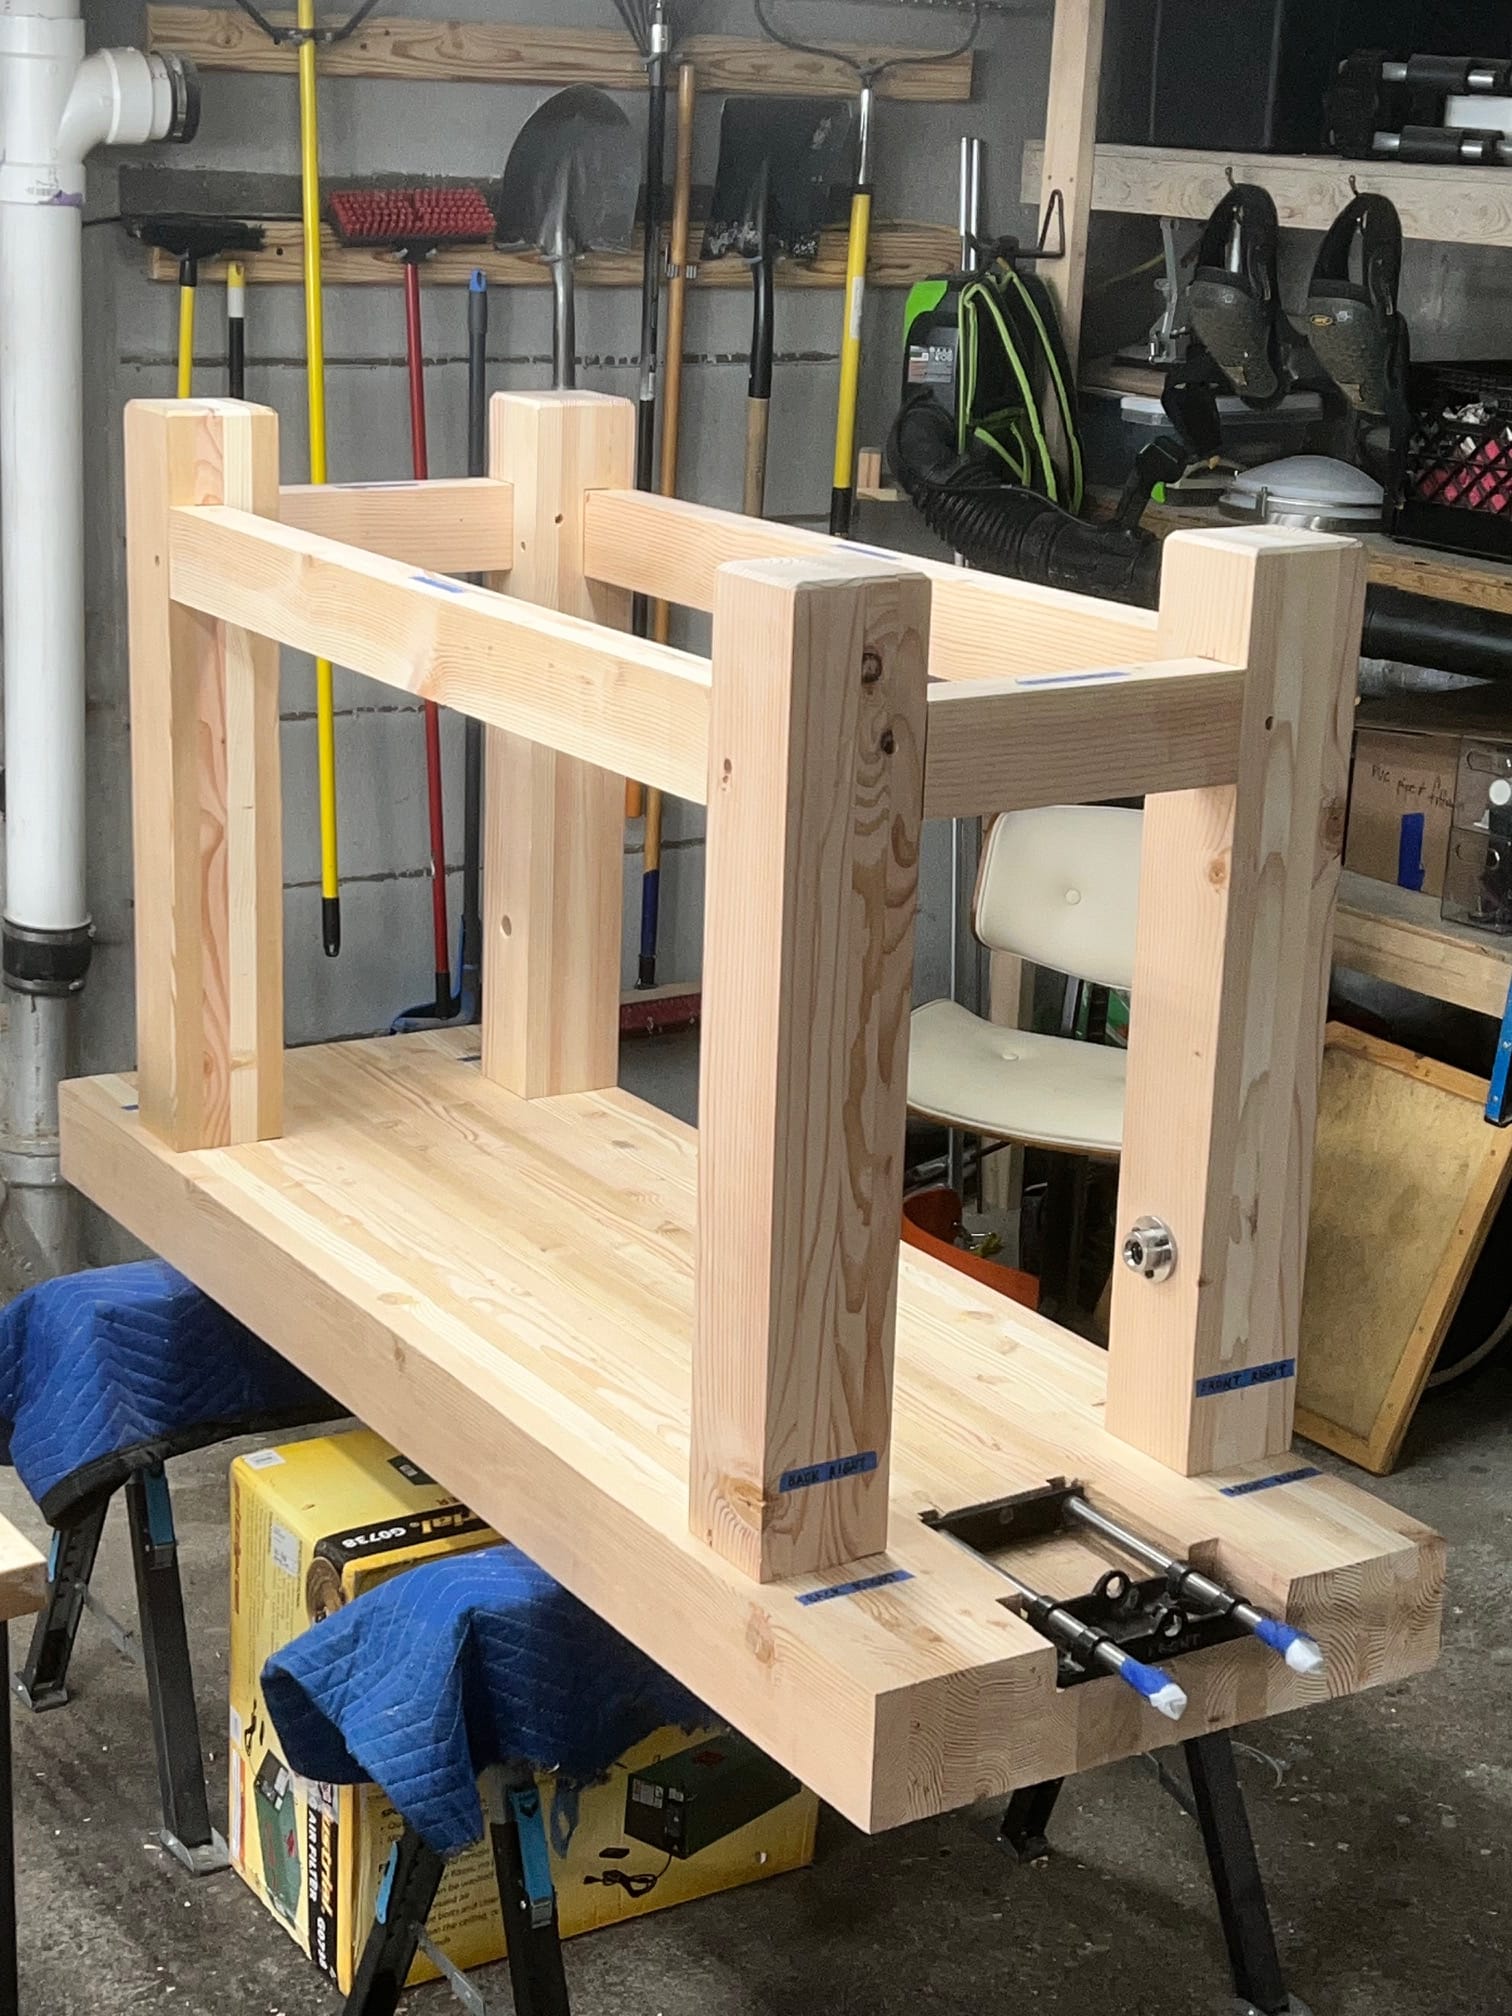
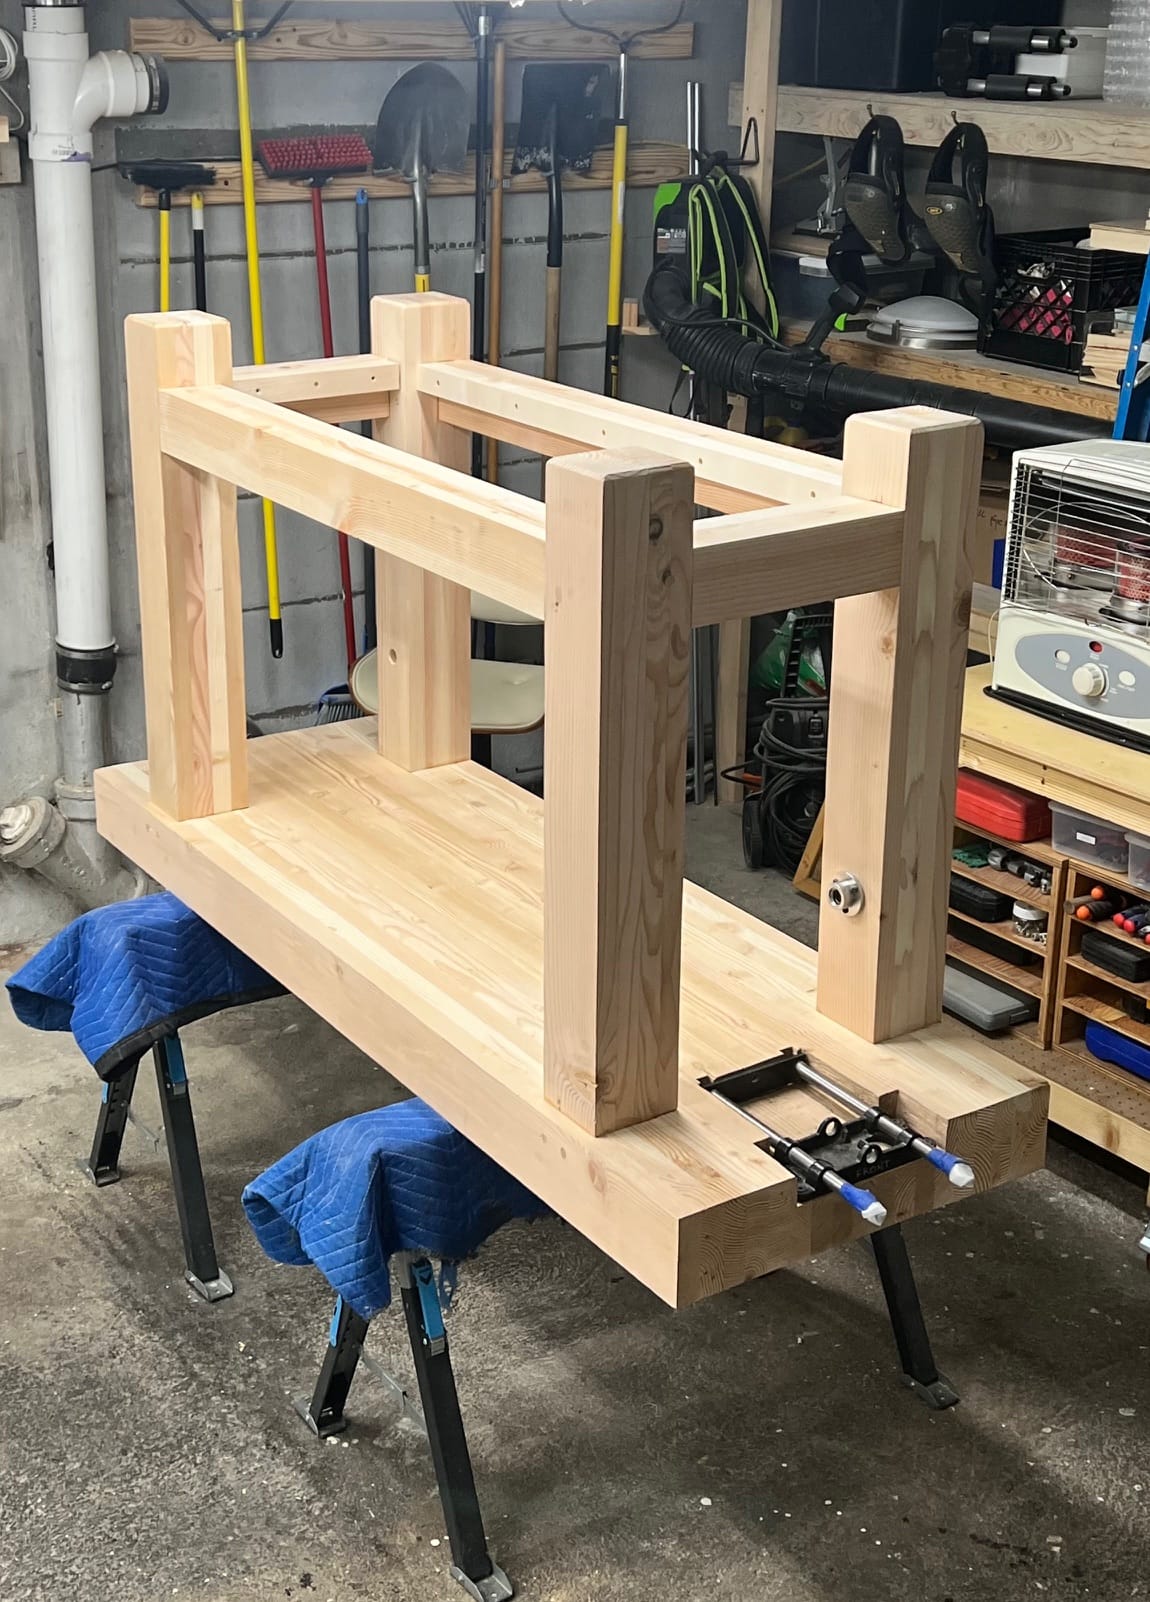
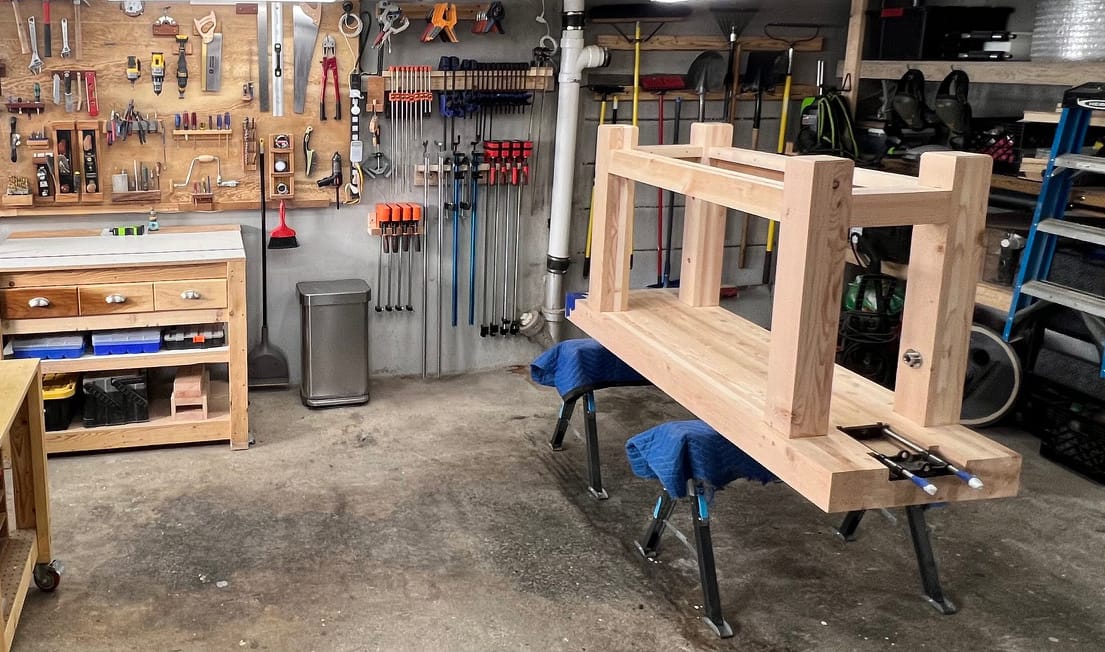
I used the masking-tape-and-plane-iron trick to lay out the mortises, as recommended in the Anarchist's Workbench PDF. That worked great, but I found that my inexpensive brace didn't work very well for boring out the initial holes. I improvised an approach using a socket wrench and a jig I made for holding the bit perpendicular, and that worked pretty well. After two days of careful cutting and lots of test assemblies, everything fit together and for the first time ever I did an upside-down dry assembly of the entire workbench!
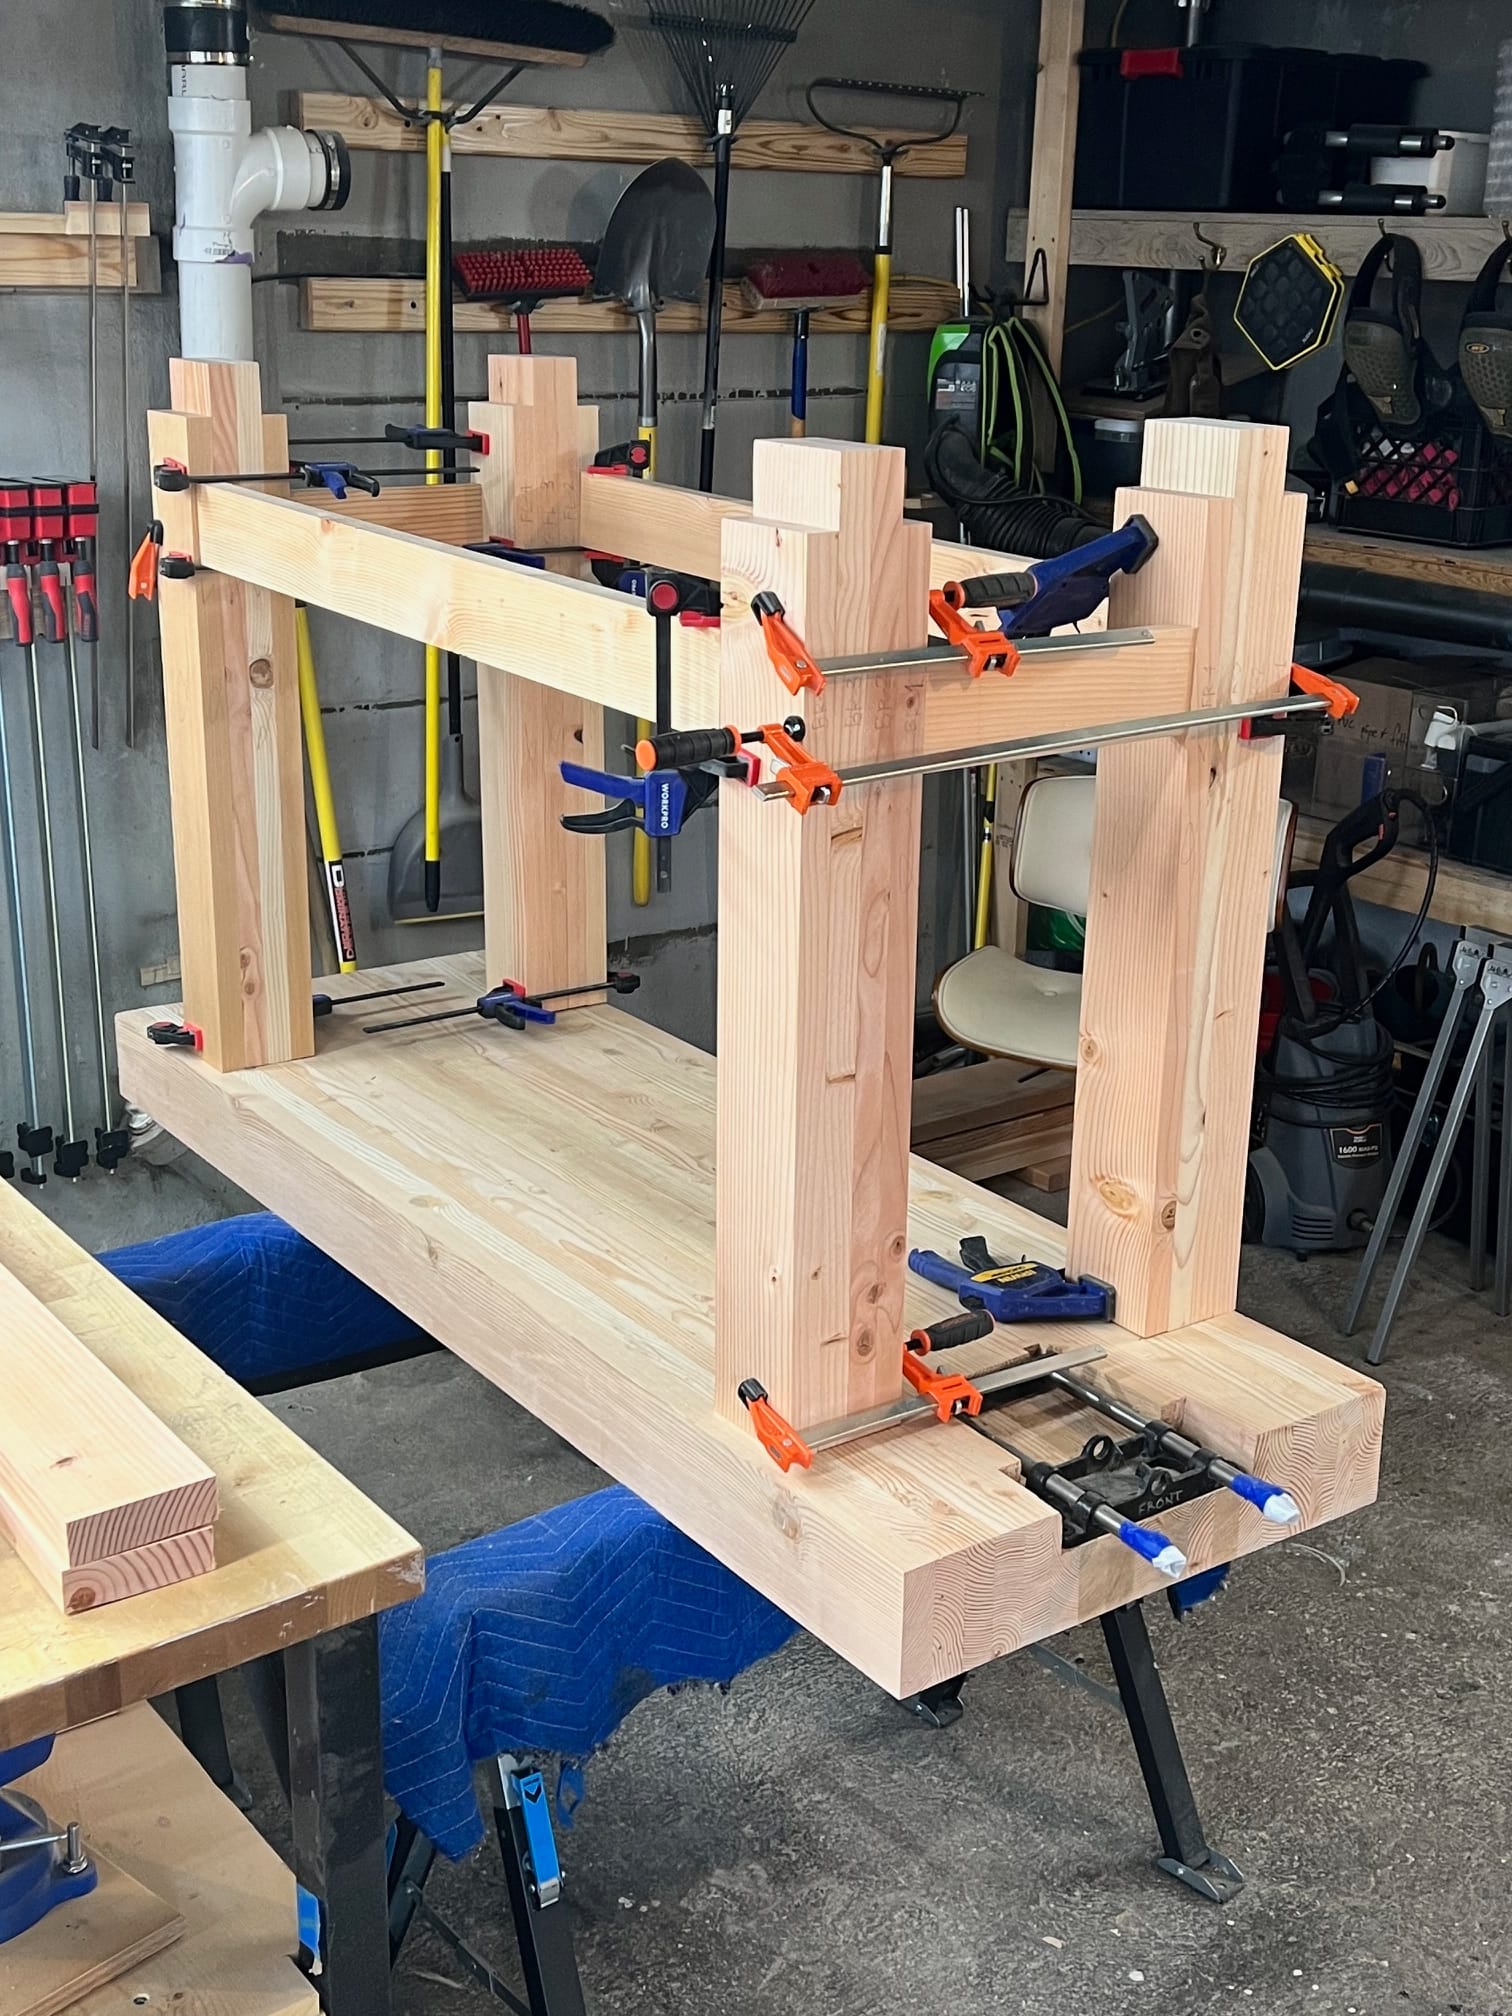
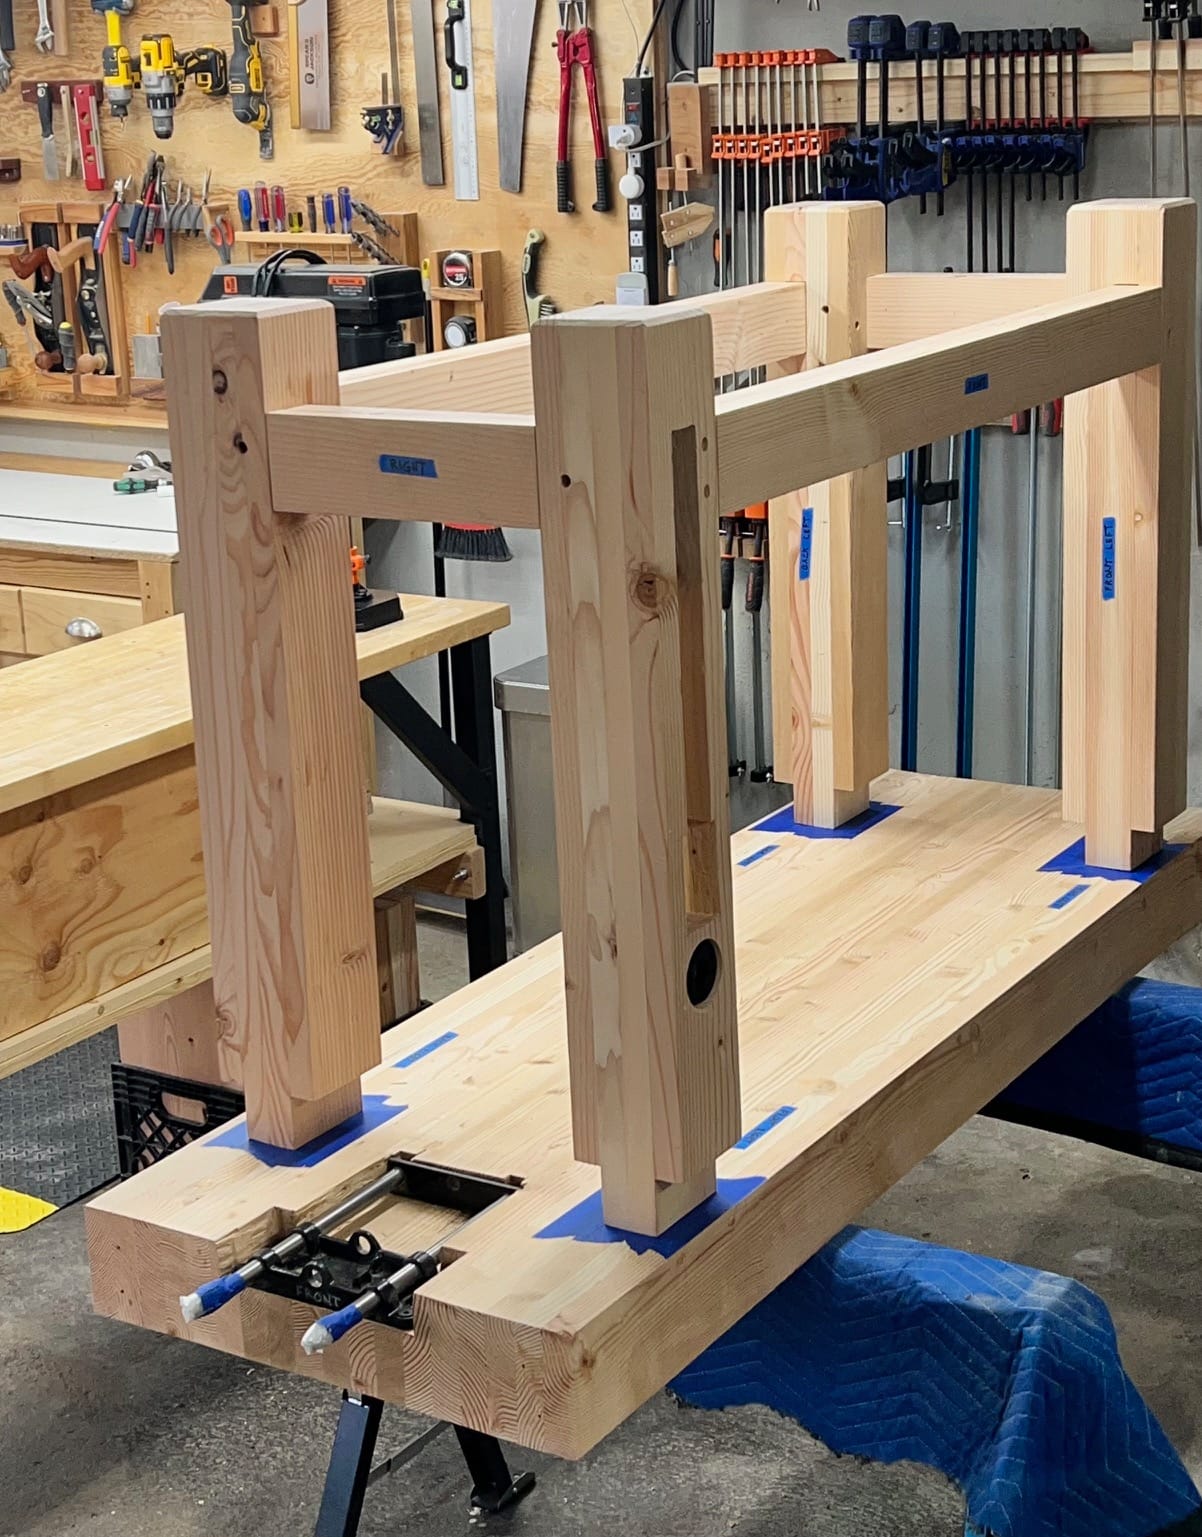
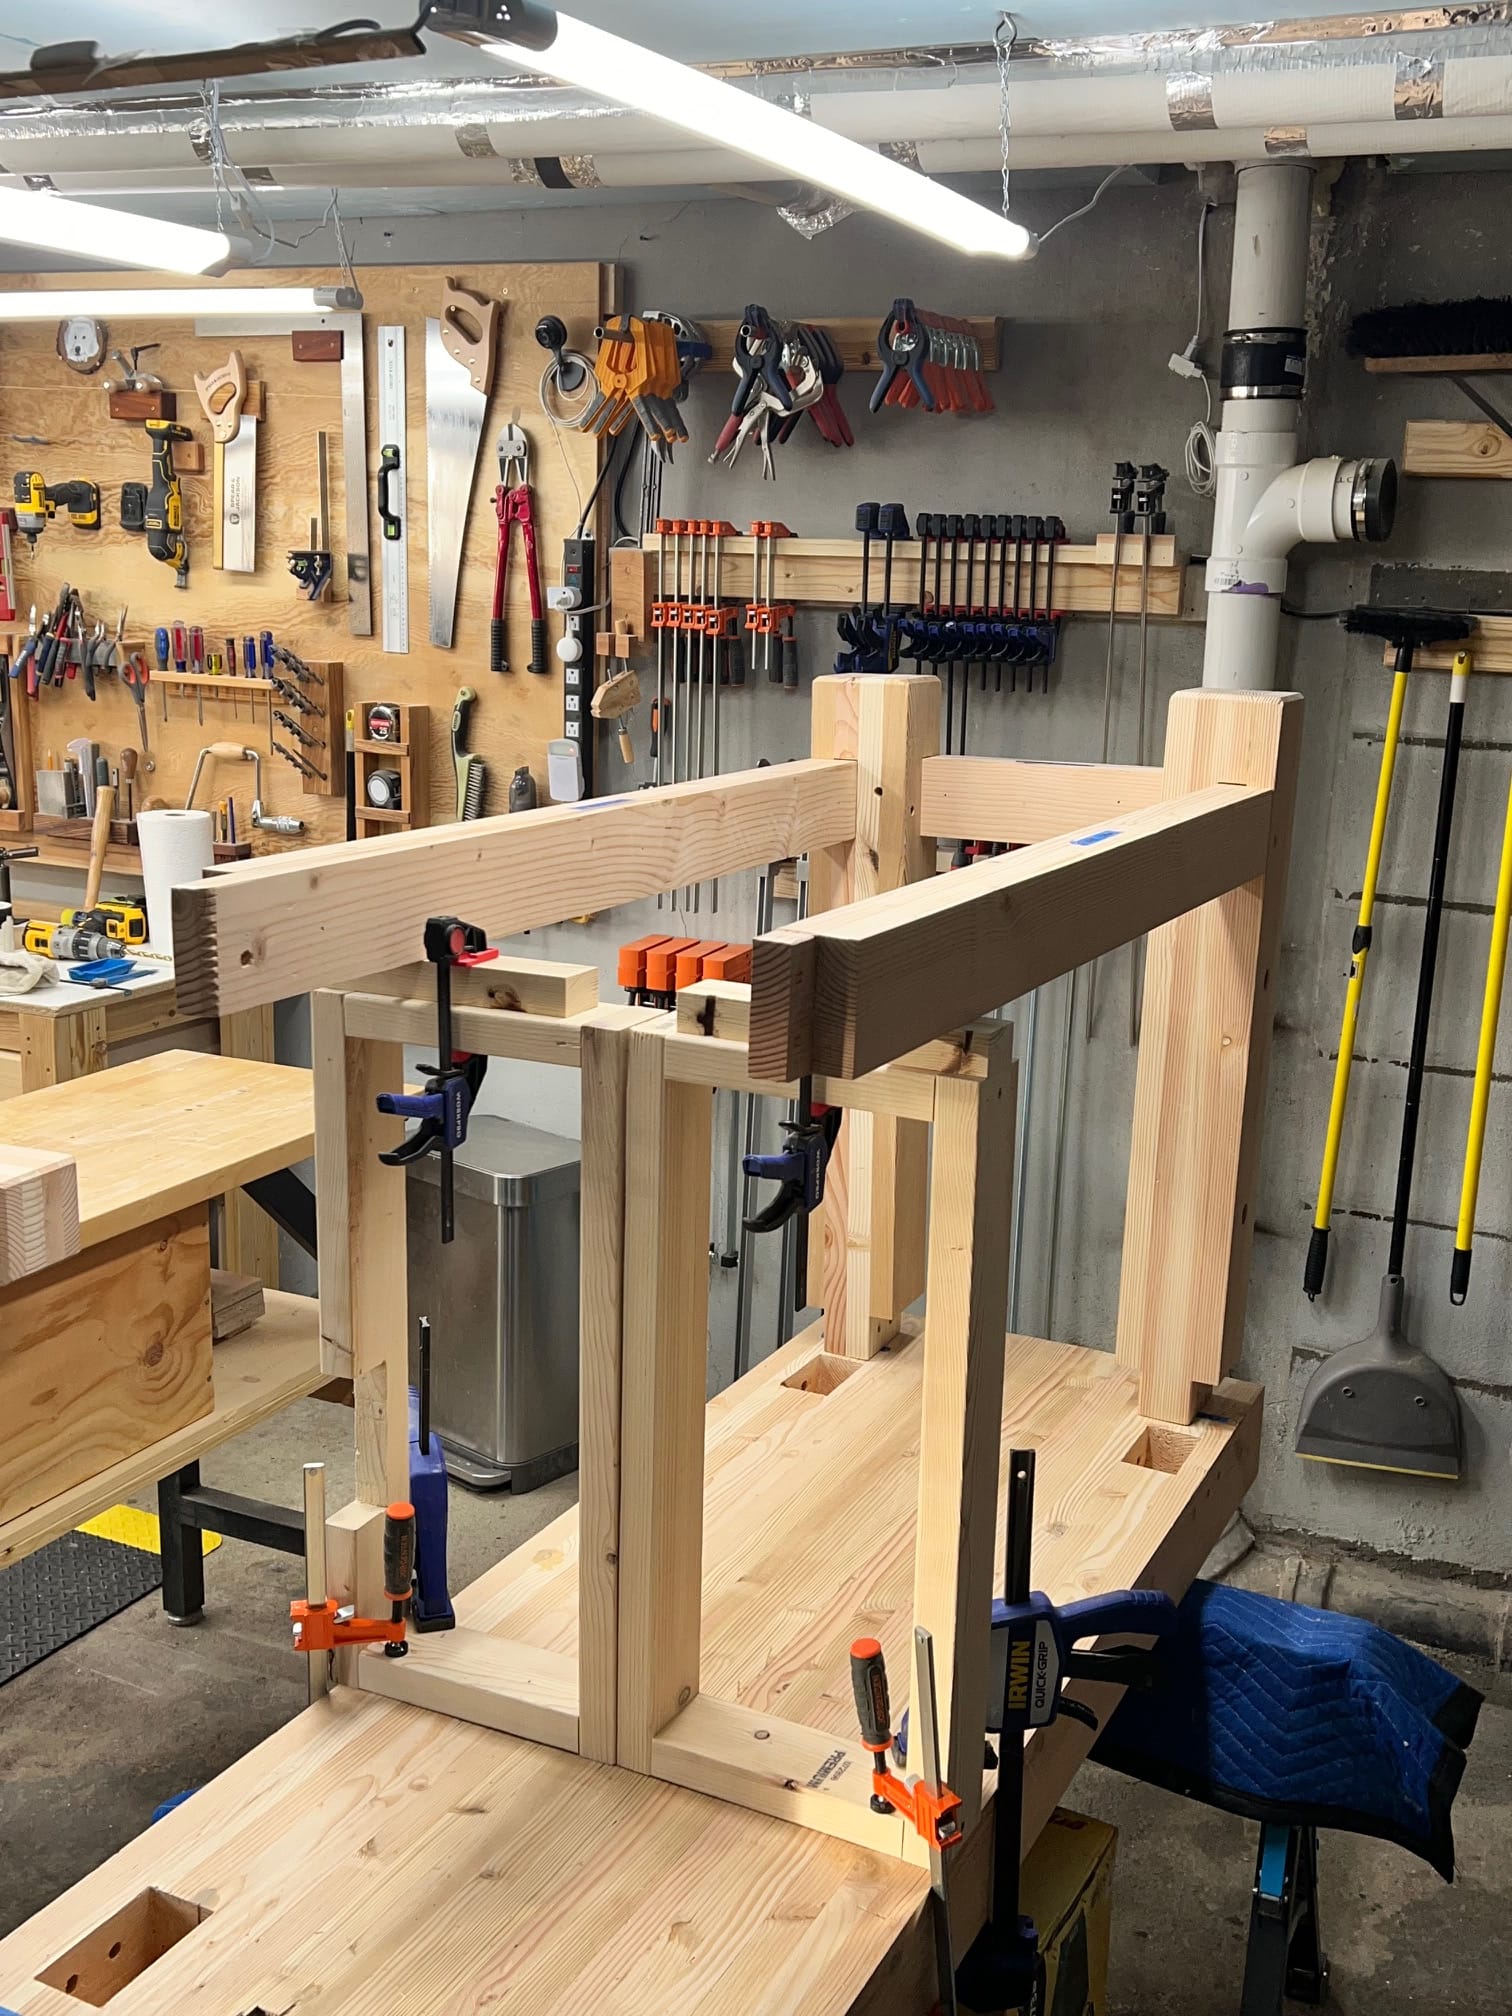
The final glue-up
The final assembly was exciting and also a bit nerve-wracking. I had been working on the bench for months, and the assembly would be one last opportunity for something to go terribly awry and ruin all my hard work. So I spent several days preparing and rehearsing.
I heated the shop (with a kerosene space heater) for two days to get it warm enough for the glue to dry. Titebond III (my glue of choice for this step) requires 45℉ to cure properly, and although it was getting below freezing every night I managed to keep the overnight lows above 50.
Megan and I did a dry run, talking through all the details to make sure we knew who would do what, and in what order. There were 12 mortise and tenon joints to be glued up, and 17 total drawbore pins to drive home, and it all had to be done in a certain order. First we'd glue together the legs and stretchers, then the big mortises in the benchtop, and then, after all the joints were glued and assembled, the final step would be to drive home all the drawbore pins.
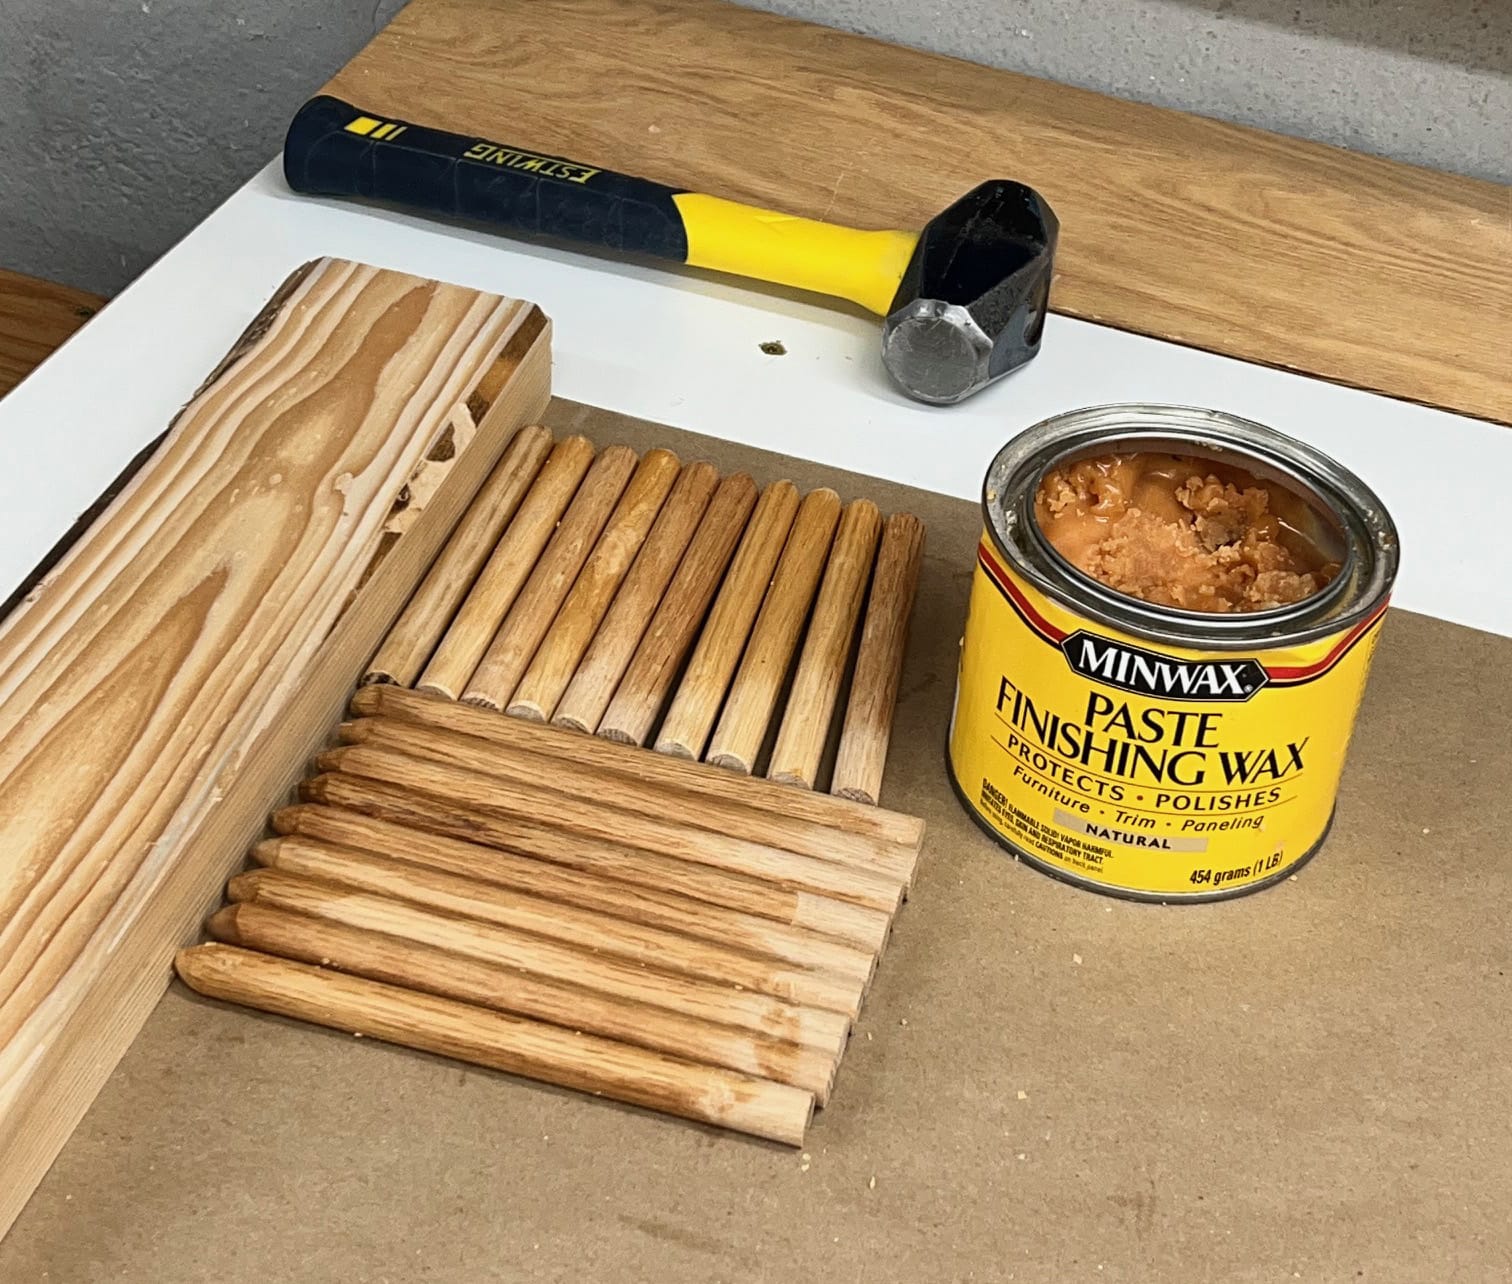

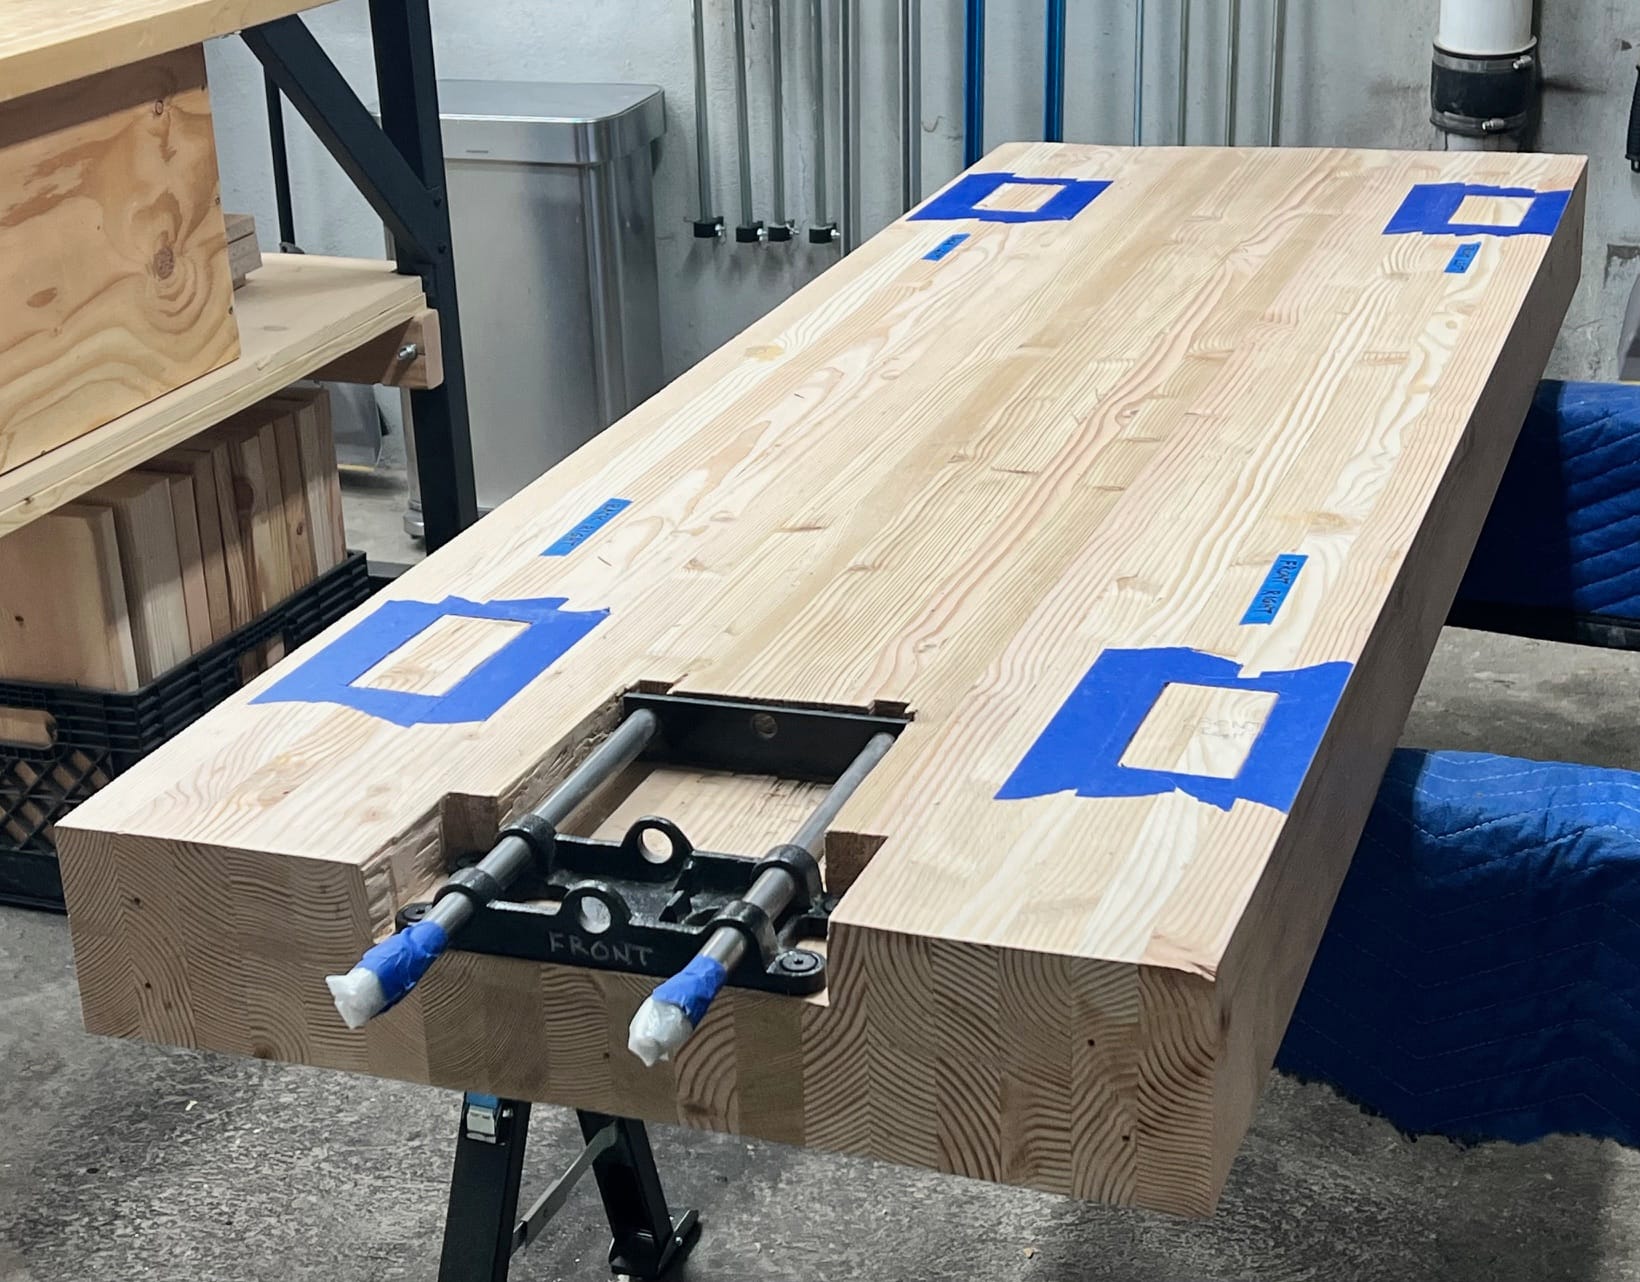
After things had cured for a day, it was time to flush trim all the drawbore pins.

Finishing touches
There were still a few days of finishing touches to be done, but this post has gotten really long so I'll just summarize that stuff quickly:
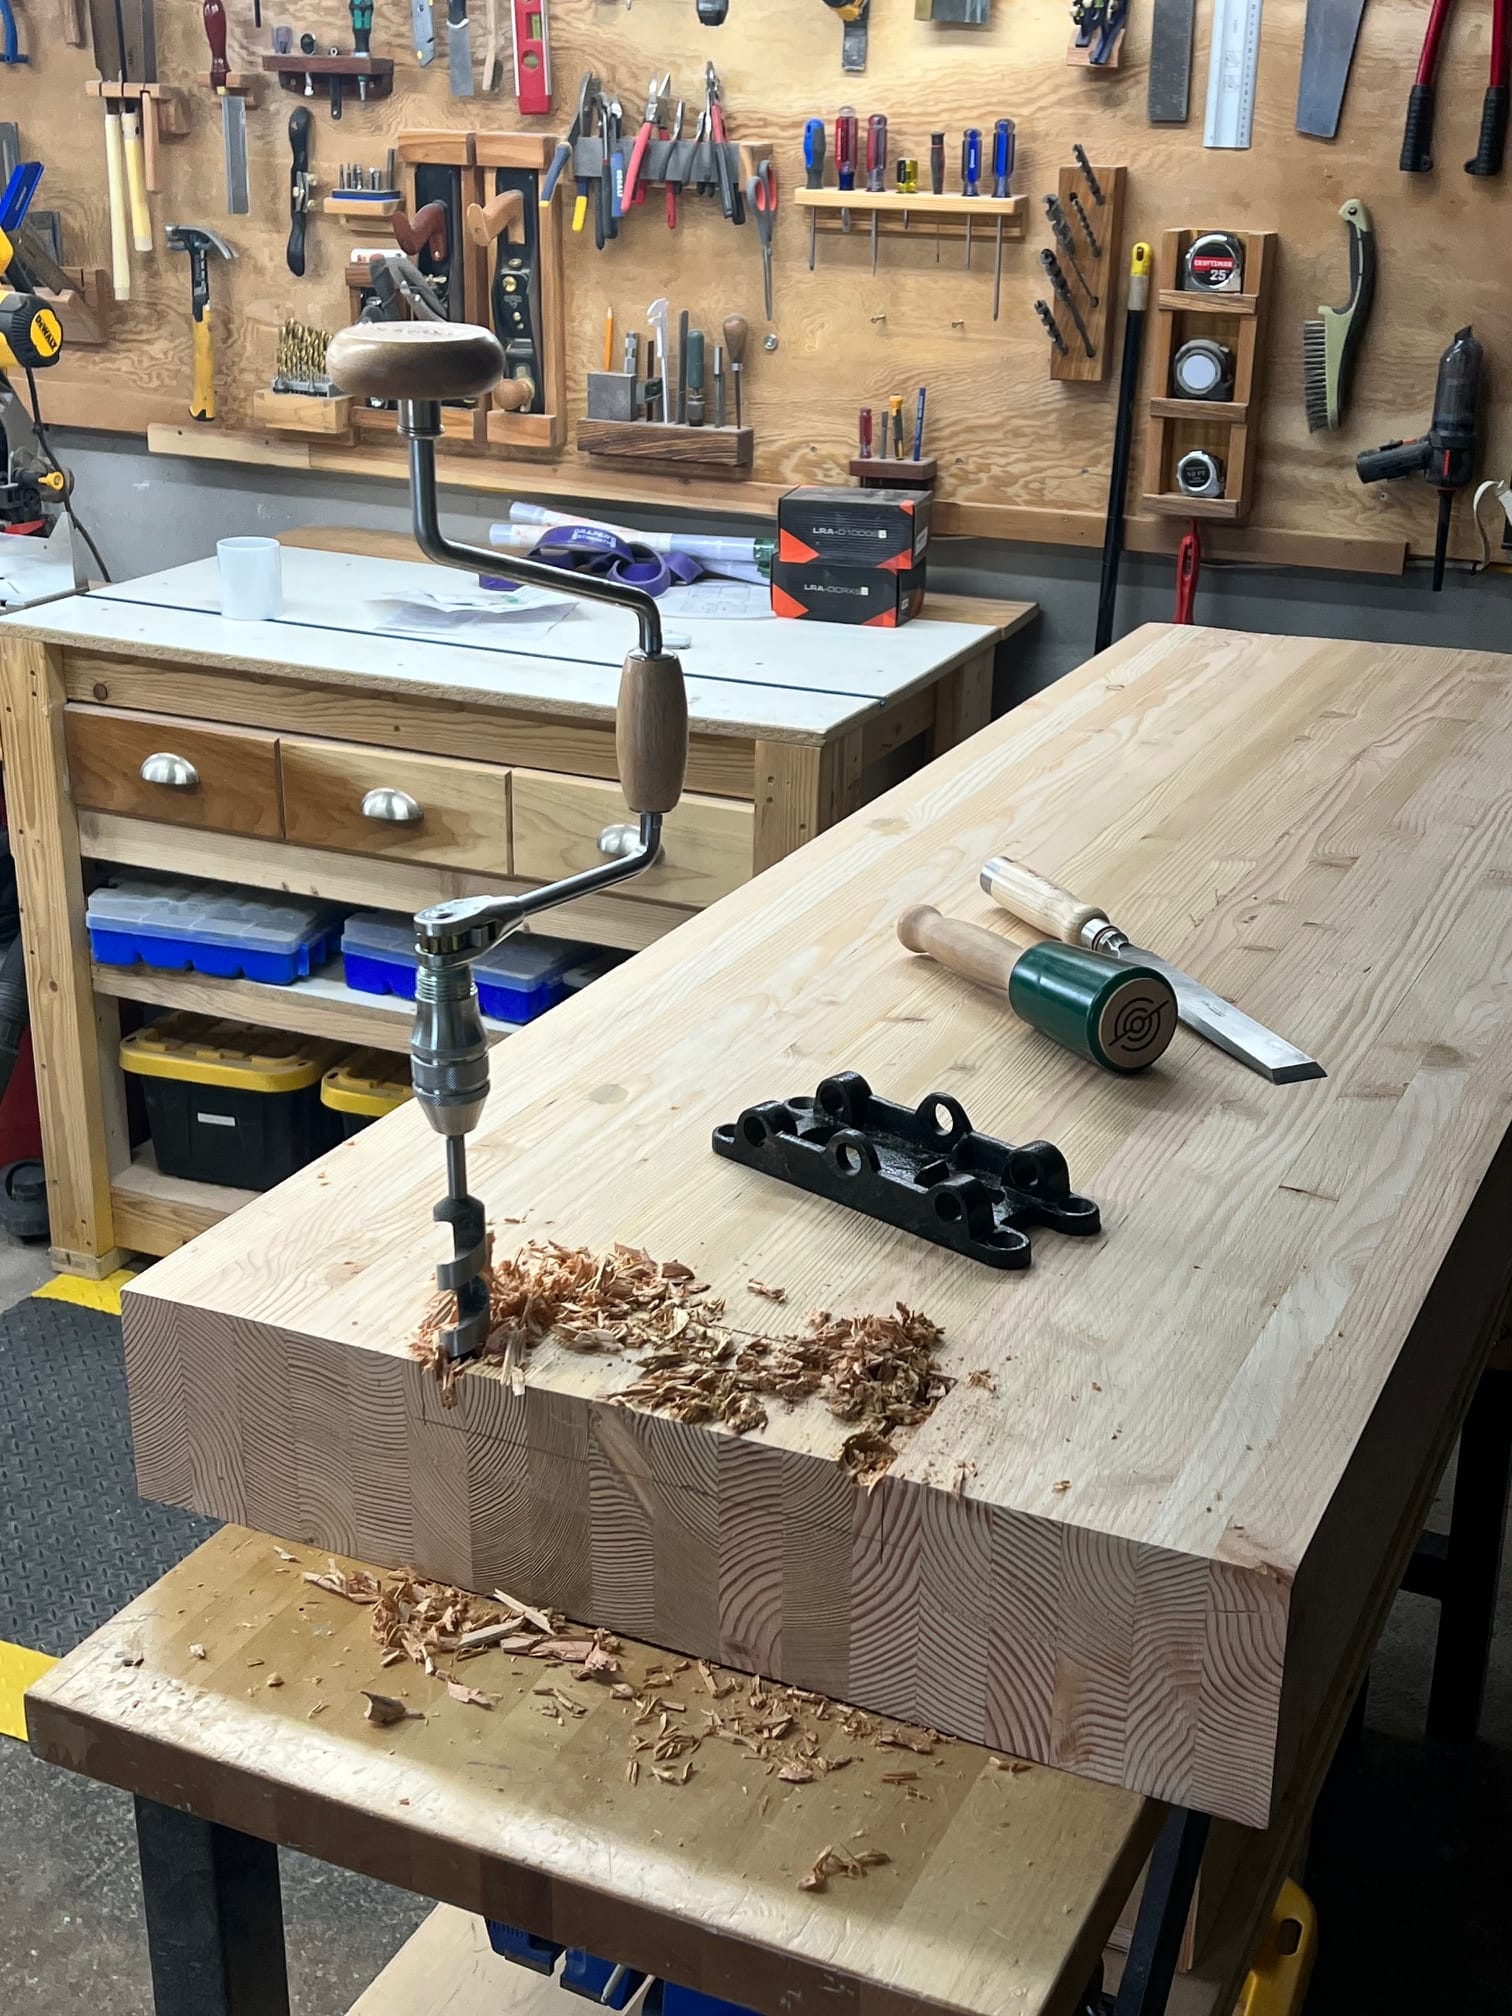
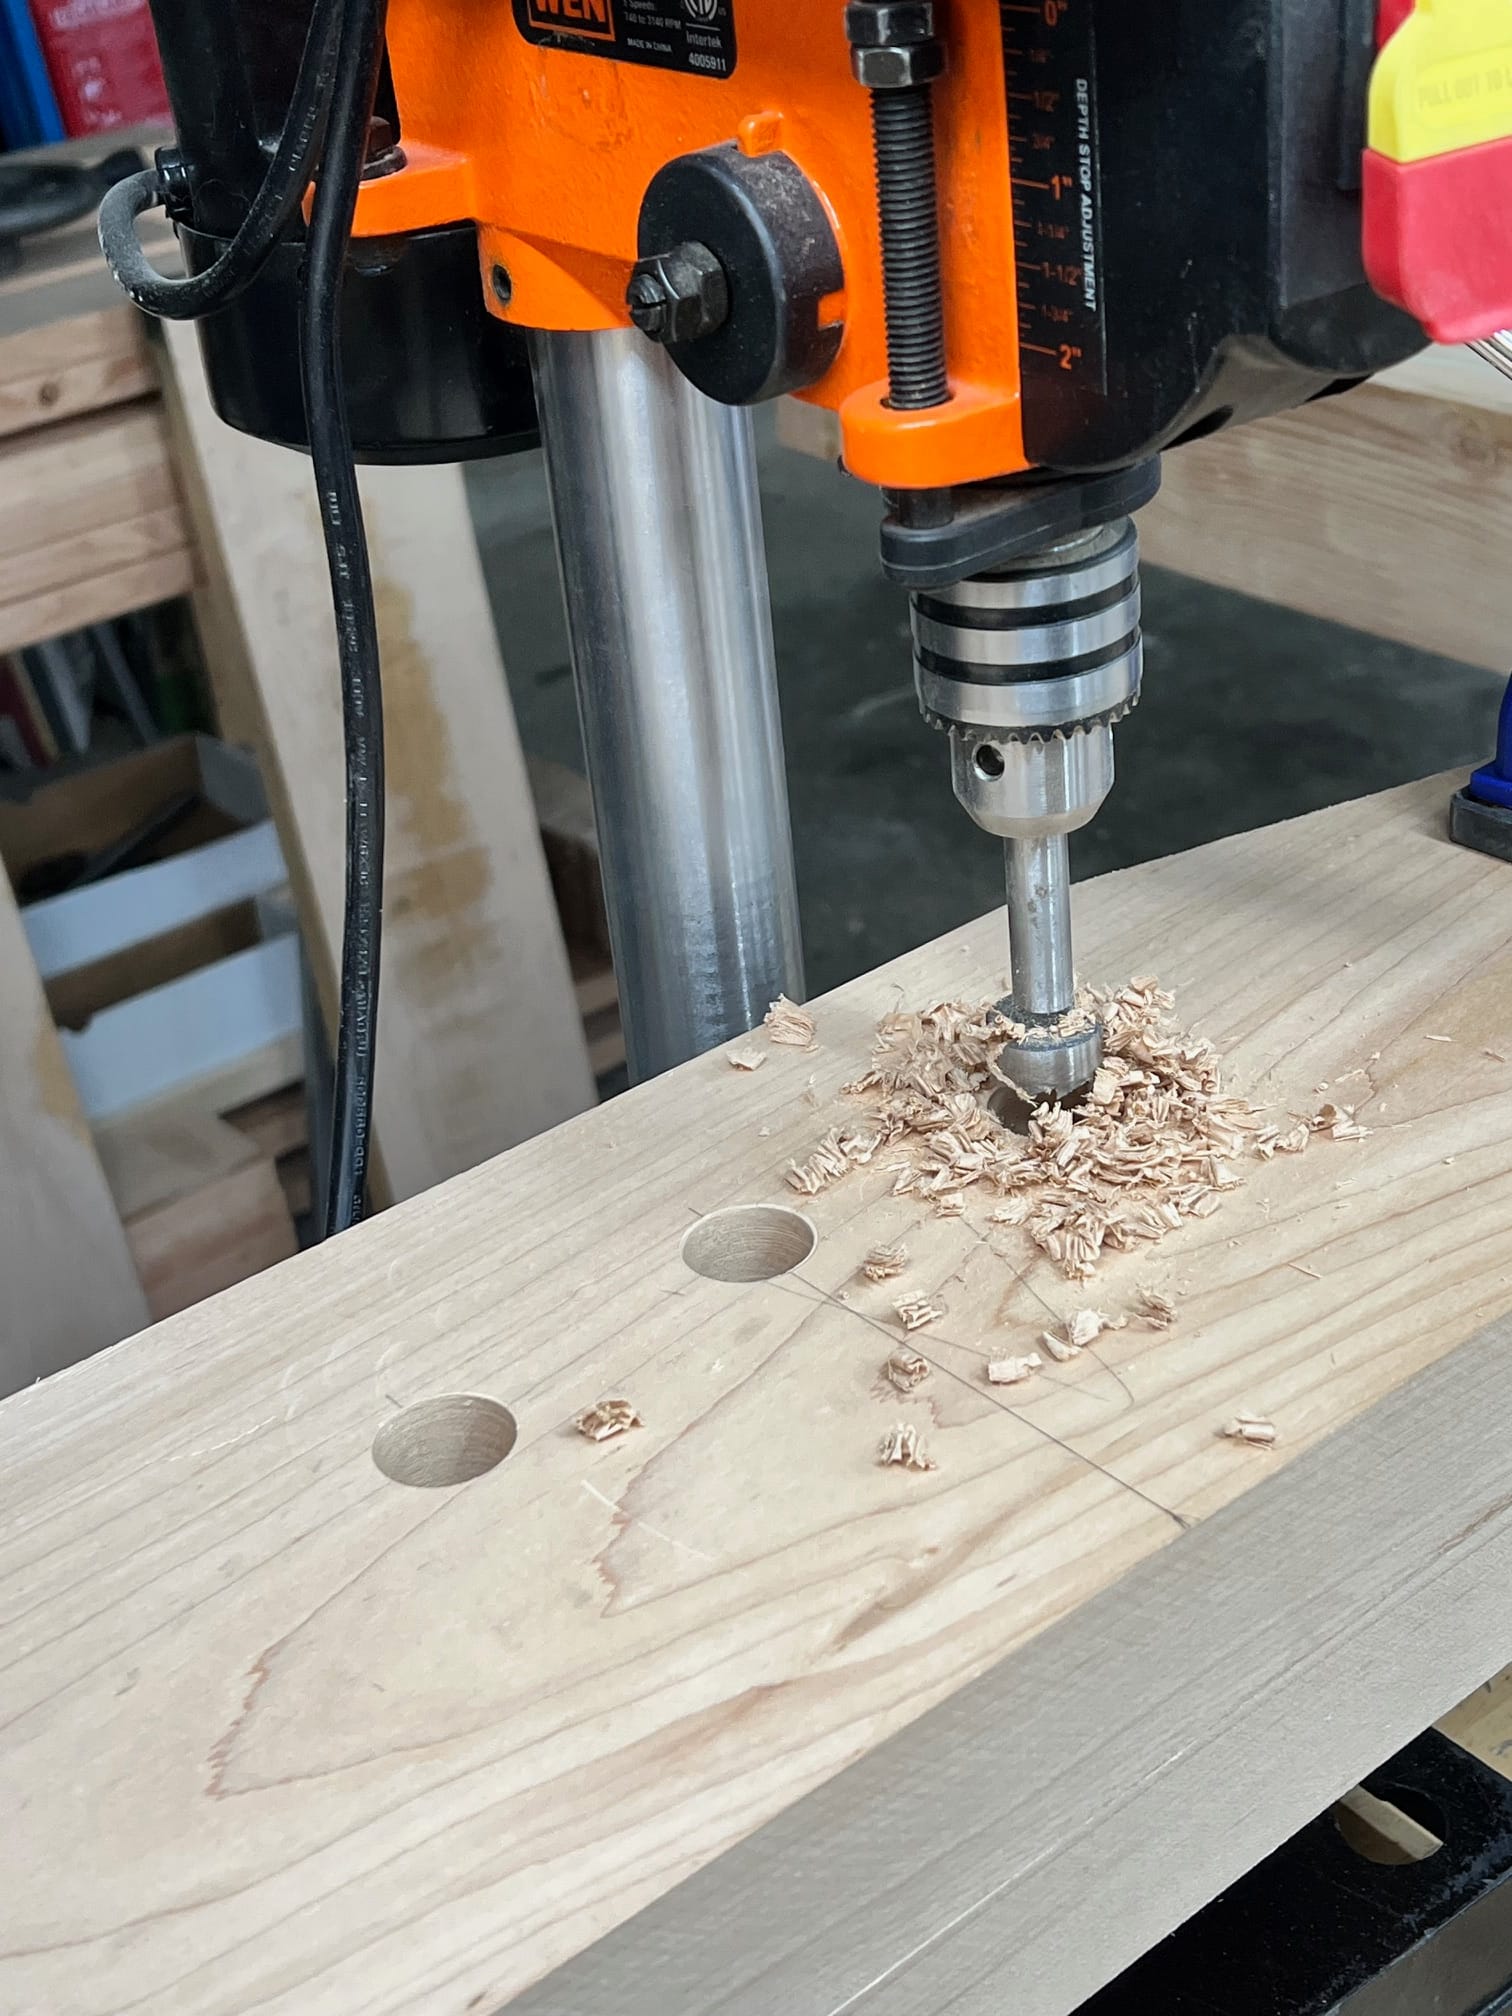
- Drilling the dog holes (the holes in the benchtop for the holdfast). The layout of dog holes is a topic woodworkers have been debating for centuries, and after seeing all the arguments for various approaches (reminds me of software architecture debates!), I settled on a simple minimalist set of dog holes because I can always drill more later if I decide I need them.
- Building the shelf. An optional detail that I decided to go with was adding a simple shelf inside the stretchers, a few inches off the floor. I had some leftover hard maple from making the vise faces, so I used that to make railings for the shelf boards to fit on. And then I cut the shelf boards from some beautiful 1" thick ash I picked up at Crosscut Hardwoods in Seattle. I chamfered the edges of the shelf boards because I like that look.
- Applying the finish. After considering several options, I went with Osmo PolyX, a hardwax-oil finish based on natural vegetable oils and waxes. It made the pine a bit darker, and I finished the maple vice faces and ash bottom shelf with rub-on polyurethane for a lighter contrasting look in those areas. The main reason I picked PolyX is that it's really easy to repair, and by design a workbench is going to get plenty of abuse over the years.
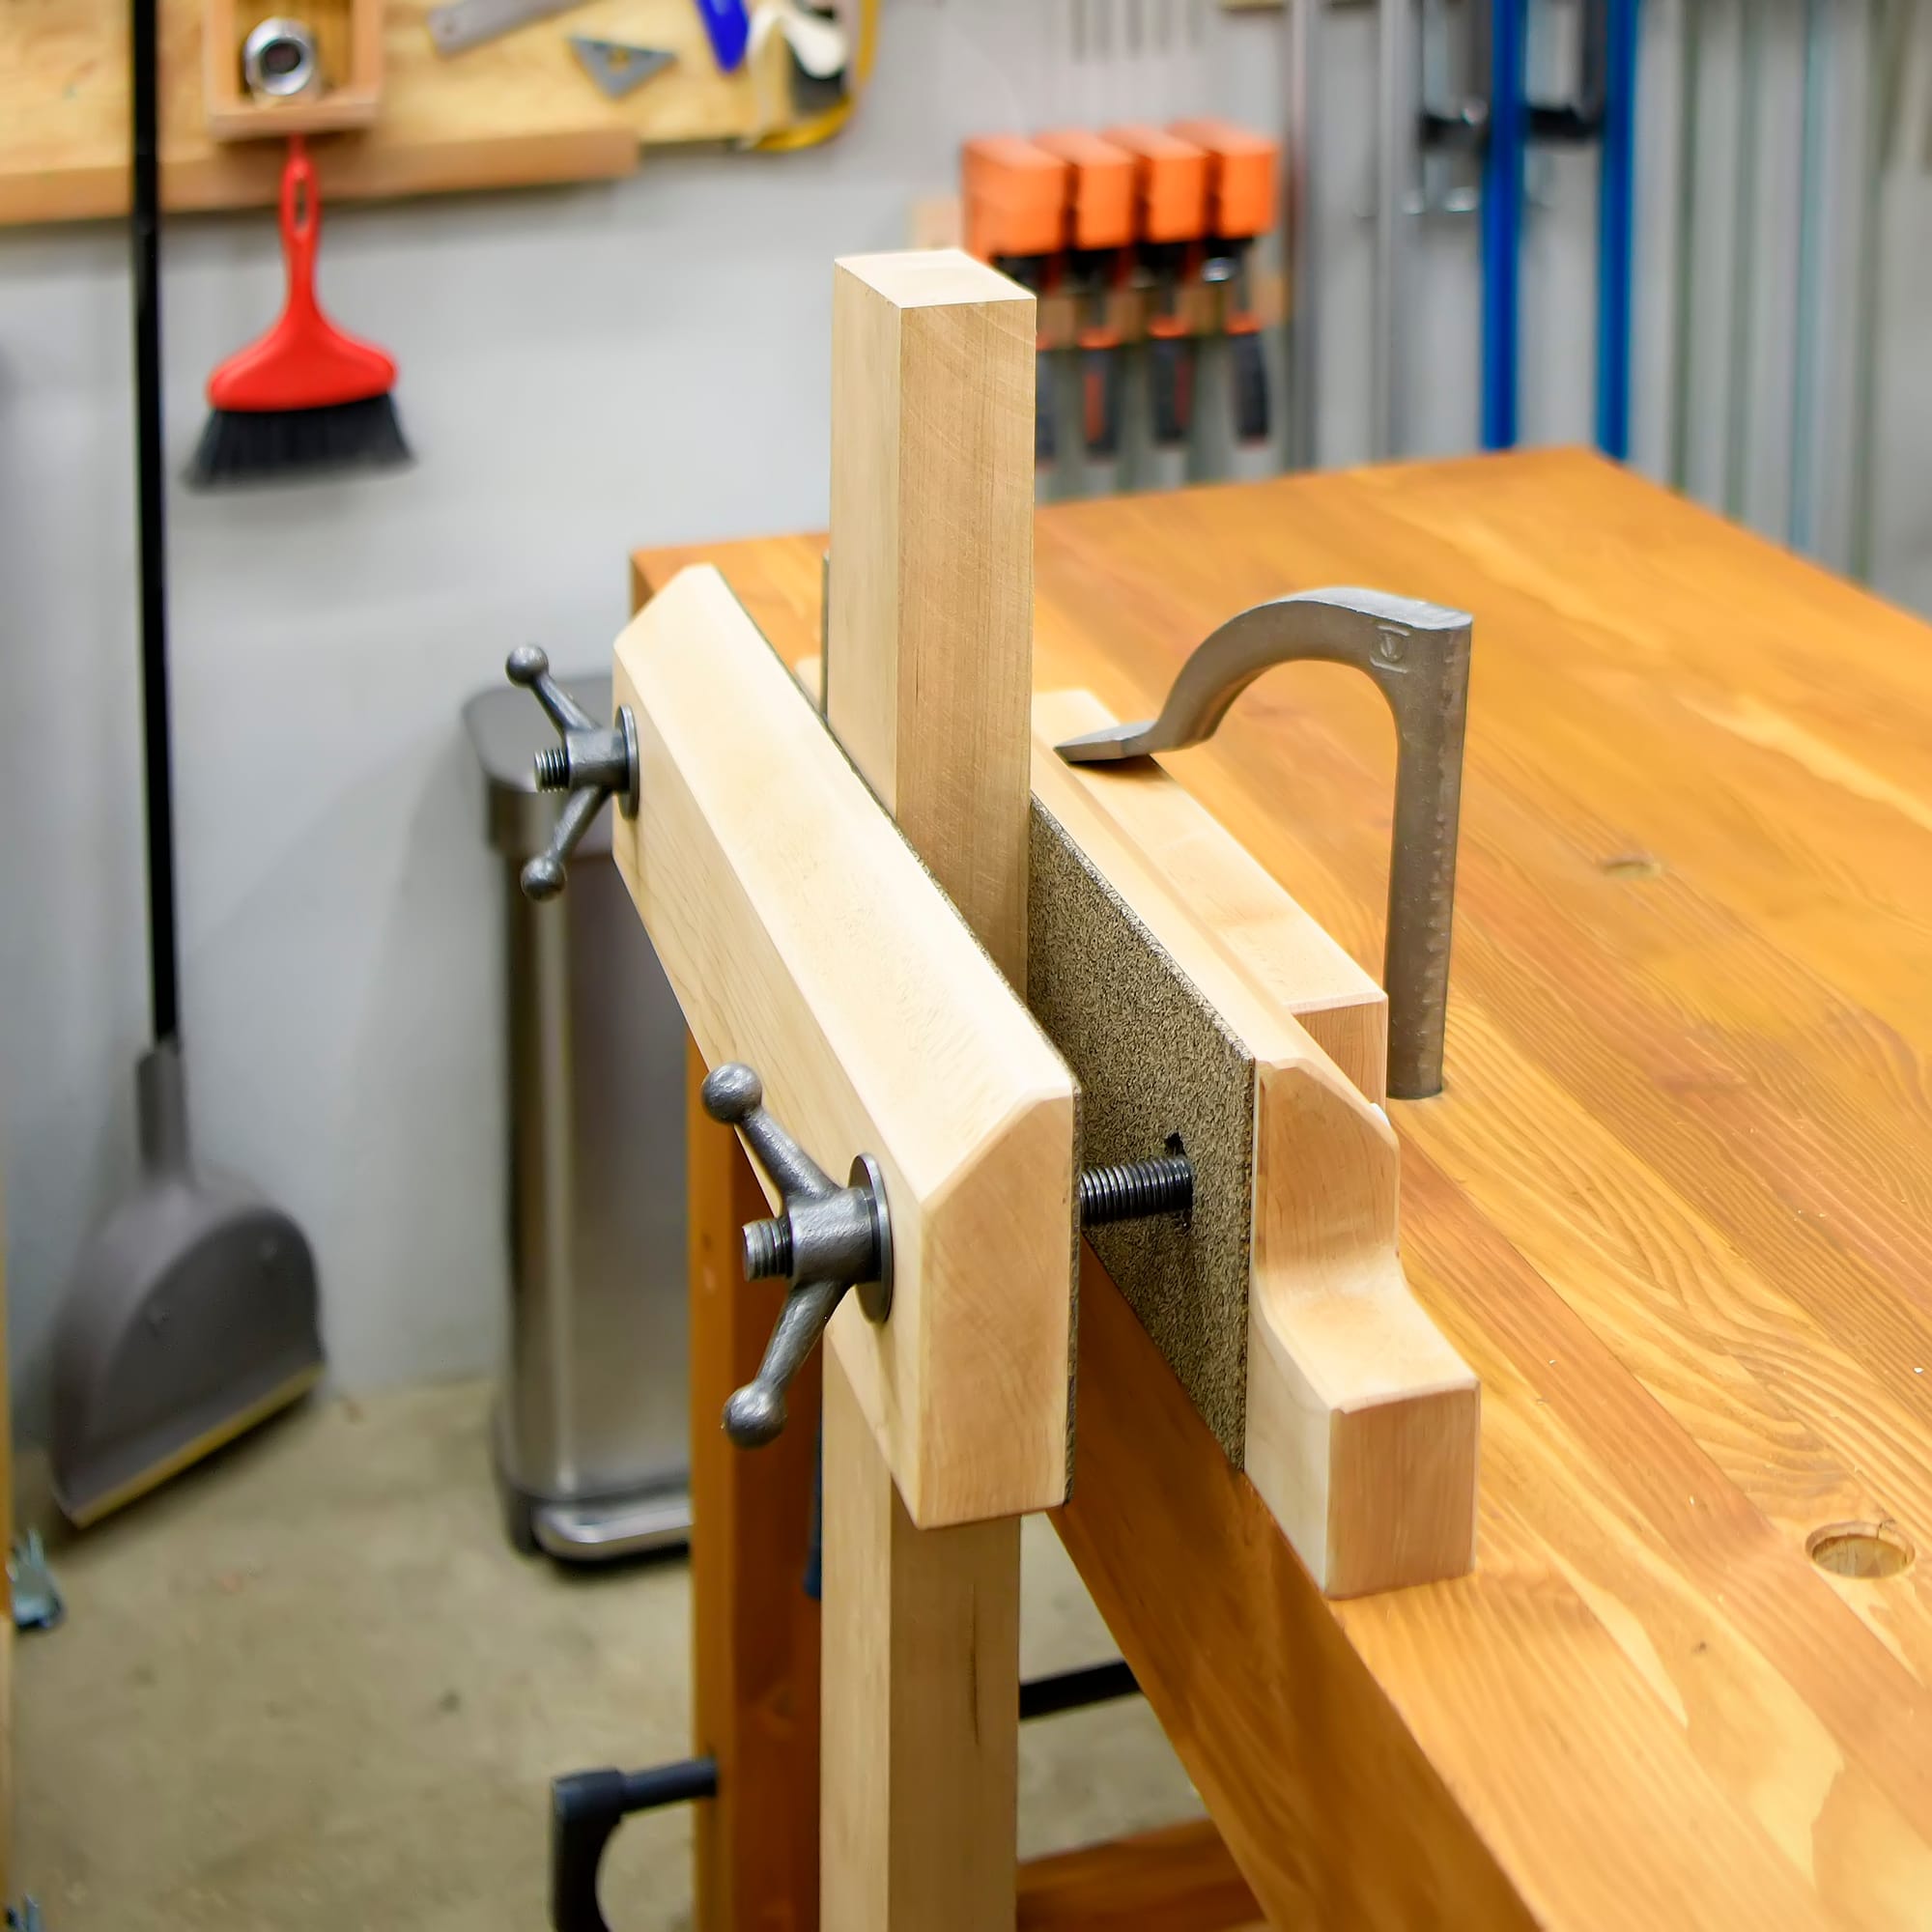
- Building the Moxon vise. This is the devise that you can see in some of the photos below with two big V-handle screws in the front of a slab of maple. It's a popular style of vise for cutting dovetails, among other things, and I always wanted to build one and try it out. I store it on the shelf underneath the bench, and when in use it gets mounted on top of the bench with a holdfast or clamps.
- Building other bench accessories. I also built several accessories that Chris Schwarz recommends, including a couple of doe's feet, a couple of bench hooks, some vise spacers, and so on.
Lessons learned
In no particular order, some things I learned going through this process ...
When building a leg vise, keep the chop oversized and rectangular as long as possible. This would have simplified some of the processes involved in installing the crisscross mechanism and vise hardware, but I foolishly cut the chop to a sexy tapered chamfered shape early on, and that made it much more complicated to do things like build jigs to help cut the crisscross slots.
Speaking of, build jigs. Lots of them! I guess that's not a workbench thing, more of just a woodworking thing, but I learned it in earnest building this bench. How many jigs did I build? I couldn't even guess; a lot.
Even if you're not doing a lot of fancy woodworking from rough cut stock, you need a jointer and planer. I thought I didn't need them, but halfway through this project I realized there was no way I'd get the workbench finished this year without them. I went with a cheap 6 inch jointer made in China, and the best-selling DeWALT 735X "four poster" planer, and I love them now.
And speaking of that, another lesson learned was that Chris's claim that you can build this bench out of $175 in lumber from Home Depot is nonsense. Setting aside the fact that lumber prices have gone up (I think I spent a bit over $400 for the lumber), you need a couple thousand dollars in specific tools to do something like this and do it right. Don't get me wrong, I love having all those tools now (especially that Robert Sorby chisel!), but the actual cost of building this bench was an order of magnitude more than what I thought I was getting into.
Buy a quality holdfast. I decided I was going to need a holdfast, and looked around at options and then ordered a model from a popular store who shall not be named for $35. It was crap, and I started to wonder why oldtime woodworkers fell for this scam. And then I shelled out $144 for the one from Last Art Press (this one), and OMG it was like night and day. It works so well. I've developed such a visceral reaction to the sound of whacking it that I may make that my phone's ringtone.
You can never sharpen your chisels too often. Well, sure, you can, but you probably won't. And I learned that sharp chisels matter more for soft pine than for hard maple and ash. That seems counter-intuitive, but the soft fibers of pine are easy to crush and mangle if you're trying to cut them with a dull chisel, whereas those other woods (especially maple) are so hard that they hold together even when your tools aren't sharp.

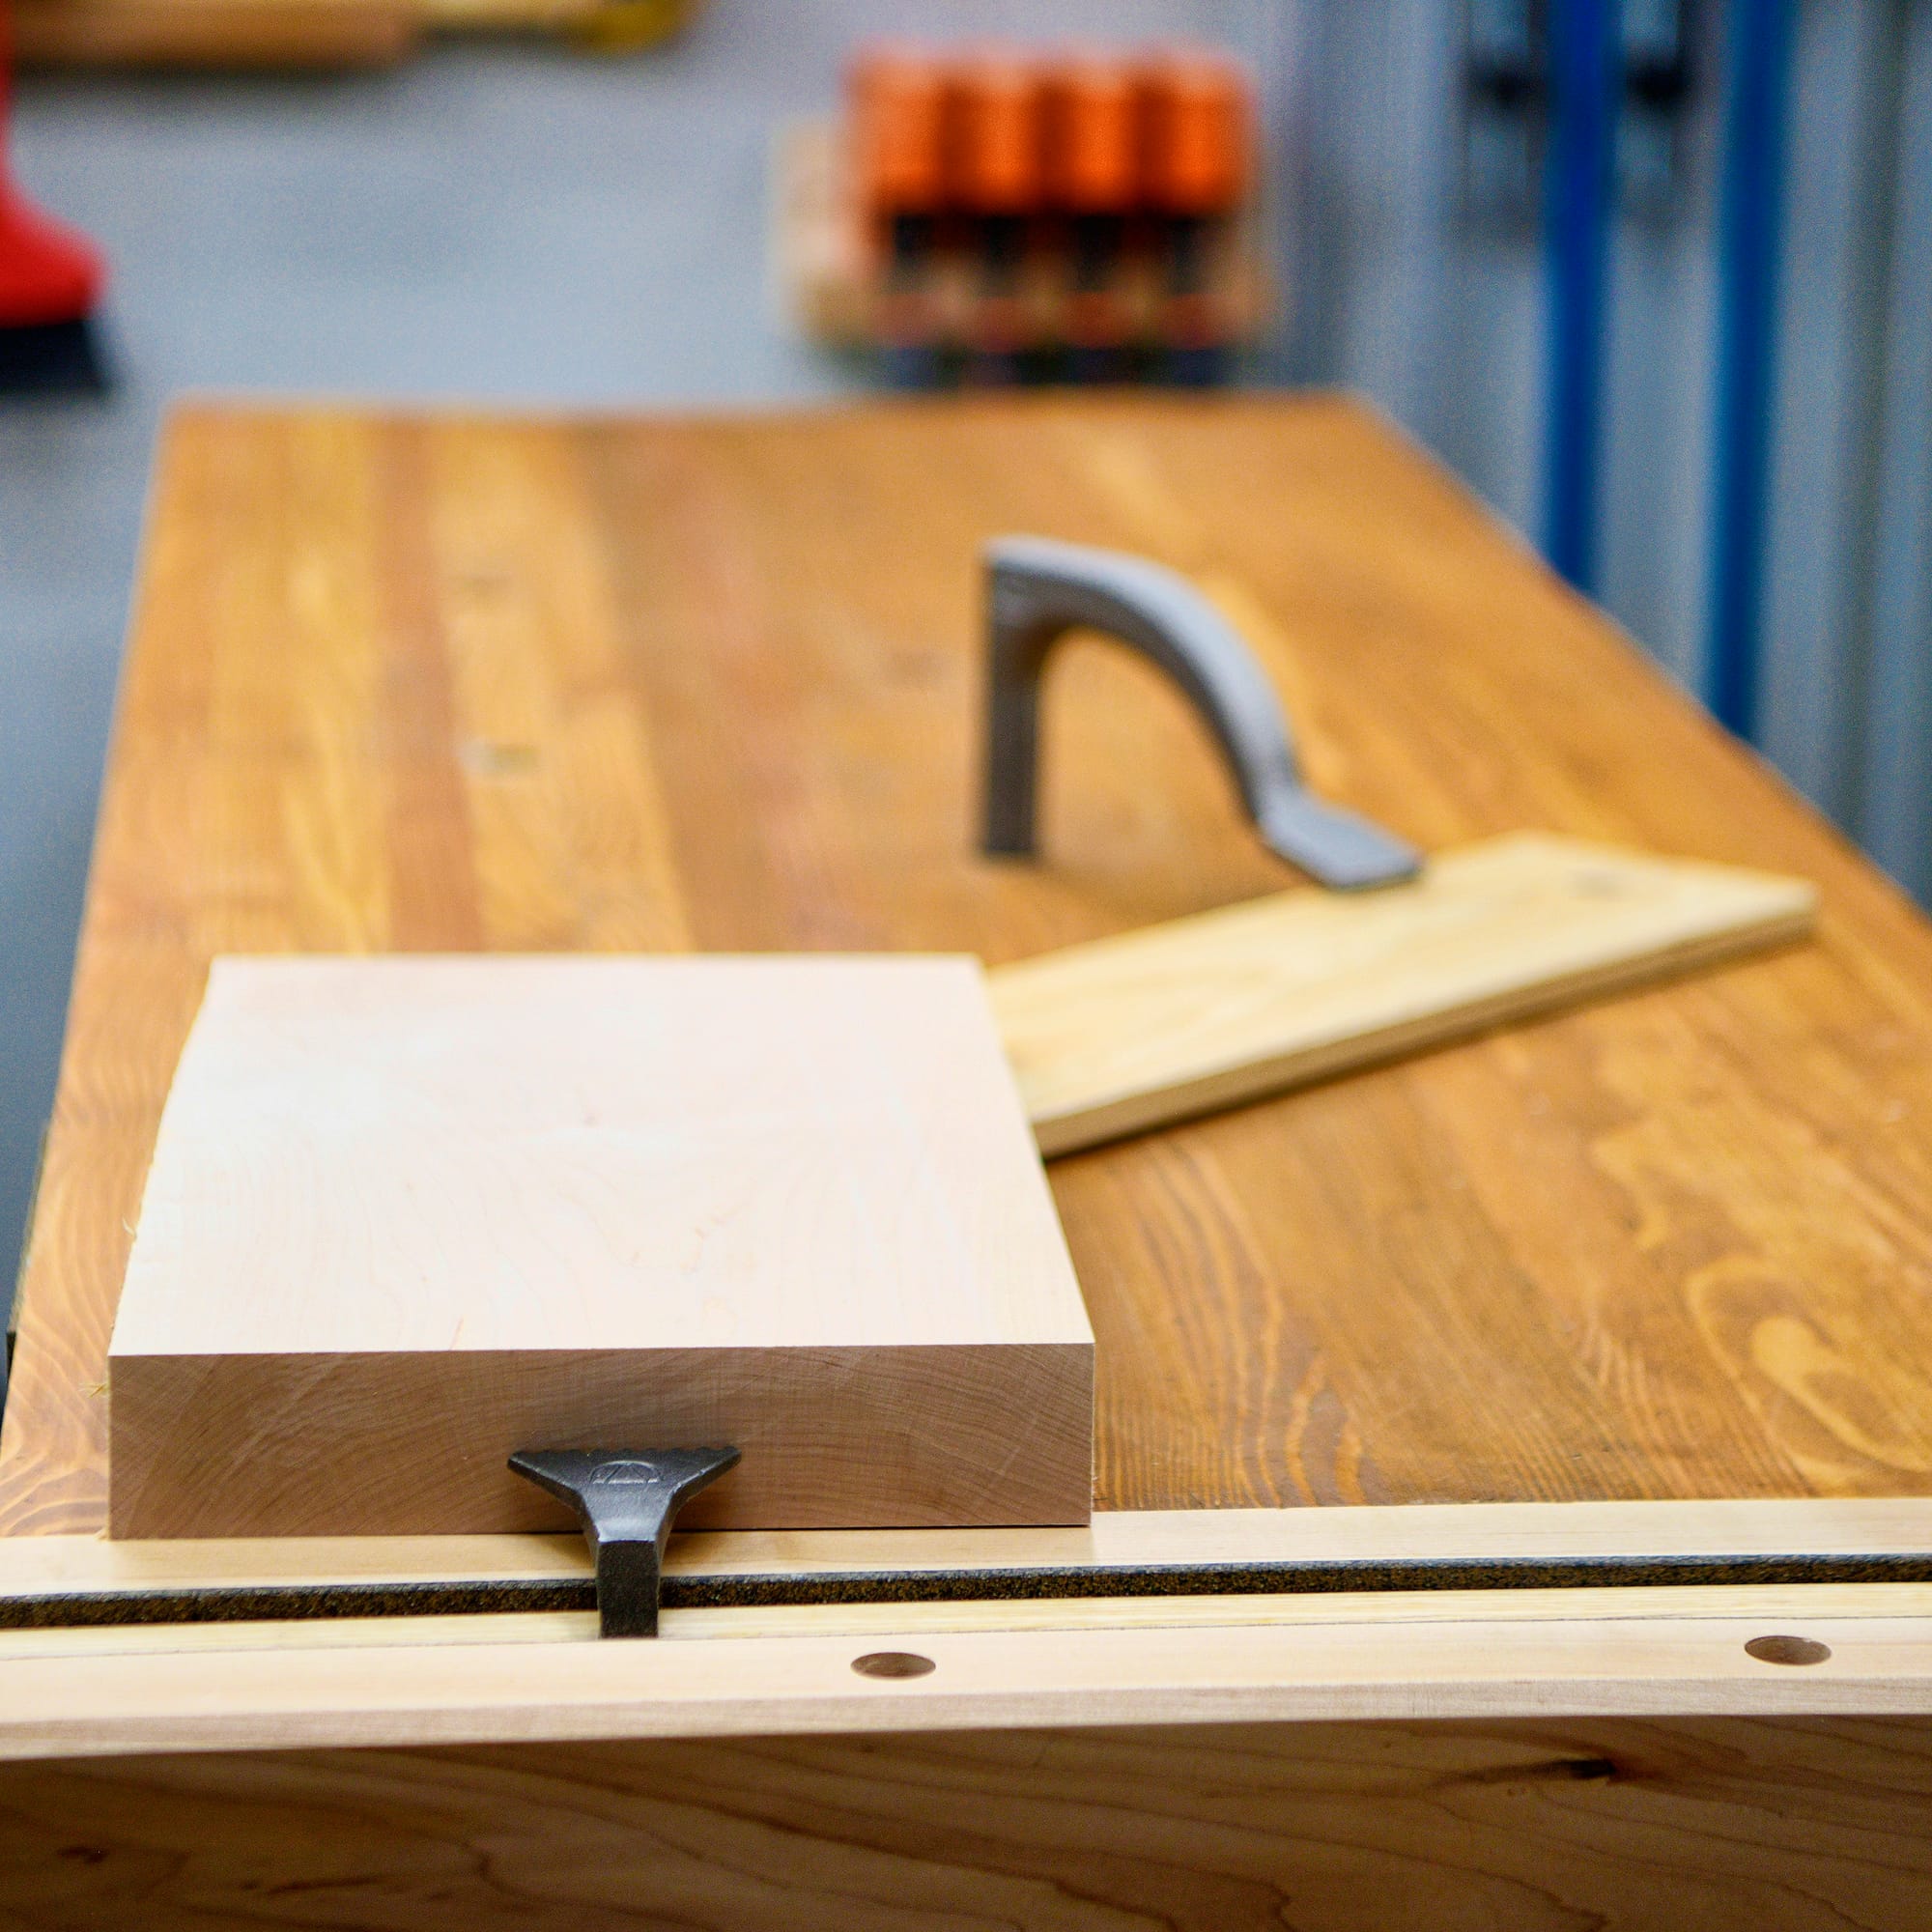
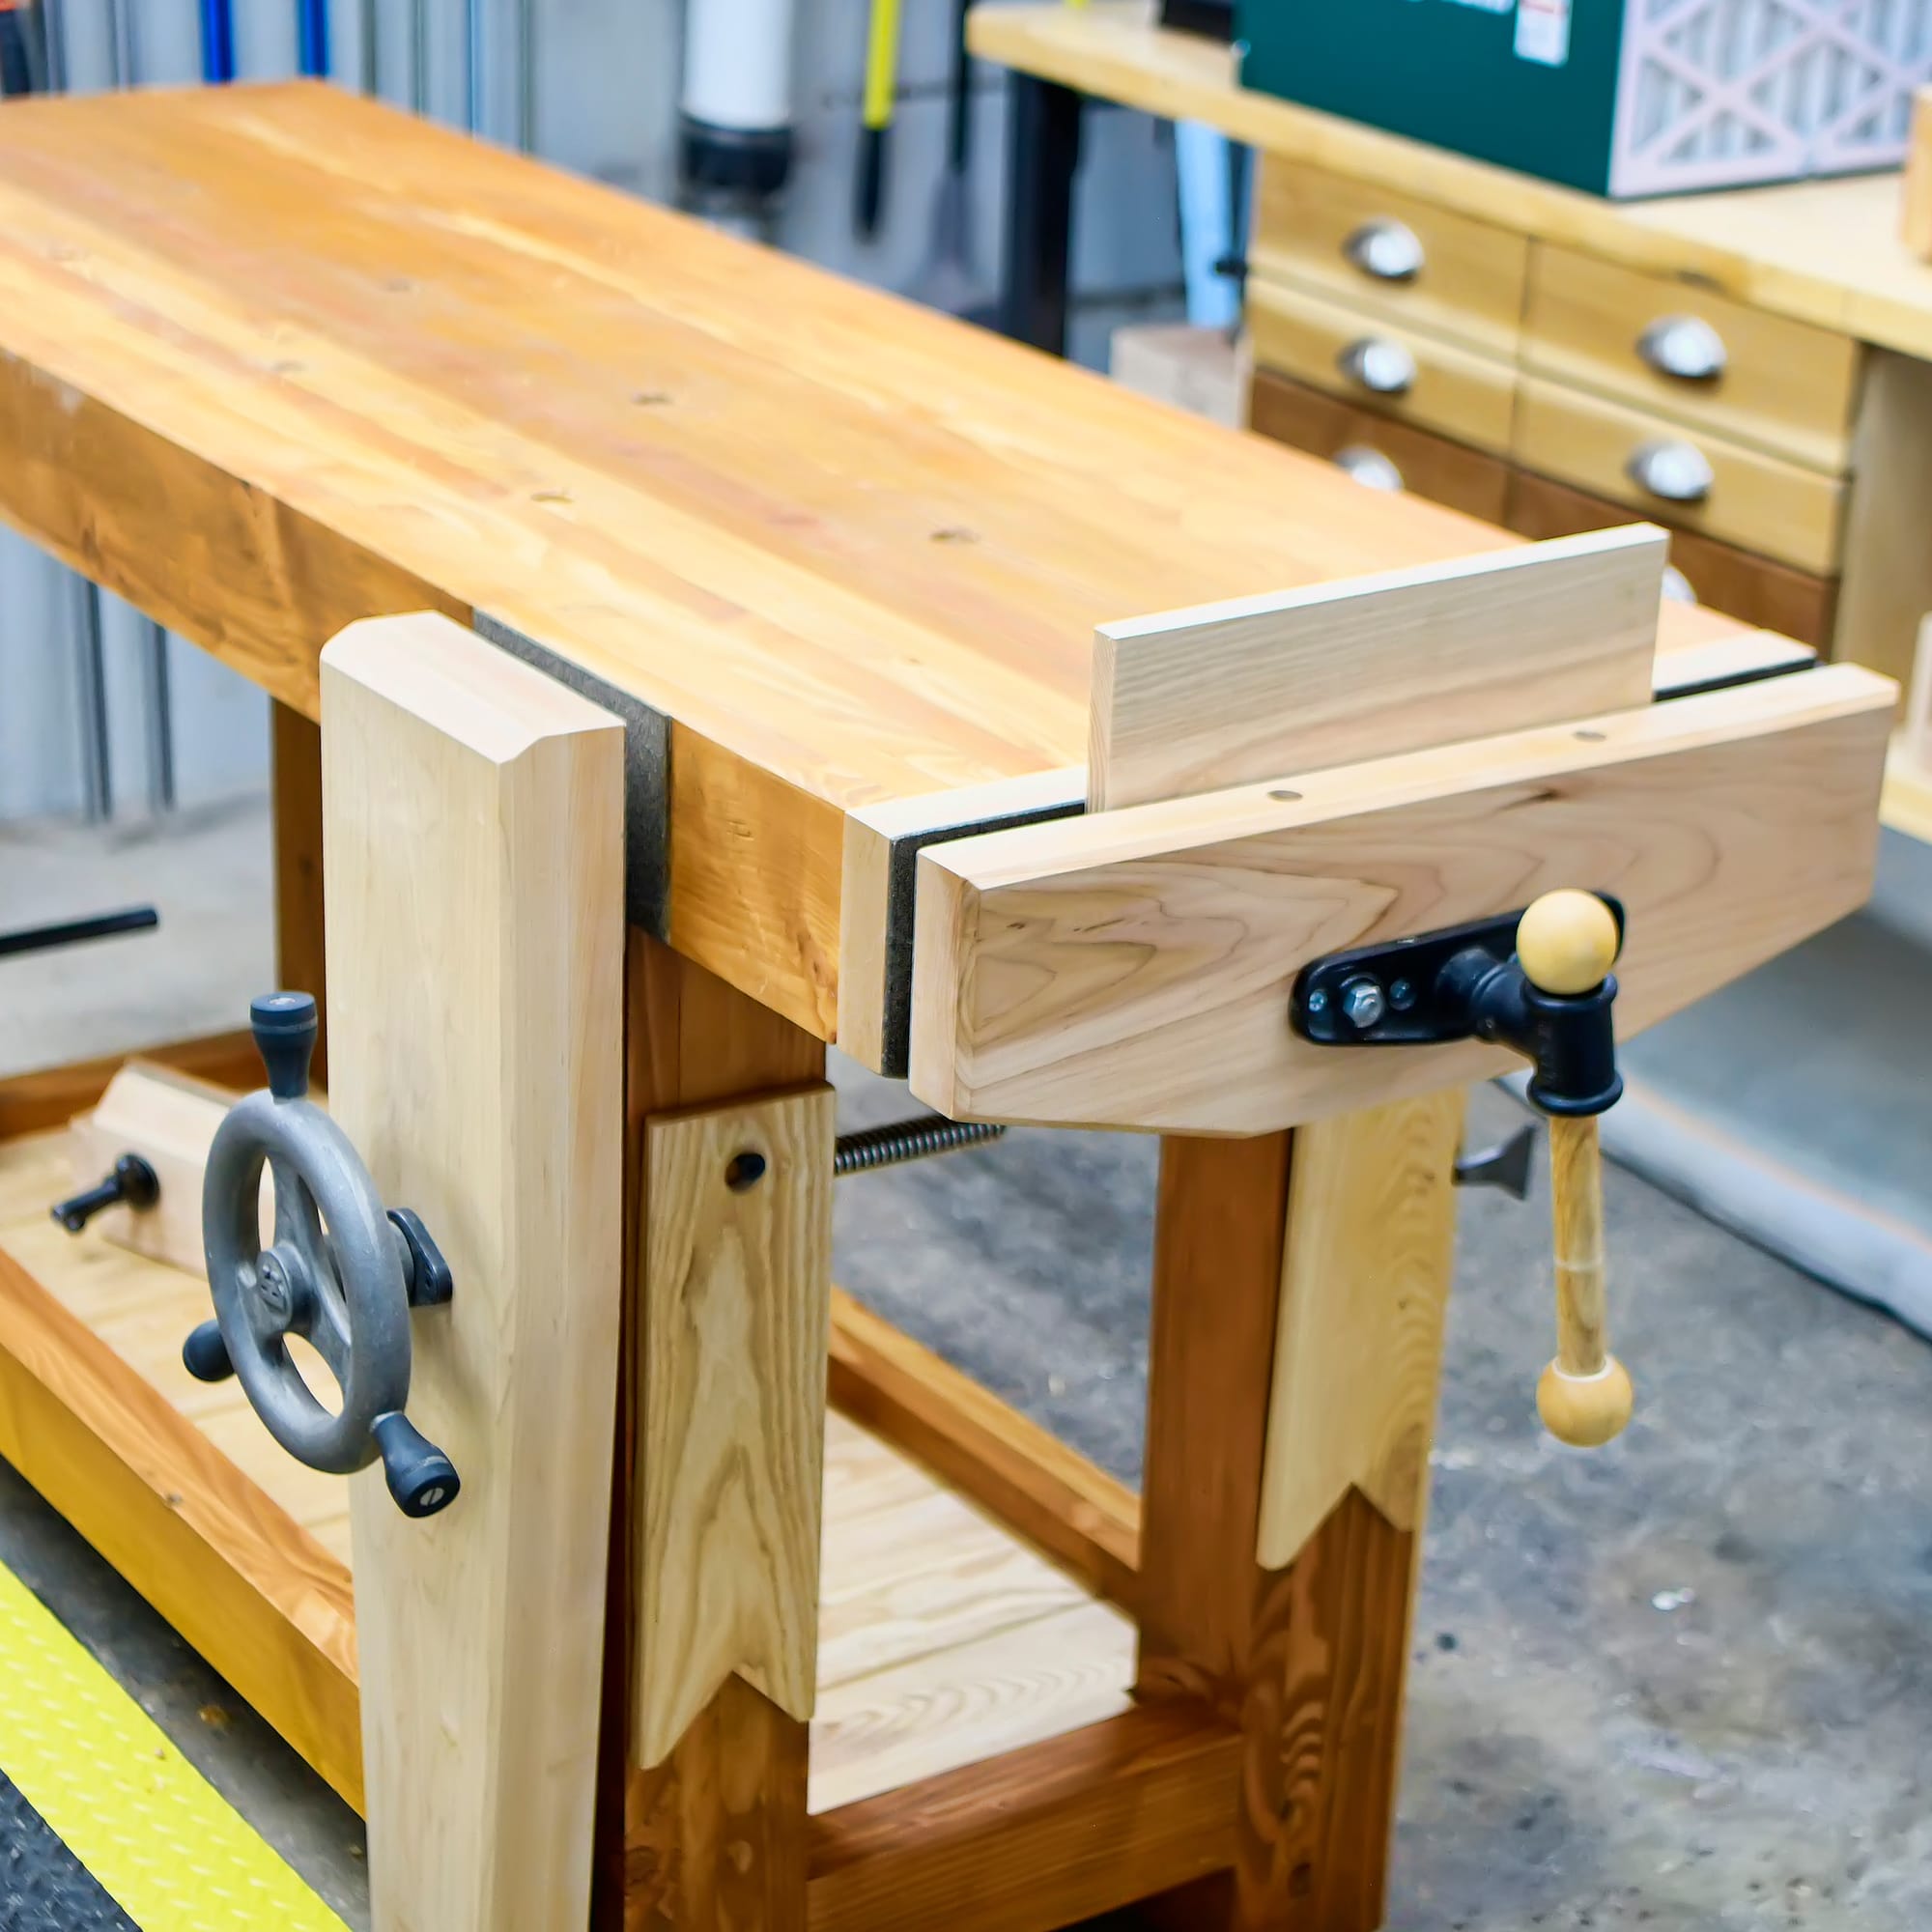
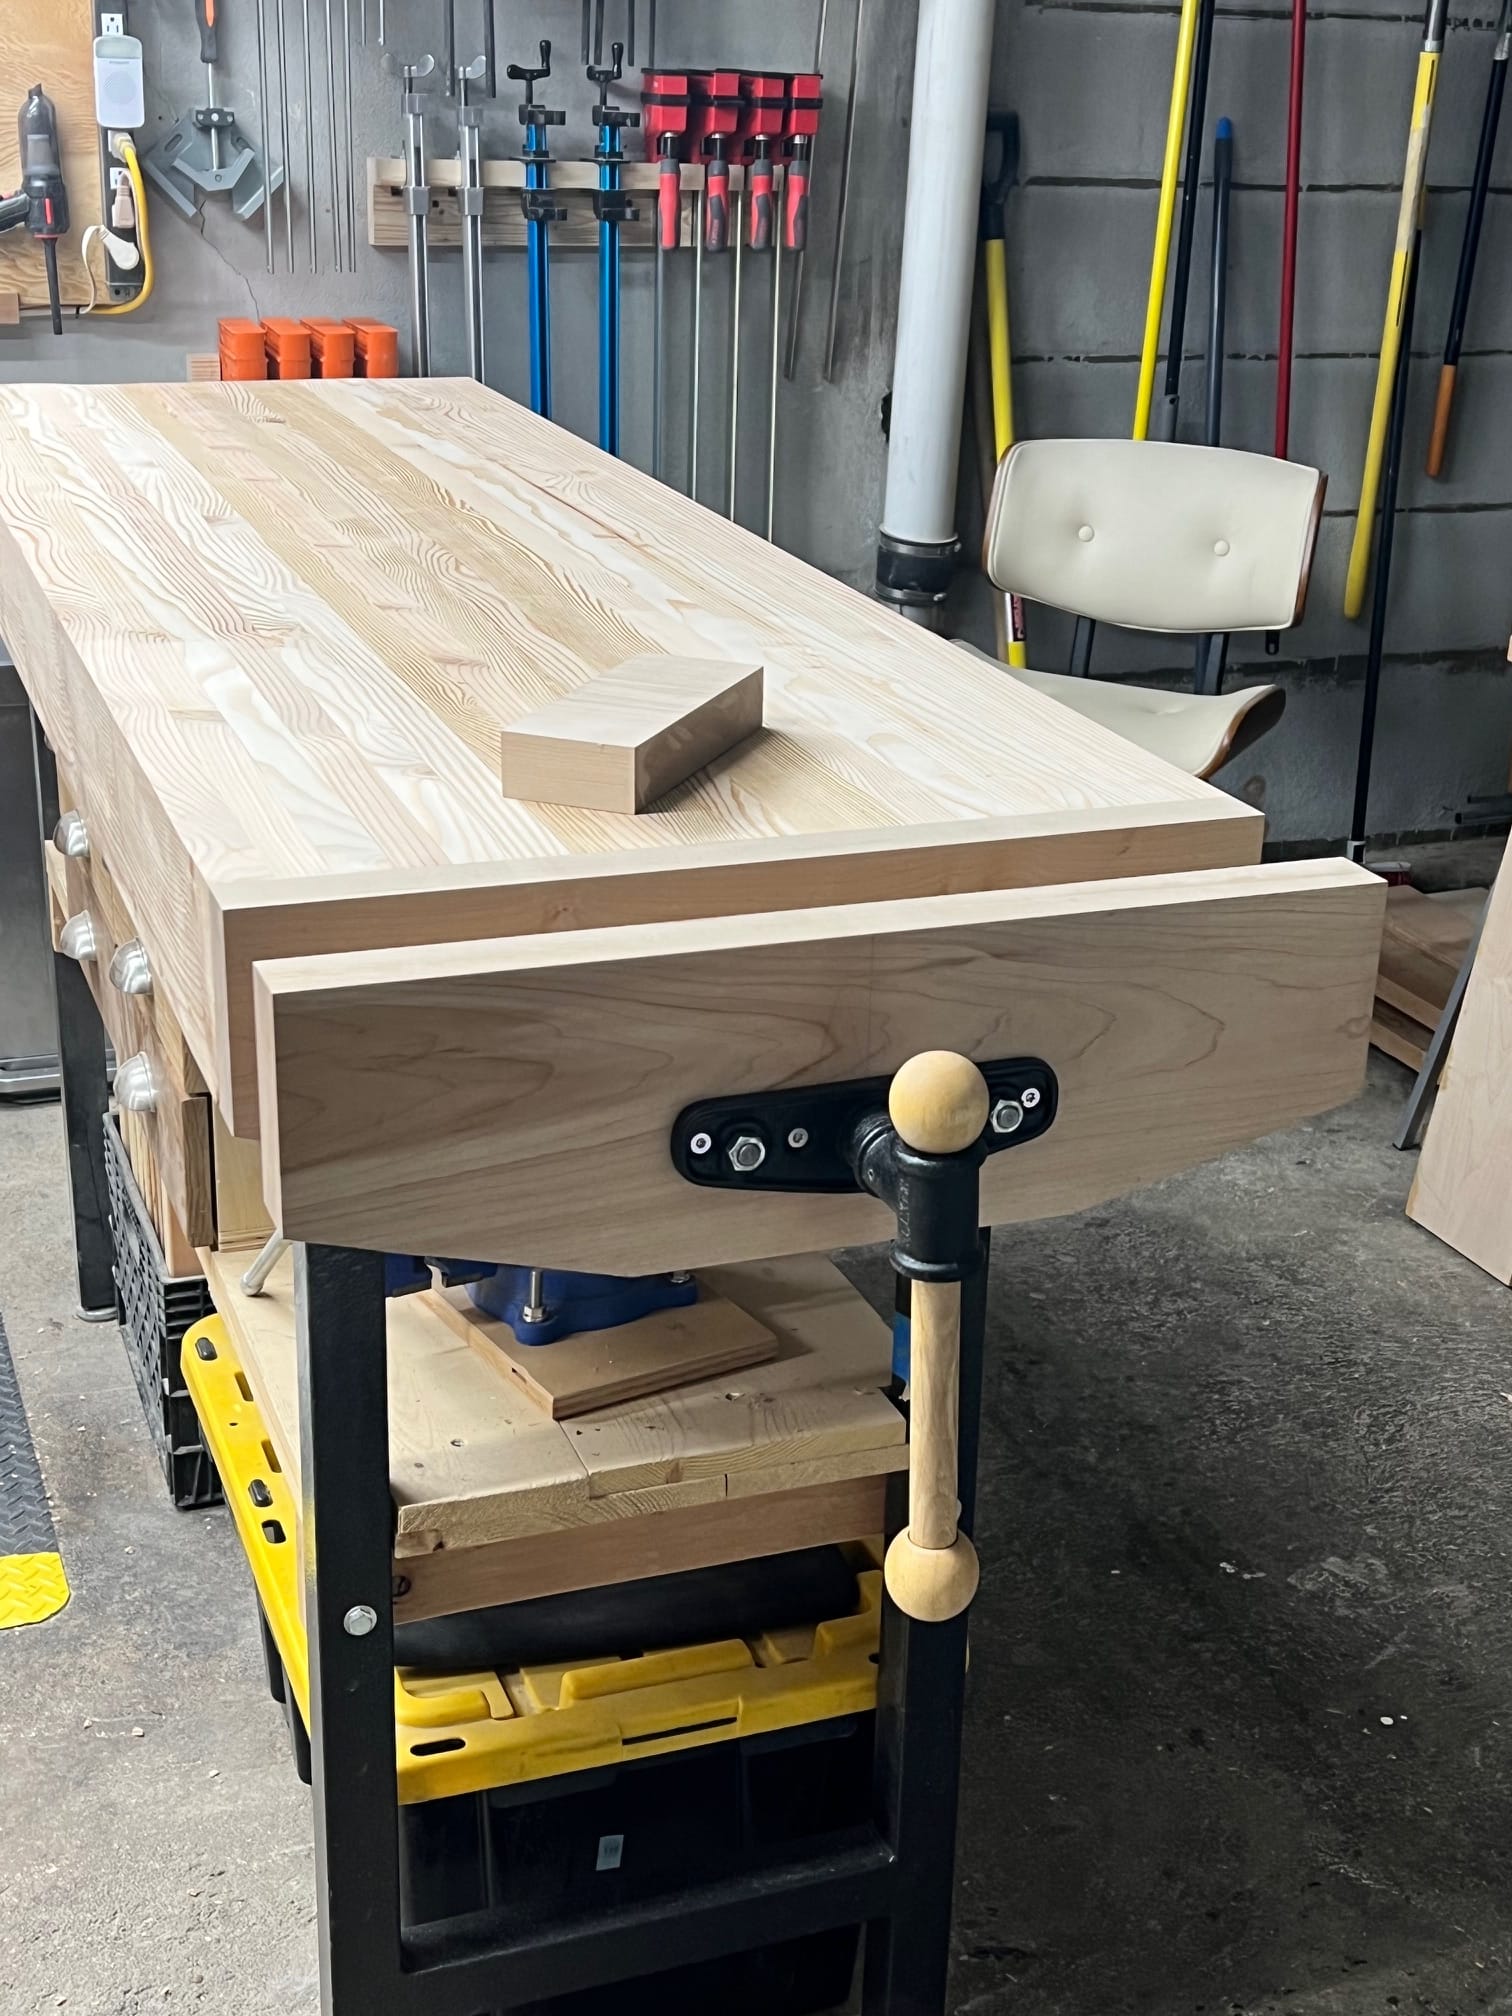
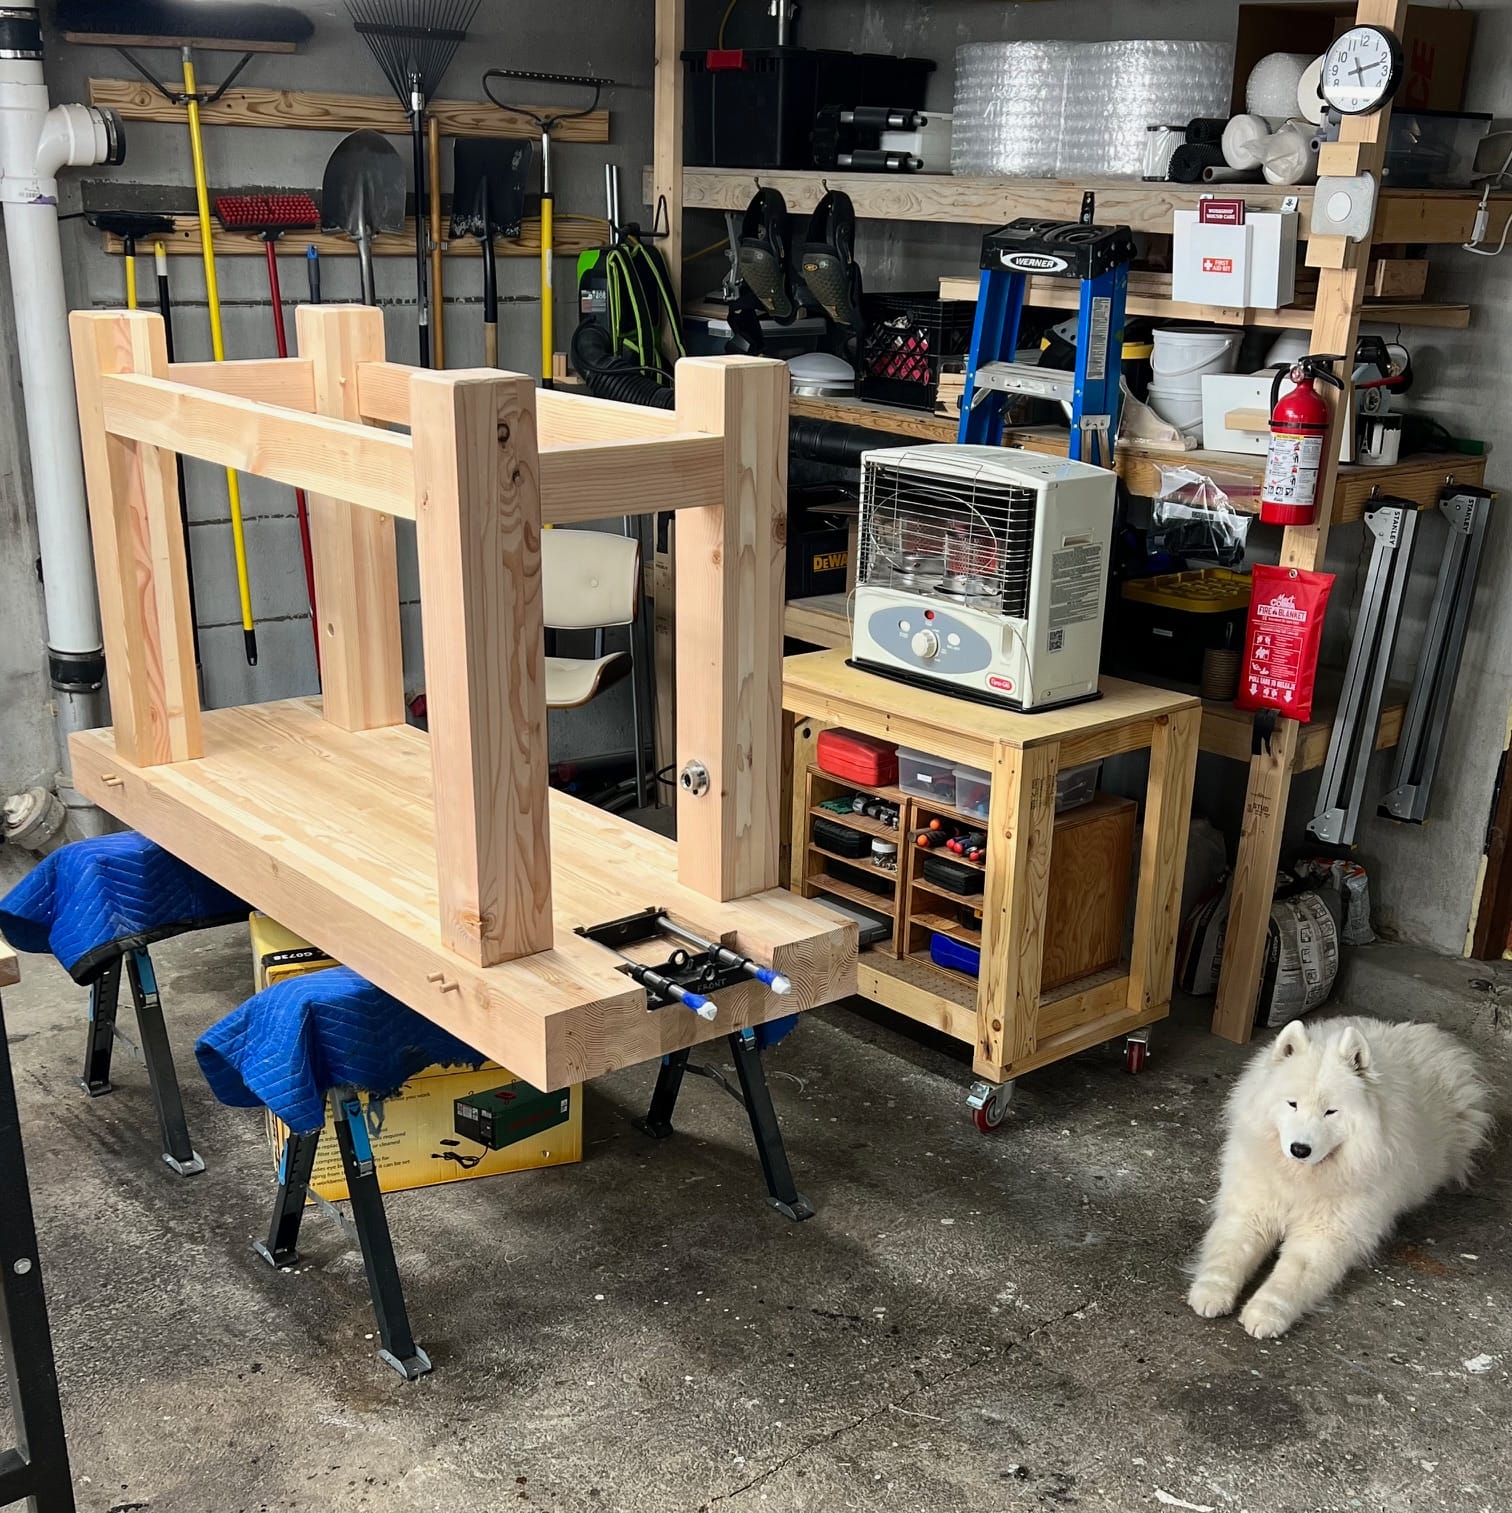
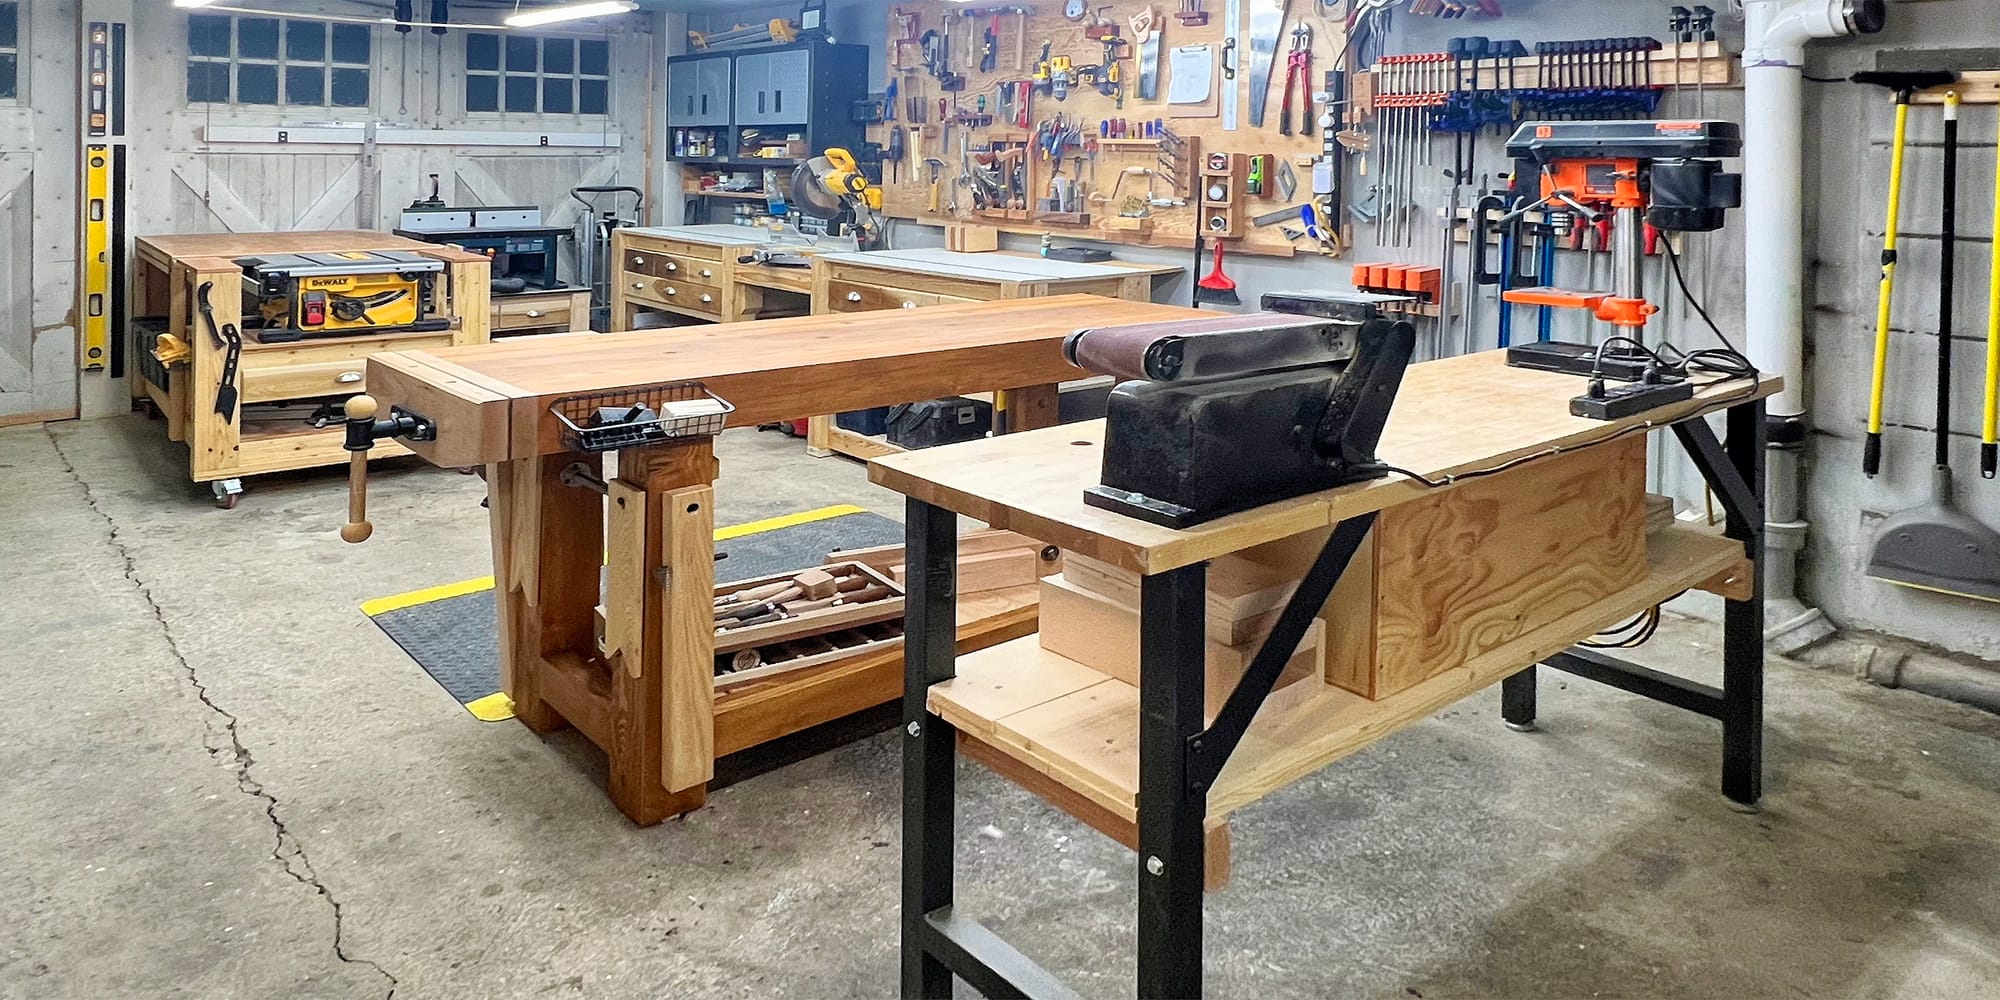
A few of the many work-holding features of the bench. Between the weight of the bench (over 300 pounds) and the sturdiness of the vises and holdfast, there are many ways to make a piece of wood stay perfectly still while sawing or chiseling.
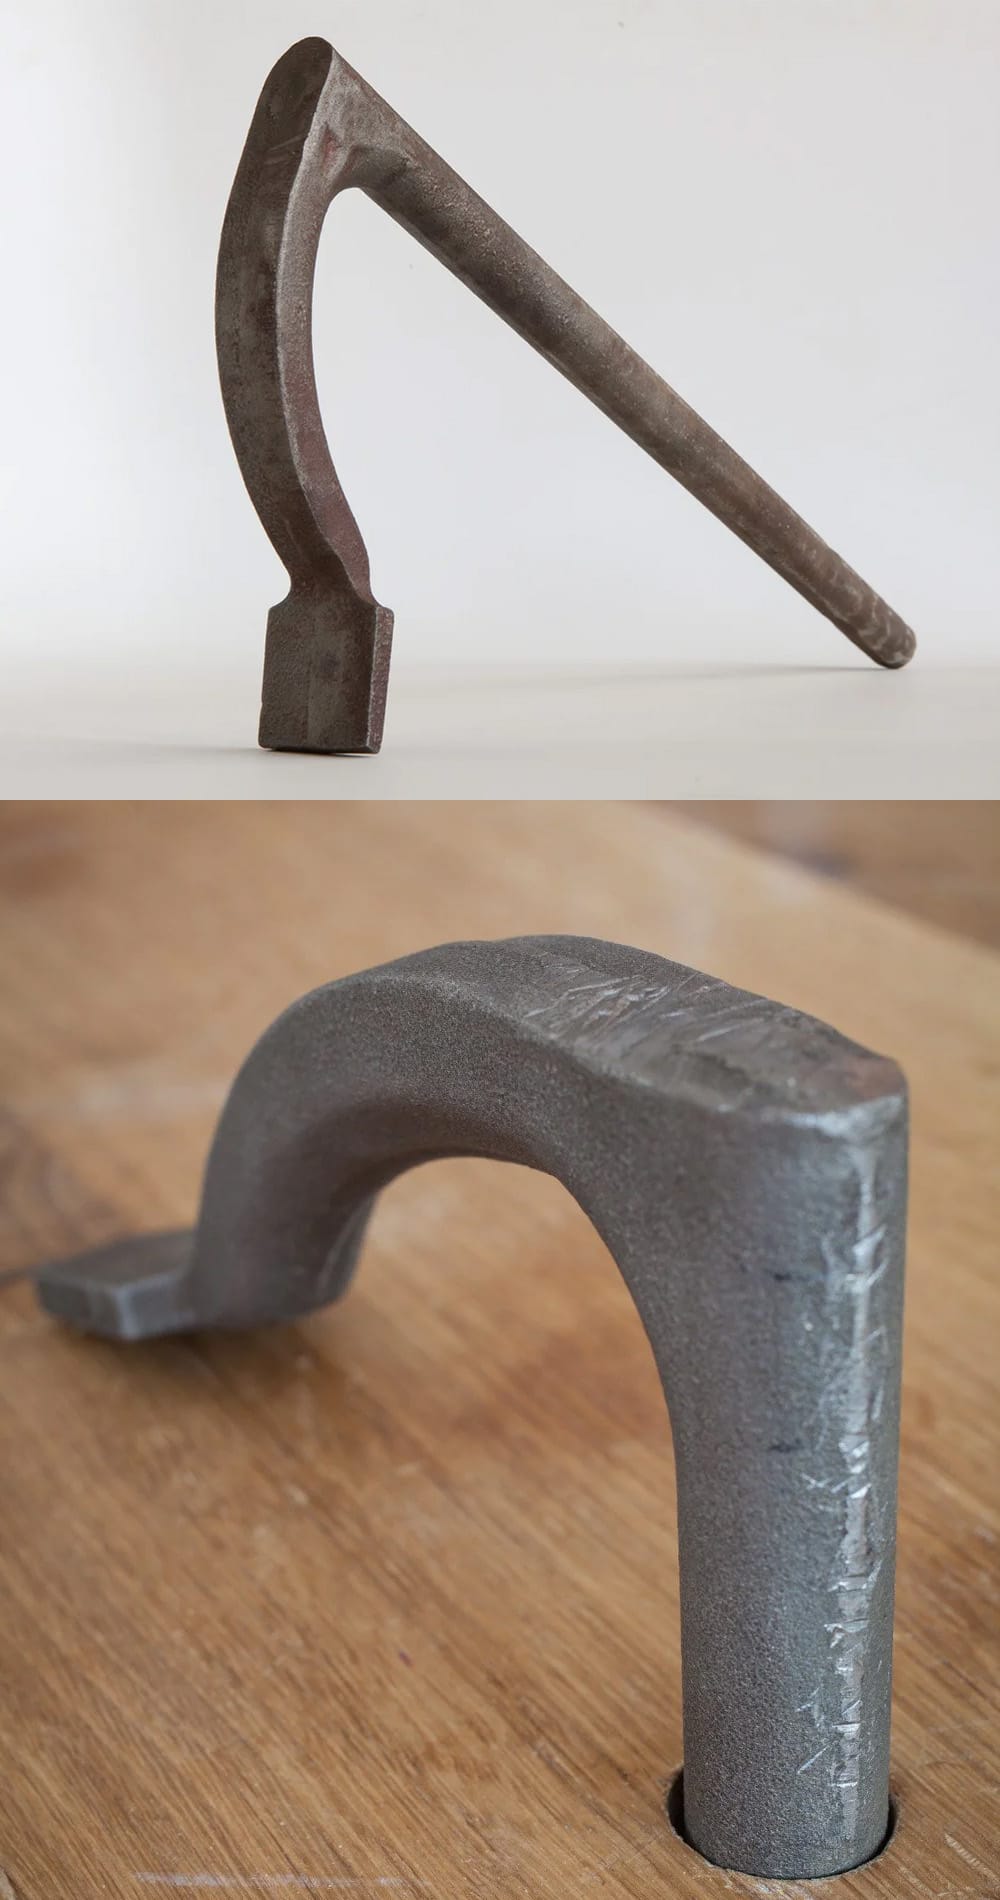
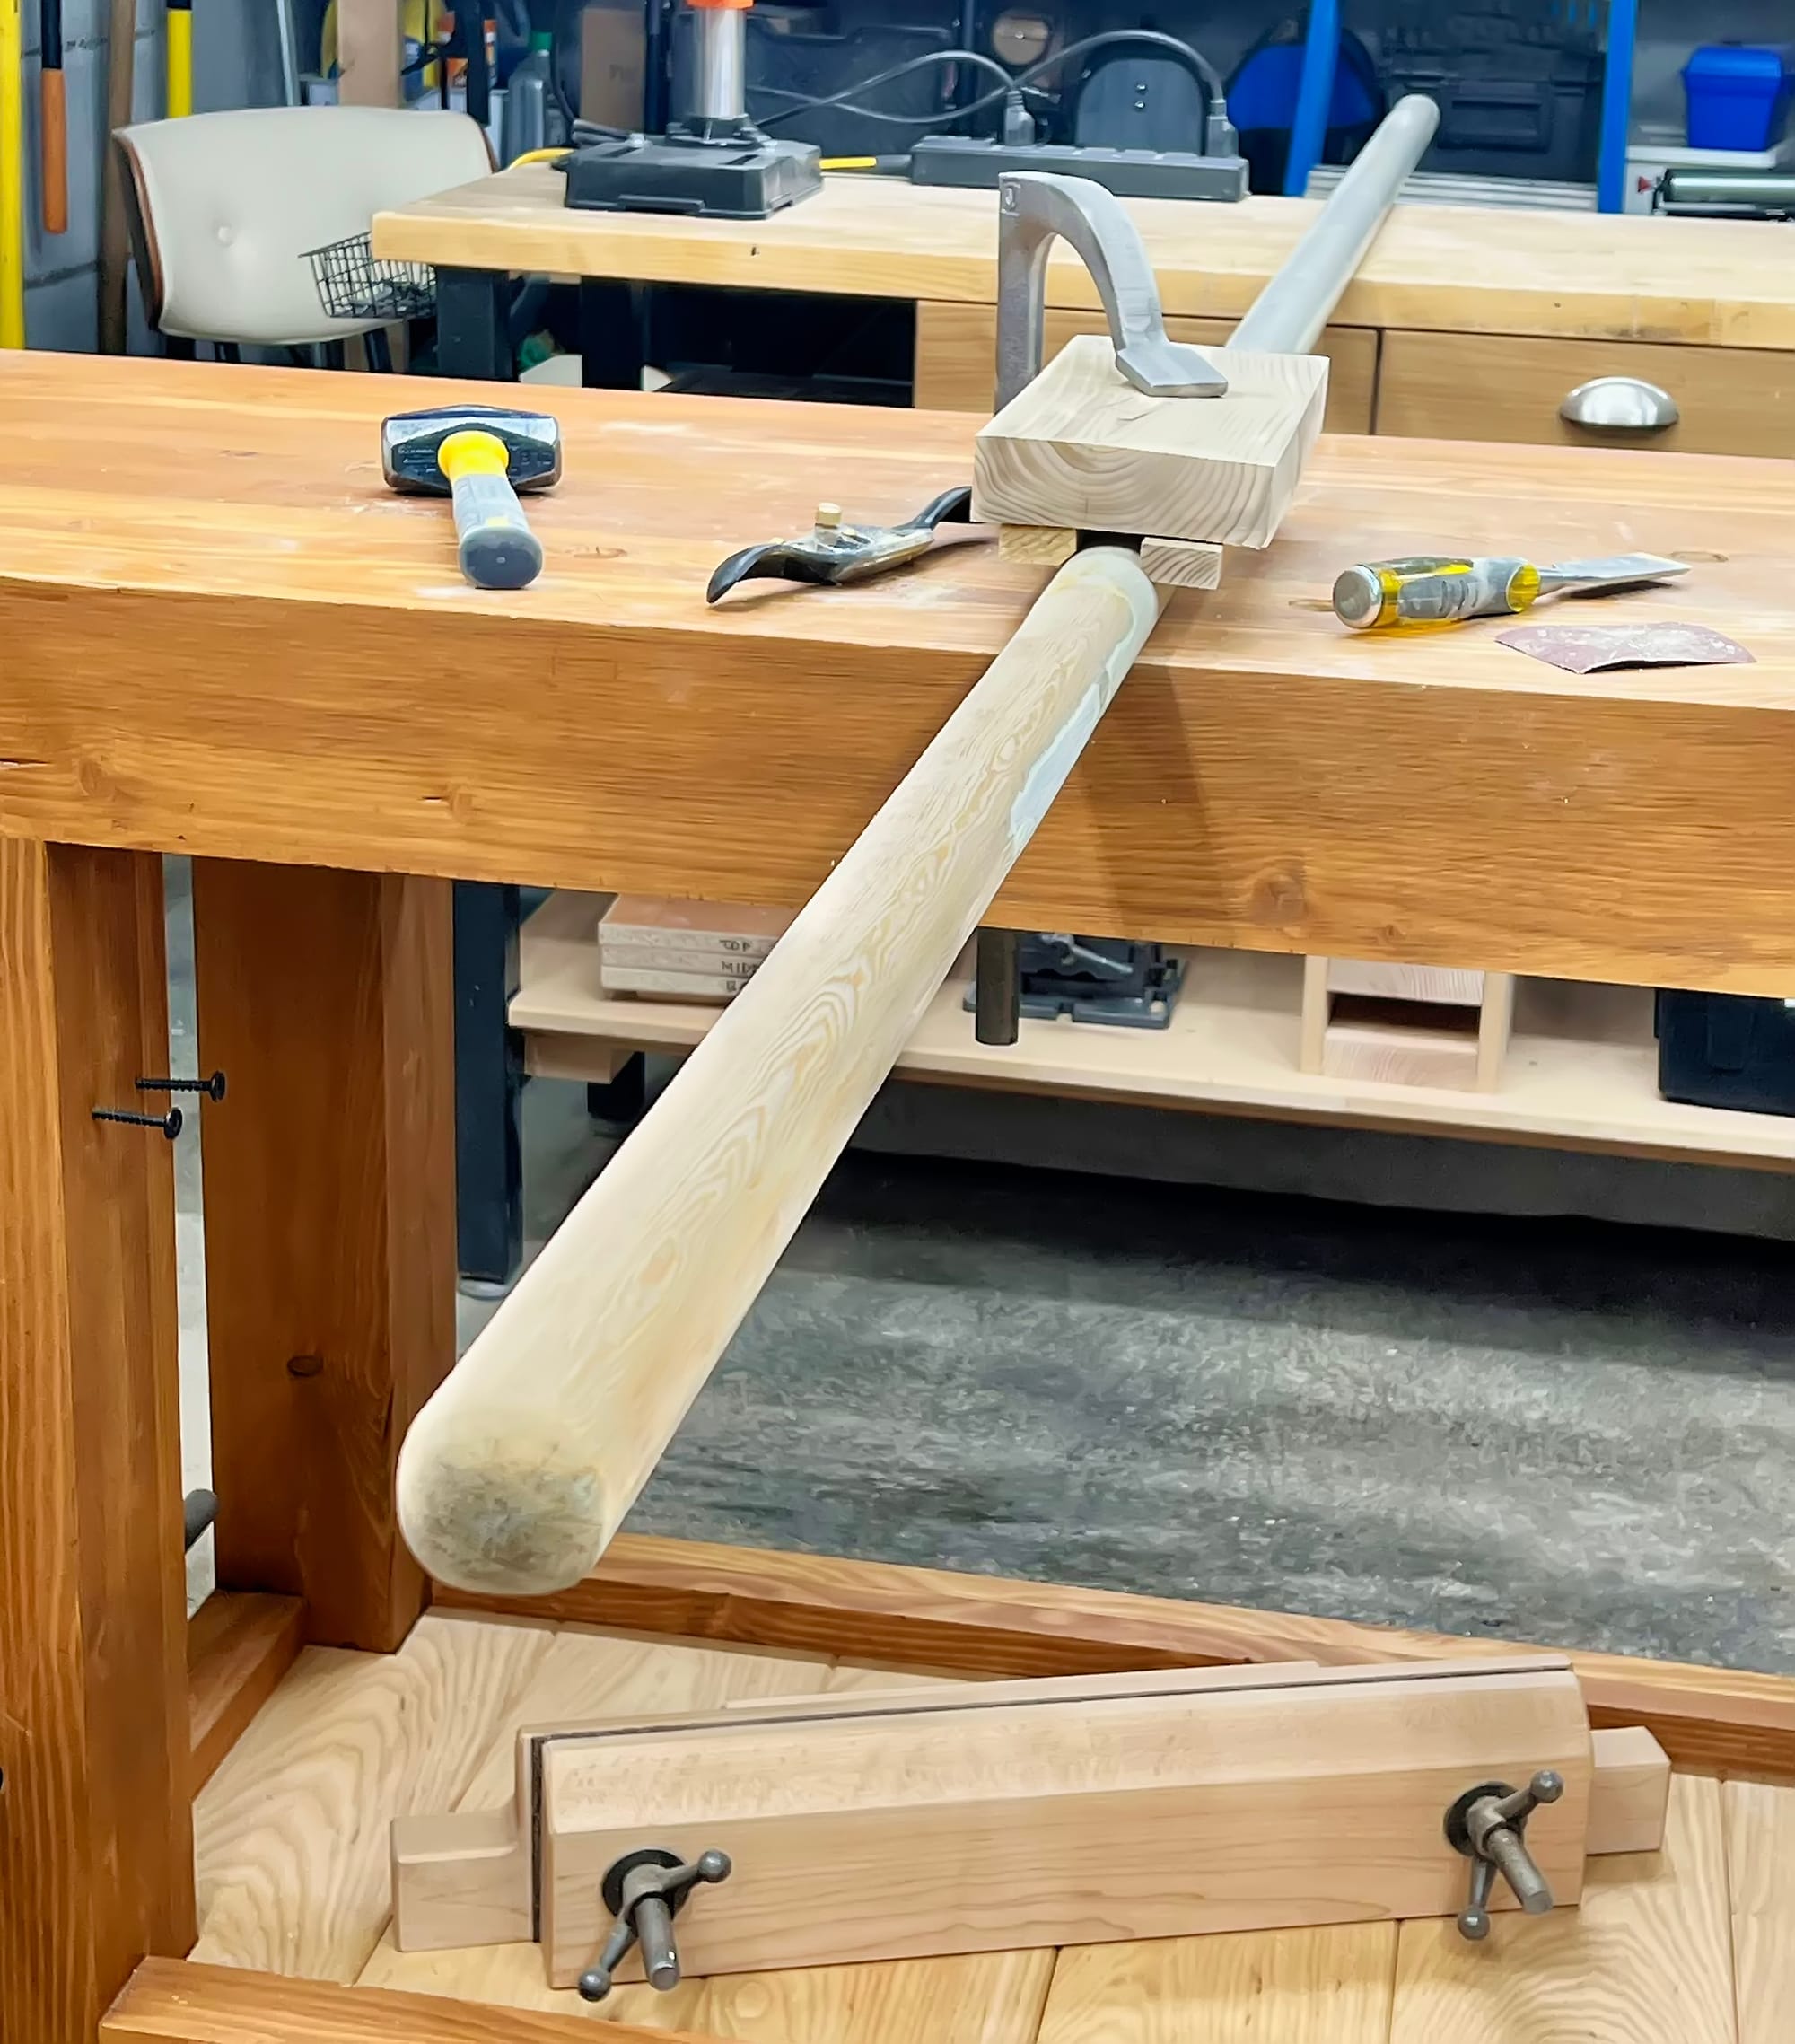
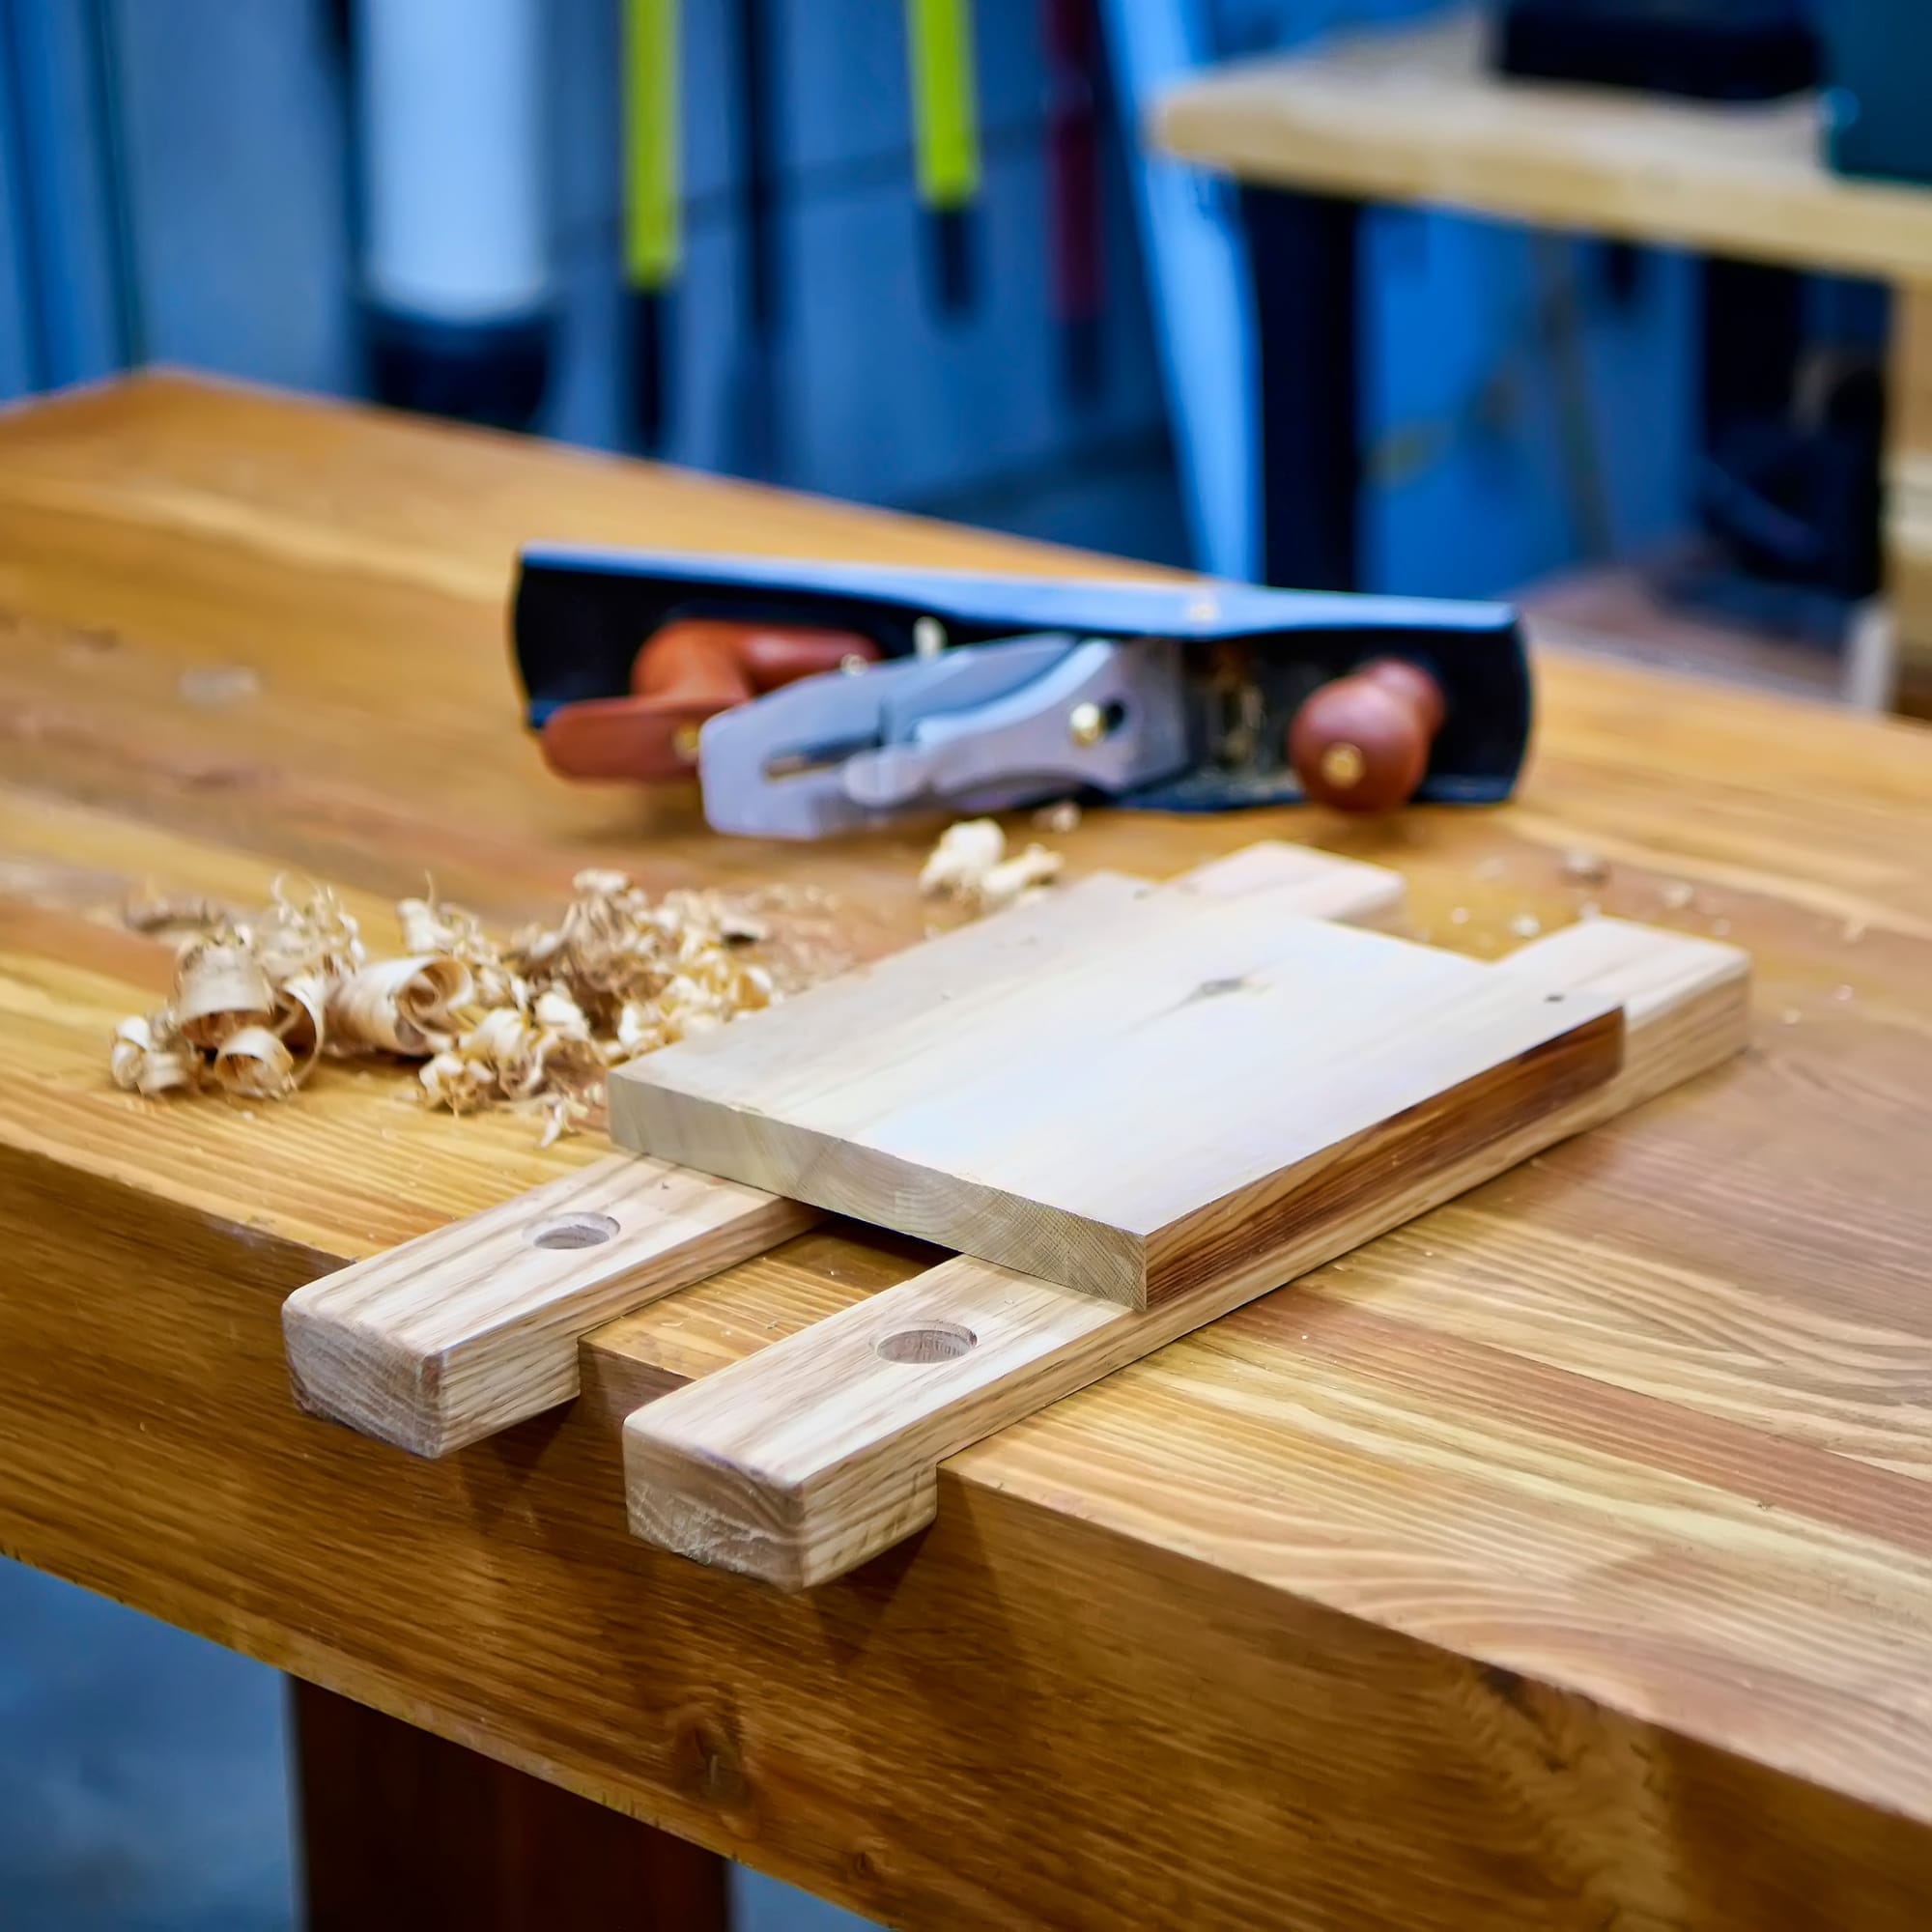
The Crucible ductile iron holdfast (available from Lost Art Press) is my favorite work-holding device. It's based on an old French design and it works extremely well: one tap from a mallet and it locks into place, another tap to loosen it. The thunk it makes has become the sound of my shop, much more so than the whir of power tools, and I love it. On the right is an example of making a jig to work with the holdfast: a few scraps of wood nailed together to hold the 11 foot long railing for our basement stairs while I scraped and sanded it.
I am now a big fan of the Anarchist's Workbench (get your free PDF here), but I didn't follow those instructions in every detail. My bench is shorter (6 feet long instead of 8 feet), a little deeper (24 inches instead of 22 inches), and much taller (39 inches instead of 28-36 inches), for reasons I don't feel like explaining. And I've installed not one, not two, but three vises, in part because I wanted to make all three of them. I also didn't wait as long as Chris recommends to cure my lumber, in part because I wanted to get it done before winter set in; so I may need to deal with some wood movement eventually. But overall, I'm happy with my choices.