


I've enjoyed getting my workshop set up over the last few years. In the first year after I retired in 2023, I bought quite a few tools, but I recently realized that I haven't bought a new tool in quite some time.
I think the only new tool I've picked up in the last year was a paint sprayer that I got last spring for the kitchen cabinets project. That sprayer definitely isn't a "favorite" for me. It's a royal pain in the ass to set up and to clean up afterward – useful for a large project, but not fun.
This post is about some tools that are fun, in my opinion. Some of them were predictable (e.g., I wanted a Festool Domino for a long time, so it's no surprise that I loved it when I got one), but a few are things I didn't expect to enjoy nearly as much as I did. And some were expensive, but some were very inexpensive – the price I paid for these tools ranged from a few dollars to over $1300.
in no particular order, here are a few tools I wouldn't want to live without ...
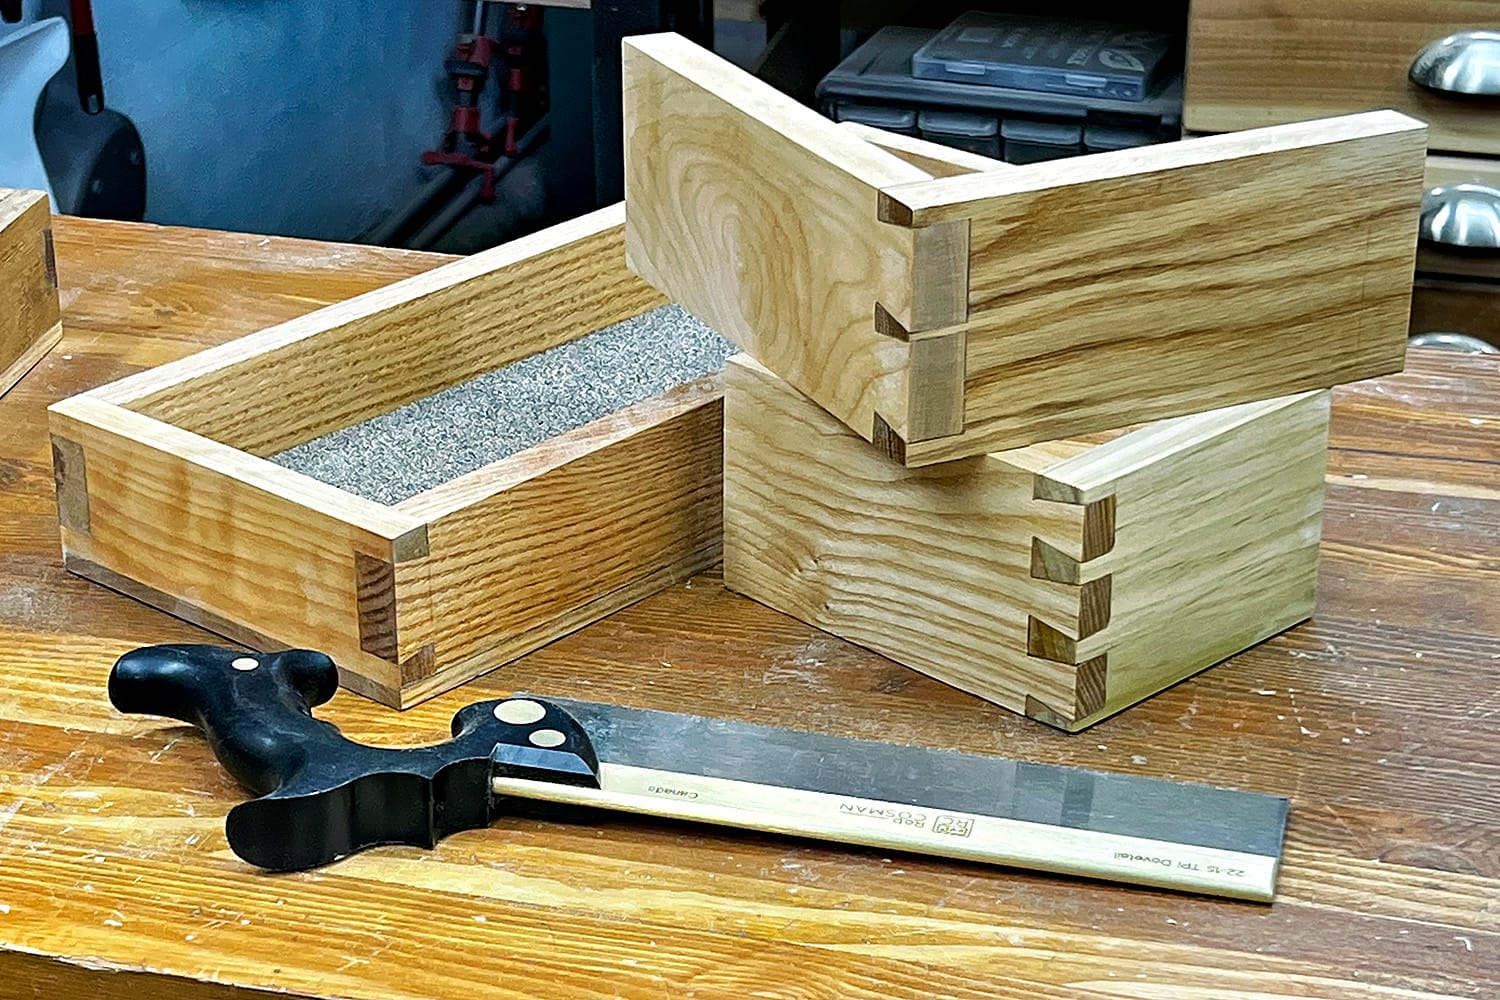
Rob Cosman Dovetail Saw
I think you'd have to try sawing accurate small cuts with other hand saws for a while (as I did) before you can fully appreciate the amazing ergonomics of this saw and the way it instantly ups your game to a new level. It's relatively small (a 10-inch blade) and very heavy for its size due to the thick brass back, coming in at over 22 ounces.
It's important to use this saw exactly as Rob has designed it to be used. Hold it correctly, start the cut correctly (taking advantage of the 22 teeth per inch "starting teeth" out at the end of the blade), and let the weight of the brass back apply a consistent downward pressure while you just slide the blade back and forth in the cut. If you do all of those things correctly, the resulting precision and control feels downright magical.
Rob Cosman is famous for being one of the world's leading experts on hand-cut dovetails, and he has taught thousands of woodworkers at the classes he runs in his shop in Nova Scotia. If you want to see the master in action, here's a video of him cutting dovetails with his saw when he first released it 18 years ago. He has improved on the technique shown in that video, adding his "tape ledge" technique and using his Kerf X10 accessory (I got mine here), but the basics have remained the same.
I never would have thought I could enjoy a hand saw this much. Sometimes when I need to cut a piece of wood, I start to step up to my big miter saw and then I see the Rob Cosman saw hanging on the wall and decide to cut it by hand instead, just for the visceral satisfaction of using this saw!
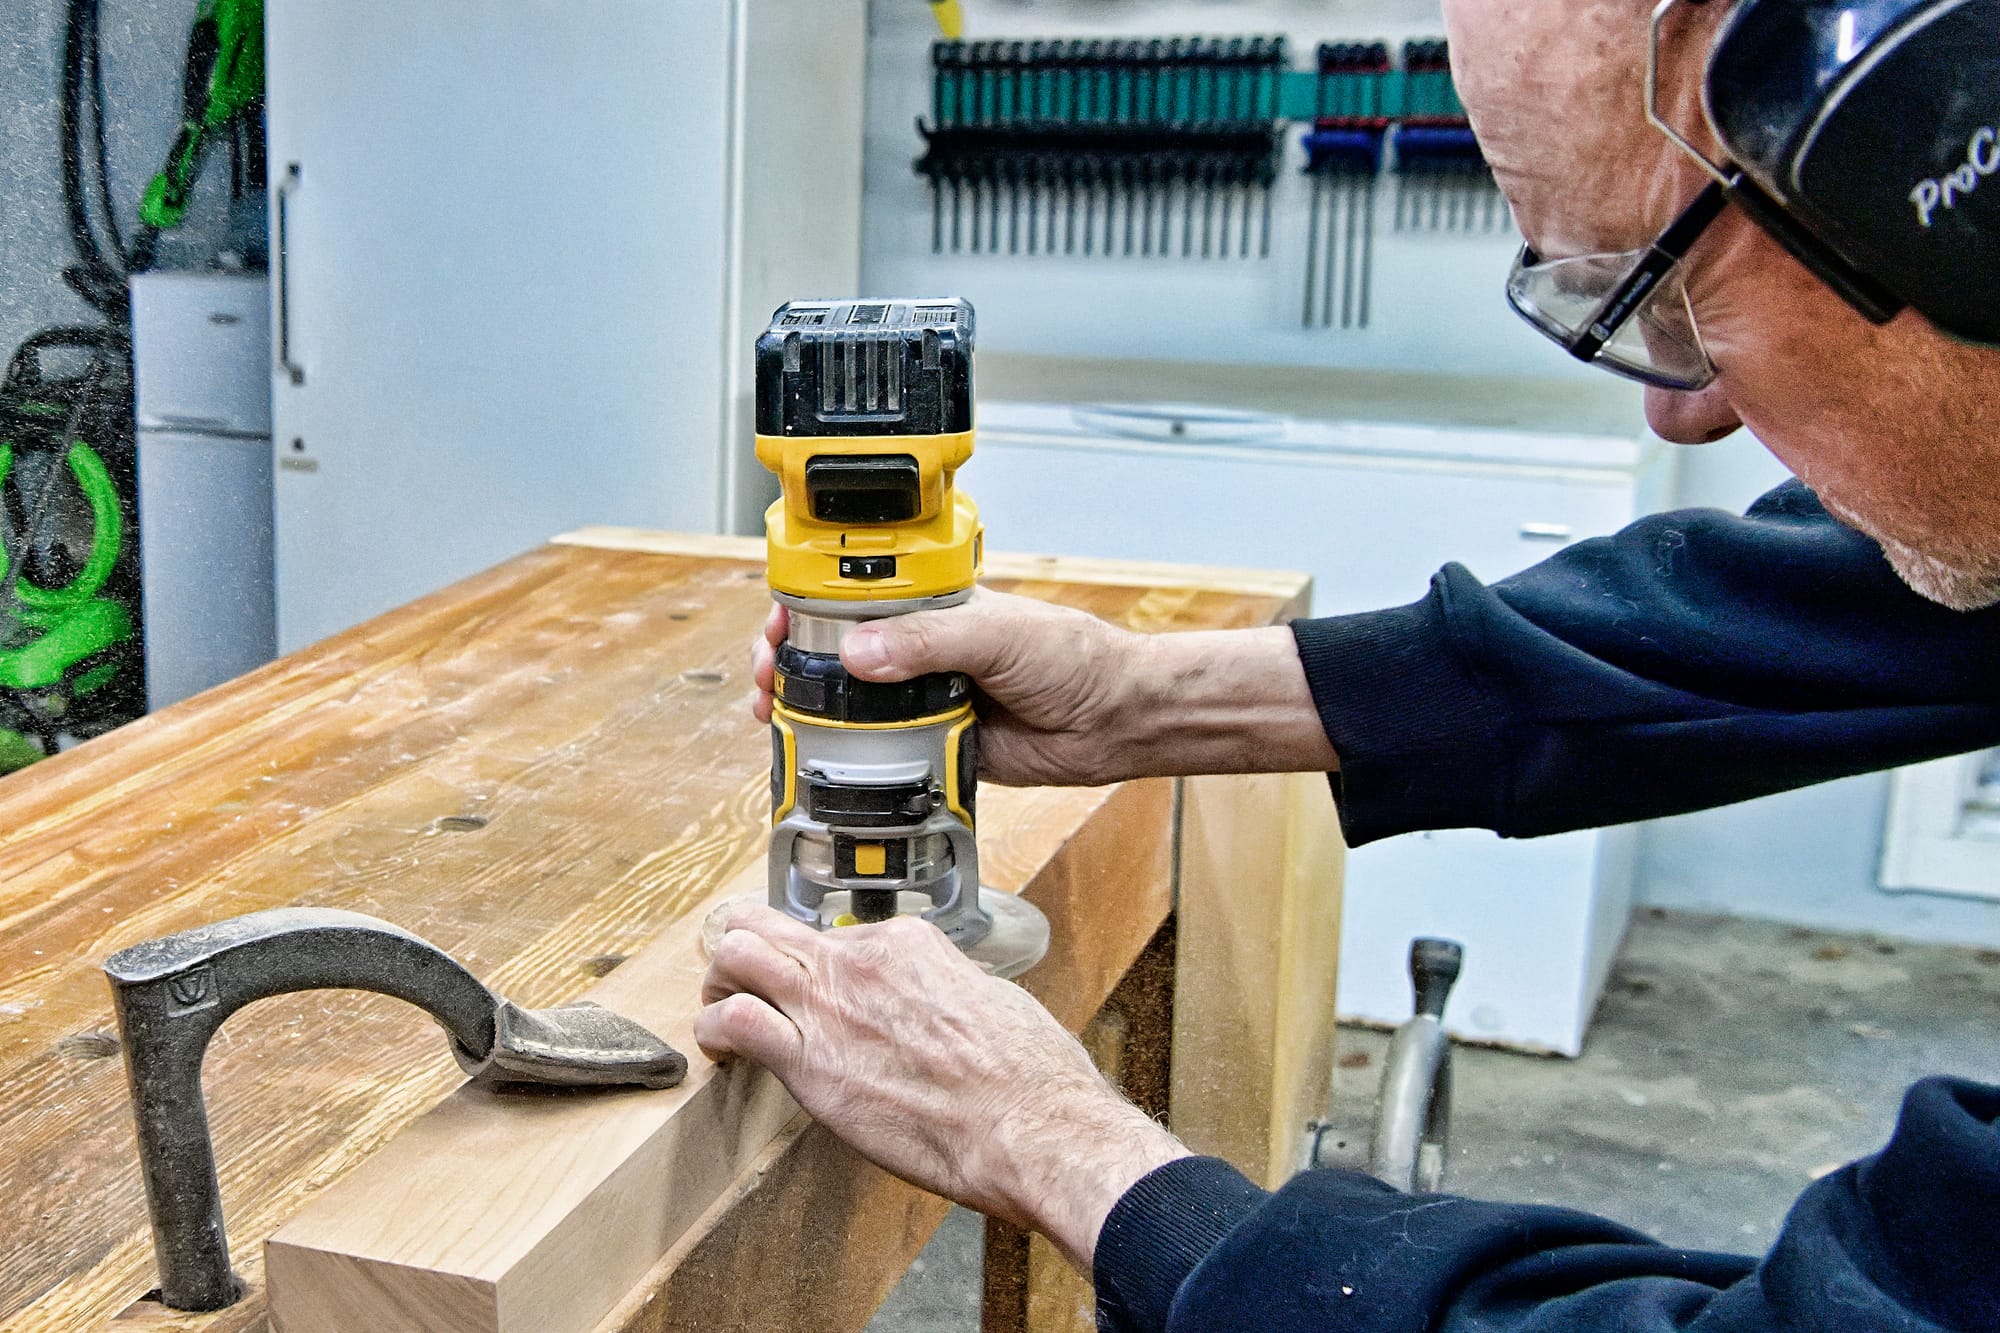
DeWALT DCW600 trim router
When I was first getting into woodworking, I once saw a guy in a video mention that he owned nine routers. That sounded utterly insane to me, and I wrote him off as a guy with some sort of kinky router obsession, or maybe just a guy with too much money on his hands.
But now I totally get it. No one router can do everything you might need to do with a router. The big strong ones that can handle super demanding jobs are too heavy and clumsy for delicate trim work, and the nicely ergonomic trim routers are too underpowered for heavy duty applications. And there are certain router bits that you use often, sometimes just for a few seconds – a nice roundover bit, for example, that puts a smooth rounded corner on a workpiece. Swapping bits back and forth to do that takes far longer than the work itself, and that's why many woodworkers have a dedicated trim router that is always loaded with their favorite roundover bit, sitting near the workbench and ready to go on a moment's notice.
That said, my shop is pretty low-budget, and routers can get expensive, so I have three:
- A versatile DeWALT DCW620B plunge router, with advanced safety features and ultra-clean integrated dust collection. This is the latest model from DeWALT, and was released with much fanfare last year – here's a review.
- A powerful 2-1/4 horsepower DeWALT DW618 12-amp corded router, which is the one I keep mounted in my router table at all times. This one has fewer features than the other two, it's just a simple sturdy workhorse.
- A lightweight and easy to use DeWALT DCW600 trim router, which is the subject of this post. I use this fun little trim router for 90% of the things I need to do with a router, and only grab one of the other more powerful and expensive models when I absolutely need to.
I paid $140 for mine when they first came out about six years ago, but they're down to $121 now here. And here's an in-depth review if you want to learn more about why the DCW600 is so popular.
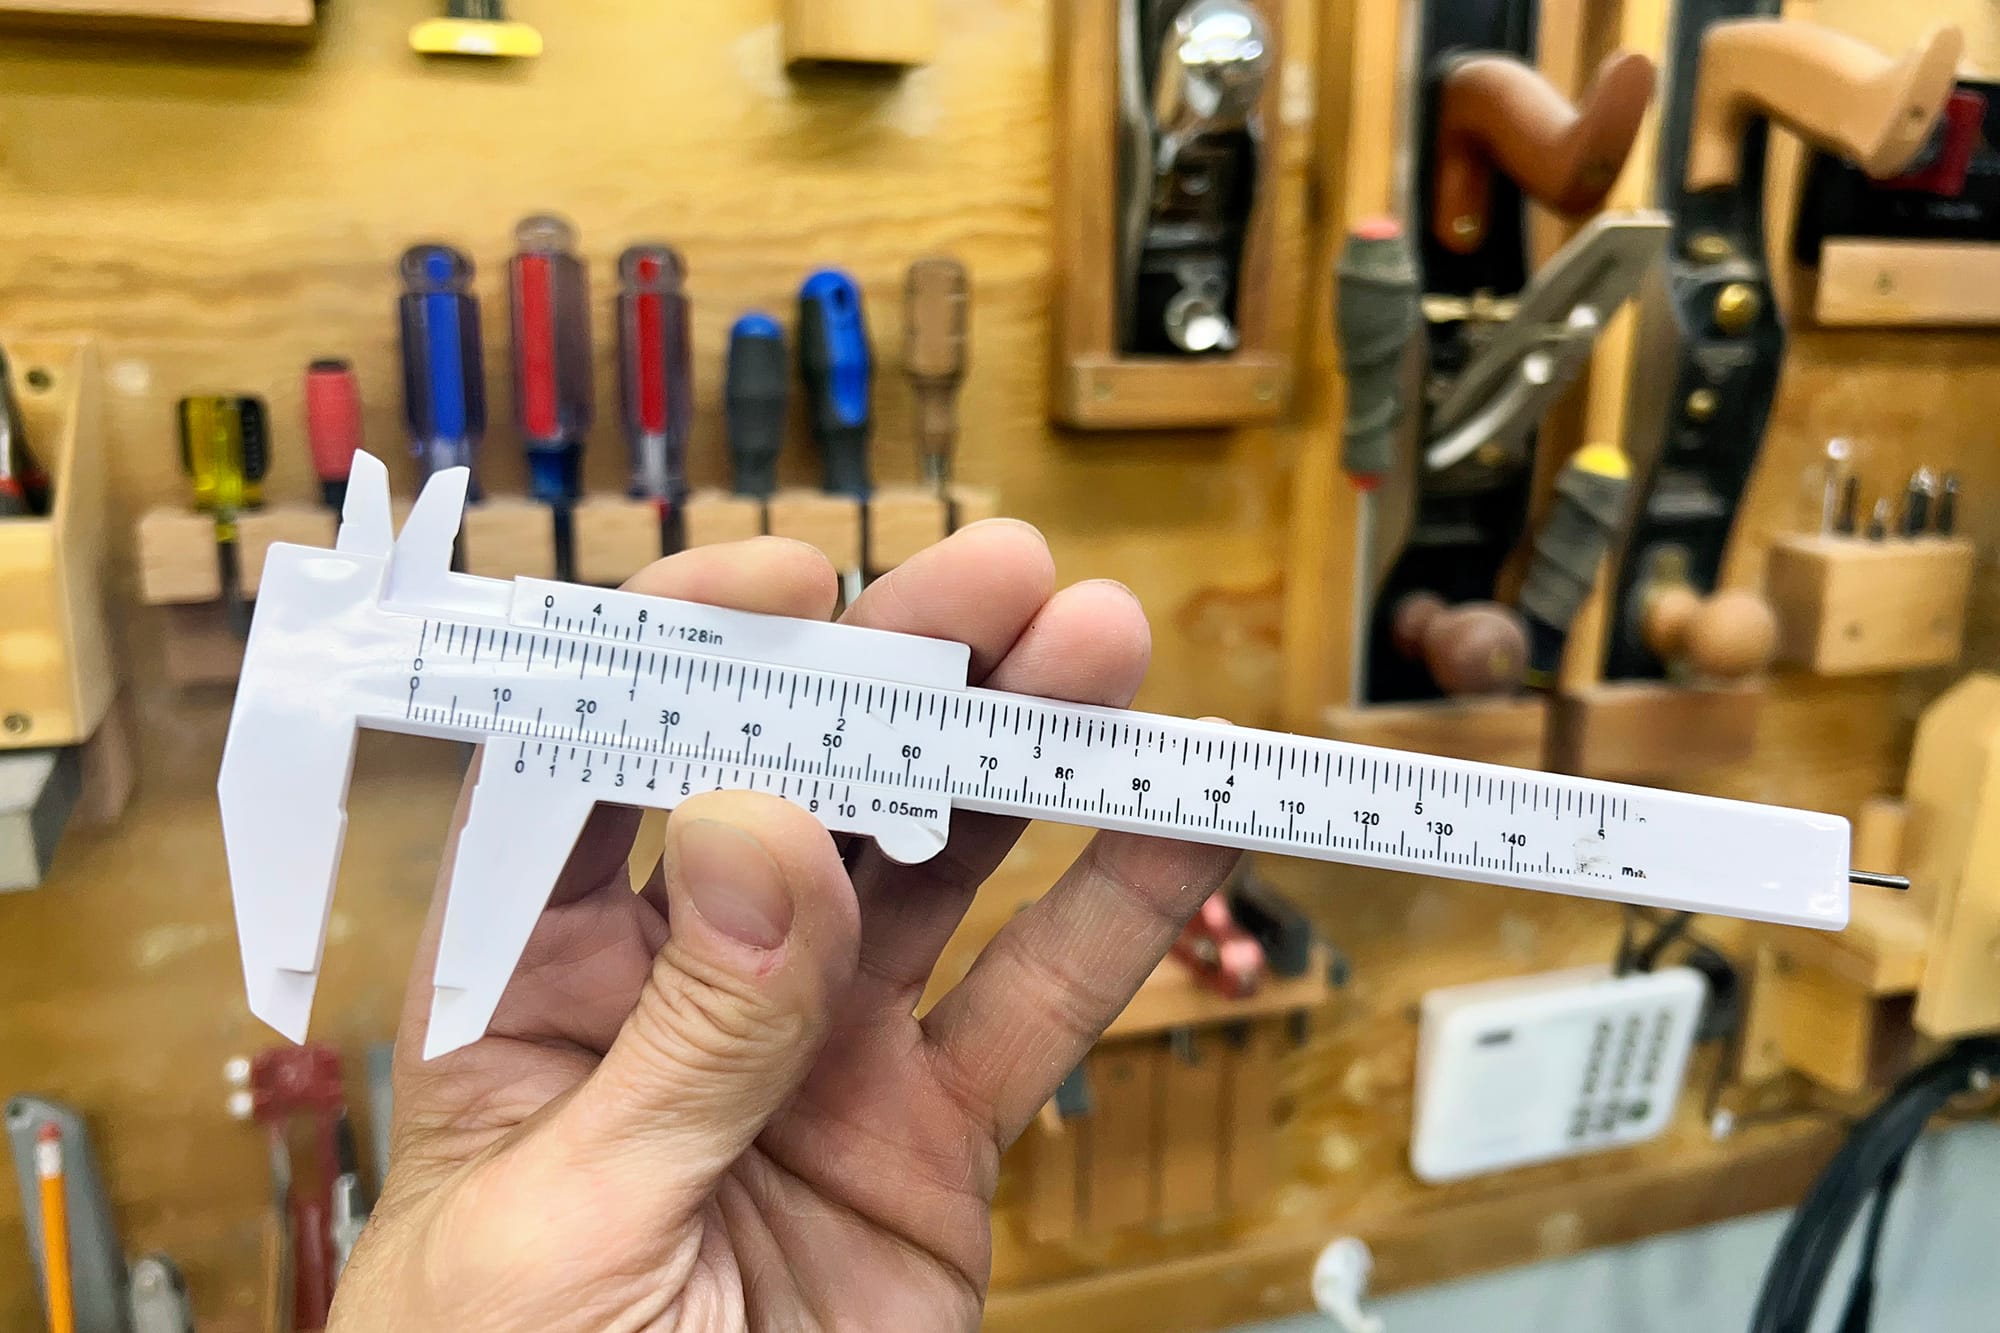
Plastic calipers
This is the least expensive tool on my list – only $6.99 here, and for that price you get a two-pack!
I have all sorts of measuring devices in my shop: multiple tape measures of various sizes and types, various rulers, a laser measuring devices, and a variety of fixed squares and combination squares. I also have a very accurate set of Helios vernier calipers that I inherited from my Dad, which are great for if you ever need to measure something to within 1/1000th of an inch accuracy.
But for most measurements, close is good enough. And for quick measurement of small things – the thickness of a board, or a drill bit – these plastic calipers are more than accurate enough. For example, I sometimes need to distinguish a 5mm diameter Festool Domino bit from the 6mm bit, and I always grab my plastic calipers to verify the size.
They're quick and easy to use, and they're so cheap that I feel free to bang them around with impunity. They're lightweight plastic, so they don't suffer any damage when dropped on a concrete floor, as I've done countless times.
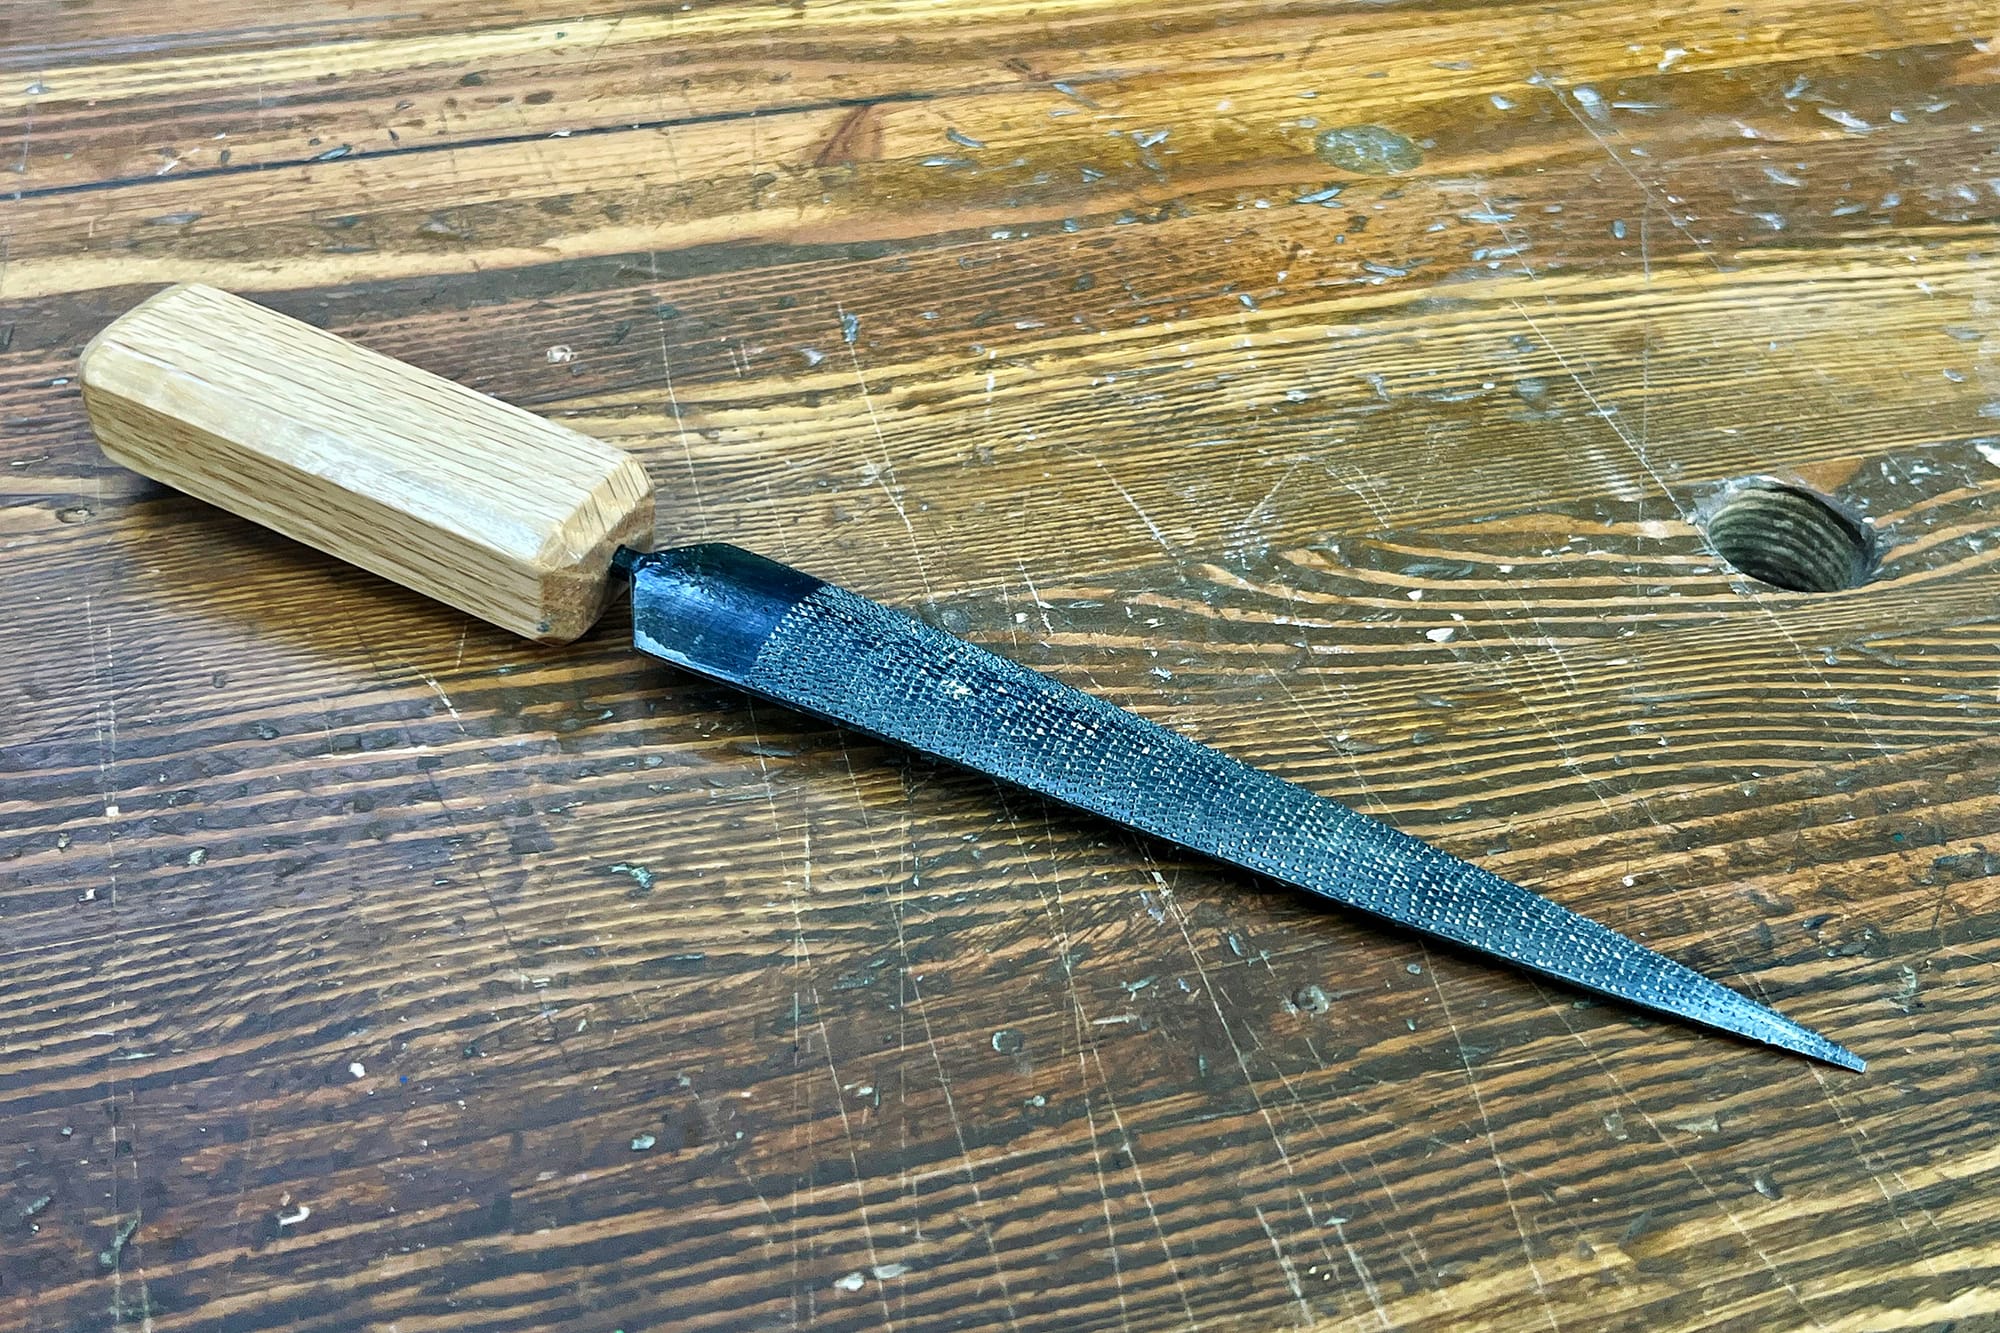
Dragon hand-cut rasp
I follow a bunch of high-end woodworkers on YouTube, including a British luthier (guitar maker) who goes by Daisy Tempest. I was watching one of her videos a couple of years ago, and she was using a hand-held rasp to shape the headstock of a custom guitar she was building.
She made it look so easy. It was as if the wood was magically conforming to her vision of the shape she wanted. Compared to my own work with rasps, she seemed to be using less effort, but removing material much more quickly, and the resulting surface looked very smooth, as if it would need very little sanding.
At the end of that clip, she casually mentioned how much she loves hand-cut rasps and would never use a machine-cut rasp for that kind of work. I had never heard of the difference! I started researching the topic, and eventually found the rasp that she had been using: a small fine-toothed Dragon model.
I bought mine from StewMac for $68 here. (StewMac is the world's leading supplier of hand tools for luthiers.) It didn't come with a handle, so I made a simple one with flat sides, so that I can feel the alignment better for precision work.
This rasp makes it a pleasure to shape a piece of wood. Since getting it, I've rarely touched any of my other rasps. The beauty of a hand-cut rasp is that the sharp little cutting points on the surface are randomly distributed. This makes it cut faster, and it also means you don't leave little grooves in the workpiece like a machine-cut rasp does because it's cutting points are all arranged in a uniform grid pattern.
I'm with Daisy – once you go hand-cut, it's hard to go back. I'll probably end up buying a larger hand-cut rasp eventually, and then all of my cheap machine-cut rasps will be headed to the Goodwill.
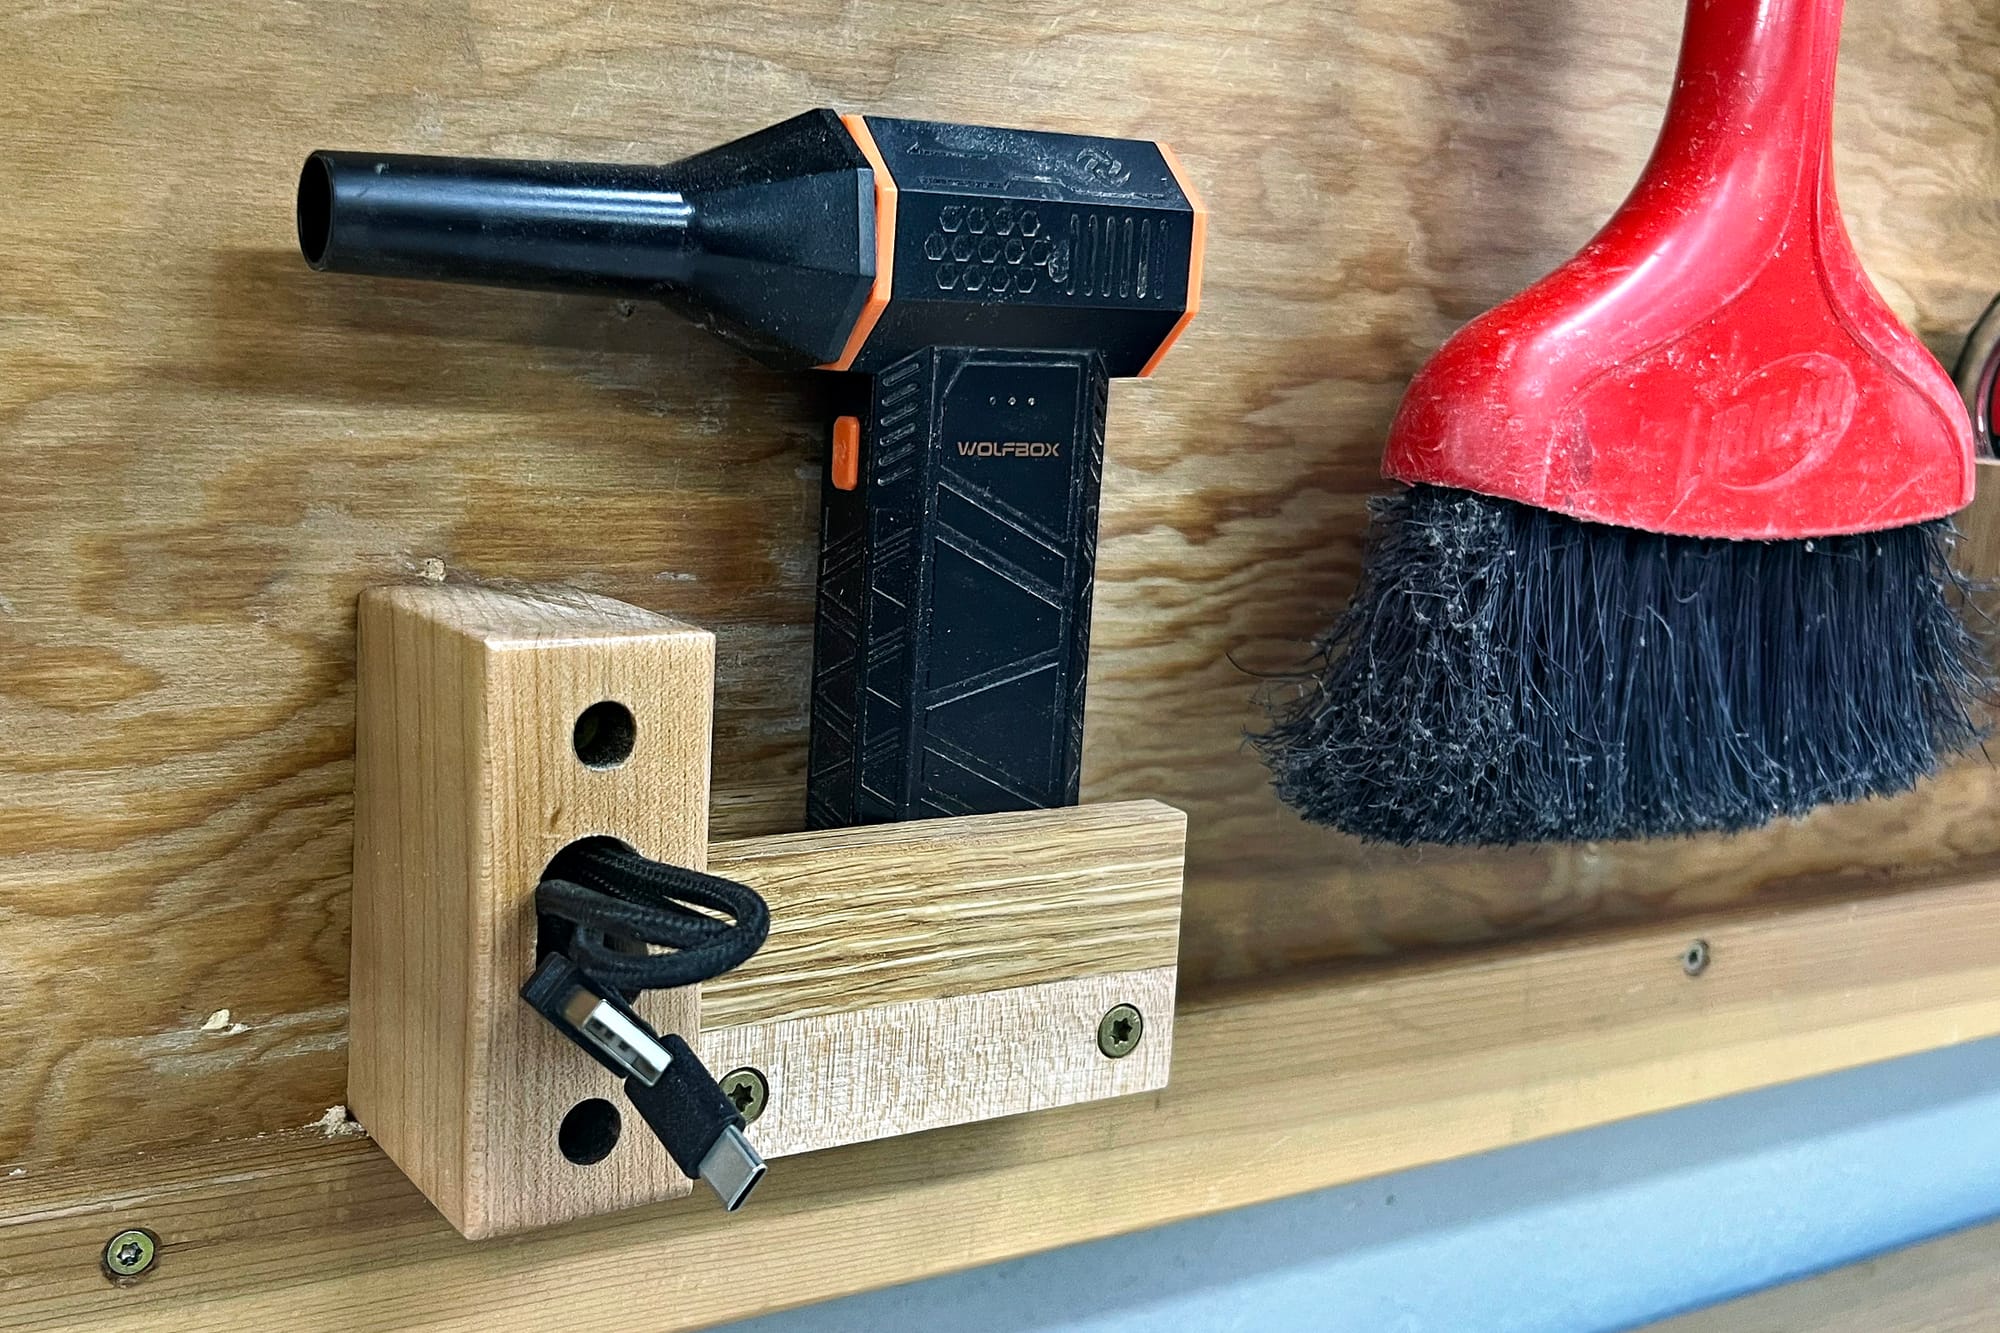
WOLFBOX MegaFlow 50 Compressed Air Duster
I got mine for $40 here.
I often need to blow dust and sawdust out of power tools. Table saws, routers, miter saws, circular saws, and other tools all collect sawdust in hard-to-reach spots internally, and that sawdust can eventually cause overheating and other issues.
I used to keep cans of compressed air on hand for this. It works, but the cost adds up, and they're not great for the environment either.
Then rechargeable little handheld blowers started appearing on the market a few years ago. I got one, found it so underpowered it was useless, and then I got another model. That one worked OK, but could barely hold a charge and eventually stopped working altogether.
The WOLFBOX MegaFlow 50 is my third rechargeable model, and it's been great. It's plenty powerful for what I use it for, holds a charge for a long time, and so far – after a year of regular use – seems to be sturdy and dependable. I finally have absolutely no cans of compressed air in the shop!
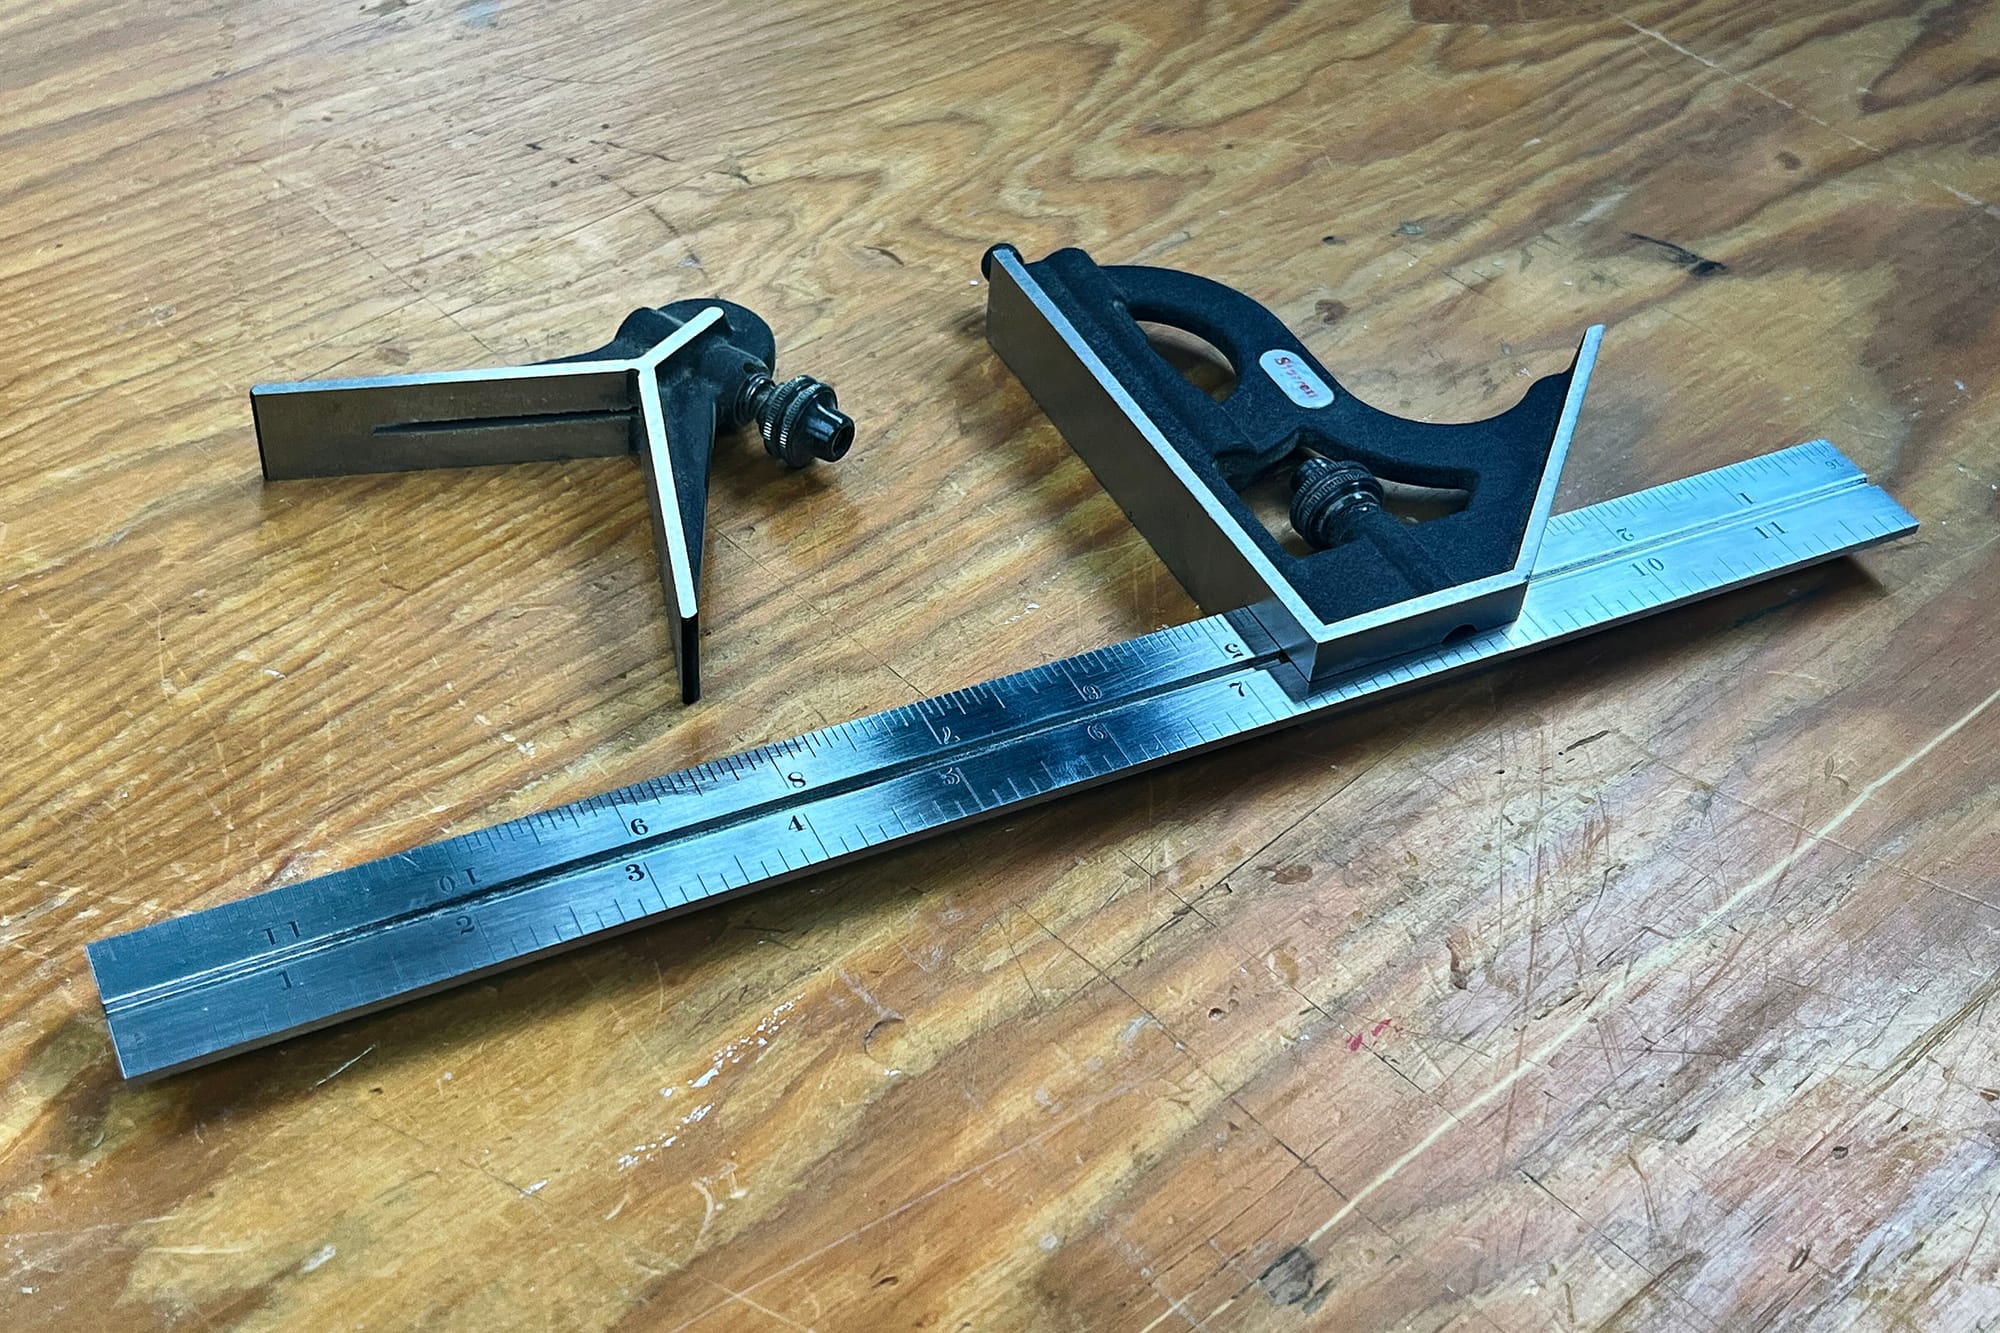
Starrett 12" steel combination square
I've owned many sliding combination squares, and they've all sucked. They're clumsy and harder to adjust than it seems they should be, and when you take them apart they're often surprisingly difficult to put back together.
A few years ago, I saw a woodworker on YouTube say that when it comes to combination squares "you get what you pay for," and that's why he used a Starrett square.
I wasn't familiar with the Starrett brand, so I did some research. Laroy S. Starrett was an inventor and businessman in the Northeastern US in the 19th century, and in 1878 he invented the sliding combination square. He started his company, L. S. Starrett Company, two years later in 1880, and began manufacturing combination squares. Soon he had invented a variety of other tools as well, and sold all of them under the Starrett name.
Starrett's innovation in combination squares was simple but important: he found a way to create a perfectly straight ruler, so that it would slide smoothly through the gap in the square head. The grinding process used to create straightedges at that time generated heat, and the heat tended to warp the metal, so straightedges were rarely perfectly straight. Starrett figured out how to solve this problem, and Starrett has been one of the world's leading manufacturers of sliding combination squares ever since. (They also make a wide variety of other patented tools now as well – see Starrett.com.)
Sold on the idea, I looked into getting a Starrett square. Yikes! I had never paid more that $20 for a square, and Starrett's simple 12-inch square sells for over $180! So I didn't order one. I mean, how good could they be?
And then, when I was building our bookcases a couple of years ago, I was telling Megan one evening about what a pain in the ass my combination square was, "but we can't afford a Starrett." She asked how much they were, I said $180, and she said go for it. I had one on the way to our house within a minute or two (from here). There may have been drinking involved.
And when it arrived, I was blown away. The ruler and the gap it slides in are machined with extreme accuracy, and the end result is that the square feels so smooth that you'd swear that it has been greased. But the metal is bone dry. That's just what a perfect fit feels like.
Thanks, Megan!
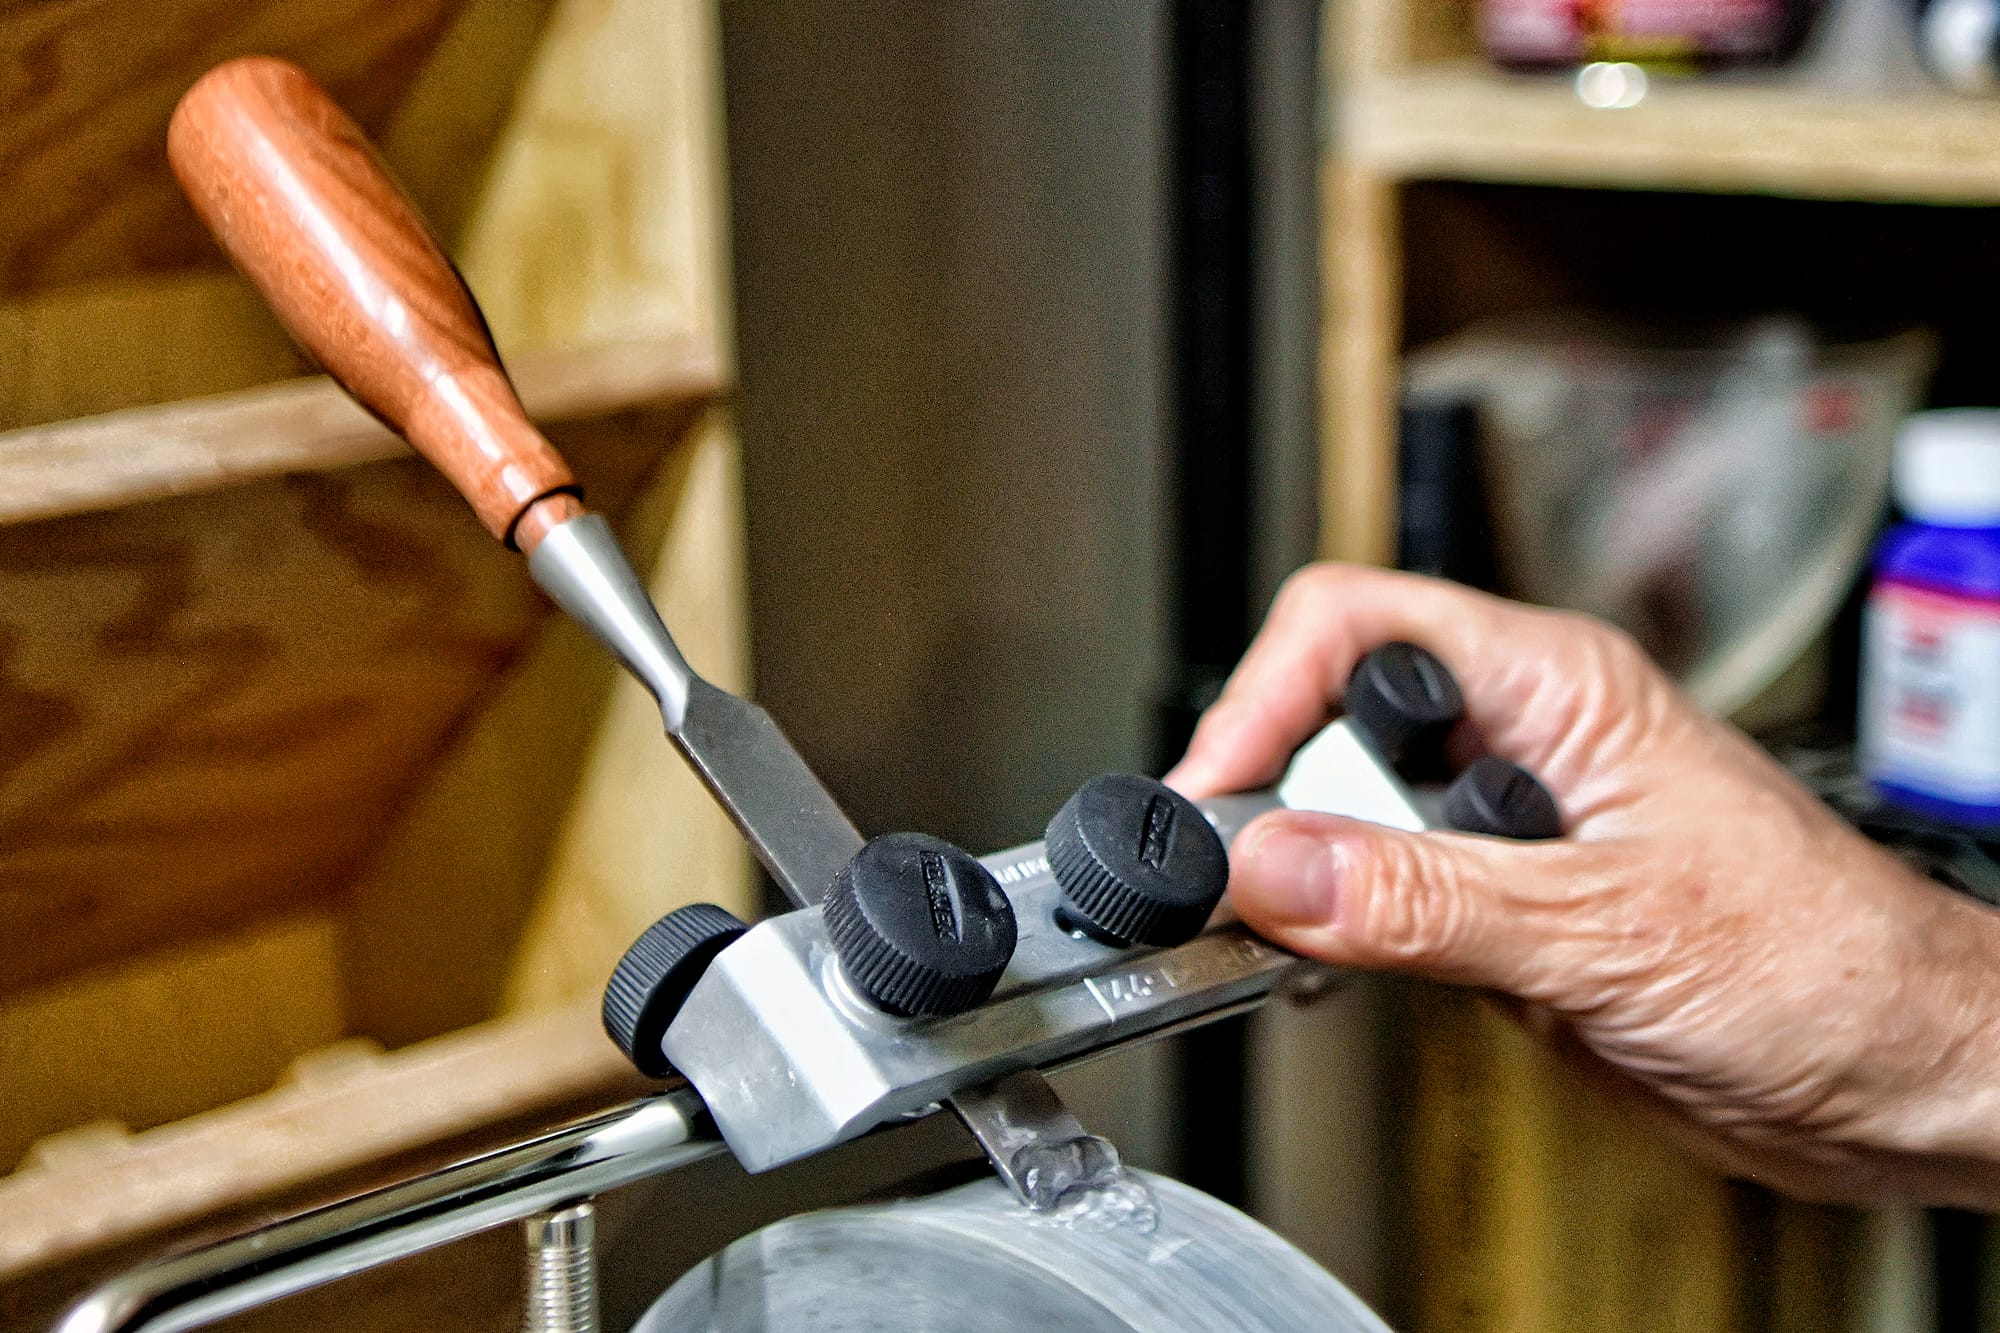
Tormek T-4 water-cooled sharpening station
Sharpening hand tools can be a tedious and annoying process, but if you're using hand tools you have to do it, because a dull tool is worse than nothing at all. And you don't just have to do it occasionally, you really need to get good at it, and fast at it, so that you won't hesitate to sharpen tools right away when they need it.
I really tried to get better at sharpening a few years ago, and I made some improvements, but was still slow. And then I started seeing references to the popular Tormek line of sharpening stations, which make sharpening quick, easy, and repeatable, even if you don't do it very often. After some research, I picked up a Tormek T-4, and I'm thrilled with it. I got mine for $450 from Sharpening Supplies two years ago, but they're up to $600 now.
The thing that makes Tormek's sharpening stations so useful and versatile is their large line of jigs. They make jigs for holding hand chisels, plane blades, kitchen knives, scissors, hatchets, and all sorts of things. I bought several jigs, but the one I use most often is the SE-76 square edge jig for sharpening chisels. Here's a 2-minute video showing how that works.
The water-cooled approach provides some great benefits. Most importantly, it keeps the tool that you're sharpening nice and cool. Heating up metal makes it loose its ability to hold a sharp edge, and that can't happen with a water-cooled grinder. The water also keeps the surface of the grinding wheel free of debris, which allows for faster and more accurate cutting.
Another benefit with the Tormek is that the grinding wheel spins very slowly: only 120 RPM, which is two revolutions per second. Spinning that slowly, and with a constant water bath, means that metal filings can't fly off the wheel. And that means you don't need eye protection, which means you have the best possible view of the sharp edge that you're creating.
The Tormek makes it easy to get a super sharp and perfectly square tip on a chisel in just a minute or two. Not just easy, but also fun in its own way, and deeply satisfying. I recently dropped a chisel point-down on the concrete floor in my shop, and my reaction was just to smile. "Cool, I get to fire up the Tormek for a minute and make this chisel like new again!"
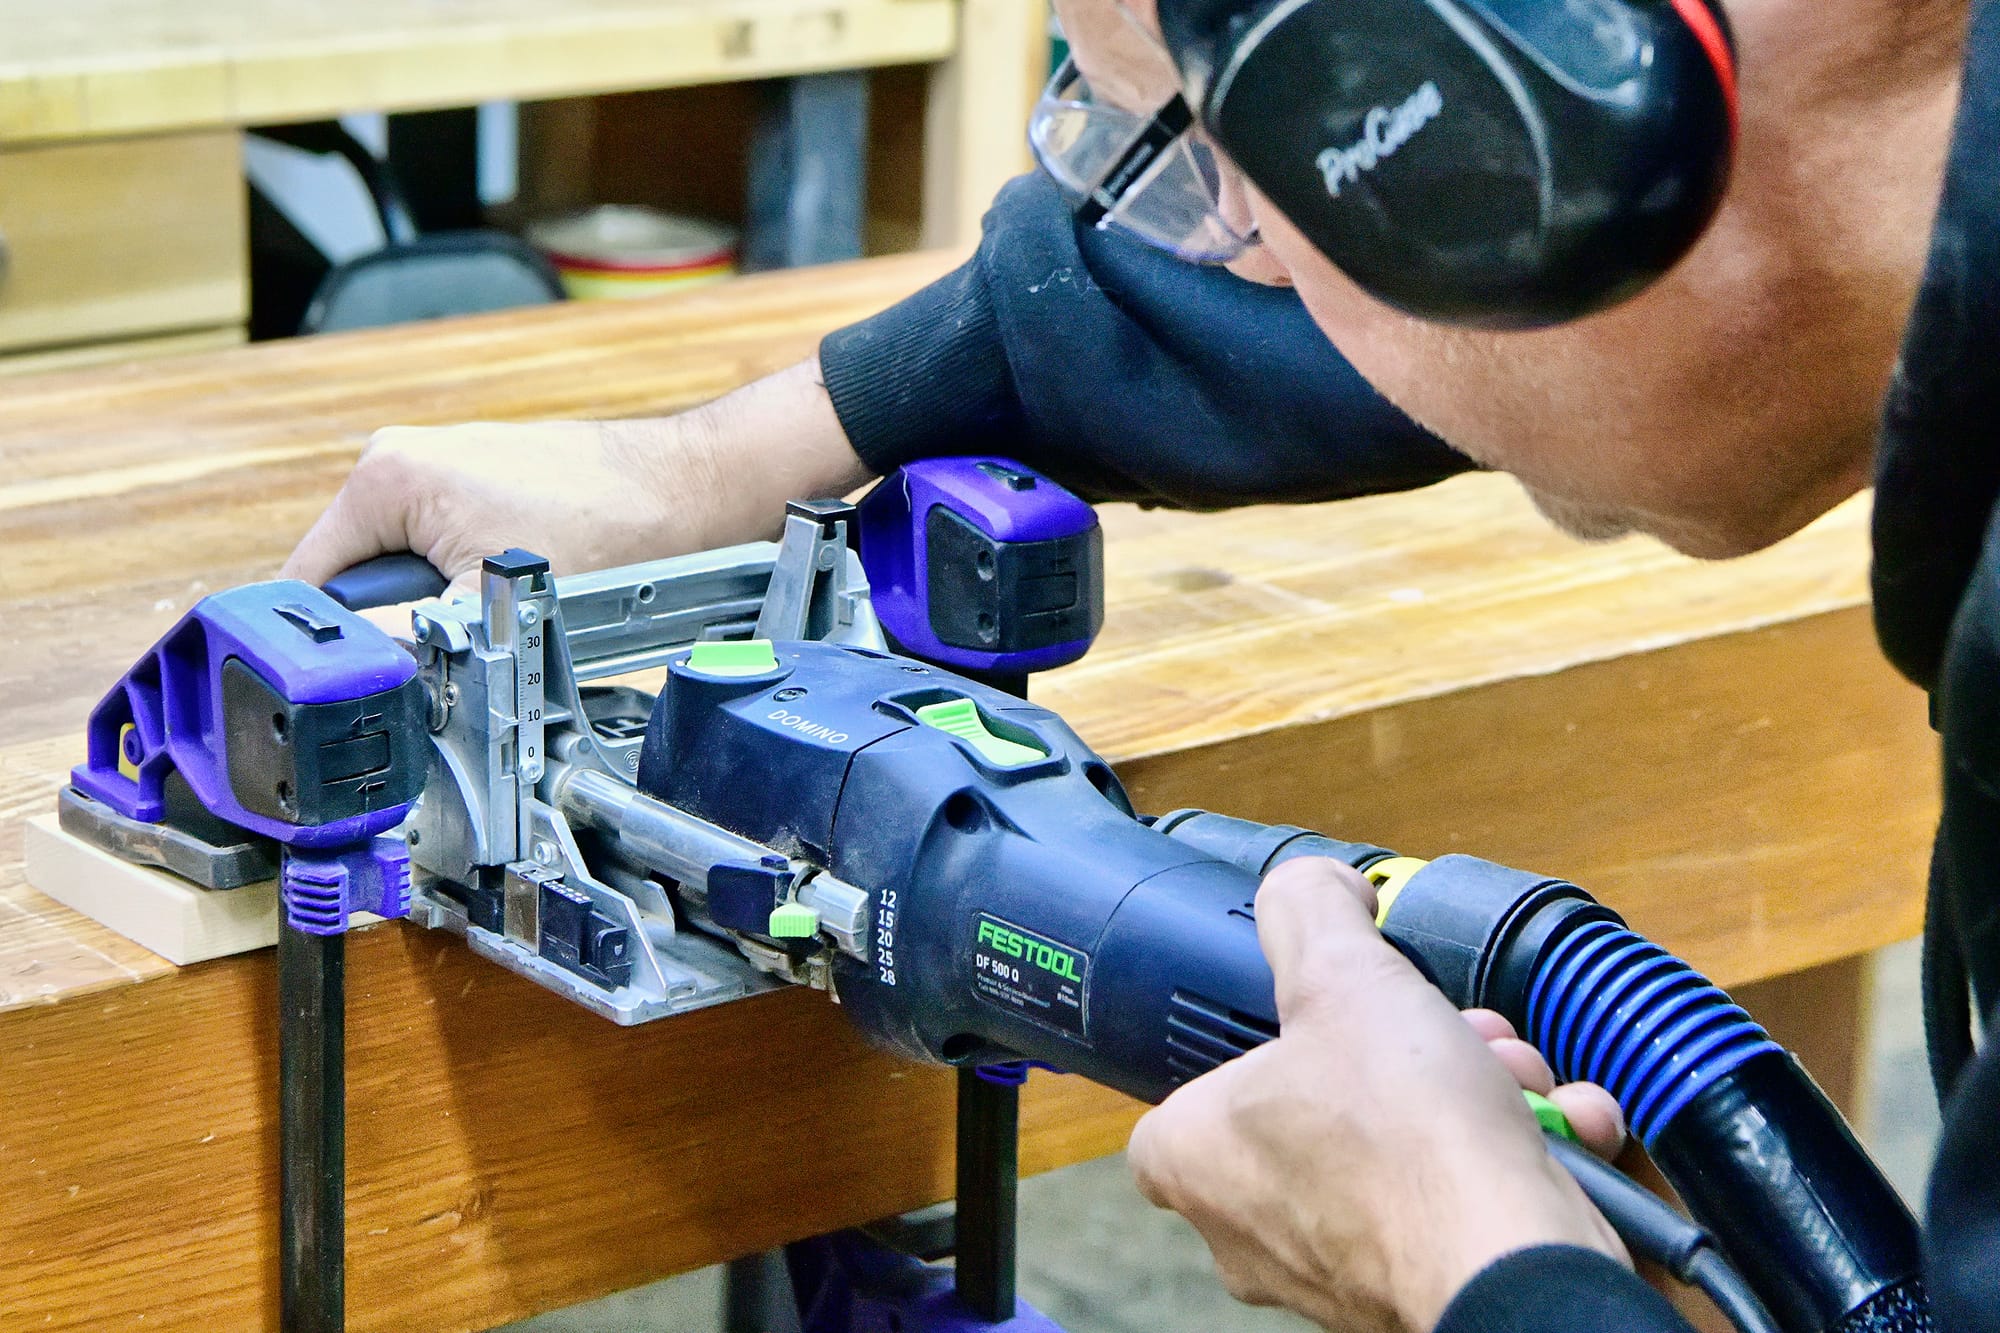
Festool Domino DF500
The Festool Domino came out in 2005, and since then it has completely transformed the cabinet-making industry worldwide. The vast majority of people who build custom cabinets every day use a Festool Domino, because it greatly simplifies the process of joining two pieces of plywood or other flat stock, whether in-line or at a 90-degree angle.
The Domino does just one thing, and does it extremely well. It cuts slots into the edge of a board, so that you can put domino-shaped pieces of wood into those slots when you glue up an edge joint. The wooden dominoes hold the joint in perfect alignment while the glue dries, and they also provide additional strength to the joint.
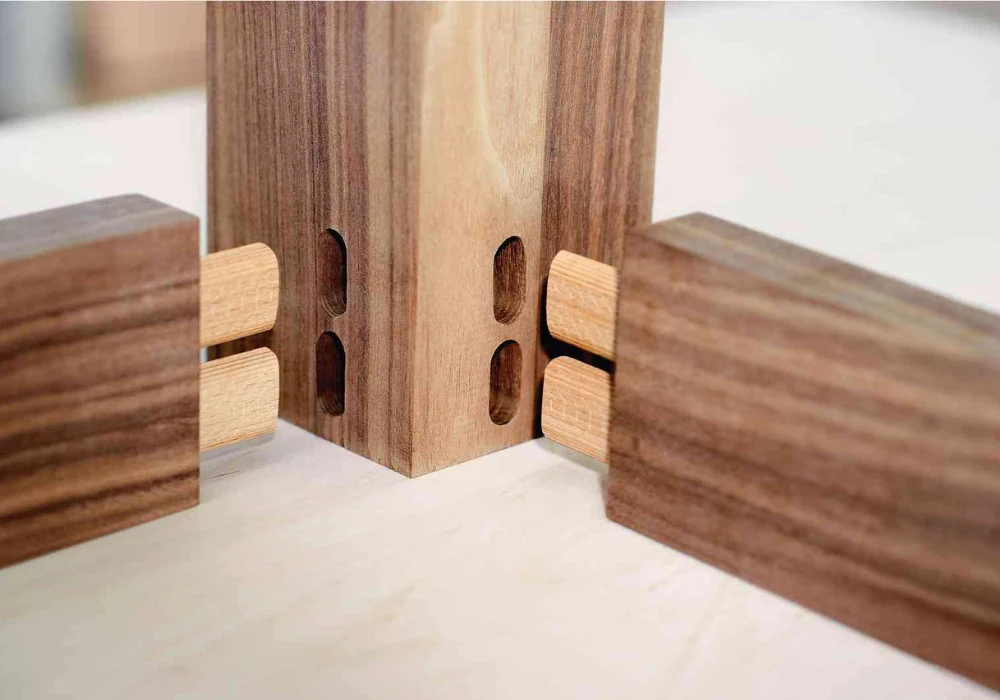
Here's a good video overview of the Festool Domino's features and how it's used.
I bought my Festool Domino DF500 for $1359 from Woodcraft, which makes it the most expensive tool in my shop. I also bought a bunch of accessories for it, so my total investment is probably close to $2000. But it's a joy to work with, especially now that I've gotten much better at all the little subtleties of how to hold it and operate it in a way that's accurate and repeatable. The first big project I did with the Domino was the bookcases for our library, and it worked beautifully for that project.
Festool's famous patent on the Domino's cutting mechanism expired a few months ago, and Kreg quickly came out with the Kreg Edge, a $500 Festool Domino competitor. I'd be tempted to get that if I didn't already have the Domino, although it's slightly flimsier and uses cheaper construction, so I'm kind of glad I got the more rugged Domino back when there wasn't an alternative. It's a beast of a tool, and made me instantly able to do things I couldn't have done without it.
Adjustable plastic folding tables
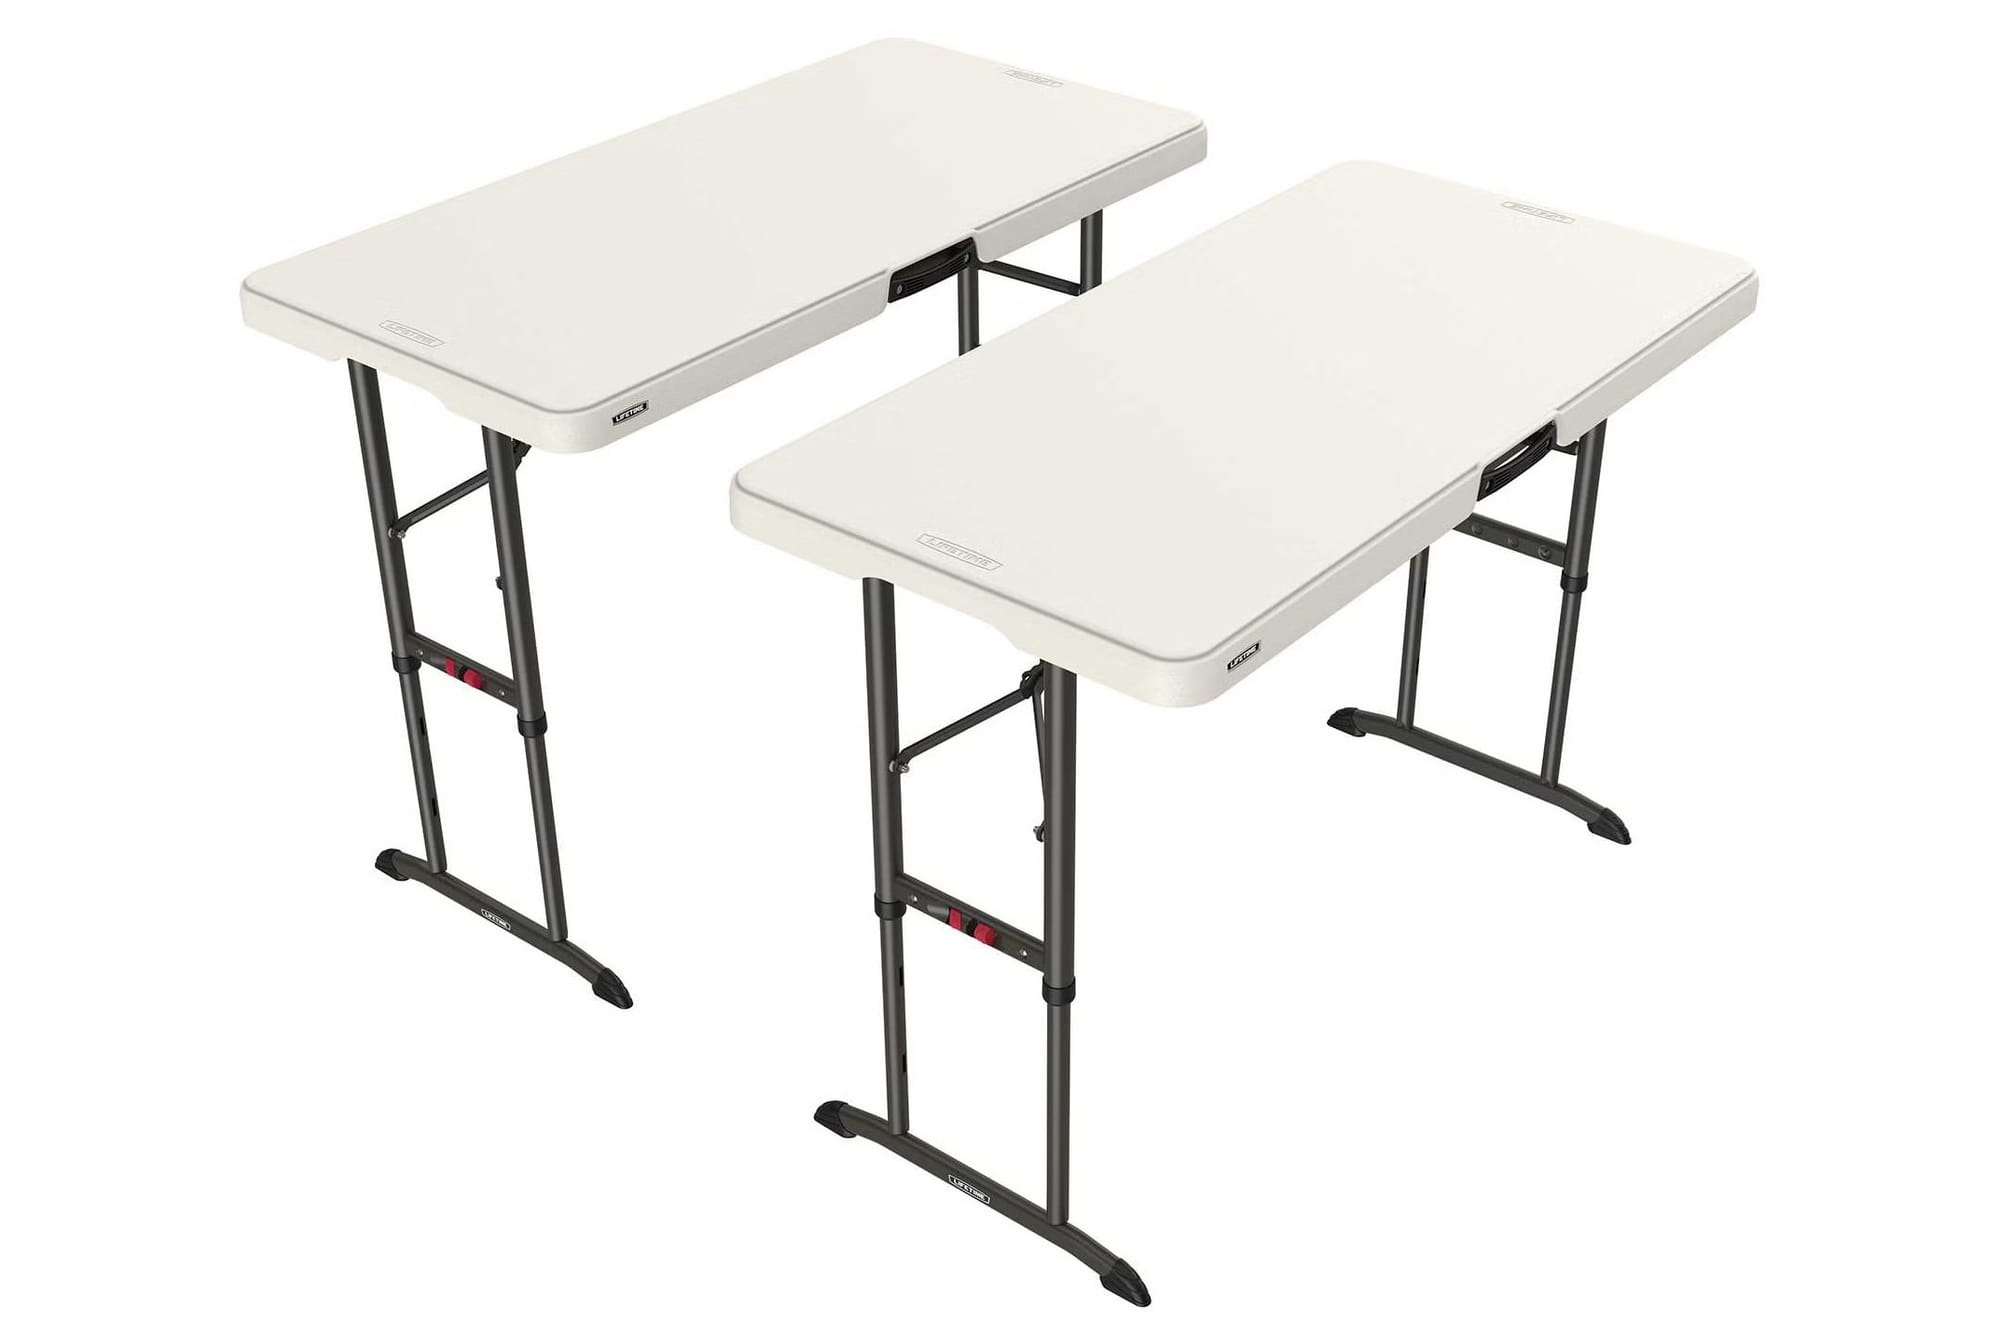
This is such a simple low-tech thing, but I'd hate to live without my two adjustable folding tables. I never expected to use them so much, but I do. They can hold far more weight than you might expect, and they're quick and easy to set up and break down. You can never have too much counter space while working on a big messy project, and these folding tables are 16 square feet of counter space that I can set up anywhere in the house as needed. When I'm not using them, they hang on the wall folded flat and take up almost no space.
The ones I have seem to no longer be available, but Costco sells an almost identical model for $114 for a two-pack here.
Self-built Tools
And finally to wrap up this list, here are two of my favorite tools that I built myself instead of purchasing:
- I love my massive 300-pound workbench with heavy-duty vises and an old-fashioned cast iron holdfast. It's so simple and sturdy, and it holds workpieces perfectly steady for precision work, even big heavy things like solid wood doors or tall bookcases. I spent several weeks building it, as covered here.
- The crosscut sled that I built (as outlined here) has transformed how I work at the table saw. I use it for almost everything I do on the table saw; the only things I don't use it for are cutting large sheets of plywood or ripping long lumber. I built mine using Tamar Hannah's design, which is brilliant.
Man, putting this list together makes me want to go build something!


