Travis CI for Test Automation
This posts covers how to get started with continuous integration (CI) for projects hosted in GitHub repos, using the Travis CI service. CI is a large and potentially complex topic, and I’ve kept the scope here very simple: just the basics of how to make some tests run automatically every time you push changes to a repo.
You can learn about more advanced scenarios in the thorough and well-organized documentation on the Travis CI web site. If you’re entirely new to test automation or build automation, start with the Travis CI for Complete Beginners page.
Travis-CI is a service that can be used to automatically run tests on your project after every change you push to GitHub. Like GitHub itself, the service is free for most common public-facing scenarios, and you can get a paid account if you have other needs.
Here’s an overview of a typical simple workflow that uses Travis-CI for test automation:

Once everything is configured correctly (mostly through settings in the .travis.yml file), you don’t need to do anything special to take advantage of the automation. Just make your changes and push them to your repo, and the tests will run automatically in a virtual runtime environment that Travis-CI deploys temporarily for this purpose. If the tests fail, you’ll get an email with the details.
Here are the steps to get Travis-CI configured for running tests on a project hosted in GitHub:
- Sign in to Travis-CI here, using your GitHub identity.
- Create a .travis.yml configuration file in your GitHub repo, which tells Travis-CI how to run your tests, which dependencies to install, and so on. Note that the documentation site includes language-specific guidance under the Programming Languages dropdown on the left.
- Go to your Travis-CI profile page and turn on the service for the repo you’re configuring for automated tests.
For example, I have a little CLI tool for doing hex dumps of files called hexprint, which I threw together last year while doing lots of analysis of metadata in JPEG. I’ve only written a couple of simple tests for it, just enough to verify that I don’t break things if I make a change. (Like most developers, I’m planning to do a comprehensive test suite Real Soon Now ™ after I finish up a couple of other more pressing things.)
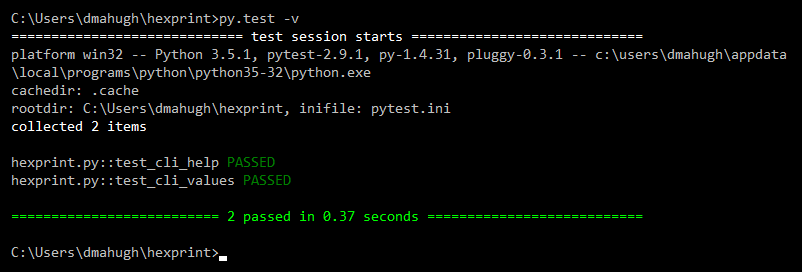
Here’s what it looks like when I run my tests locally from the command prompt:
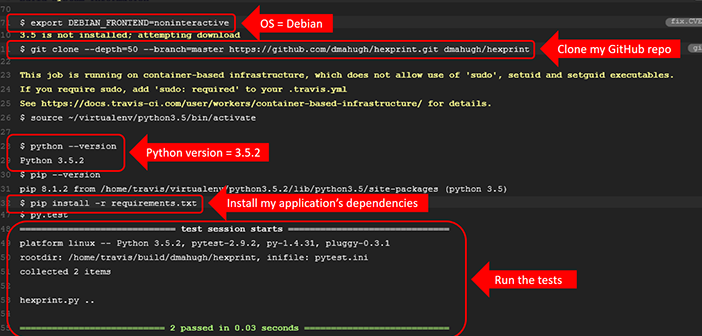
And here’s what appears in the Travis-CI build history for this repo after I push some code changes to GitHub:
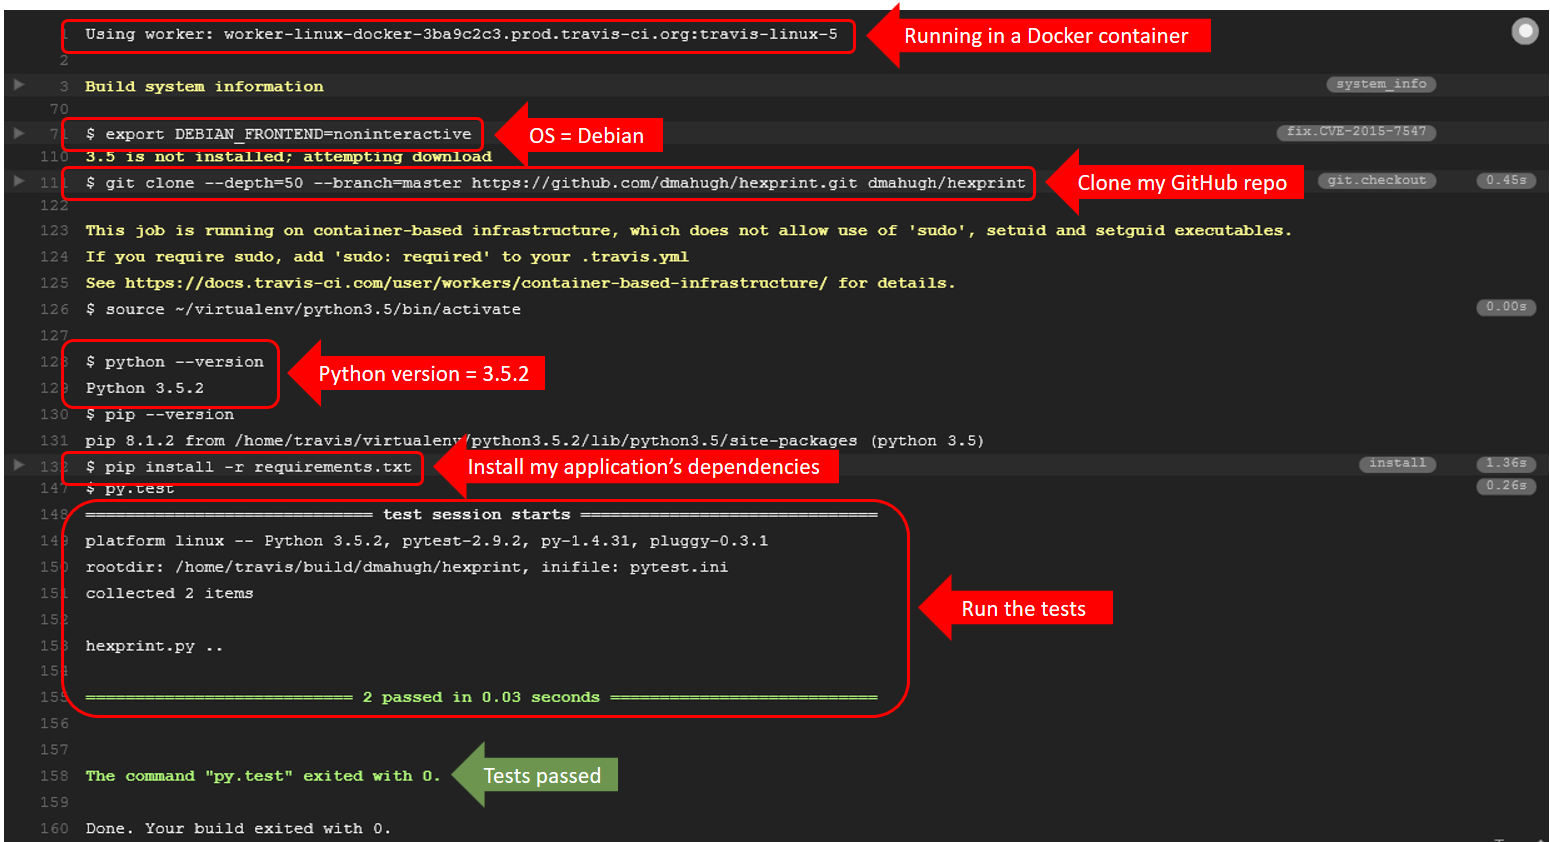
You can see that the same tests are run in both cases. I ran them locally under Windows 10, and Travis-CI ran them under Debian Linux in a Docker container, but the tests passed in both cases. Here are the contents of my .travis.yml and requirements.txt files for this repo:
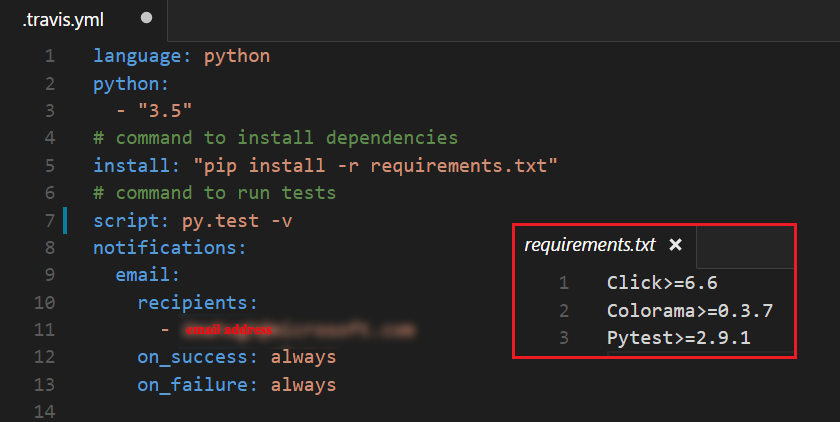
Note that I’ve only specified Python 3.5 for my tests. That works for this simple case, but one of the benefits of using Travis-CI is that you can list a variety of runtime alternatives to test your code. See the Travis-CI Python documentation for an example of how to run your tests under many different Python versions, for example.
You can also see that I’ve asked for email notifications to always be sent, regardless of whether the tests succeed or fail. You can also configure Travis-CI to just send email notifications if the test status changes (for example, tests that had passed are now failing). You can find more information on these options under Configuring Build Notifications in the Travis-CI documentation.
If you look around at repos that use Travis-CI for build and test automation, you’ll often see a badge in the README.md file that shows the status of the most recent tests. For example:
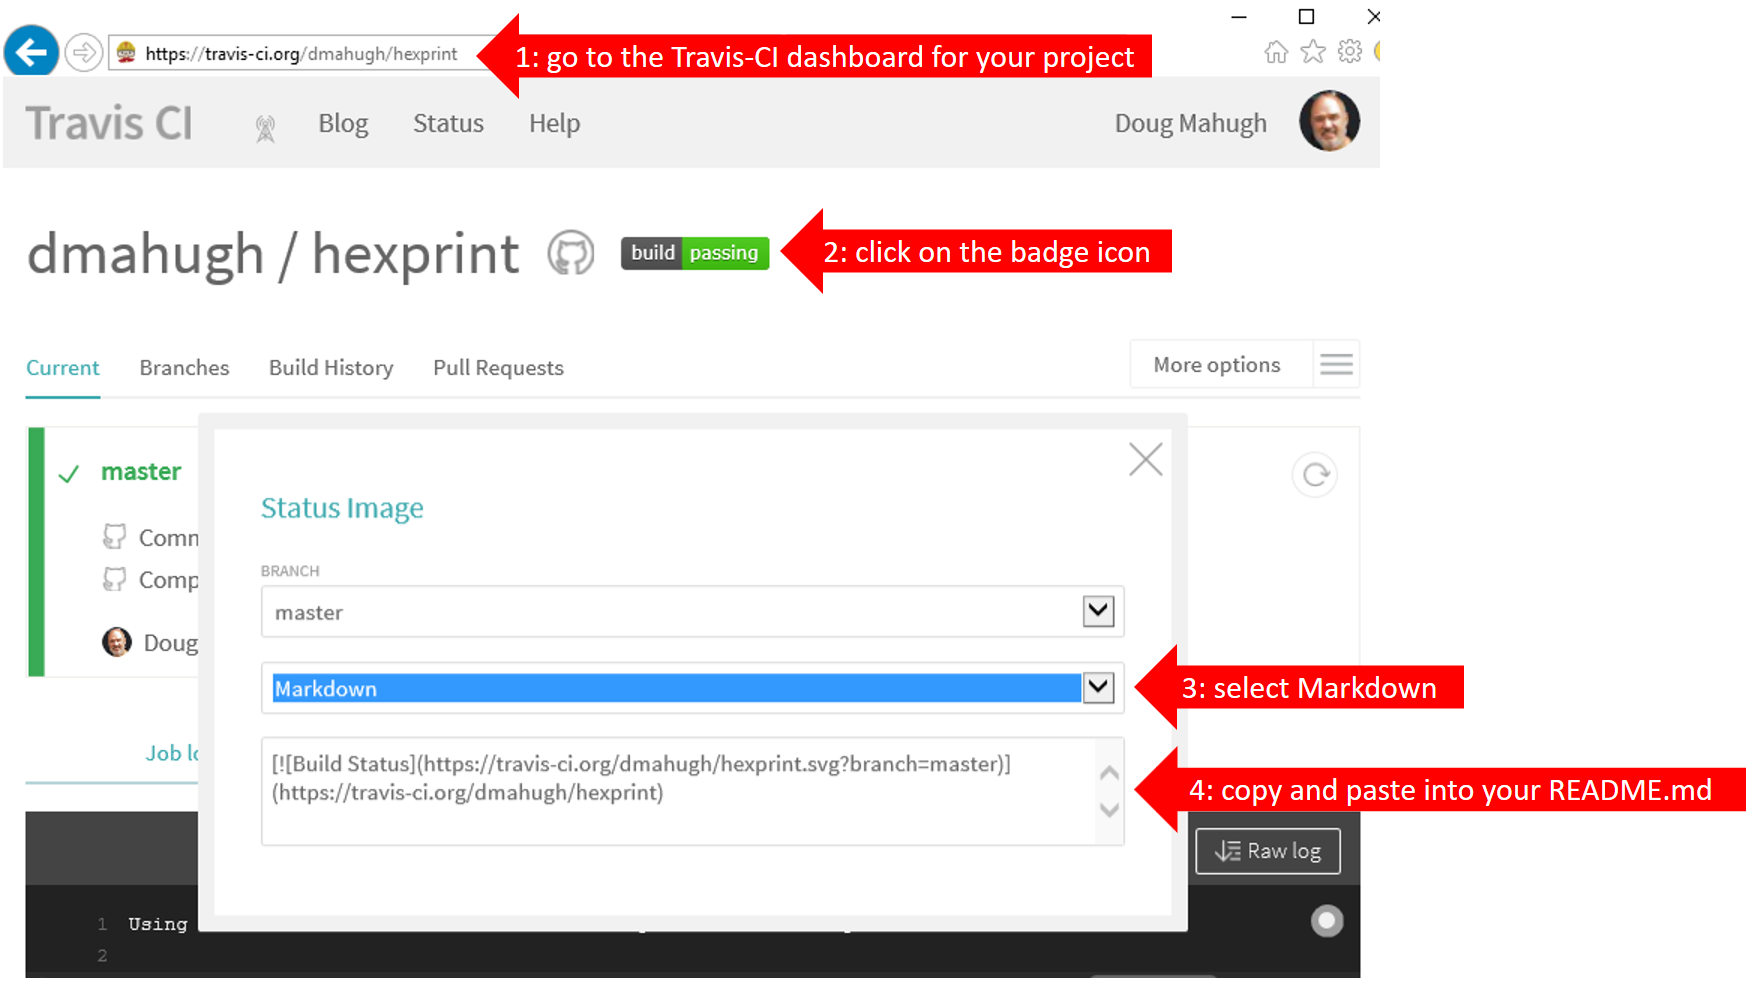
To put a badge like that on your project’s README, you need to copy some Markdown from the Travis-CI dashboard page and paste it into your README.md file. Here are the details:
Once you have everything set up as described above, you can simply follow your usual workflow for pushing changes to your repo and tests will run automatically every time. With all the time this saves, you can get back to finishing up those comprehensive test suites you’ve been meaning to write!