Installing a NAS
I've augmented my backup strategy to include a NAS (Network Accessible Storage) device at home, giving me nearly 12TB of online storage. This post covers a few things I learned while setting it up.
What's a NAS?
A NAS is simply a file server — a computer with a big hard drive whose primary purpose is storing and serving up files to other computers and devices. If you're old enough to remember the days of Novell Netware and Microsoft LAN Manager, NAS is essentially the modern approach to what those operating systems used to deliver. One key difference is that NAS servers usually don't have a monitor or keyboard attached, and instead you handle administrative chores by connecting to the server from a laptop or desktop computer using a web browser.
The operating system running on a NAS can vary, but for Synology devices like the one I've installed, the OS is Synology's DSM (Disk Station Manager). DSM has a web interface that includes a file management app called File Station, which provides file management functionality similar to Windows File Explorer or Mac Finder.
NAS servers typically have multiple drive bays, where you can install big fast hard drives, and it's common to configure those drives with some sort of RAID redundancy to protect from data loss in the event of a hard drive failure. Although these bays can take pretty much any SATA hard drive or SSD, for maximum performance and reliability it's best to use drives that are designed for NAS usage.
Once you've installed and configured a NAS on your home network, there are three ways you can copy files to and from it:
- From computers on your home network, you can simply access the NAS as a network mapped drive. For example, in the configuration described below, my NAS is always available as drive Z: whenever my laptop is connected to our home wifi network.
- You can also configure a NAS for access from any device on the internet, which allows you to get at your files when you're in a different location. This is slower, of course, and there are some security considerations you need to address, but it's a handy option.
- For high-speed data transfer, you can plug external drives directly into the NAS and copy files back and forth via USB 3.0 (or Firewire or eSATA in some models). This is the approach I used to get my data onto my NAS, as covered below.
Those are the basic concepts, and the rest of this post covers my own experience installing a NAS.
Selecting the hardware
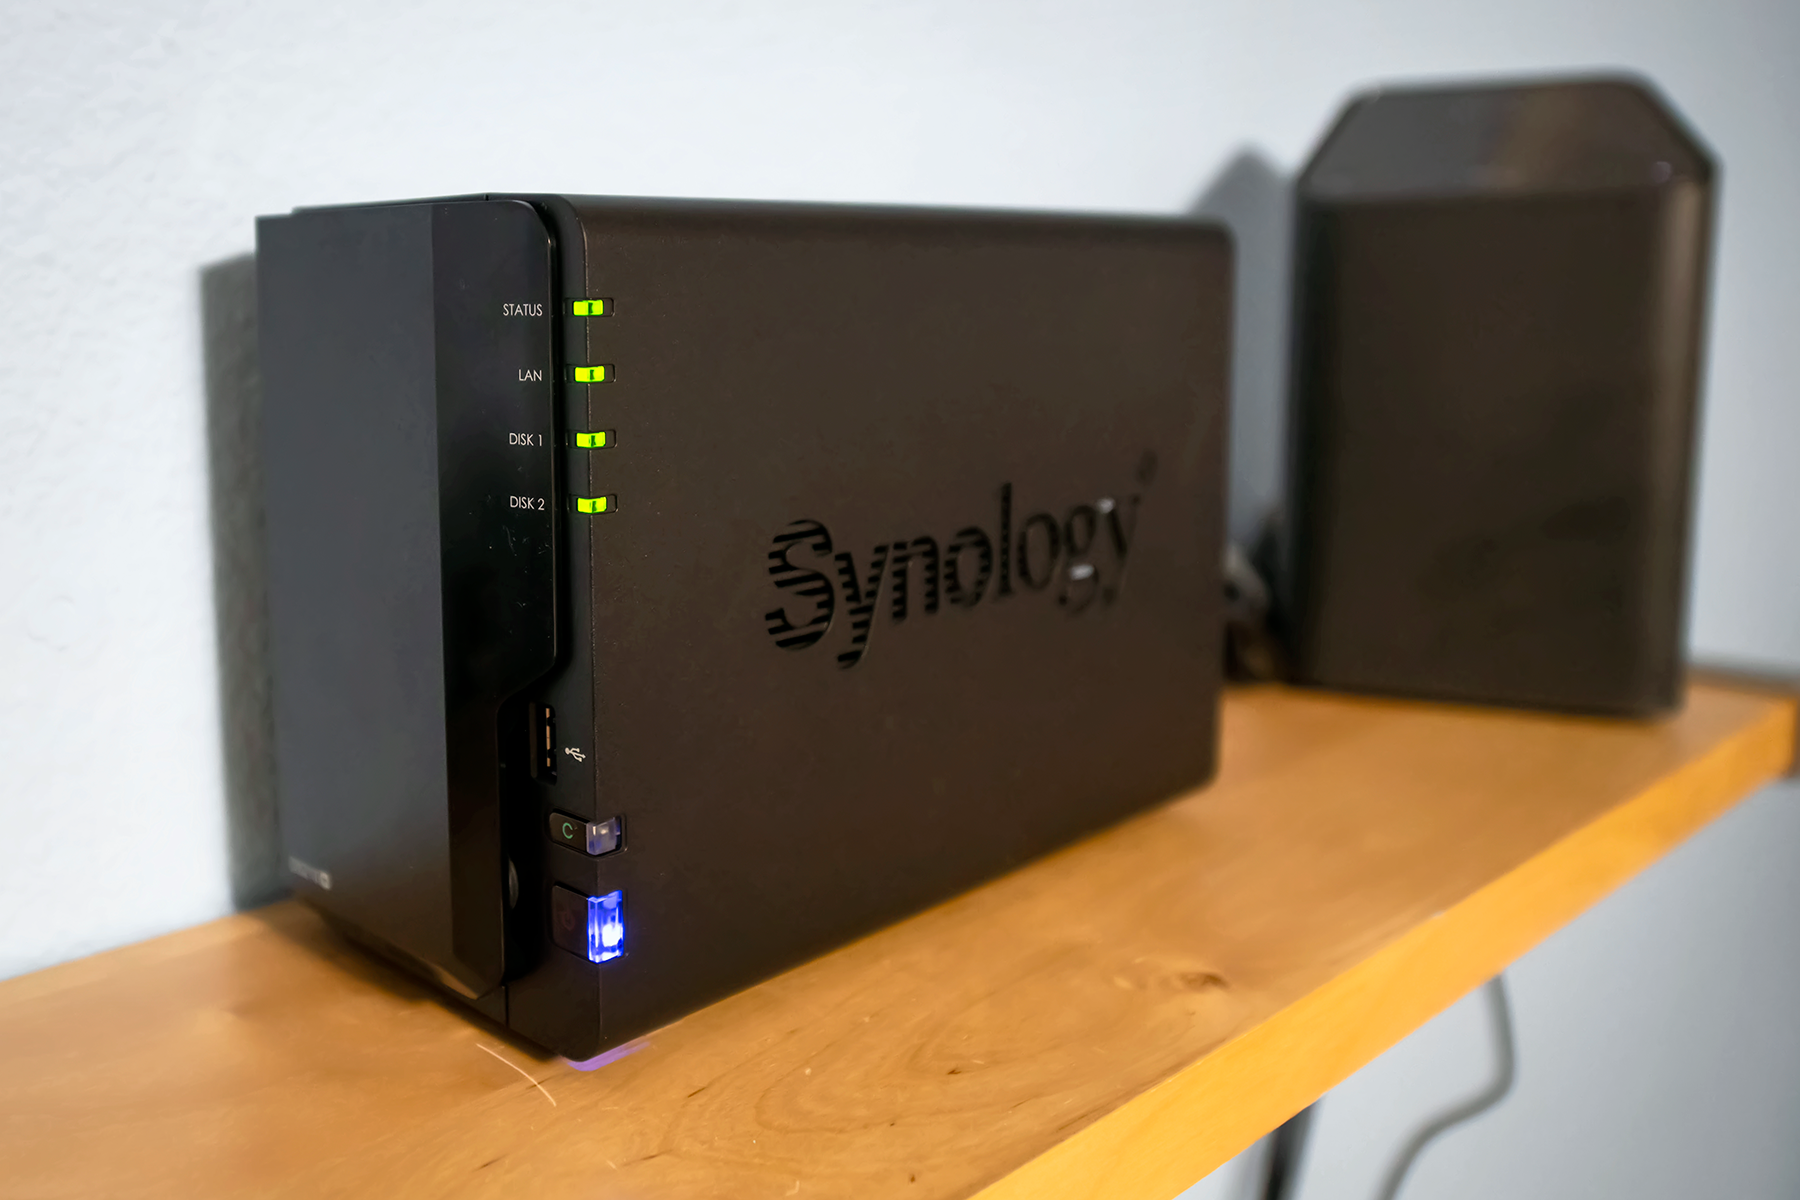
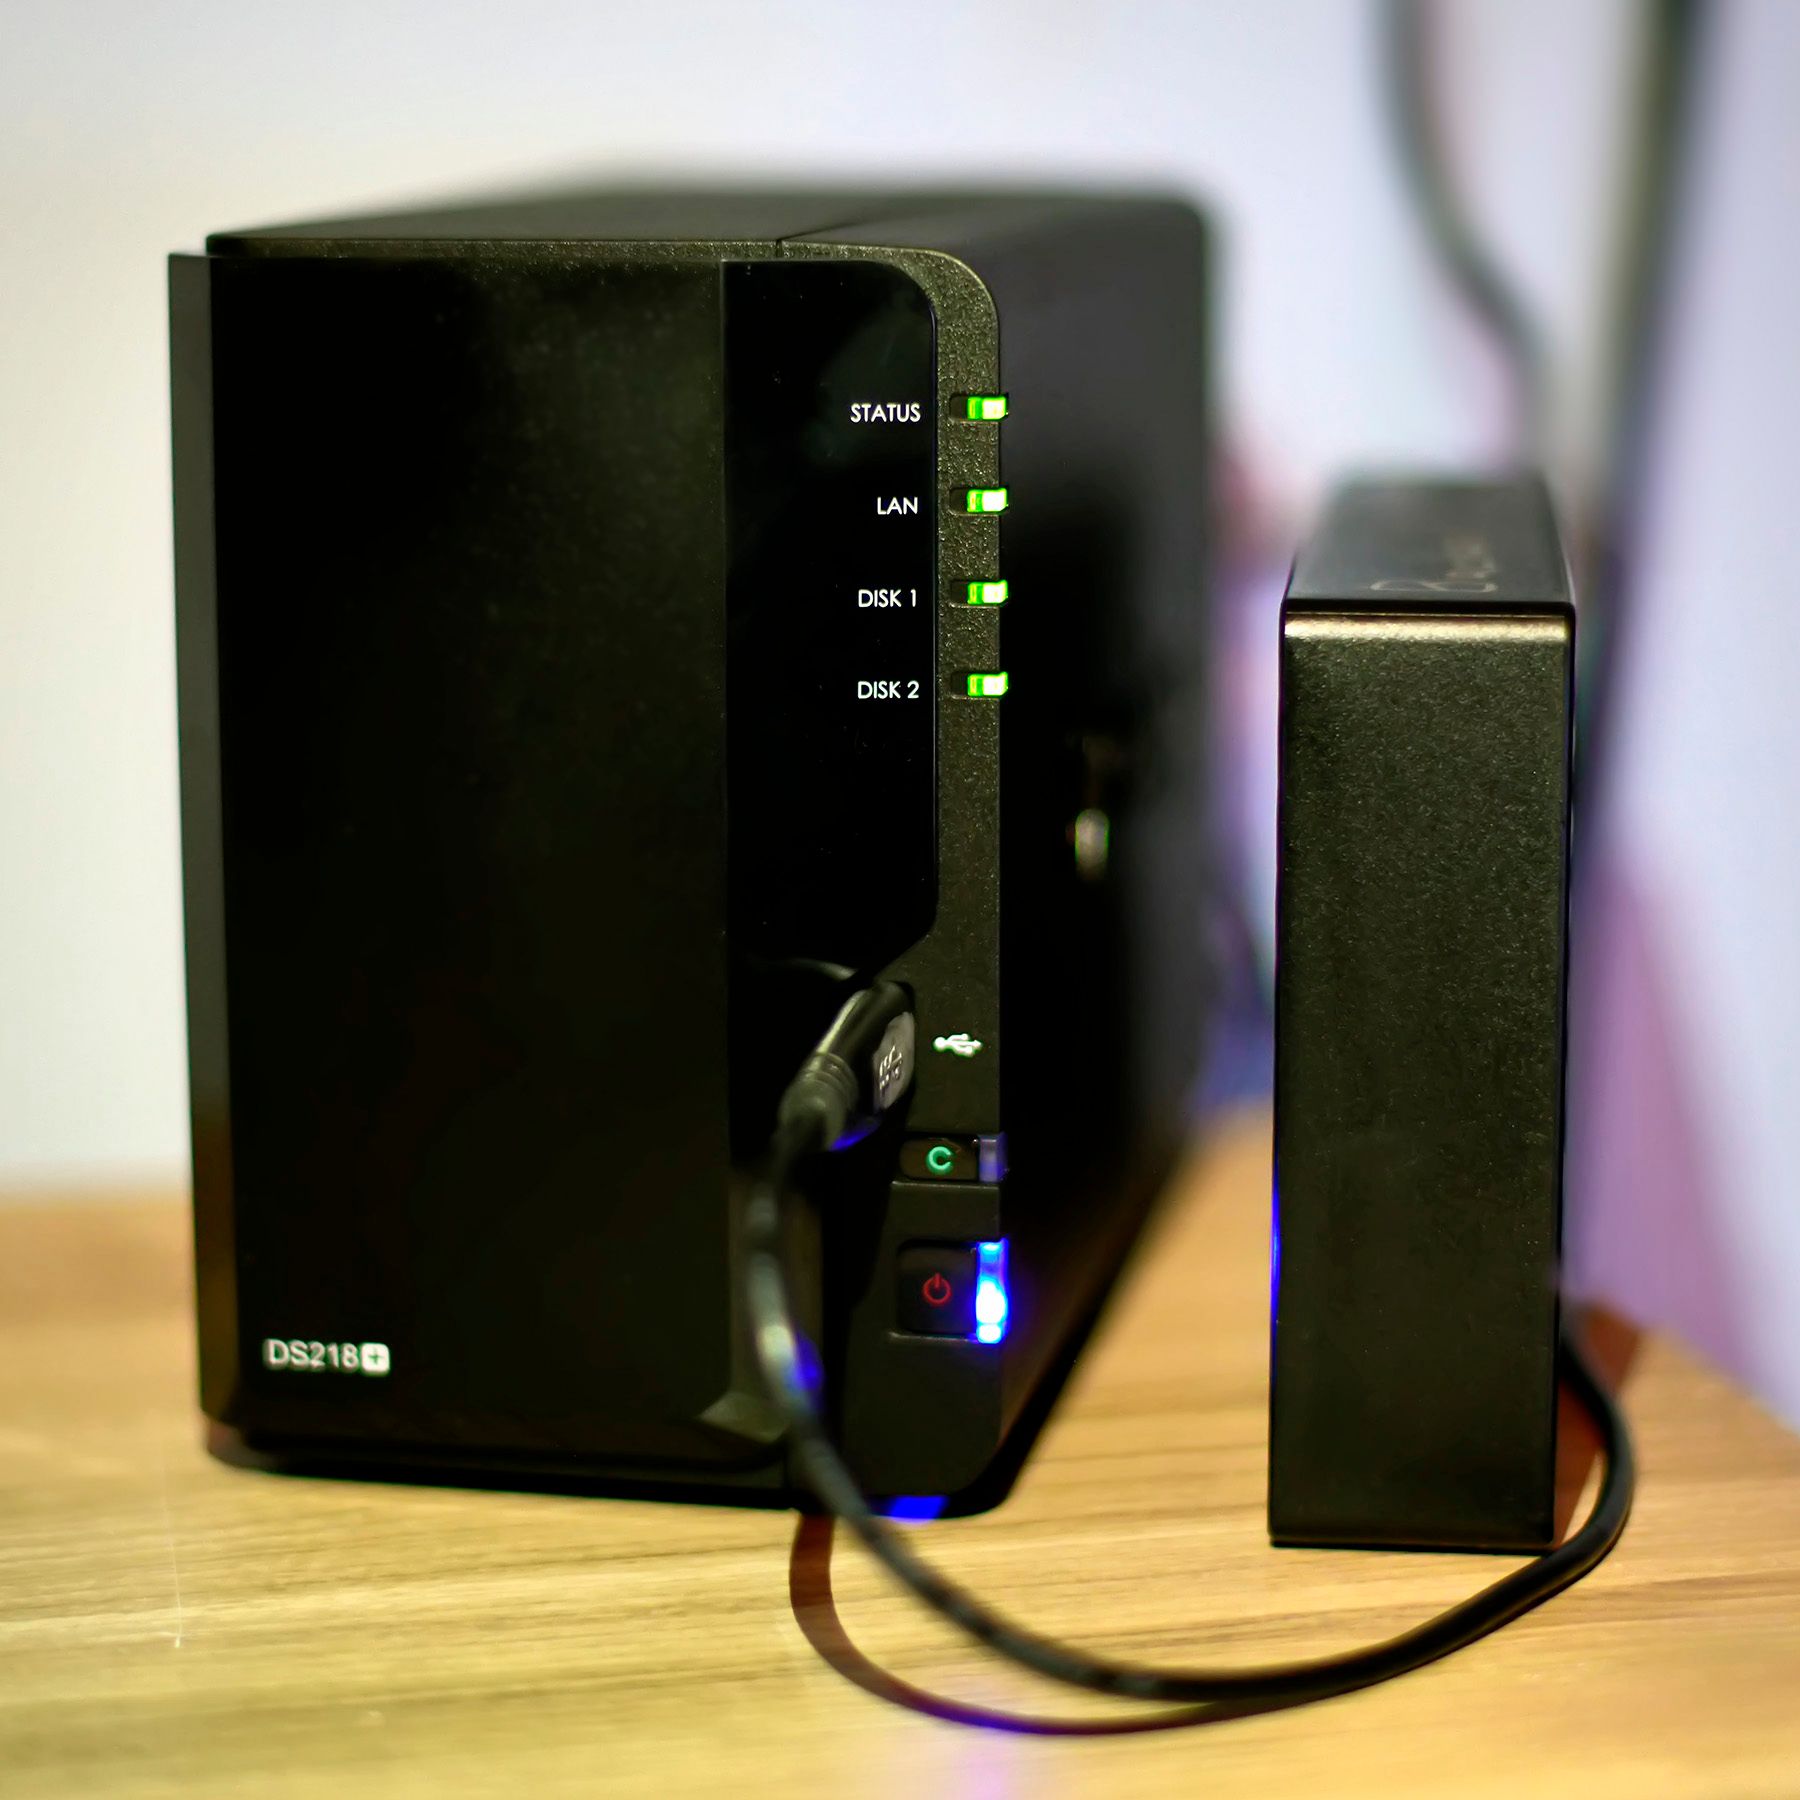
After reading a few recent reviews and comparisons of NAS servers, I decided to go with the Synology DS218+, which has a reputation for high performance and ease of installation. It has a gigabit Ethernet port for connecting to my home router, three USB 3.0 ports for copying data to and from USB drives, and two bays that can hold either 3.5" or 2.5" hard drives.
For storage, I chose two 12TB Seagate Ironwolf drives. The Ironwolf drives are "NAS-optimized," which means they're designed for 24x7 use in a NAS environment with multiple drive bays. And at 7200 RPM, they're faster than the popular 5400 RPM Western Digital Red series.
The DS218+ has video transcoding and streaming features, but I'm only planning to use it for data storage (mostly photos). I have a little over 3TB of data to store, comprising just over 500,000 files.
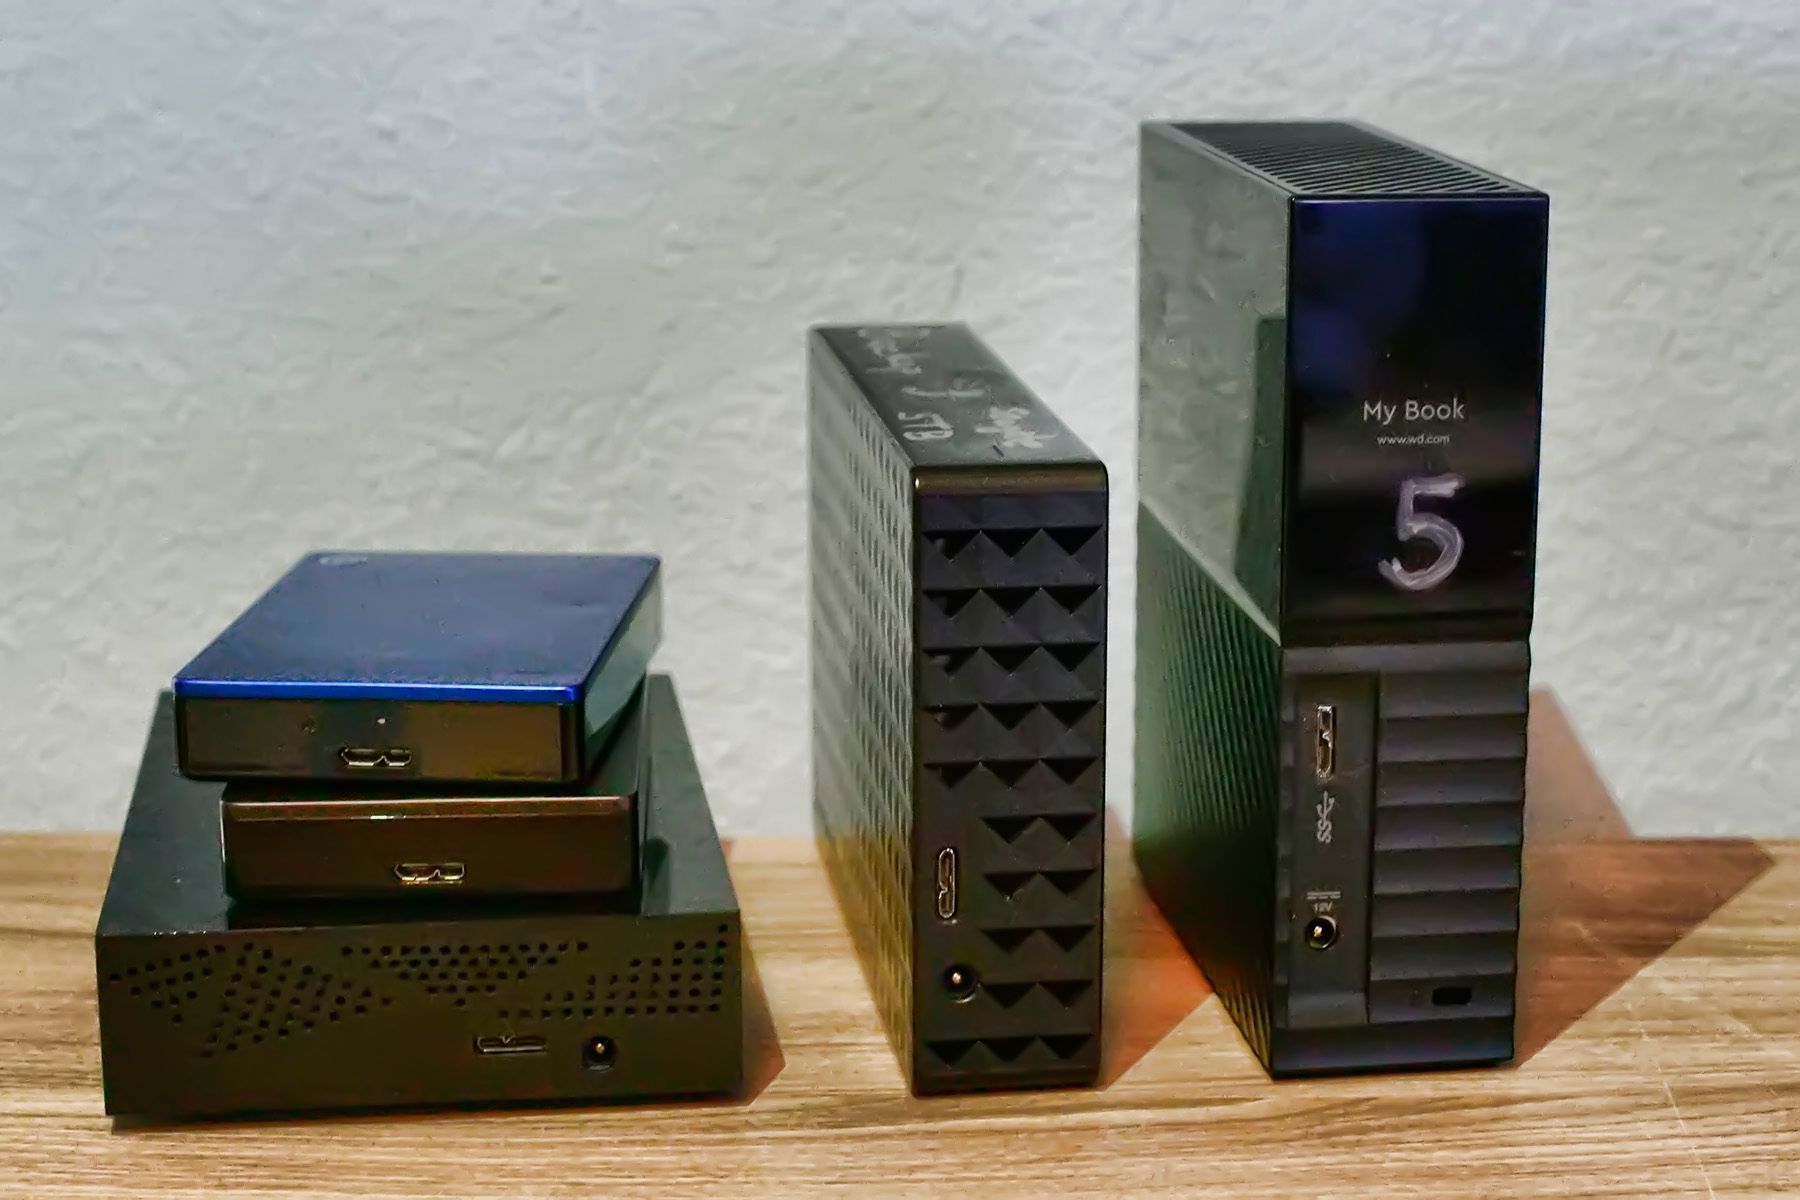
I maintain my backups on several USB drives (as covered here), each of which is a cloned copy of everything. I typically have a drive or two at home, one in my laptop bag, one in the glove compartment, and so on. The NAS will be yet another copy of that backup stream, but one that's always available as a mapped network drive on computers at home, and also accessible via a secure connection over the the internet.
Installation
Setting up a Synology NAS is simple. If you have 3.5" drives like the Seagates I'm using, no tools are required for drive installation. They just snap into place.
After that, connect an Ethernet cable between the NAS and your router, and go to a computer on the same wifi network and navigate to http://diskstation:5000 to launch the Synology Web Assistant, which will lead you through the setup options.
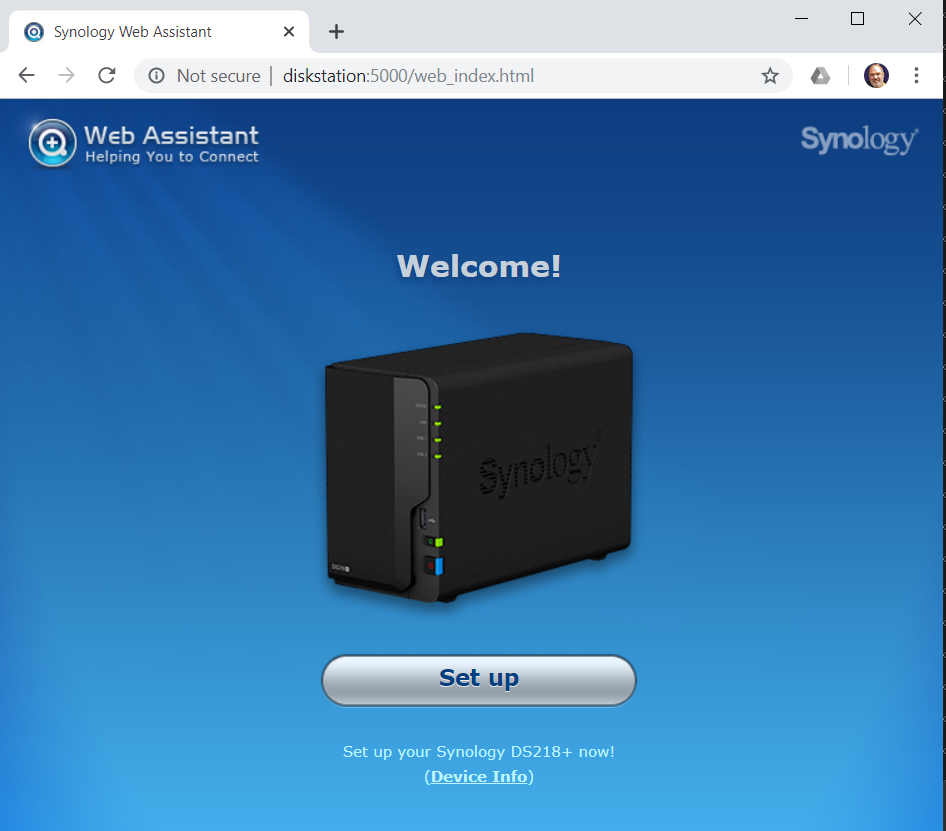
The installation process is well documented many places (there are some good videos on YouTube), so I won't go through the steps here. The basic concept is that you install the DSM operating system, which takes about 10 minutes, and then you set a few configuration options as desired.
One of the decisions you need to make is the RAID configuration. With two drives, I selected RAID1, which means data is mirrored to both drives to provide redundancy and data protection. With nearly 12TB of total disk space, I'll have plenty of room for my current 3TB backup stream to grow.
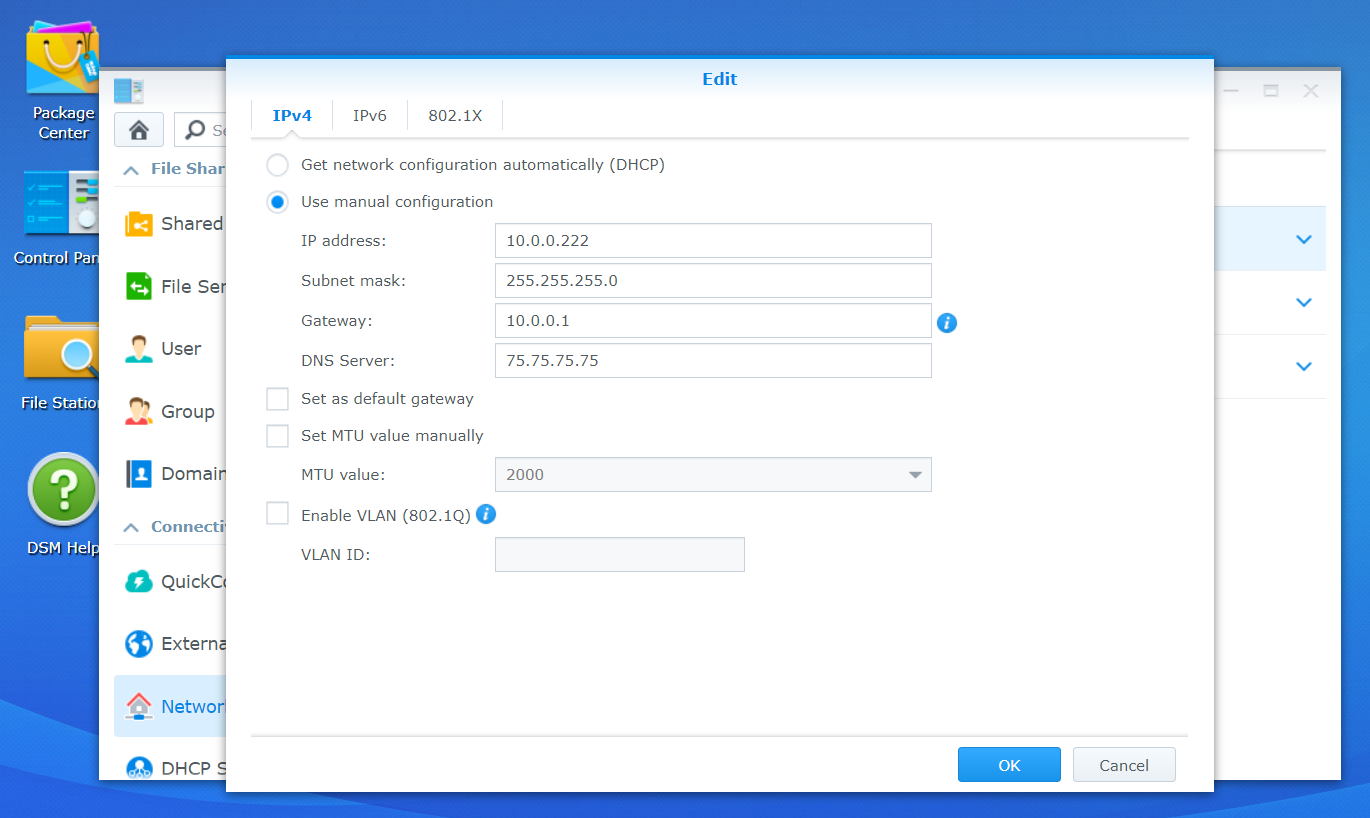
I opted to use a static IP address rather than allowing DHCP to assign one, just so that I can have a shortcut that launches the admin interface at a known and constant IP address. If you want to do that, go to Control Panel -> Network -> Network Interface -> LAN -> Edit, and you'll see the UI below. Note that DHCP assigns addresses in the range 100 to 149, so you can't use those for a static IP address.
After those configuration steps, I was ready to copy my data to the NAS.
Copying data to the NAS
The DS218+ NAS has local USB 3.0 ports on it, and those can be used for copying to and from external drives. This is much faster than copying over your wifi network. And another benefit of using this approach is that after the copying process is kicked off, your laptop or desktop computer is no longer needed.
I followed these steps get my backup stream copied onto the NAS:
- Launch a browser and go to the static IP address I assigned to the NAS during setup.
- In the admin interface, log in with the account I had created during setup.
- Create a shared folder for storing my backup stream. To do this, go to Control Panel -> Shared Folder -> Create.
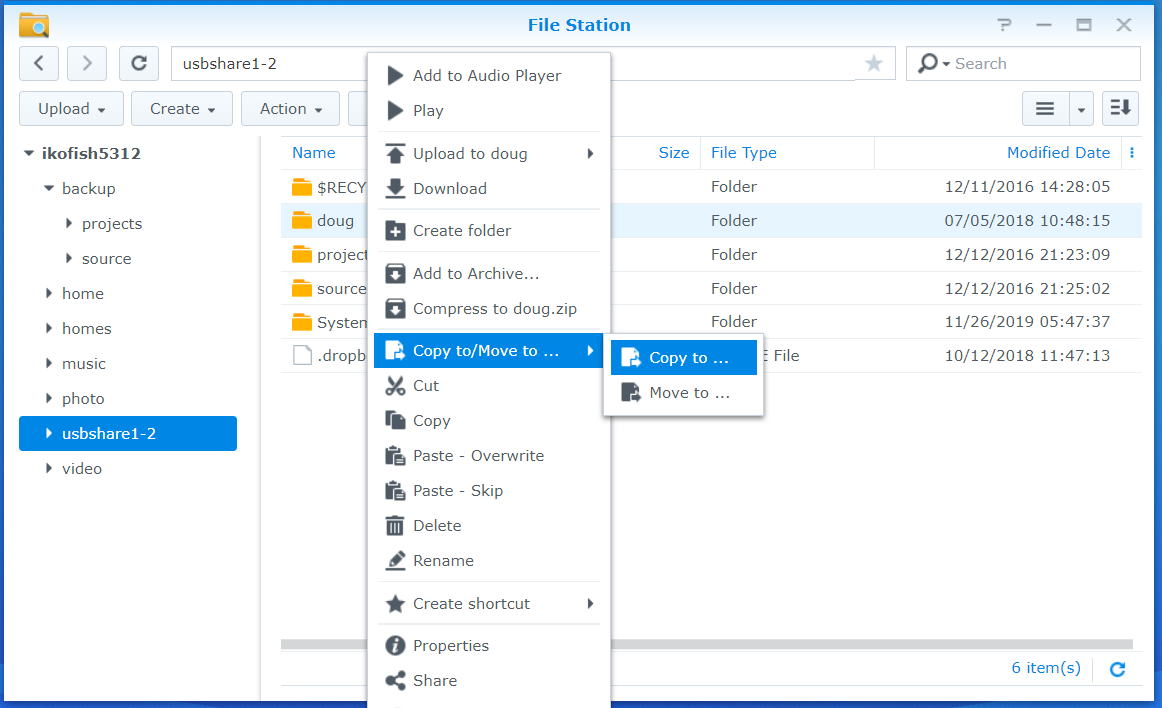
- Plug the USB drive (to be copied from) into one of the USB ports on the NAS. Give it a few seconds to be recognized and mounted, and then it should show up in the sidebar of the File Station app with a name like usbshare1-2.
- NOTE: if your external USB drives use the exFAT file system, it won't show up in File Station until you purchase an exFAT license as covered here. But if your USB drive uses NTFS or FAT, it should show up in File Station automatically.
Once the above steps are completed, you should be able to see both your new shared folder and your USB drive in File Station. To start the copying process, select the USB drive, then right-click and select Copy to, then select your shared folder as the destination.
Once the copying has started, you can use your computer for other things or disconnect it from the network. As long as the NAS remains powered up, the copying will continue.
I left the copy operation running overnight, and the next morning my 3TB of data was on the NAS.
Accessing the NAS
Once my data was on the NAS, the final step was to set up a mapped network drive so that I'll have easy access to the data while I'm on my home wifi network. I can connect via the internet from anywhere, using Synology's QuickConnect option, but a mapped drive is the quick and simple way to access the NAS when I'm at home.
Here's how I mapped a Z: drive on my Windows laptop to the backup folder where my data is stored:
- In File Explorer, right-click on This PC and select "Map network drive..."
- Select the drive letter
- For the Folder, enter \\static-ip-address\shared-folder. (See example below.)
- Select "Reconnect at sign-in" and select "Connect using different credentials."
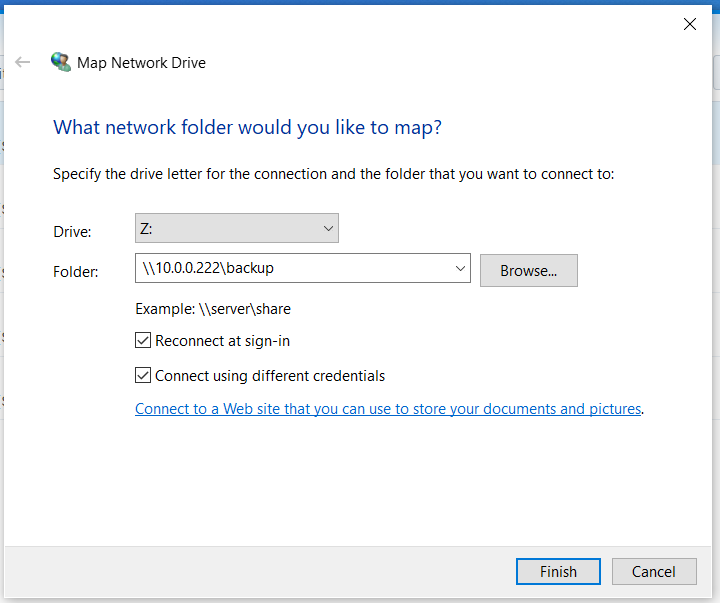
Click Finish, and then when prompted for Network Credentials enter the admin username and password that you created during installation and configuration of DSM.
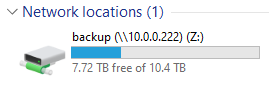
After completing the above steps, I now have a Z: drive available at all times, and it has my entire backup stream plus nearly 8TB of free disk space.
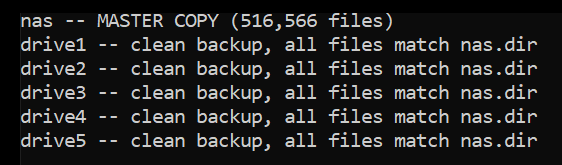
As a final sanity check, I ran my backup-verifier script to confirm that the NAS contains all the same files as my USB drives:
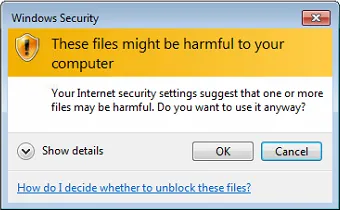
Windows Security warning
Once you have everything set up as described above, you'll be able to freely copy to and from your NAS as just another drive on your Windows PC. But ... you'll get a scary security warning from Windows every time you copy from the NAS.
To eliminate this warning permanently, follow these steps:
- Launch Control Panel, then select Network and Internet > Internet Options.
- Select Security > Local Intranet > Sites.
- Select Advanced, then Add, then enter the static IP address of your NAS.
- Then select Close or OK on the open dialogs to save your changes.
After that, you shouldn't get the Windows Security warnings when copying files from your NAS. You may need to disconnect and re-connect to your mapped network drive for the changes to take effect.
Cloning the NAS to a new USB drive
When a USB drive fails, or when my total backup size gets too large for a USB drive I'm using, then it's time to get a new drive and add it to the rotation. The first step in putting a new drive in the rotation is to clone the entire contents of one of the other drives to it. Before I had the NAS, this was a tedious time-consuming operation that could tie up a computer for days, but the NAS makes it much quicker and easier to clone my backup stream into a new drive.
I use the USB Copy package from within the Synology DSM to do the copying. Here's a quick summary of the steps involved ...
The USB drive should be formatted with NTFS to make the process a bit simpler. Most USB drives come that way these days, but check to make sure and reformat as needed.
Plug the USB drive in to one of the USB ports on the NAS.
n a web browsser, go to Synology DSM web interface (typically at at port 5000, so the URK will be something like http://192.168.1.xxx:5000/), and then log in as admin.
Verify that the USB drive is mounted - it should show up in File Station as usbshare1.
Install USB Copy from the Package Manager if needed, then launch USB Copy from the Main Menu button in the top left corner of the Synology DSM interface.
Create a new task by clicking the + (lower left corner of USB Copy), and select the Data Export option. Then enter a Task Name, set the Source and Destination folders, and select Mirroring for Copy mode as shown here:

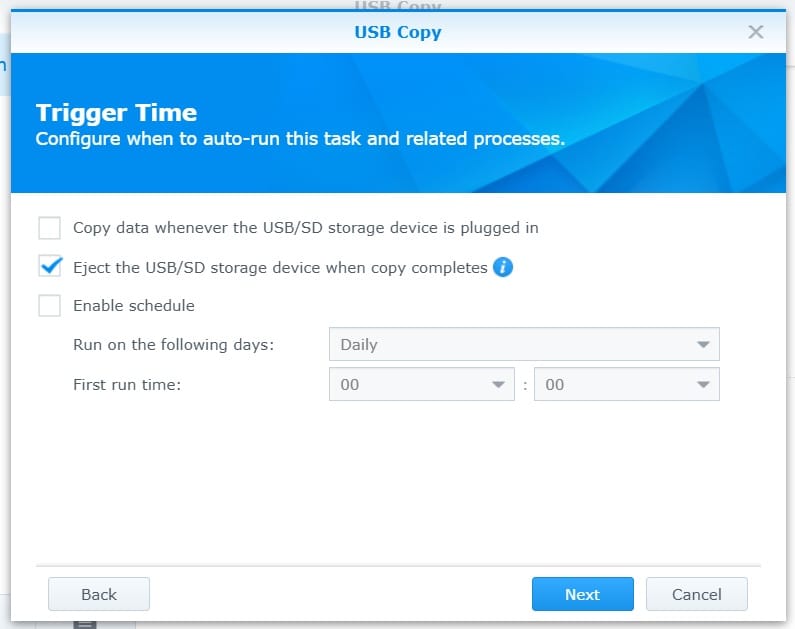
Click Next, and you'll have an option to set a trigger time if desired. I don't bother, because I want to run the copy right away as a one-time operation. Here are the options I use:
Next is an option to set File Filters, to only copy certain file types. I want everything, so I leave all the boxes checked. After you apply the filter and save the task, it's ready to click Run to get it started.
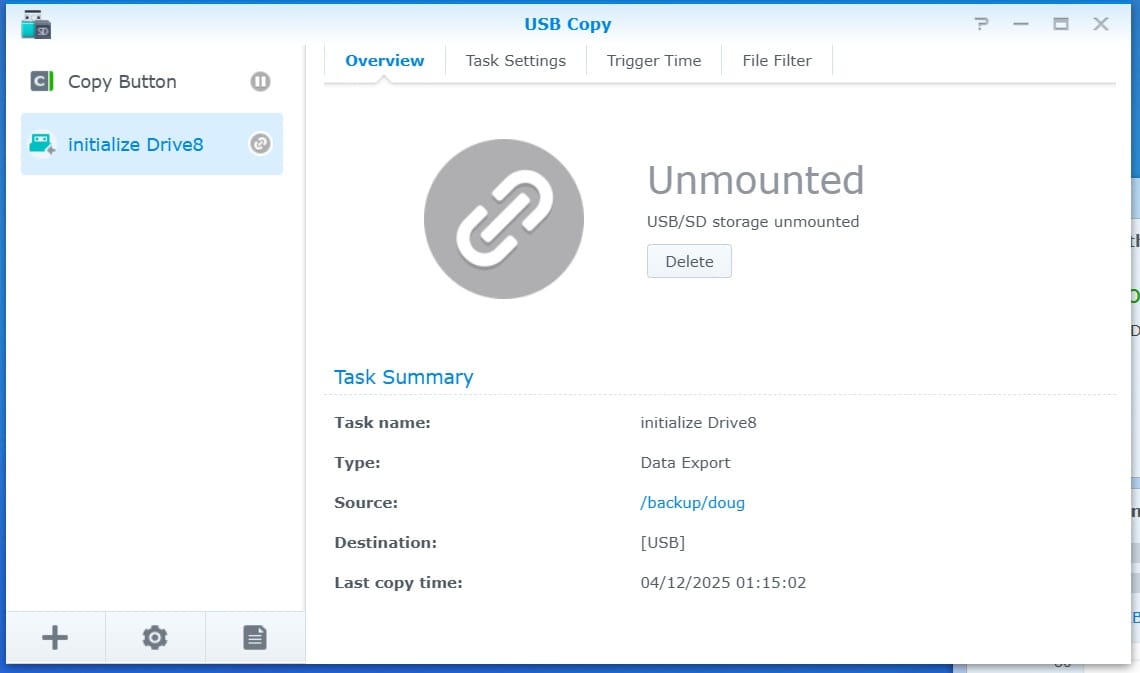
Once the task is running, you can exit the Synology DSM and use your computer as desired. The copying process will continue on the NAs until it's completed, regardless of whether you're monitoring it, and you can go back into the Synology DSM at any time to check status. If you selected the option to eject the USB/SD device when copying is completed, then you'll know the copying is completed when see an Unmounted status message in the DSM.
That's it! The process works great, and on my current network I'm getting a rate of about two hours per terabyte when copying to a new drive.
Update: July 2020
After switching networks twice over the last few months (moving to an AirBnB, then moving to a new house), I've learned a bit more about what can go wrong and what to do about it. Documenting here for my own future reference:
- First, a brief note on performance. I found copies were going surprisingly slowly, and this guidance helped.
- After switching networks, the mapped drive on Windows will no longer work because the IP address of the NAS has changed. There are a couple of ways you can find the new IP address and re-map the drive.
- First option is to use the online app from Synology here: http://find.synology.com/. Apparently that works for some people, but it has never worked for me.
- The more reliable option is to download the Synology Assistant app and use that to locate the NAS. Their download pages are pretty clumsy (note the tabbed interface, you have to click Utilities to find the app), so here is the direct link for downloading the Windows 10 executable for the DS218+ (the NAS model that I have): https://www.synology.com/en-us/support/download/DS218+#utilities
- With the Synology Assistant installed, you can simply right-click on your NAS and there is an option to map a drive from there. Hope this helps others!