Creating time-lapse videos
Time-lapse sequences have become de rigueur in many types of video, movie and TV production. As a typical example of their popularity, the hit series Breaking Bad had nearly 40 of them:
Time-lapse video clips typically last only a few seconds (although some are much longer to great effect), but they can be haunting and gorgeous, downright unforgettable. The patterns traced by clouds, stars, traffic, and other temporal phenomenon take on new and interesting characteristics when the time scale is accelerated by orders of magnitude.
The good news is, if you have a sturdy tripod, a bit of patience, and a camera that can shoot in intervals (or an external intervalometer for your camera), you can create time-lapse videos yourself. You don’t need the fancy “time lapse video” feature built in to some high-end cameras these days. For example, I have that feature built into my Nikon D800, but I don’t use it – I create a time-lapse video with the D800 in the same way I create them with the D700, which doesn’t have that feature.
If you’d like to experiment with time-lapse videos, this blog post covers exactly what you need to do. The process may sound a bit clumsy and complicated if you’re not accustomed to digging into technical details, but if you routinely manage files and folders and occasionally work with a command line instead of a graphical user interface, the process will be pretty simple for you.
Which brings up a good question: why don’t I (and many others) use the time-lapse feature built into the camera?
It’s about control. When you use the camera’s time-lapse feature, it takes a whole bunch of pictures (“frames”) and assembles them into a video automatically, so you end up with just one thing: a finished time-lapse video, ready to enjoy. Or ready to disappoint you, if something isn’t quite right with the exposure, cropping, white balance, or other details.
Instead, what many of us like to do is capture all of those individual frame images and them assemble them into a video using a software tool designed for this purpose. (my favorite is FFmpeg, covered below.) That way, you can do some post-processing on the images if needed, before committing them to a video. I’m not going to cover post-processing here, which is a huge topic unto itself, but I prefer this approach for the flexibility it provides.
If you’re game to try creating a time lapse video yourself from a bunch of still images, keep reading.
Capturing the still images
You need to think about a few things before you start capturing images, including your setup, the pace of your final video, and your power and storage requirements.
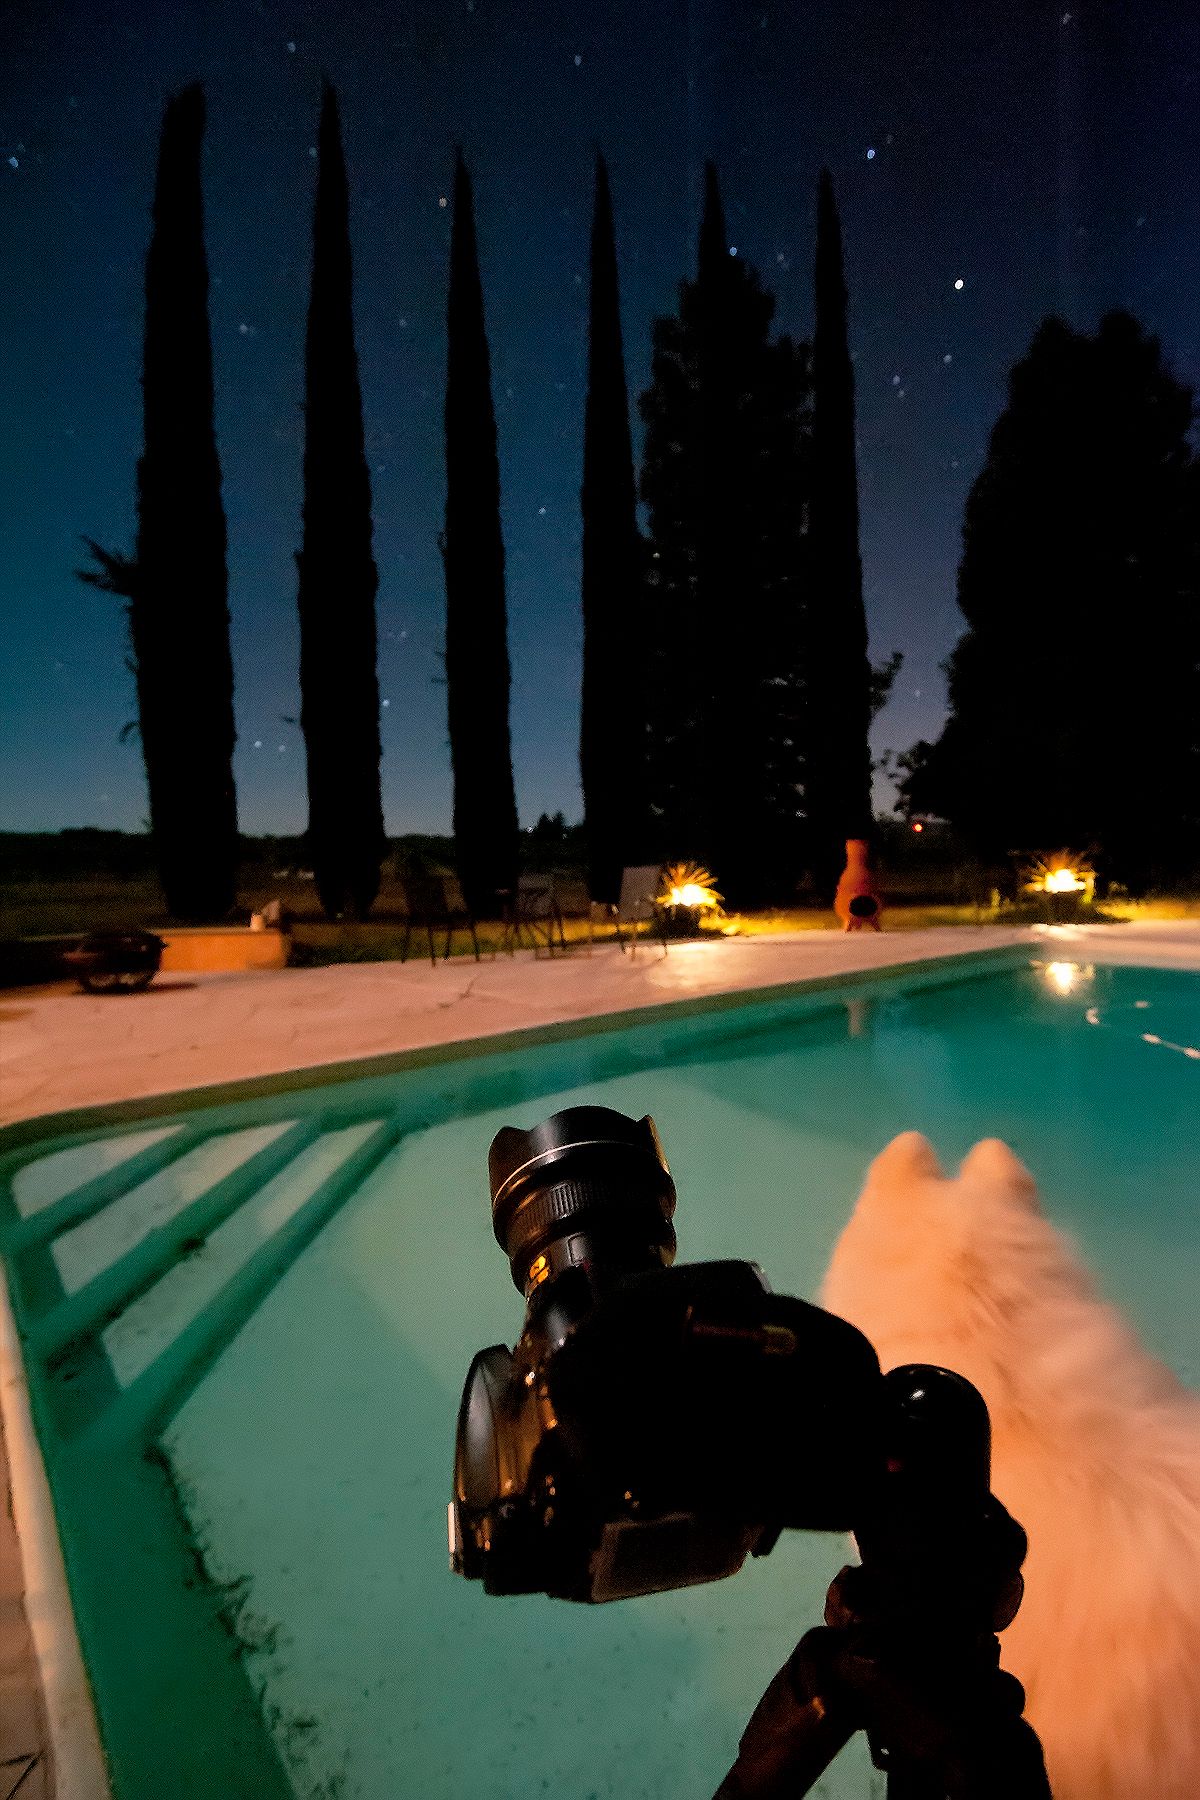
Setup. First you need to find something you’d like to shoot and plan your focal point, exposure, and other details. Sure, you can adjust some (not all) of this stuff in post-processing, but for best results you should strive to capture images that are as close as possible to what you want to end up with. And you need to set up your tripod, and learn to use your camera’s interval shooting option or an intervalometer. (They’re all different – read the manual!)
Pace. There are two variables that affect the pace of your final video: how many seconds between each image you capture, and how many frames per second (FPS) in the final video you produce.
As a simply example, if you take a photo every minute and then assemble those into a 60 FPS video, you’ll pack one hour of action into each second. Now, 60 FPS is a higher-quality video than you will need for most purposes. So I usually go with 30 FPS or even 15 FPS, which works pretty well for clouds and stars and keeps the final file size smaller. If you don’t have an opinion on this, I’d start with 15 FPS.
Power. This is a key consideration: make sure you have enough battery power for what you want to capture, and/or use an AC adapter for your camera. This is especially critical in cold weather, where your battery life can be much less than in warmer conditions.
If you’re far away from civilization, you can’t use AC power, but there are still options for getting a time-lapse sequence that’s much longer than a single battery can last. For example, if you find that a charged battery will capture about 4 hours of photos in your situation, you could have several fully charged batteries handy and then swap them out (quickly, between shots, and carefully, without moving the tripod) every 3 hours.
Storage. Make sure you have a big enough memory card in your camera to capture the hundreds (or sometimes thousands) of images you’ll be capturing. Some cameras can be attached to a laptop computer for even more storage, so look into that for your camera if it’s a reasonable option.
And note that the storage requirements can vary significantly based on what you’re capturing. If you’re capturing “raw” files, for maximum post-processing flexibility, those things are huge – on my D800, I sometimes capture an image whose Nikon raw file is over 50MB. That adds up quickly.
If you’re capturing JPEG files, your camera probably has settings for various resolutions. Video resolutions tend to be much lower than photography resolutions (generally speaking), so you might want to select a lower resolution to make sure you can capture a large number of images.
On my D800, it offers three resolutions:
- Large = 7360 x 4912 pixels
- Medium = 5520 x 3680 pixels
- Small = 3680 x 2456 pixels
I usually capture Small images for a time-lapse series, because that’s still far more resolution than I need in the output video. HDTV, for example, is merely 1280×720 pixels.
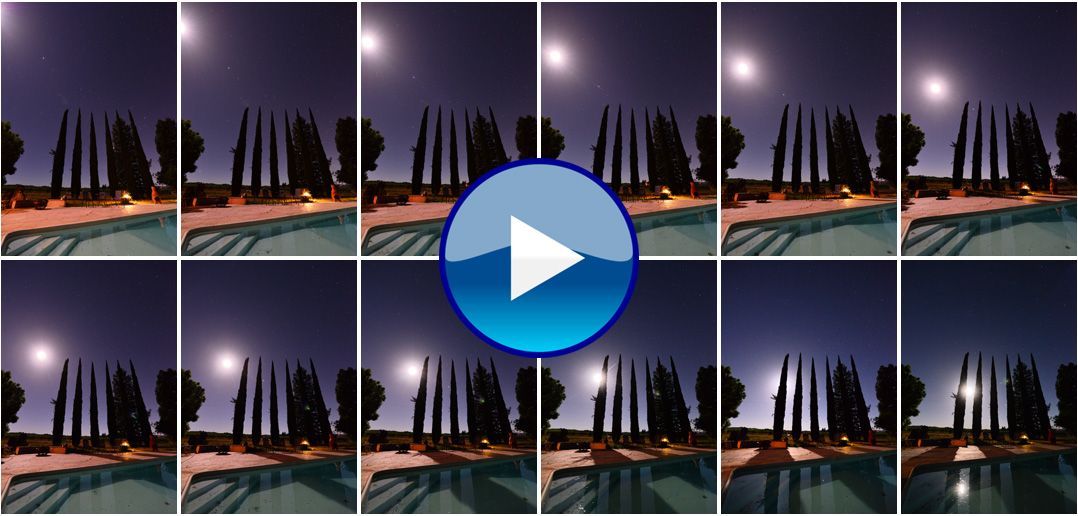
Once you’ve planned out all of those details, kick off the interval shooting feature and be patient for a few hours. The exact duration depends on what you’re capturing, of course. As an example, here’s a video for which I captured four hours of images, one per minute, then combined them into a 15 FPS video that runs for 16 seconds total:
Merging the still images into a video
OK, so you’ve captured a few hundred images at a regular time interval, and you’ve copied them into a folder on your computer. Now what?
There are many tools that can merge still images into a video. My favorite, because it’s free and extremely capable, if a bit complex and awkward, is FFmpeg. I use a Windows laptop, but it’s a cross-platform app that works with the Mac and various Linux distros as well.
Once you have FFmpeg installed and in your search path (or a copy of it in your image folder), you’re ready to go. The basic concept is that you’ll go to a command prompt (DOS prompt, Linux shell, etc), navigate to the folder with the images in it, and then run a single FFmpeg command that will create your video.
Let’s look at a simple real-world example. This one:
When I captured those images, I wound up with 286 JPEG files in a folder. The first file was named DRM_5795.jpg and the last one was named DRM_6080.jpg. So I went into the folder and typed the following FFmpeg command:
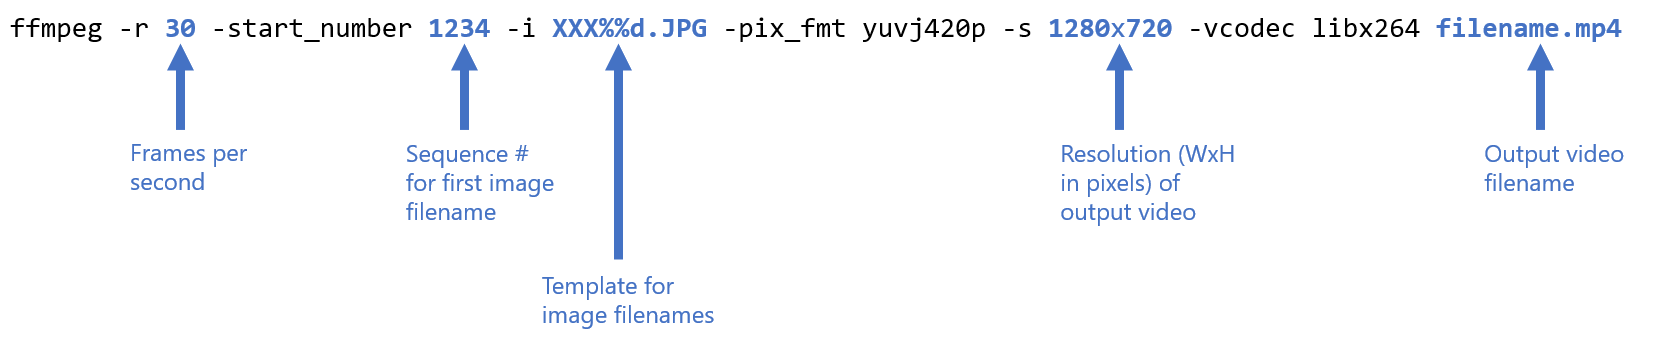
FFmpeg assumes that your filenames contain a sequential number within a template, which is a fair assumption for pretty much any digital camera in existence. In the example above, the first image filename would be XXX1234.JPG, following by XXX1235.JPG, and so on. If your number series contains leading zeroes in the sequence numbers, you'll need to use a format such as XXX%04d.JPG.
After I typed a command like that for the example in this post, FFmpeg ground away for about a minute and then stopped:
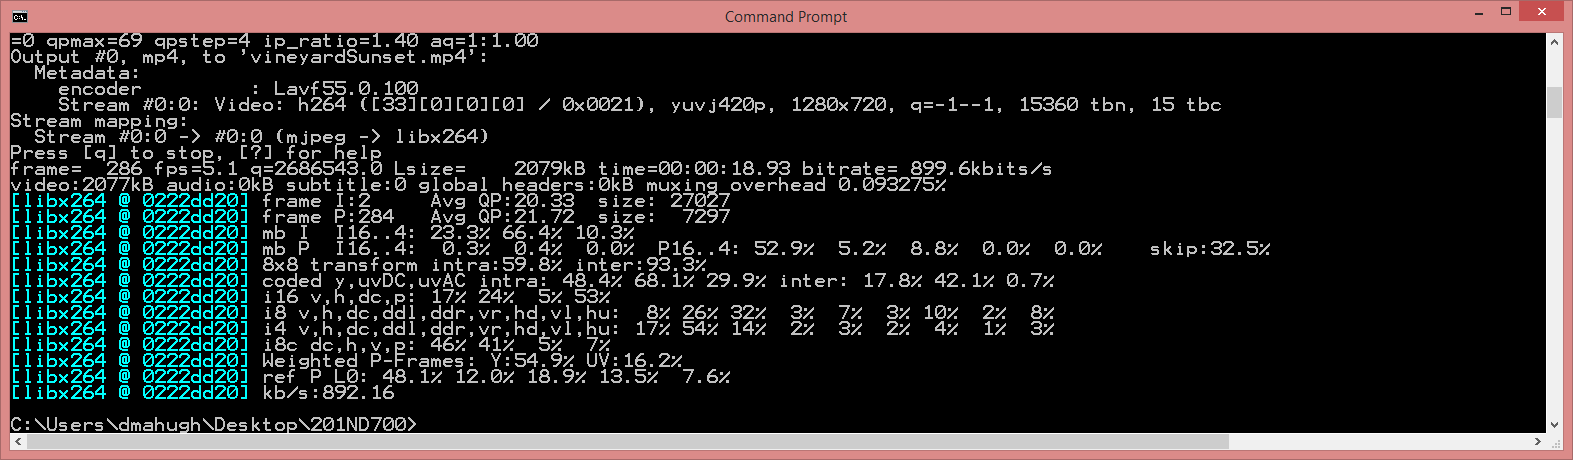
At that point, I was done! I had my final video in the file vineyardSunset.mp4, and I could click on it to play it, or post it to YouTube.
A couple other topics
That’s all there is to it, but I’ll also briefly mention a couple of other areas that you might need or want to explore: video rotation and post-processing.
Rotation. One thing that can happen is that you might capture your video in a rotated orientation (e.g., camera turned 90 degrees) and then you’ll need to rotate your video to make it play in the proper orientation. For example, here’s how my camera was set up for the Moon over Kelseyville video we looked at earlier:
Rotating a video is one of a huge number of things that FFmpeg can do for you. (As an aside, if you want to get a feel for how vast is the functionality offered by FFmpeg, go scroll through the documentation. Good grief, you could make a career out of learning FFmpeg. Which some folks have, actually.)
To rotate that video 90 degrees counterclockwise, I used this FFmpeg command:
C:\> ffmpeg -i myvideo.mp4 -vf "transpose=2" fixed.mp4
This is applying a rotation transformation, and the transpose=2 parameter indicates which transformation we’re applying. Change that 2 to 1 for a clockwise rotation. There are many other options, too – see the massive FFmpeg documentation if needed.
Post-processing. I mentioned earlier that I won’t cover post-processing here, but as an example of how post-processing works in general terms, take a look at the vineyard sunset video we used in the first FFMPEG example above.
Note that it has a semi-opaque copyright message throughout. To add that copyright message, I recorded an Action in Photoshop to add it to an image, than ran that action on every image in my folder as an automated batch. Then I merged the images with FFMPEG as described above.
It’s a simple example, but you can do pretty much anything you want in post-processing. You can crop images, add text or other elements, and if you capture raw files, you can adjust exposure and white balance. You do these things to your captured still images, and then use FFMPEG to combine the resulting images into your video.
Hope that helps you have fun creating time-lapse videos!