Building Bookcases
I've spent about two months out of the last year building two massive bookcases, and I'm planning to build a third and final one later this year. This post covers why I've taken up this project, as well as a few things I've learned along the way.
It' a long post, so unless you're into this sort of project you probably won't want to read the whole thing. Short version: it's been more work than I expected, but I'm having a blast and that's all that matters.
Transition from work to leisure
When we moved into our house in April 2020, each of us picked a room to set up for a home office. I picked an upstairs bedroom directly above the front porch, and spent several months getting it set up the way I wanted, as detailed in this blog post.
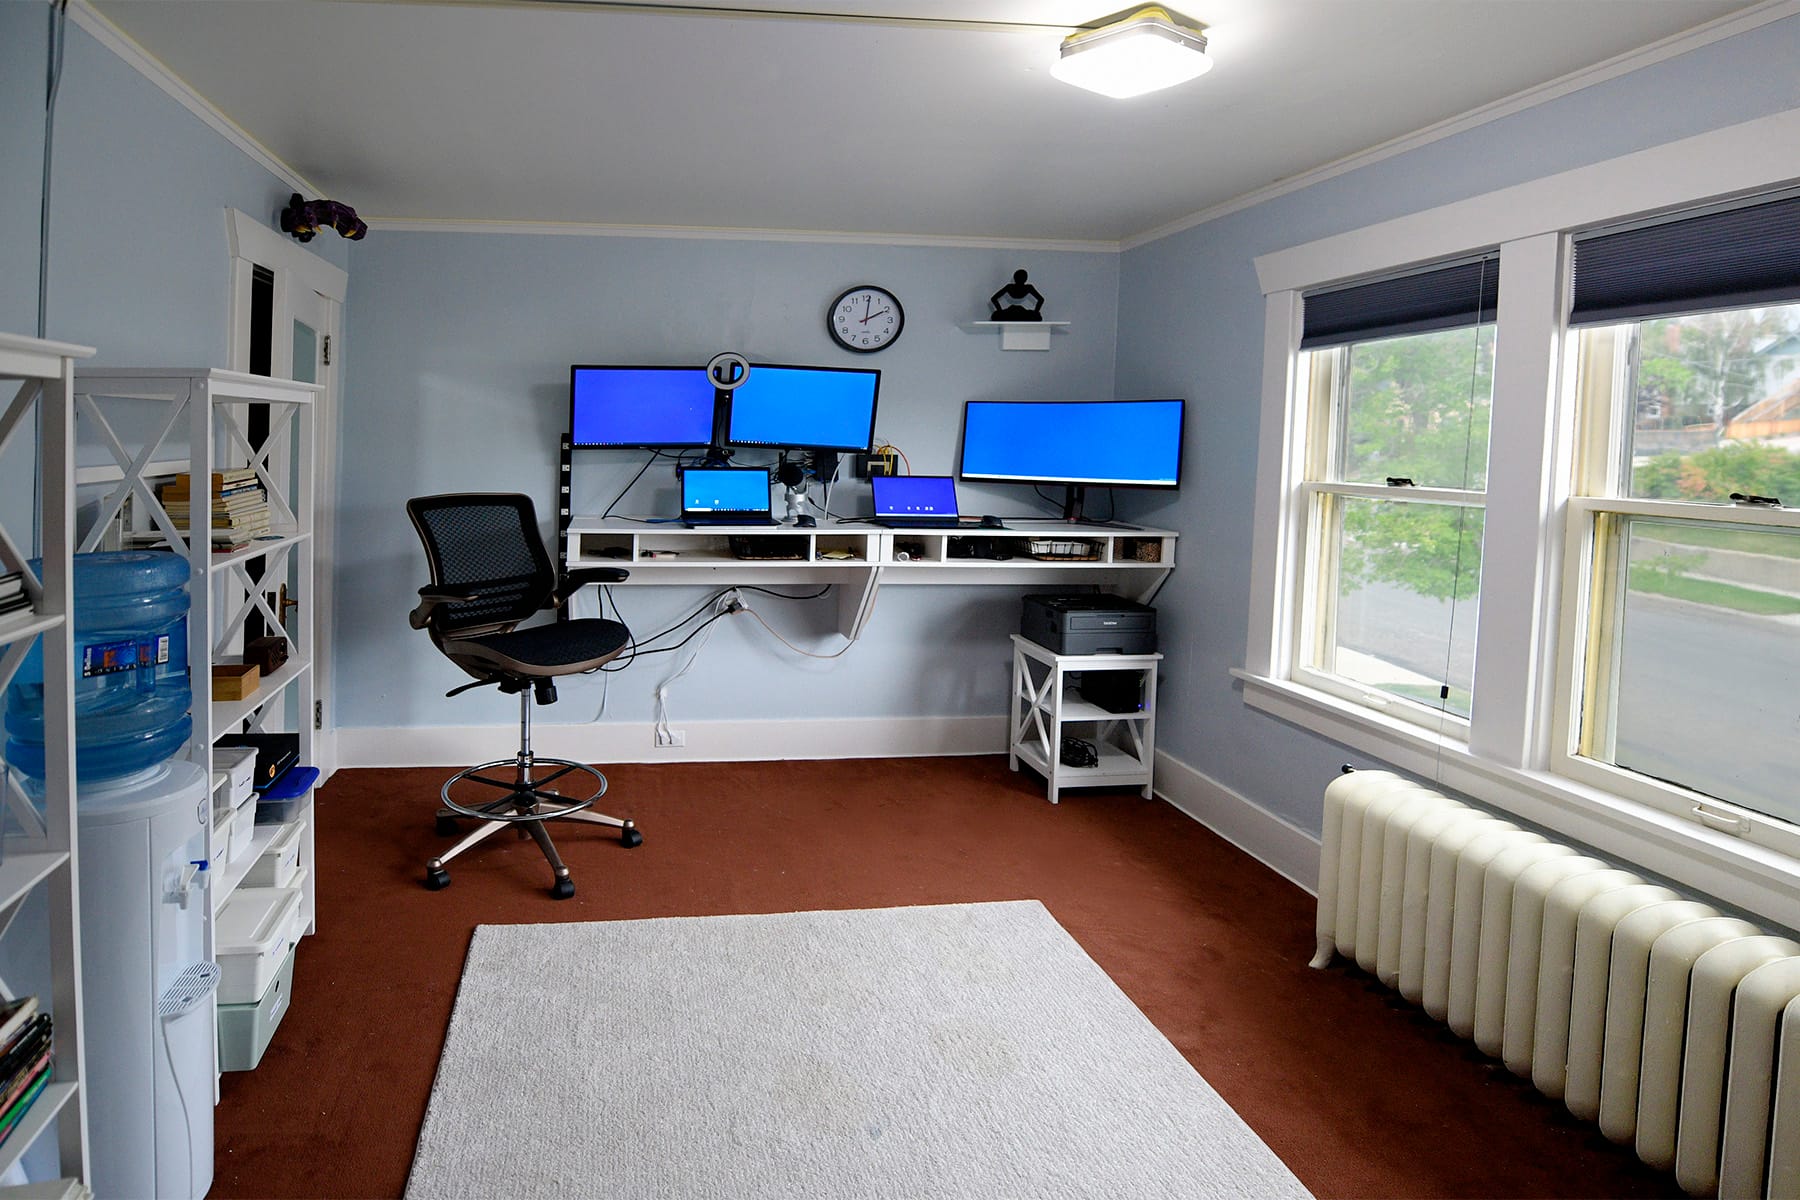
I worked from that office for three years, and after I retired in the summer of 2023, we decided to make it into a library.
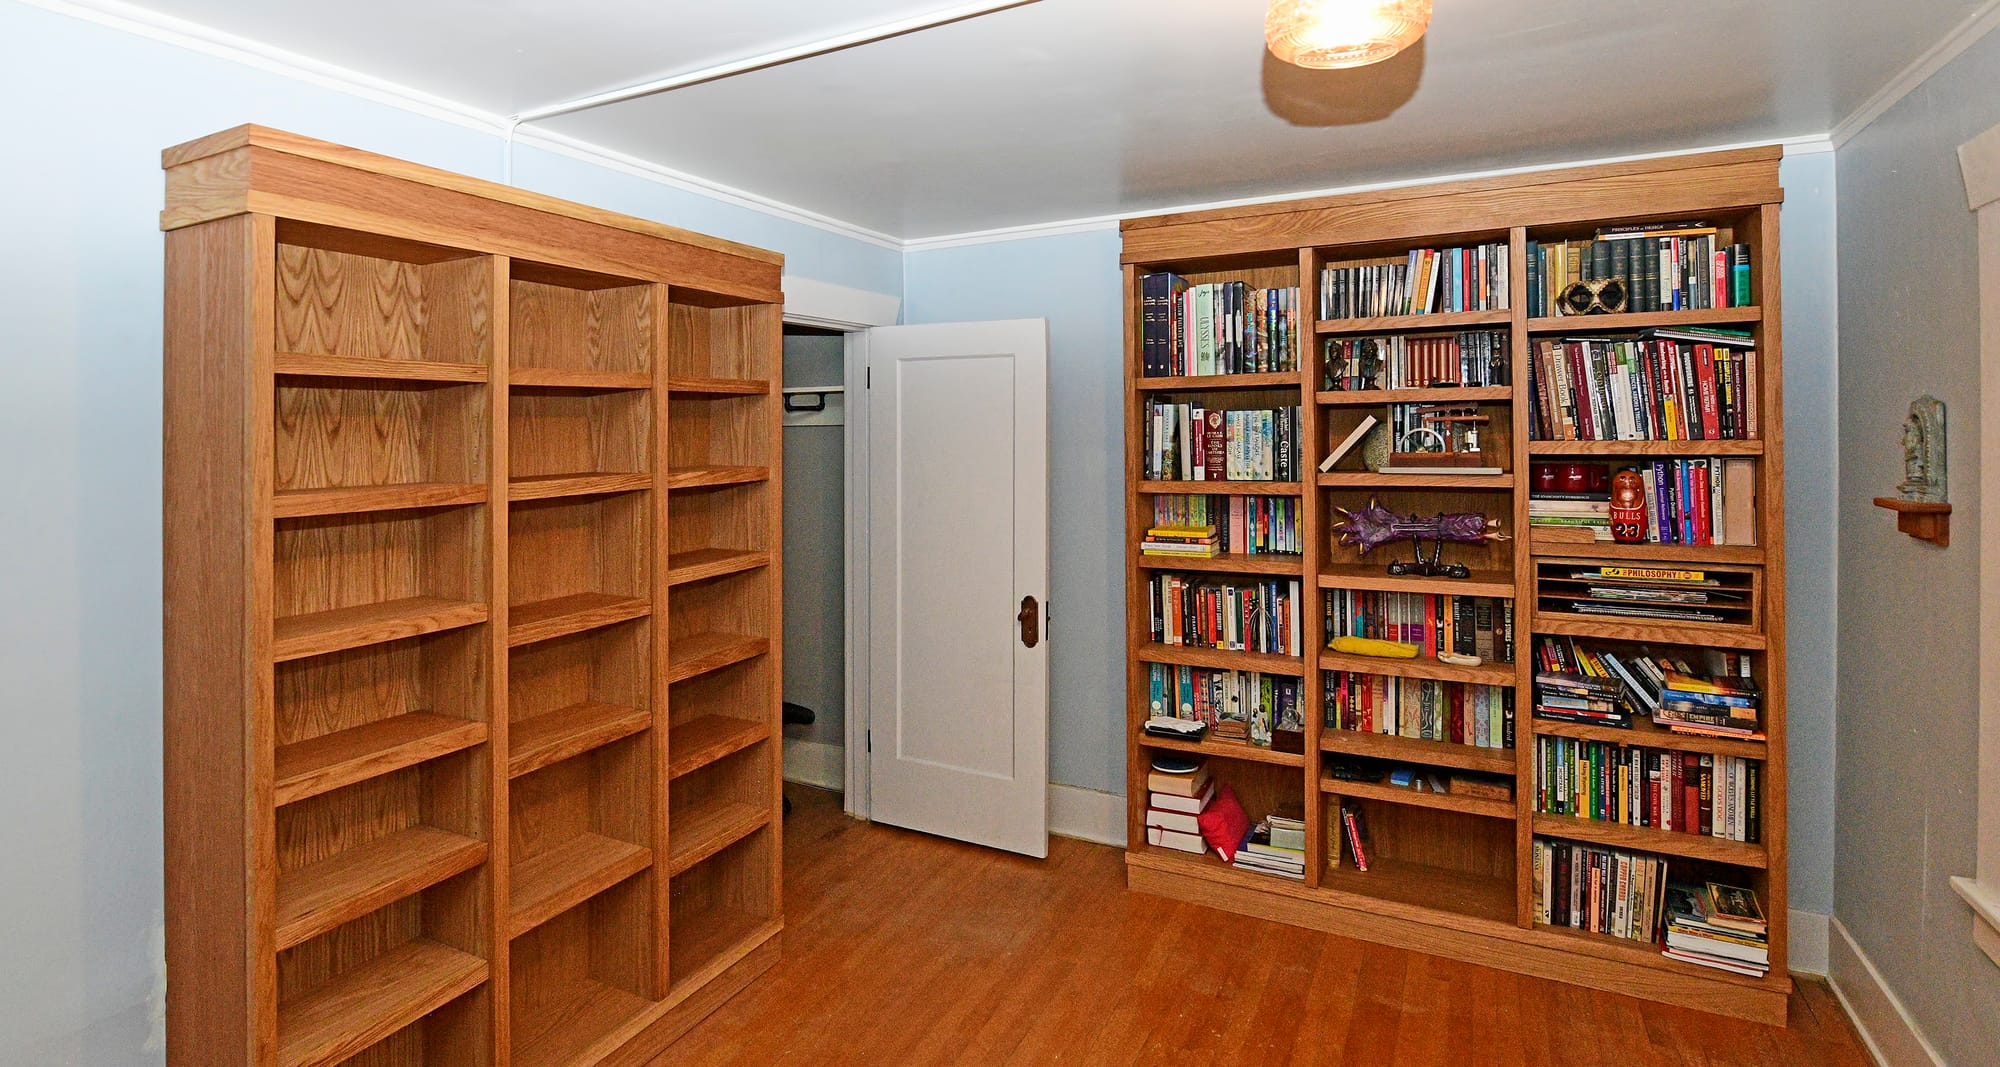
At first, I was planning to do built-in shelves from floor to ceiling all around. But after thinking through the details of what that would entail, it didn't seem worth the work and expense. And it would also mean permanently reducing the size of an already-small bedroom, which could be a hassle when it comes time to sell the house. So we opted for freestanding bookcases instead of built-in shelves, with a large bookcase on each of the three available walls in that room. (The fourth wall has a large radiator and three windows on it.)
We reviewed many different bookcase designs, and in the end we decided to go with the Alm Fab Bookcase designed by Michael Alm, a Seattle-based custom furniture builder with a large YouTube following.
Here are a few of the things that made us pick this design:
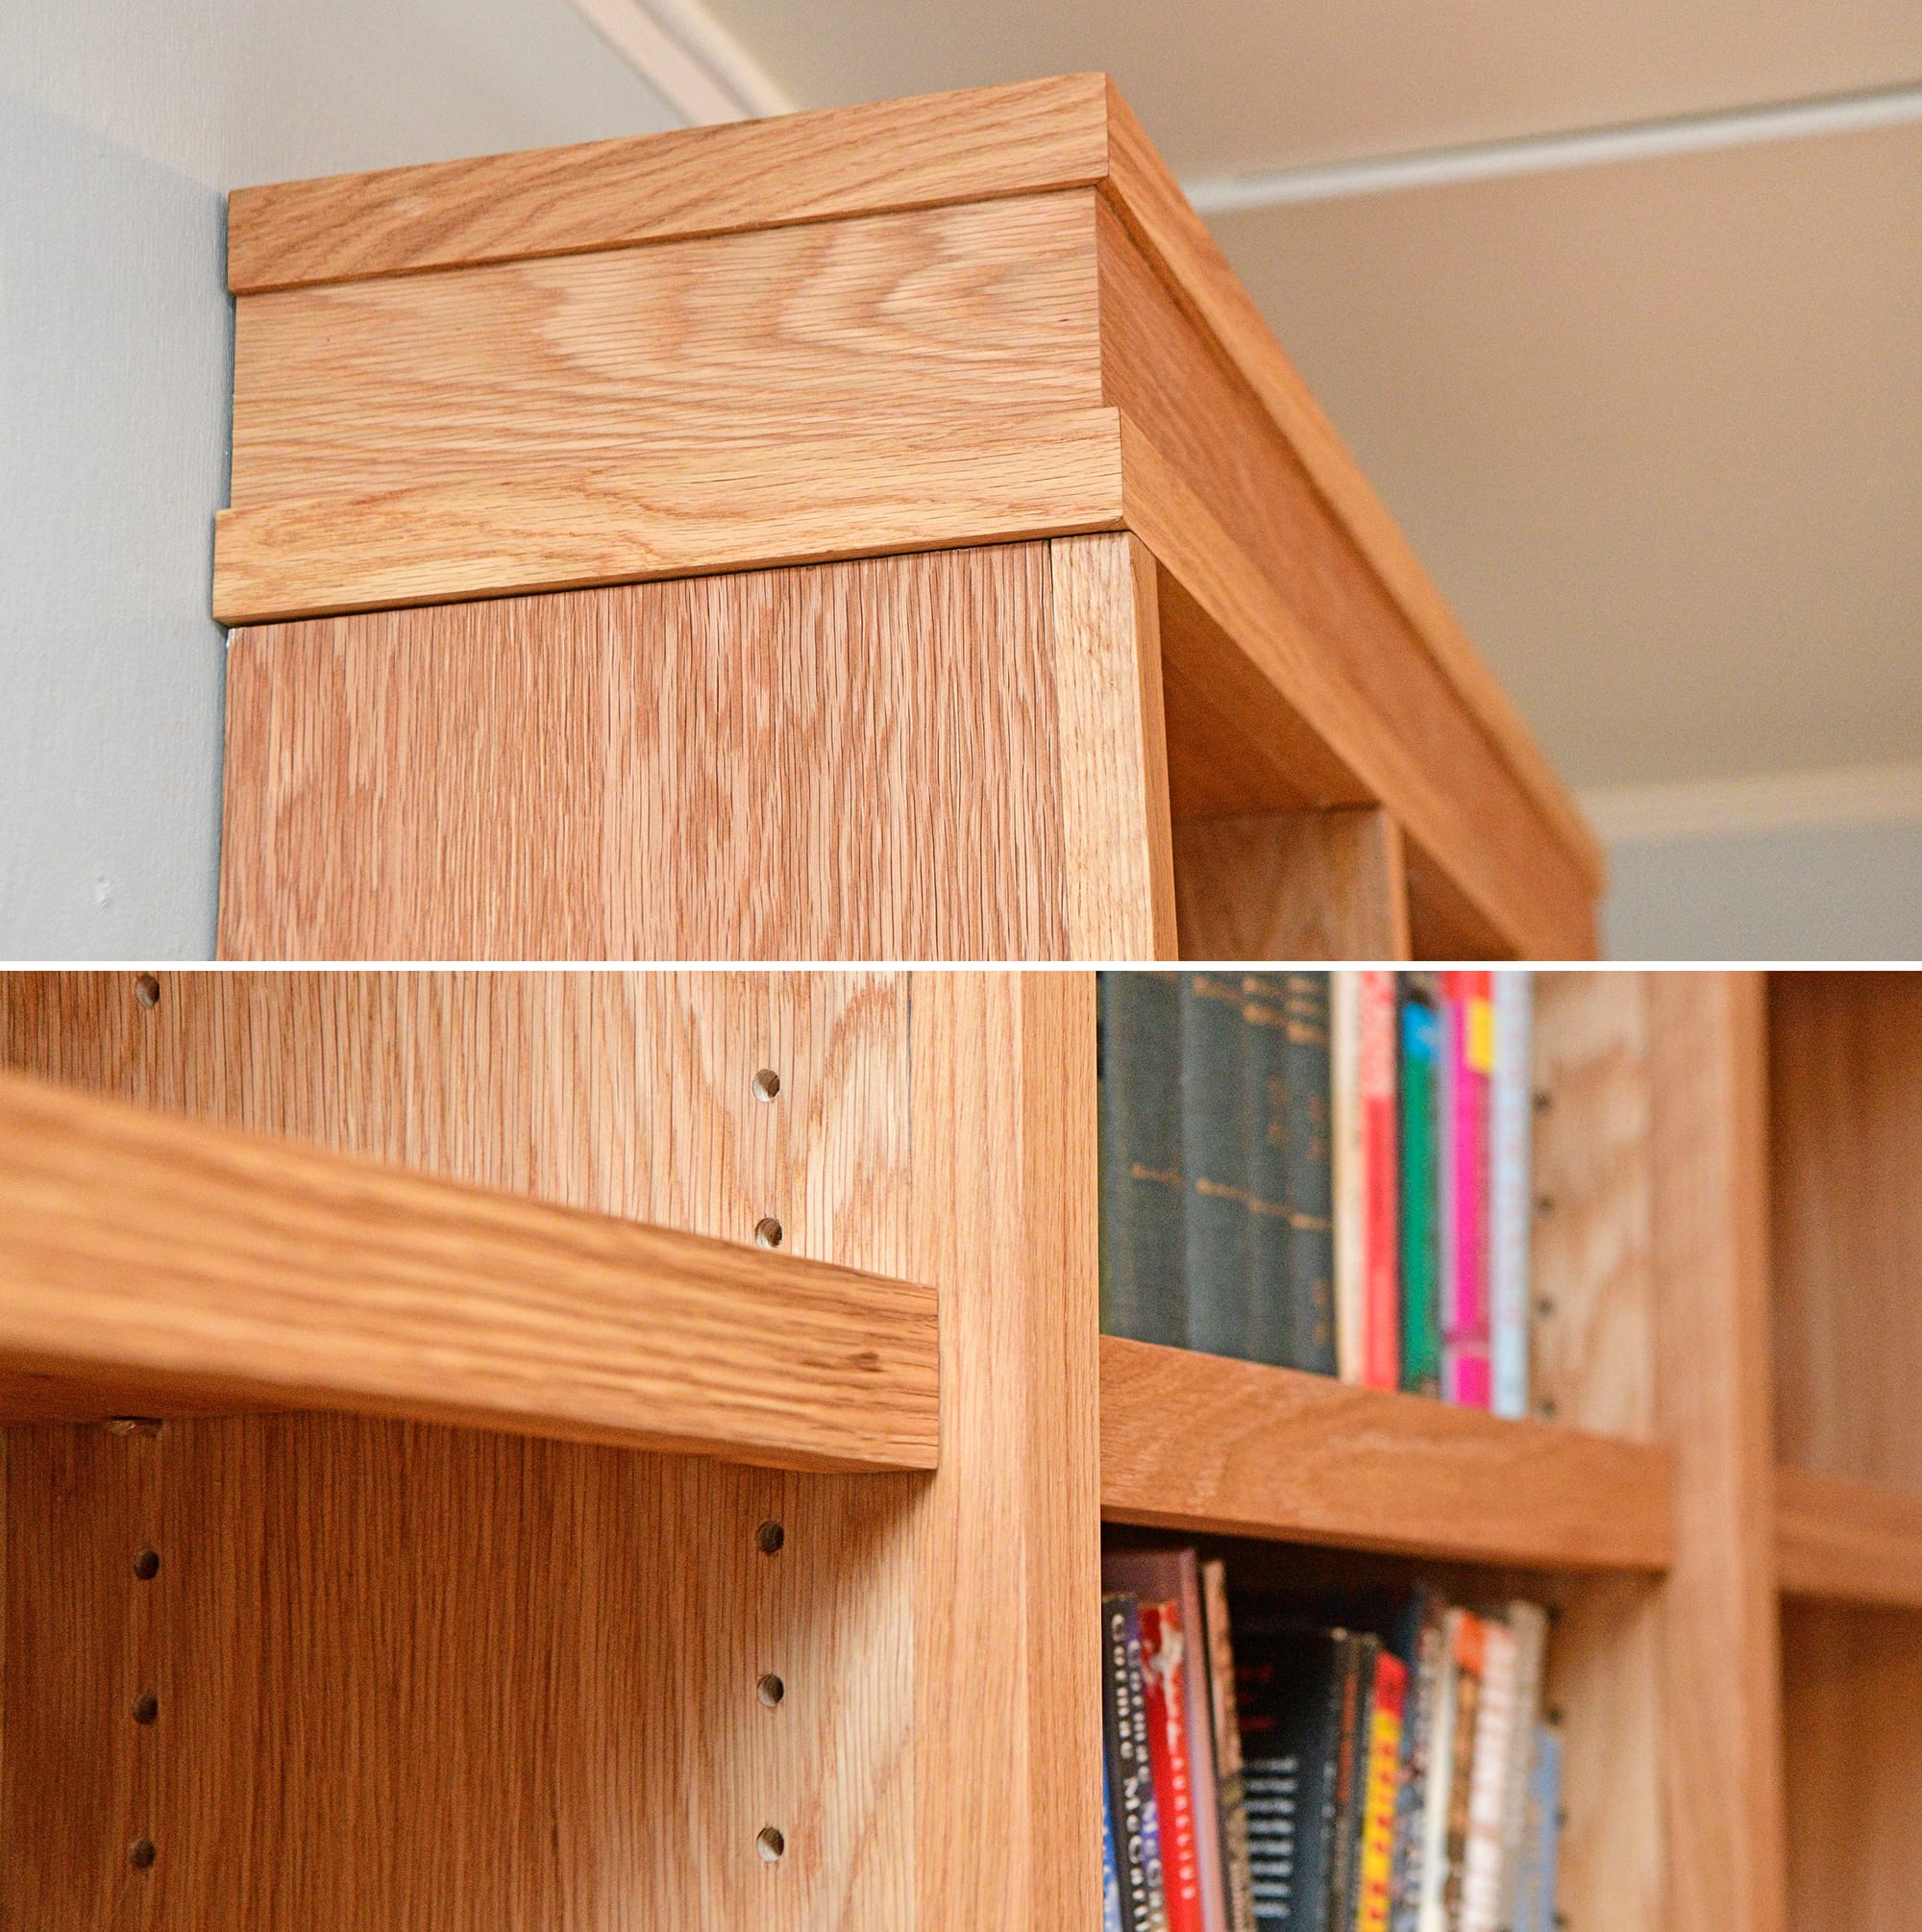
- It was designed to hold a collection of heavy art books, with shelves that are reinforced by thick oak trim across the front. We have some big heavy books, and with this design we'll never have a shelf start sagging.
- It was also designed to be modular, to allow for installation at a client site where the pieces would need to be hauled up stairs and then assembled in place, and our library room is two floors above my workshop so we have the same consideration.
- There are some details of the design that make it easy to modify the dimensions while maintaining the same look and feel. This will allow us to have three different sizes of bookcases, with aesthetic details that tie them all together.
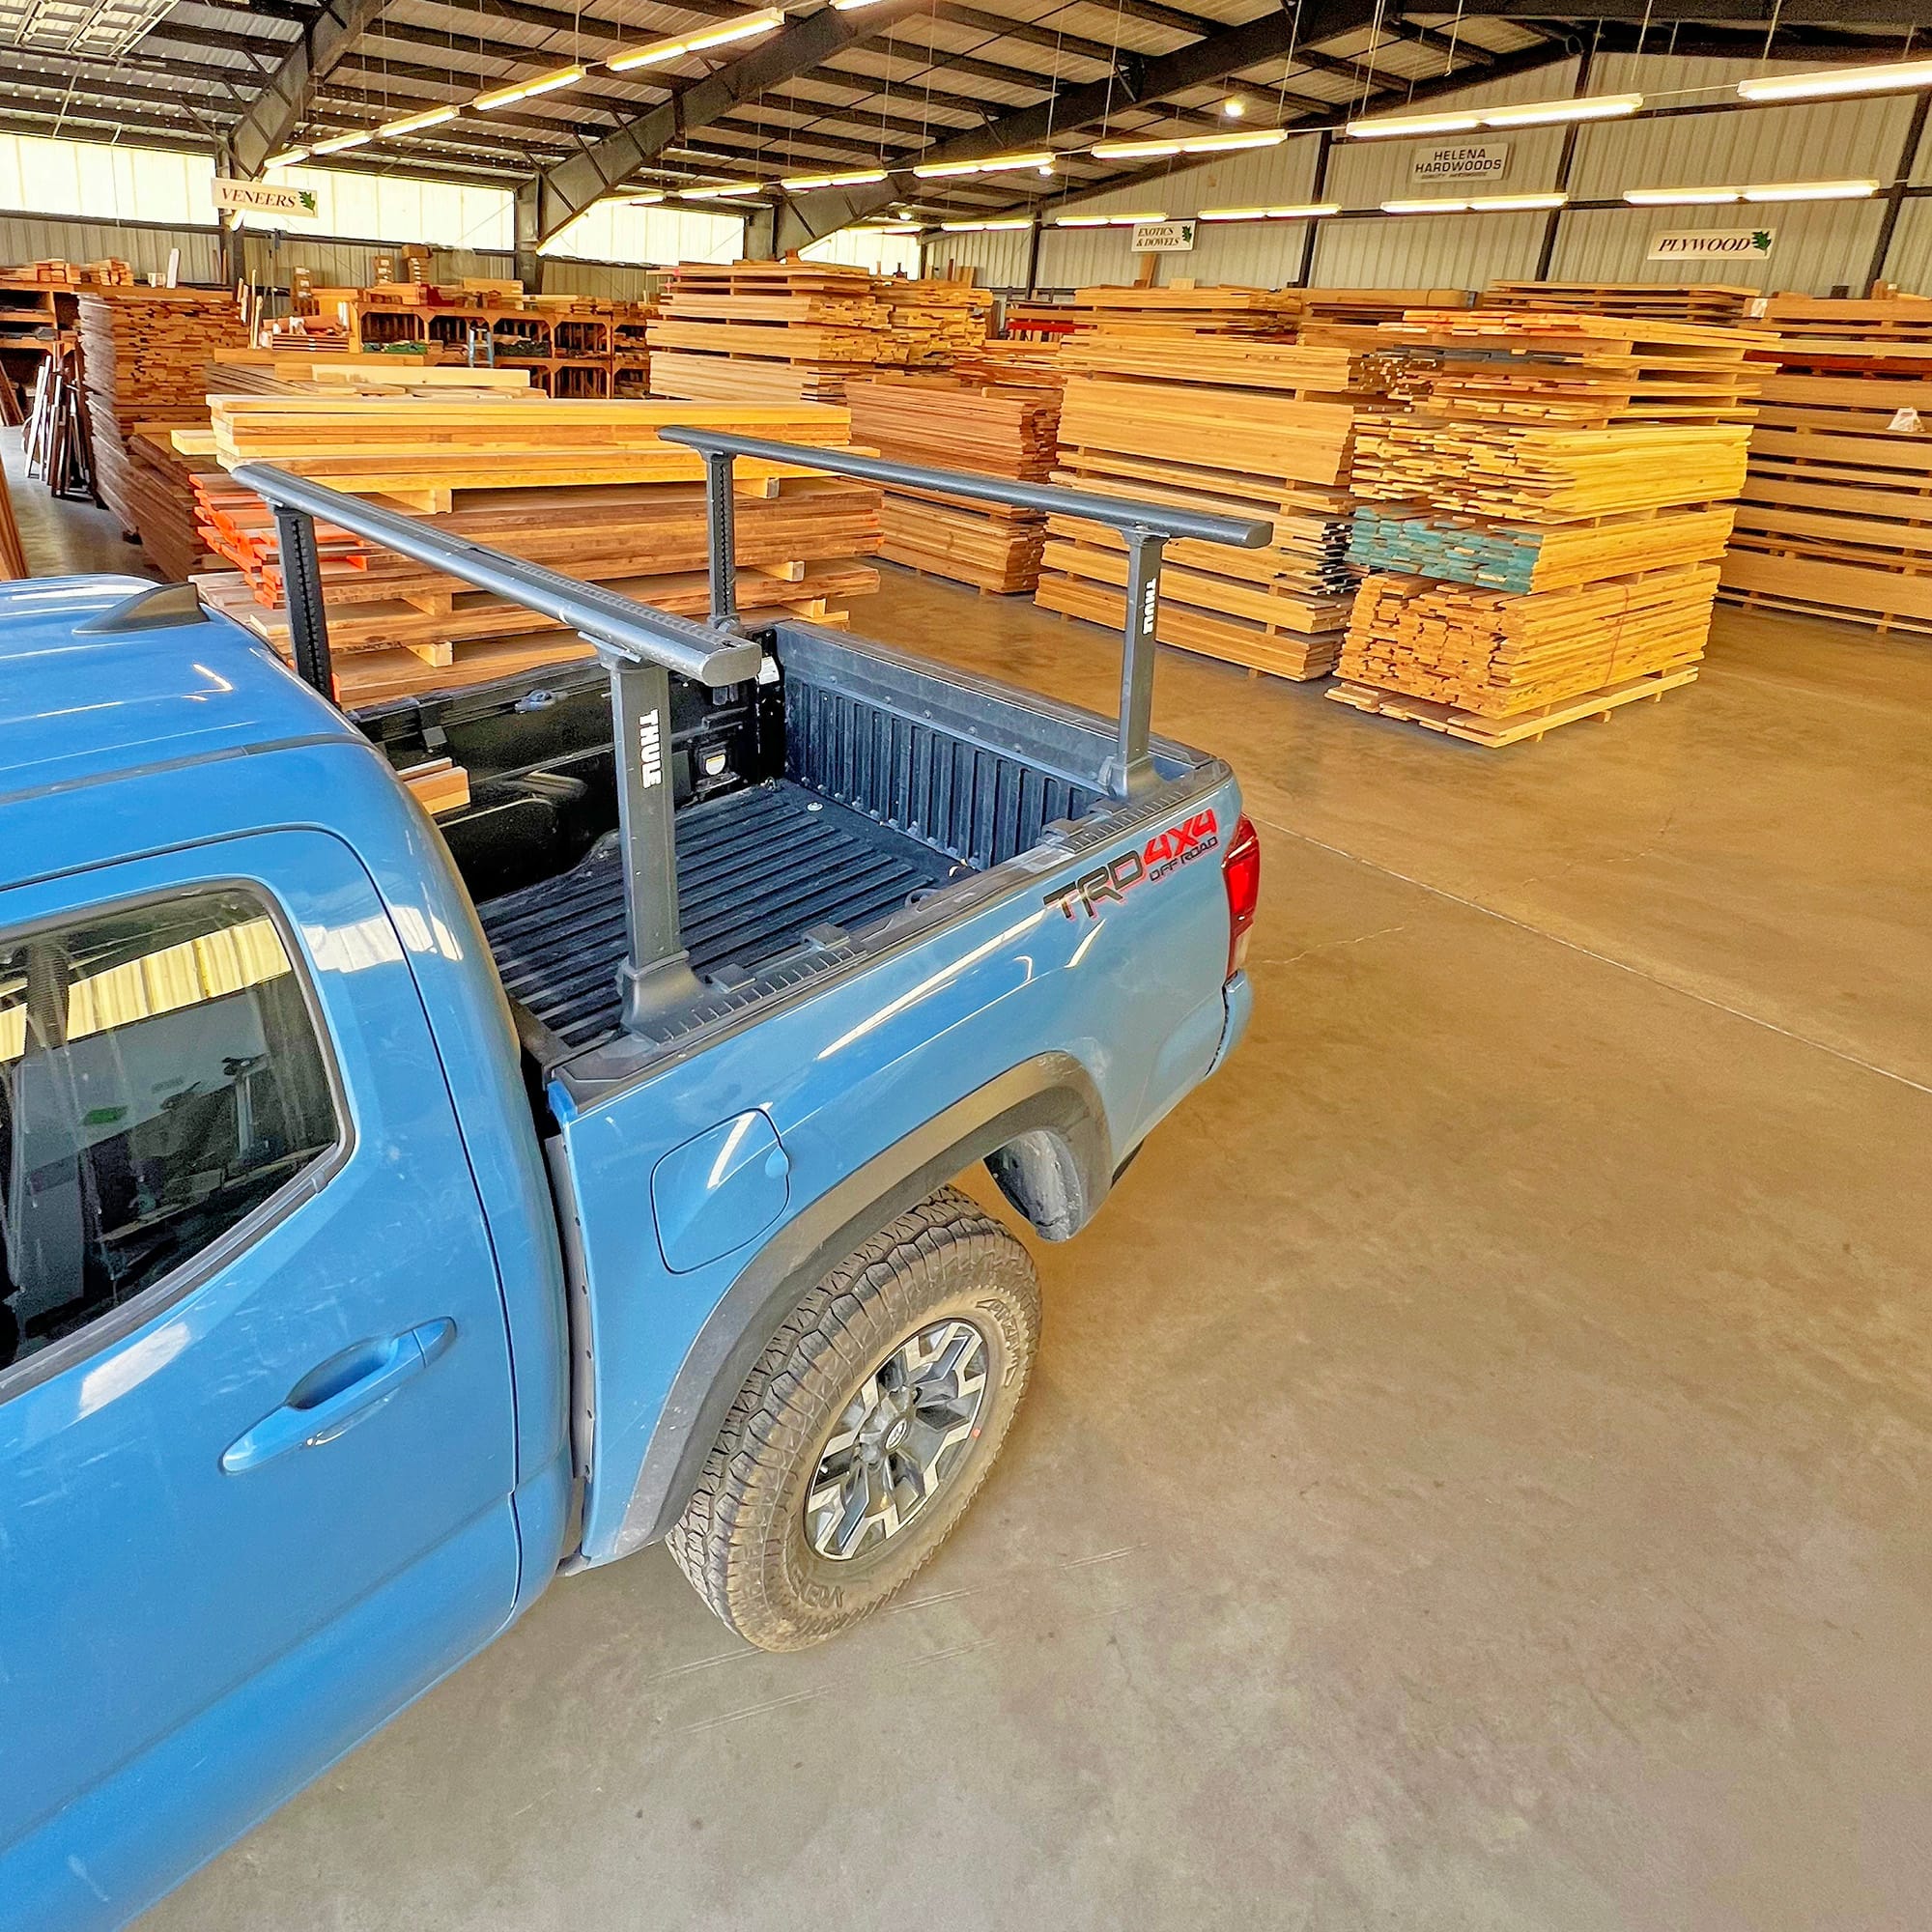
- It's a design that uses only two materials – white oak plywood and white oak lumber – both of which are readily available at my favorite hardwood store, Helena Hardwoods.
- Megan and I both like the way it looks.
After settling on this plan, I watched and re-watched Michael's how-to video so many times that I think I have it memorized, and then in September 2024 I started construction of the first bookcase.
Bookcase #1
For the first bookcase, I followed the Alm Fab plans precisely, except for a couple of things I had to tweak due to the details of our baseboards and trim. At a high level, construction is roughly divided into these phases (with the tools used in parentheses):
- Cut the plywood to size (table saw, circular saw)
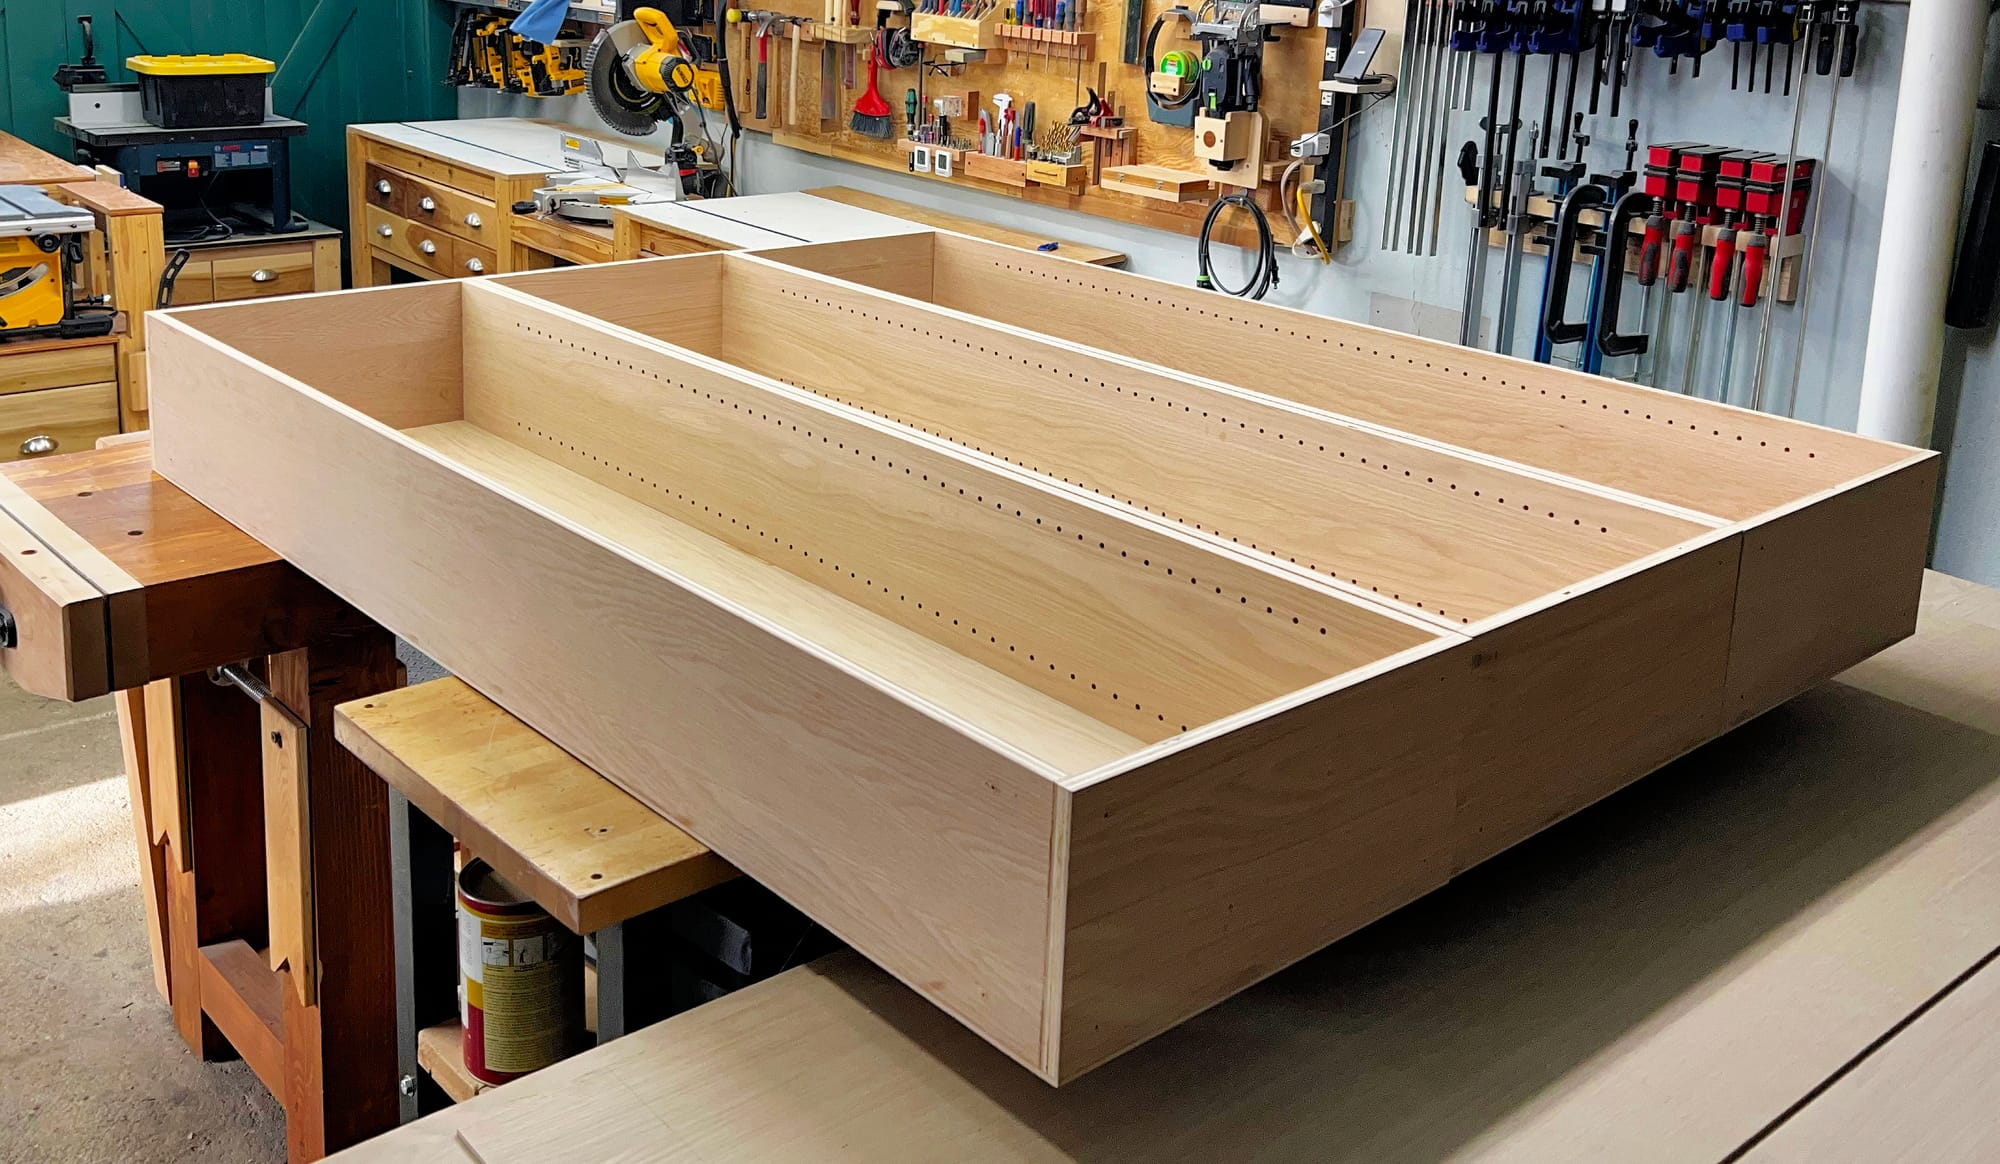
- Drill shelf pin holes (hand-held plunge router)
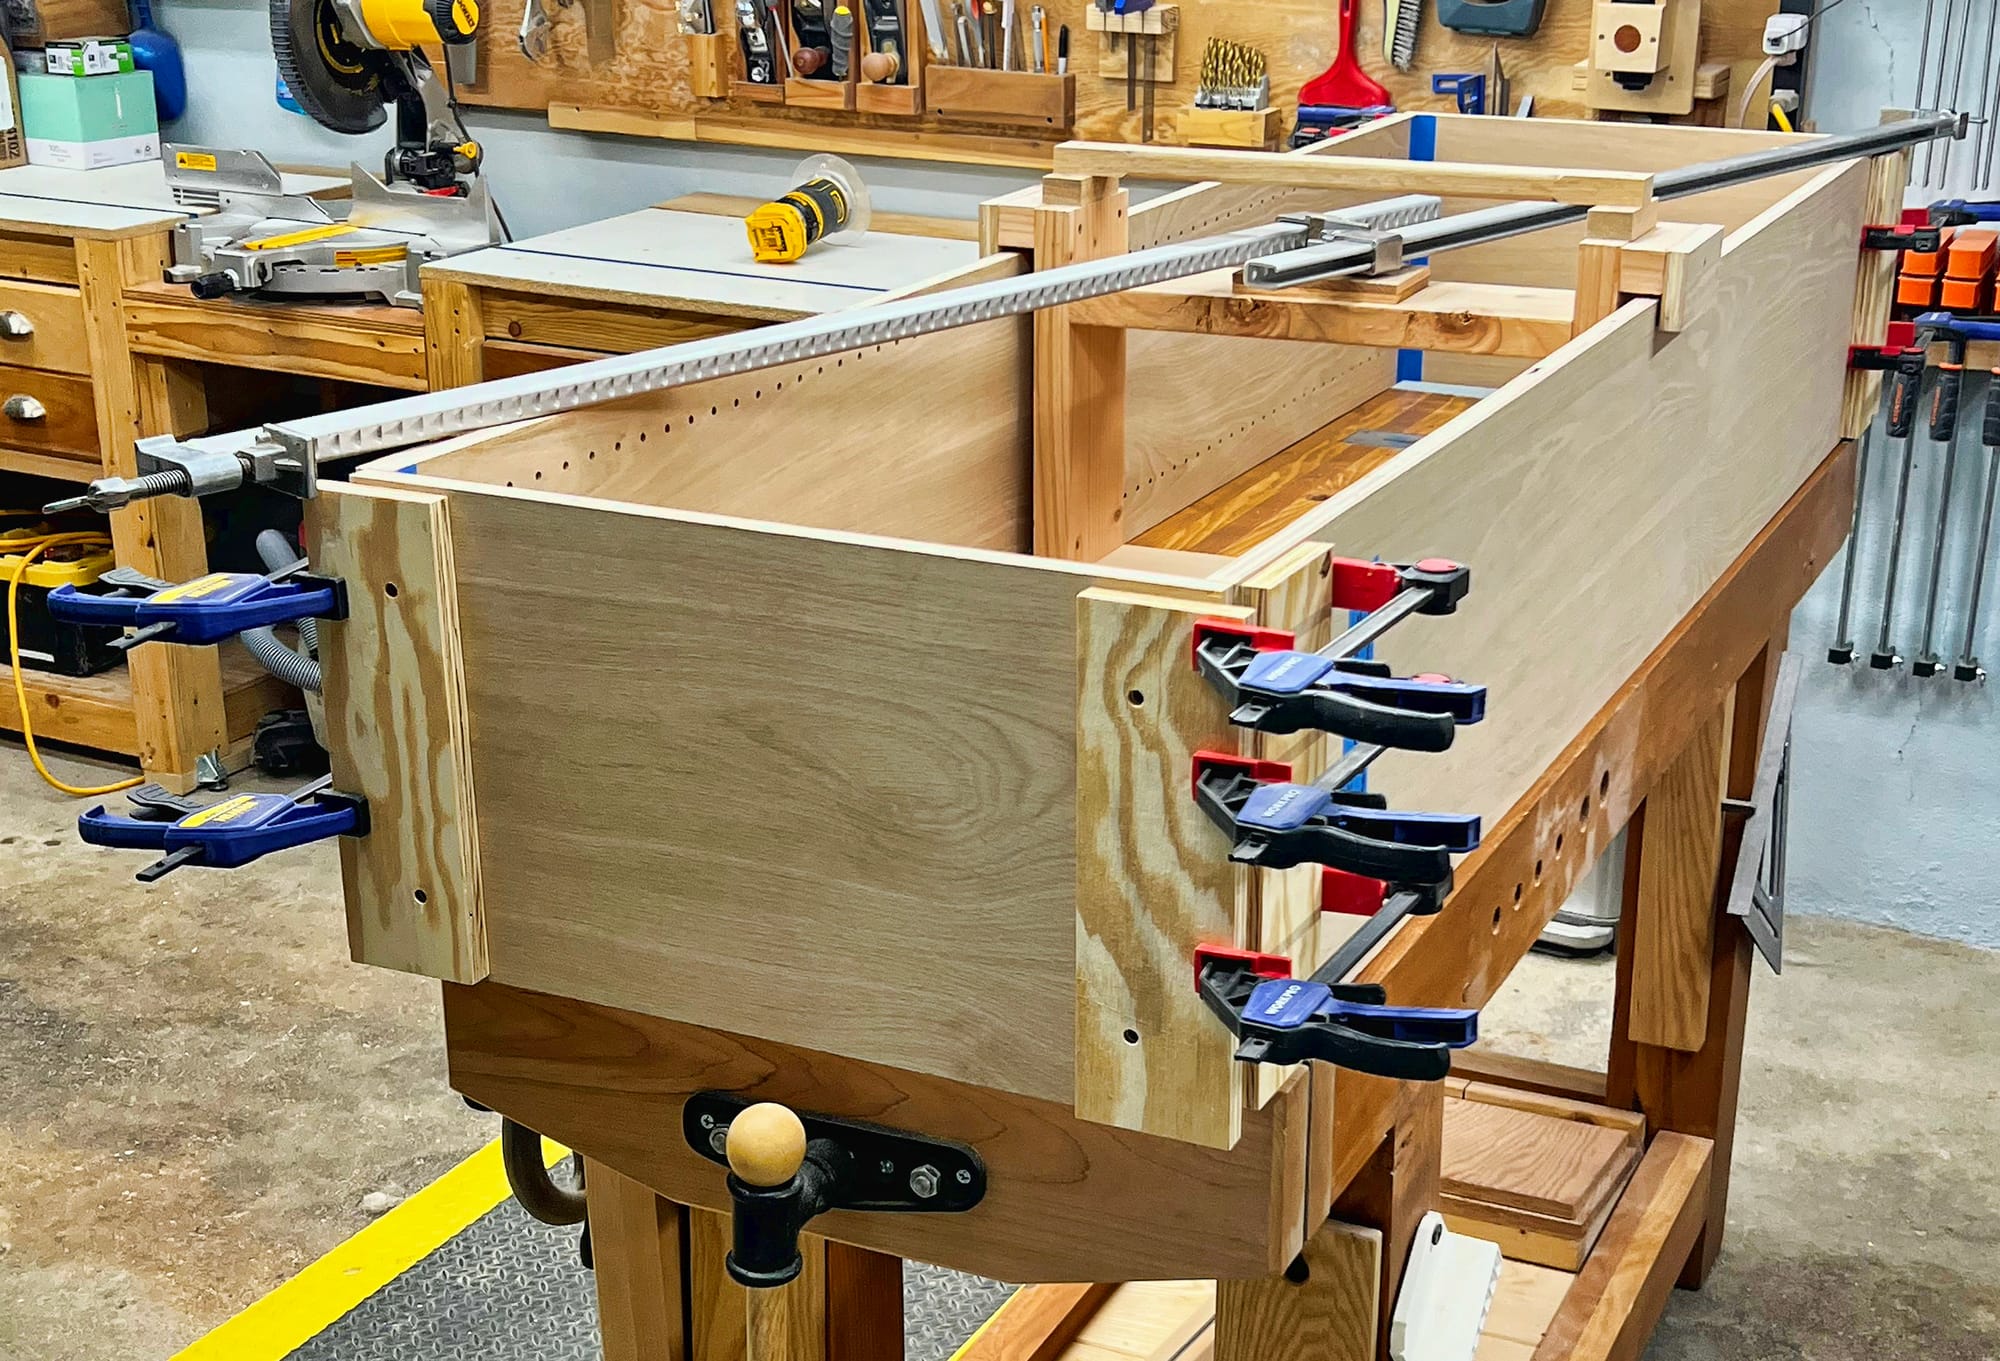
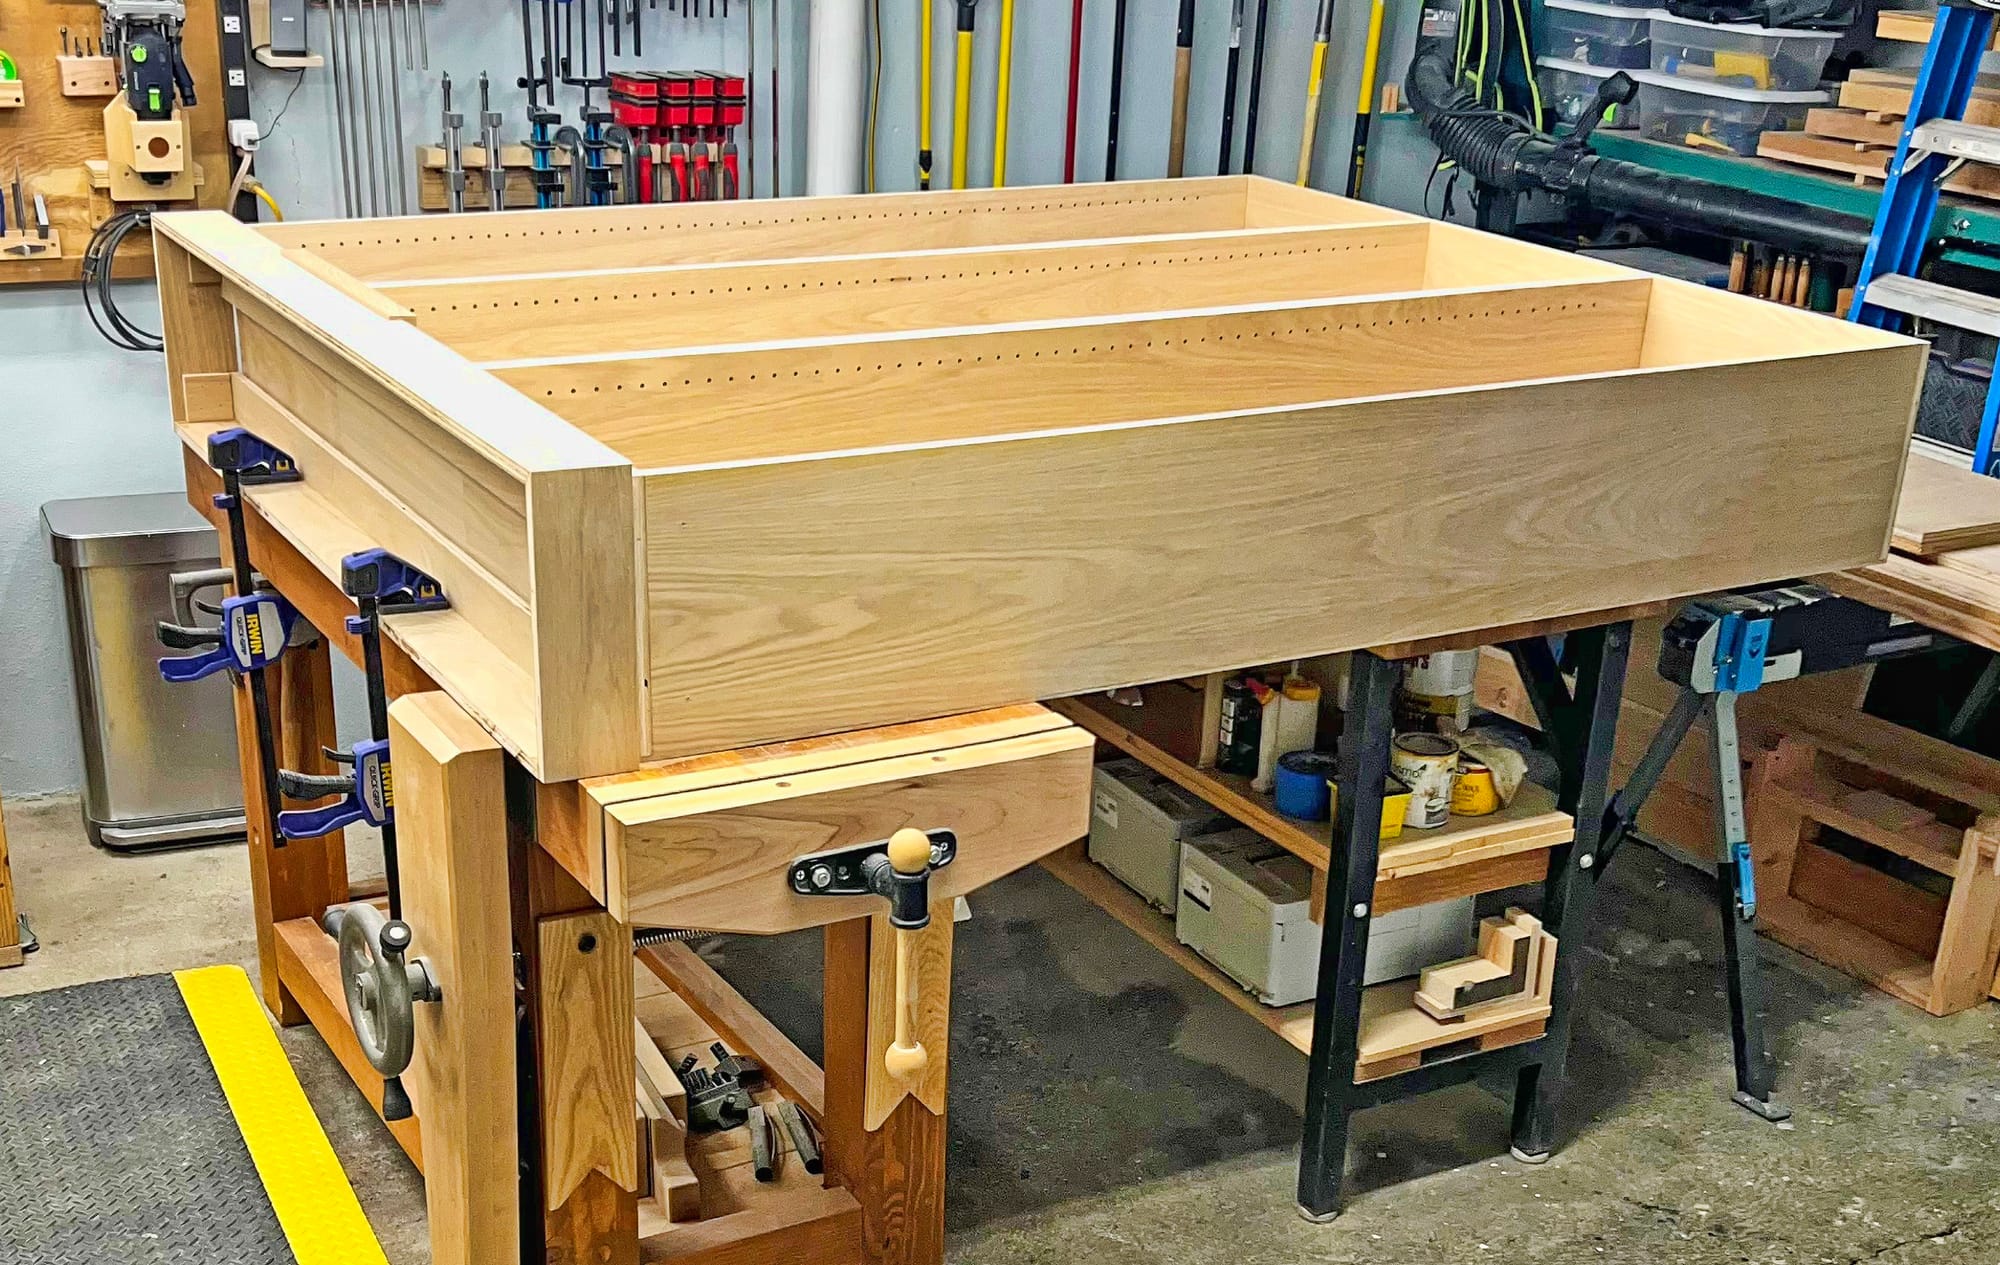
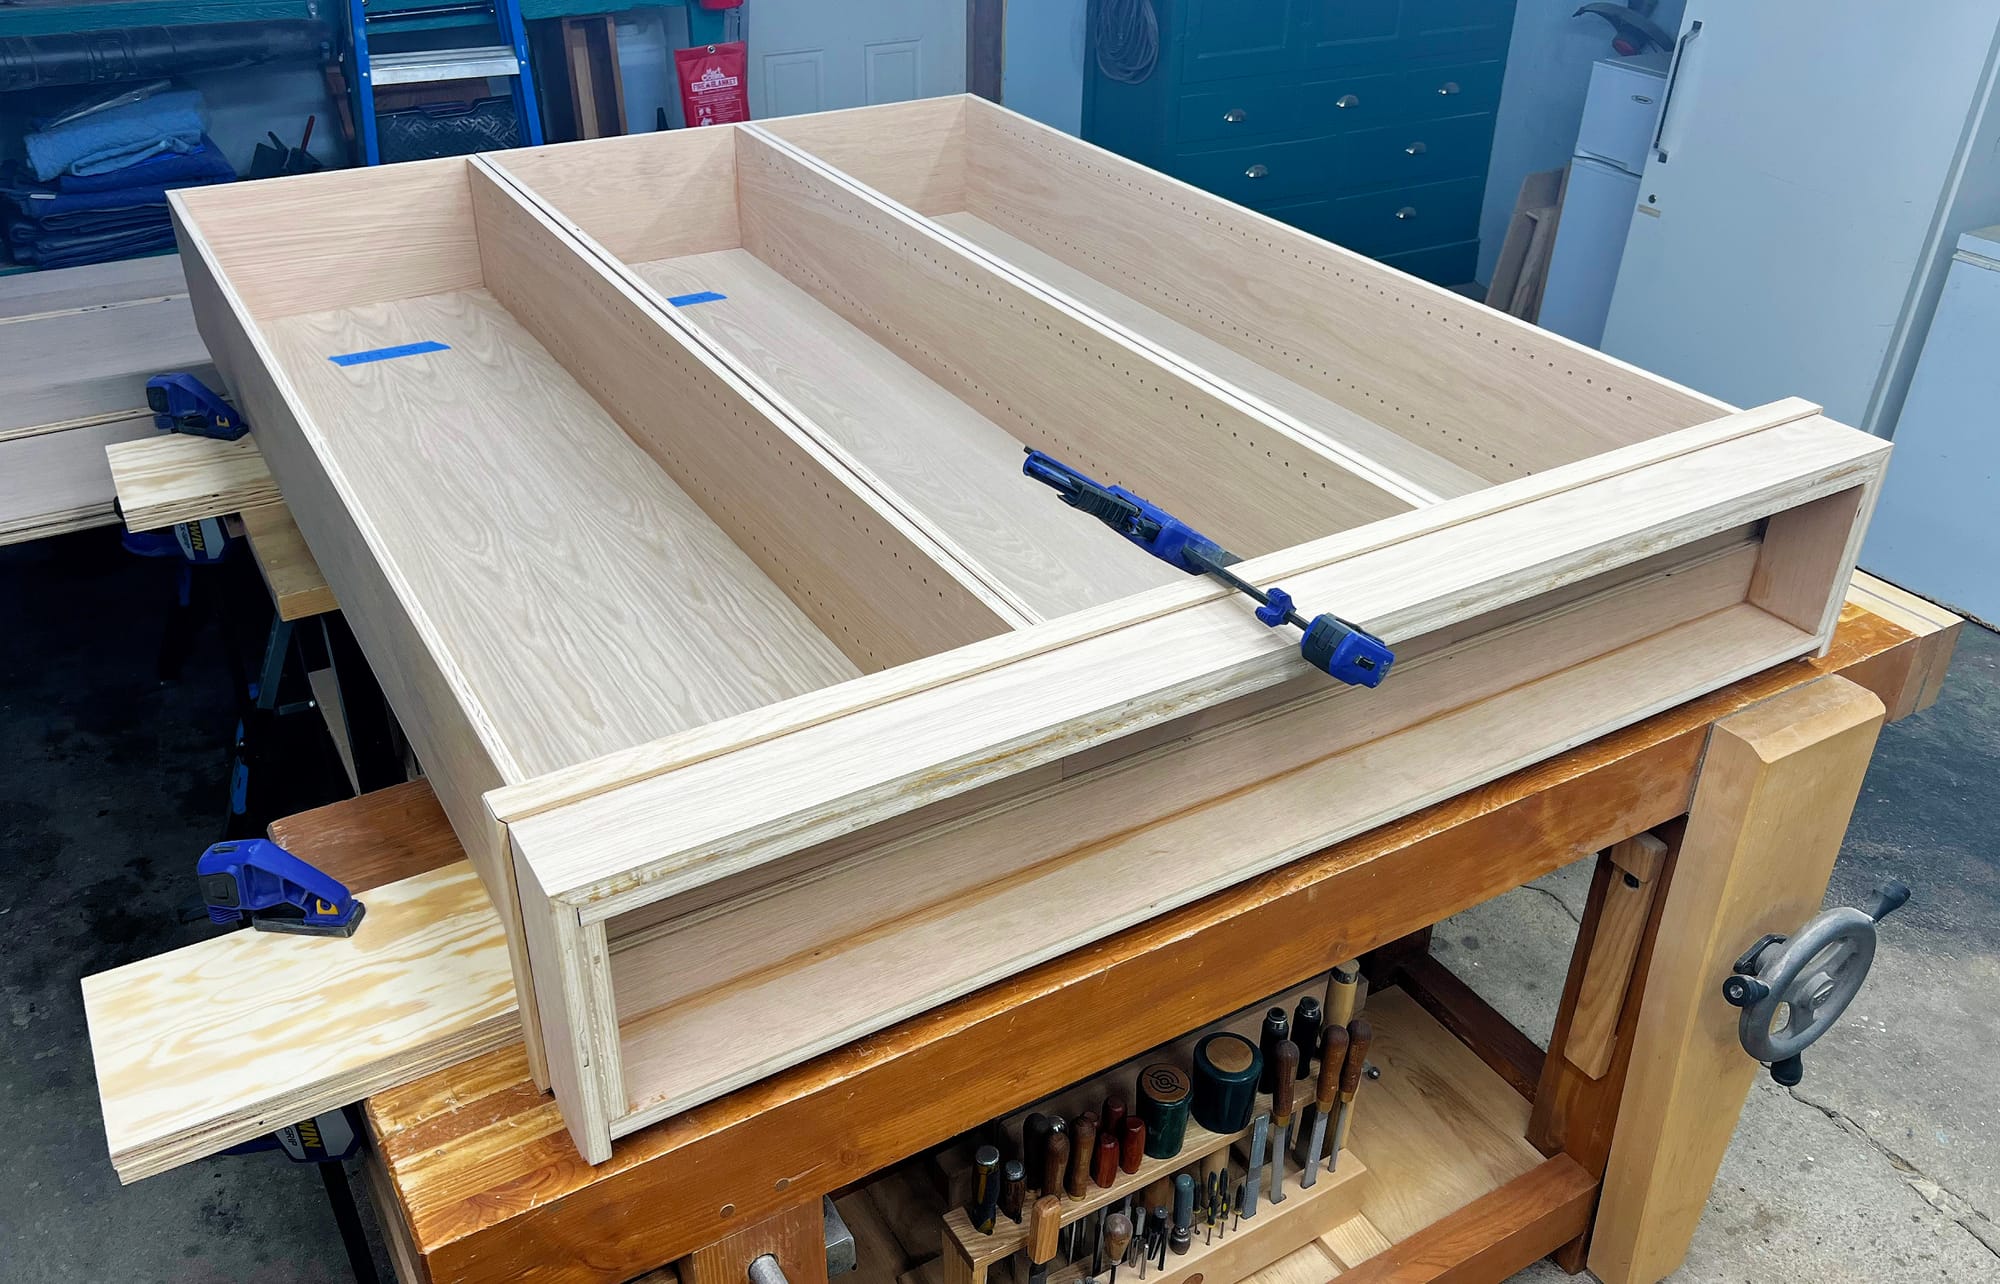
- Assemble the three bays, including a 1/4" panel on the back of each one (Festool Domino, pin nailer, router with flush trim bit, and lots of clamps)
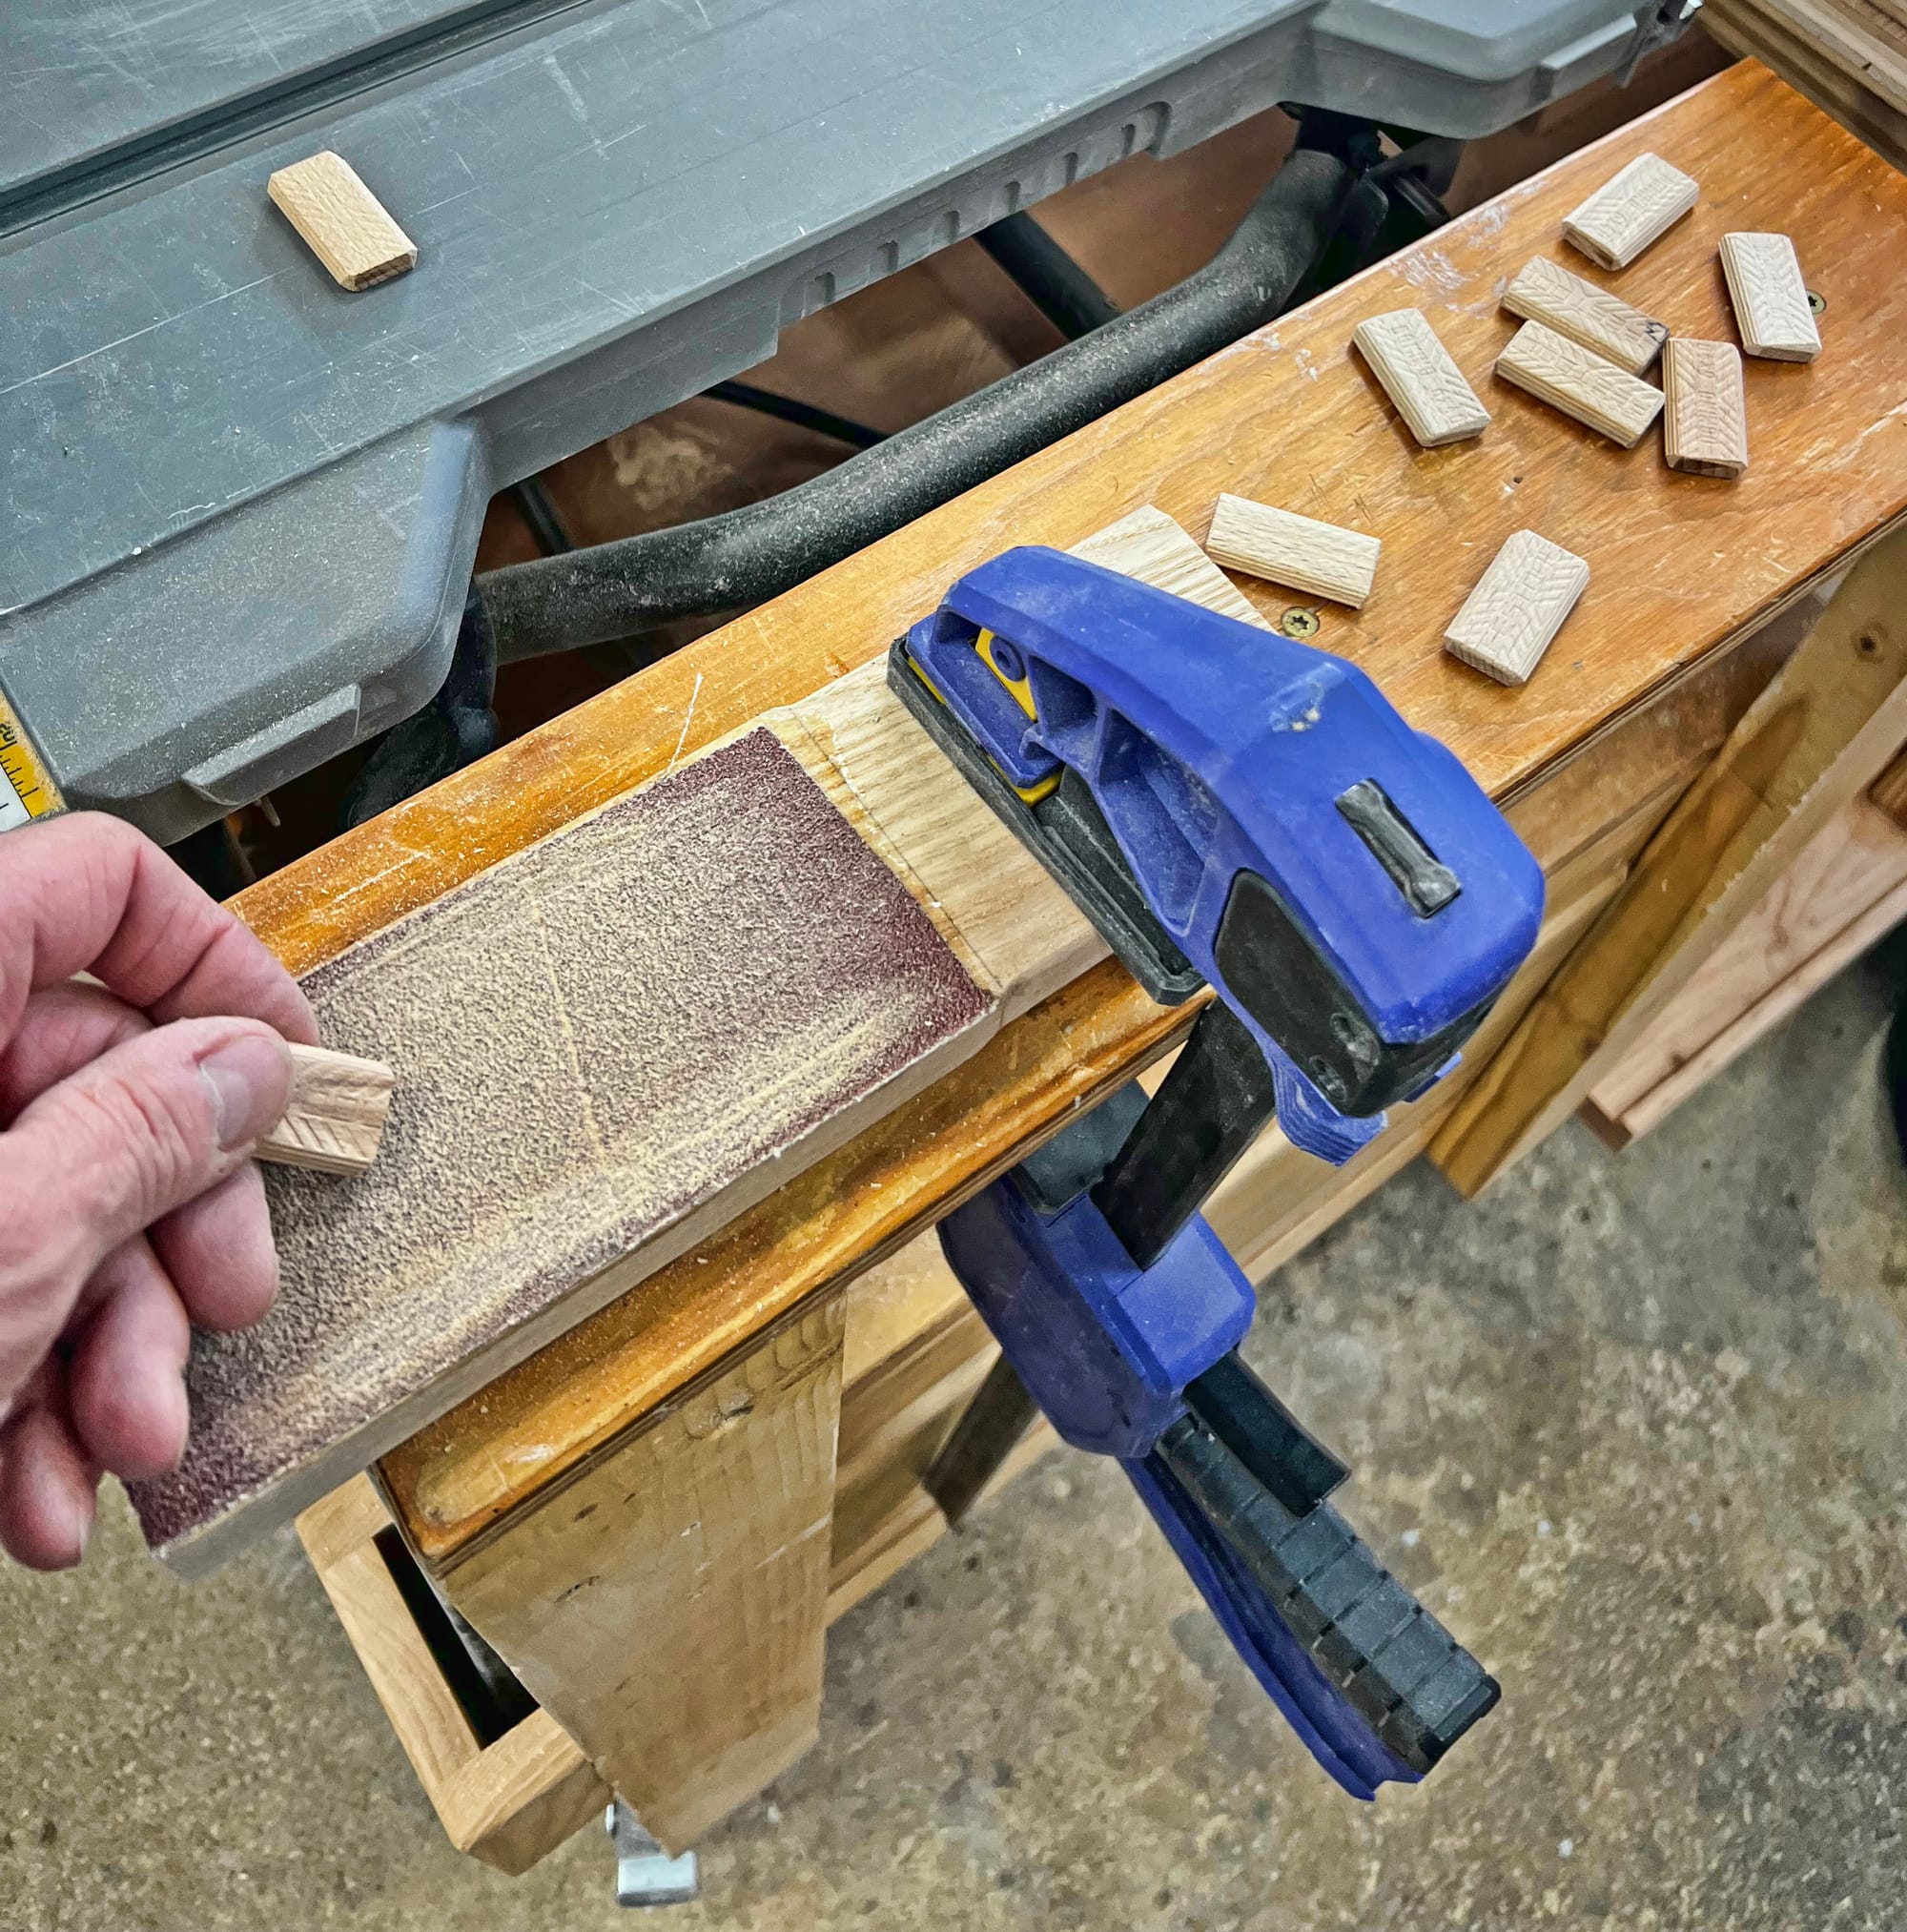
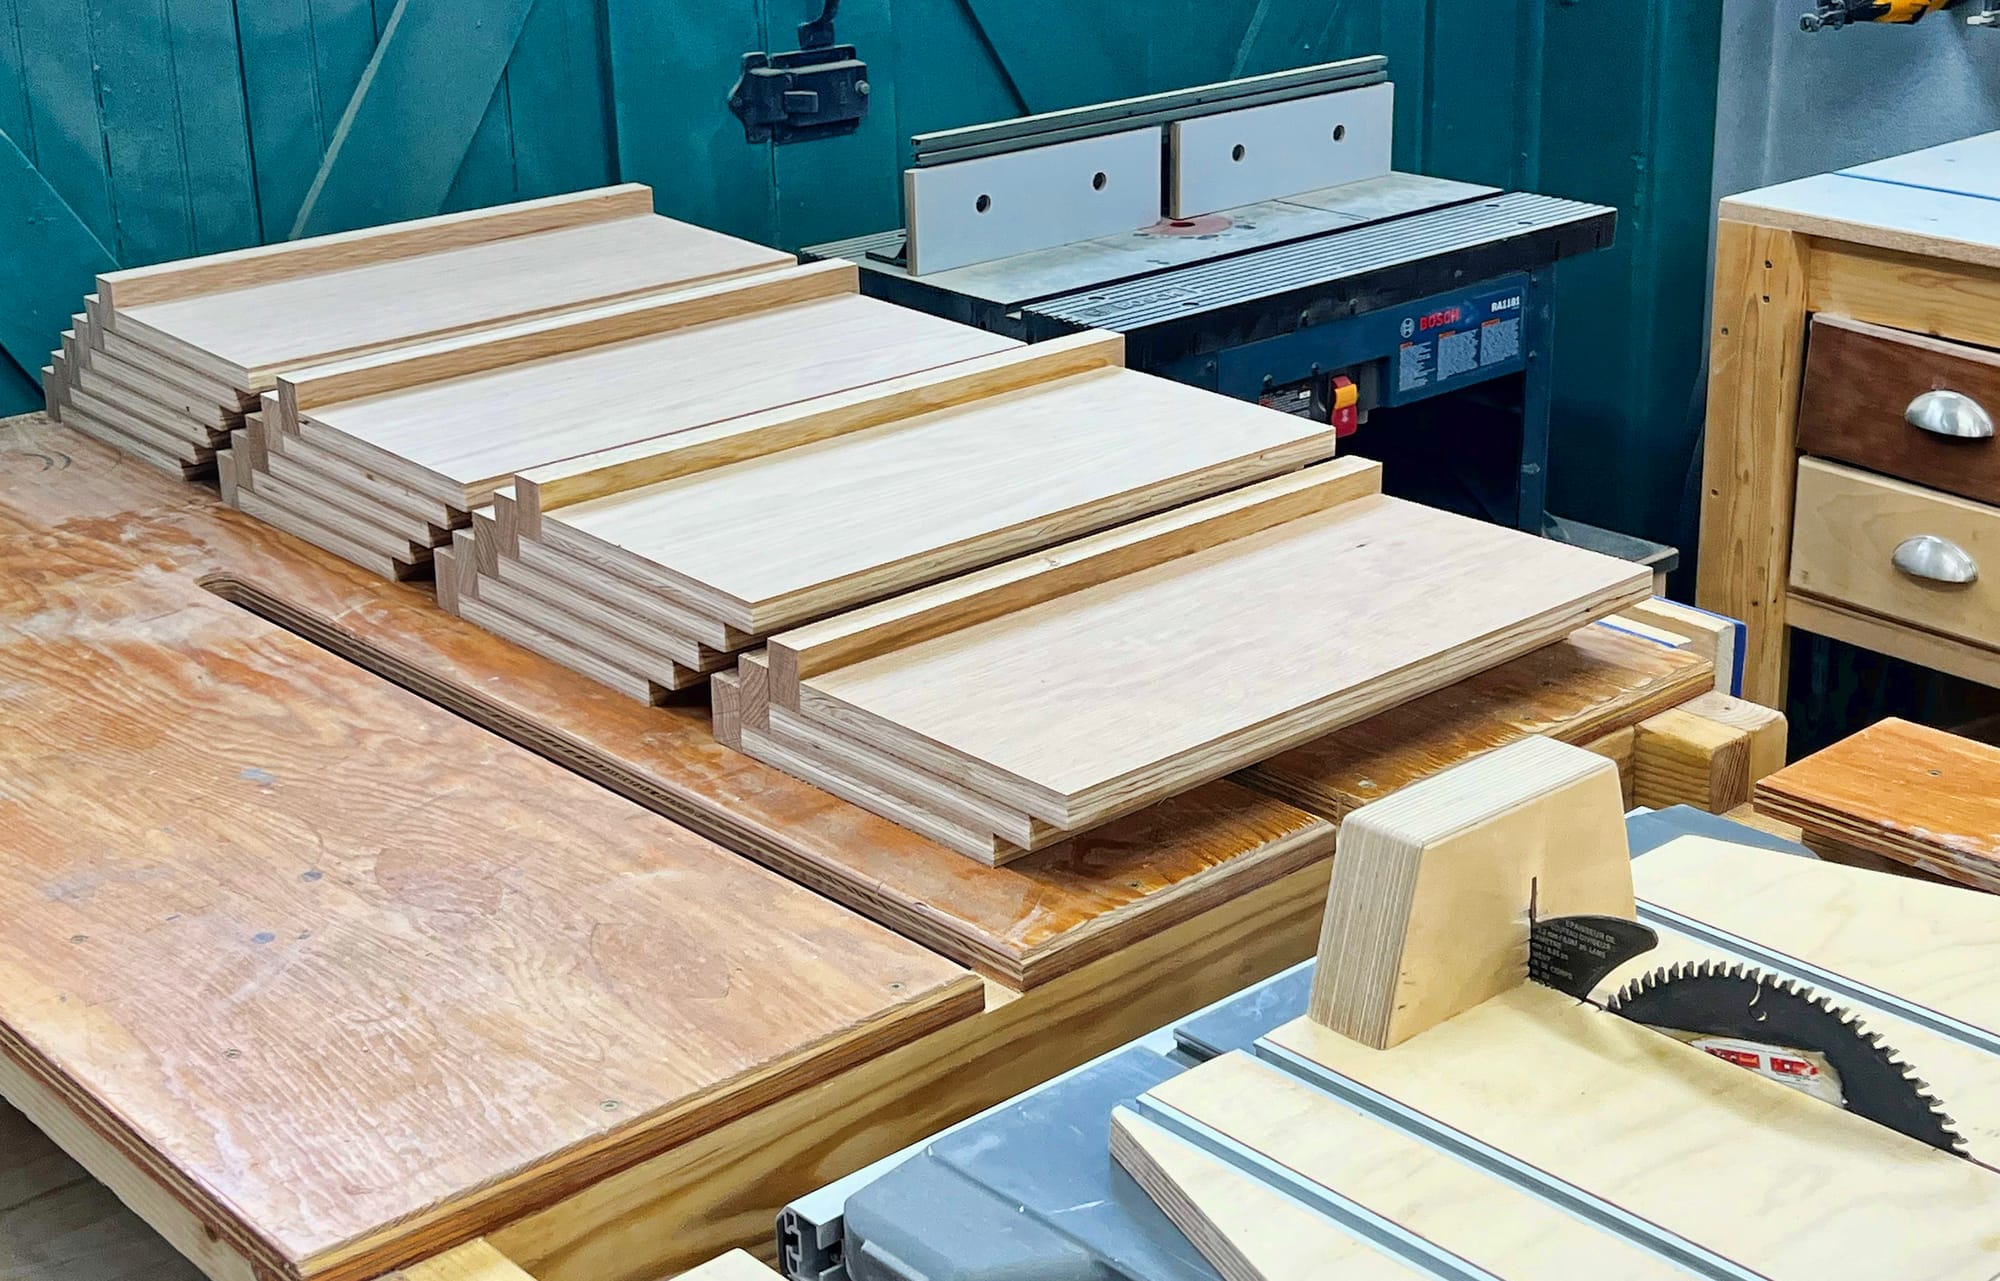
- Mill the trim pieces from the rough lumber (planer, joiner, table saw, belt sander)
- Build the base, which holds the bays together at the bottom (table saw with crosscut sled, miter saw, pin nailer, lots of clamps)
- Build the crown which holds the bays together at the top (identical to the base, but with extra trim around the top)
- Do a test assembly of everything, then measure/cut/glue the two side panels (table saw, circular saw, lots of clamps)
- Cut the insert for the top of the crown (table saw)
- Build the shelf pieces (table saw with crosscut sled, miter saw, lots of clamps)
- Sand everything (belt sander, orbital sander, sandpaper)
- Apply Rubio Monocoat finish to everything
- Assembly: mount the base and anchor it to studs, put the bays in the base, put the crown on top and anchor it to the studs, insert the top of the crown
- Add the shelves and books!
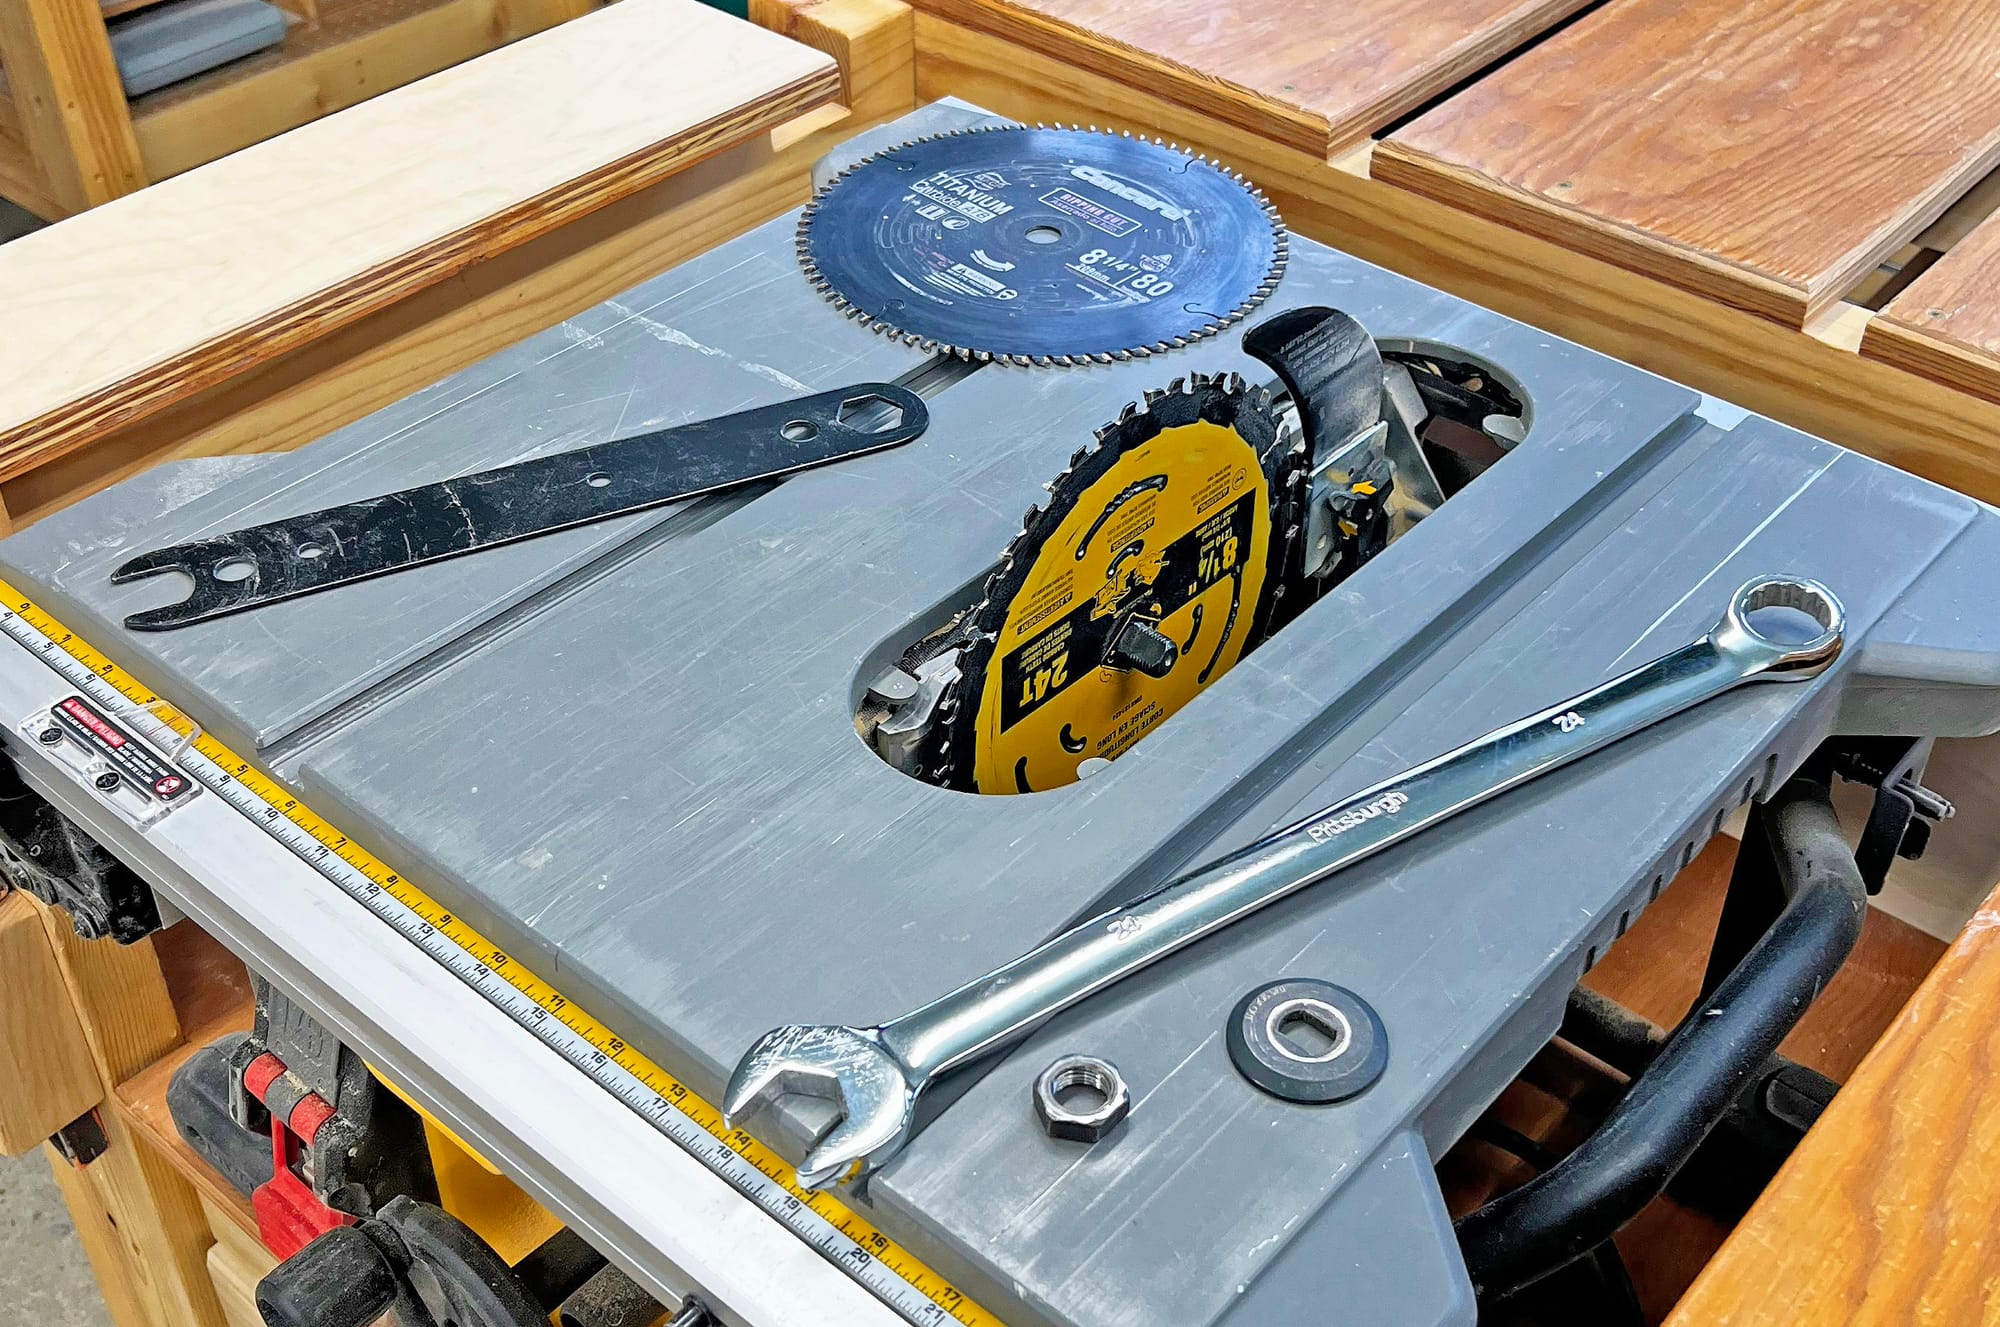
Before I could assemble the bays, I needed to drill the shelf pin holes. After looking into options, I realized that doing them with a power drill would make it difficult to get a clean and consistent result, but I couldn't justify spending nearly $3000 on a Shaper Origin, which is the tool used for shelf pin holes in the how-to video.
I settled on an in-between approach that worked great. I used the plunge router I already own, with a spiral upcut bit and an inexpensive plastic jig for spacing the holes. I needed a guide bushing for my router to match the jig, so I used that as an excuse to get a nice set of brass guide bushings in a variety of sizes.
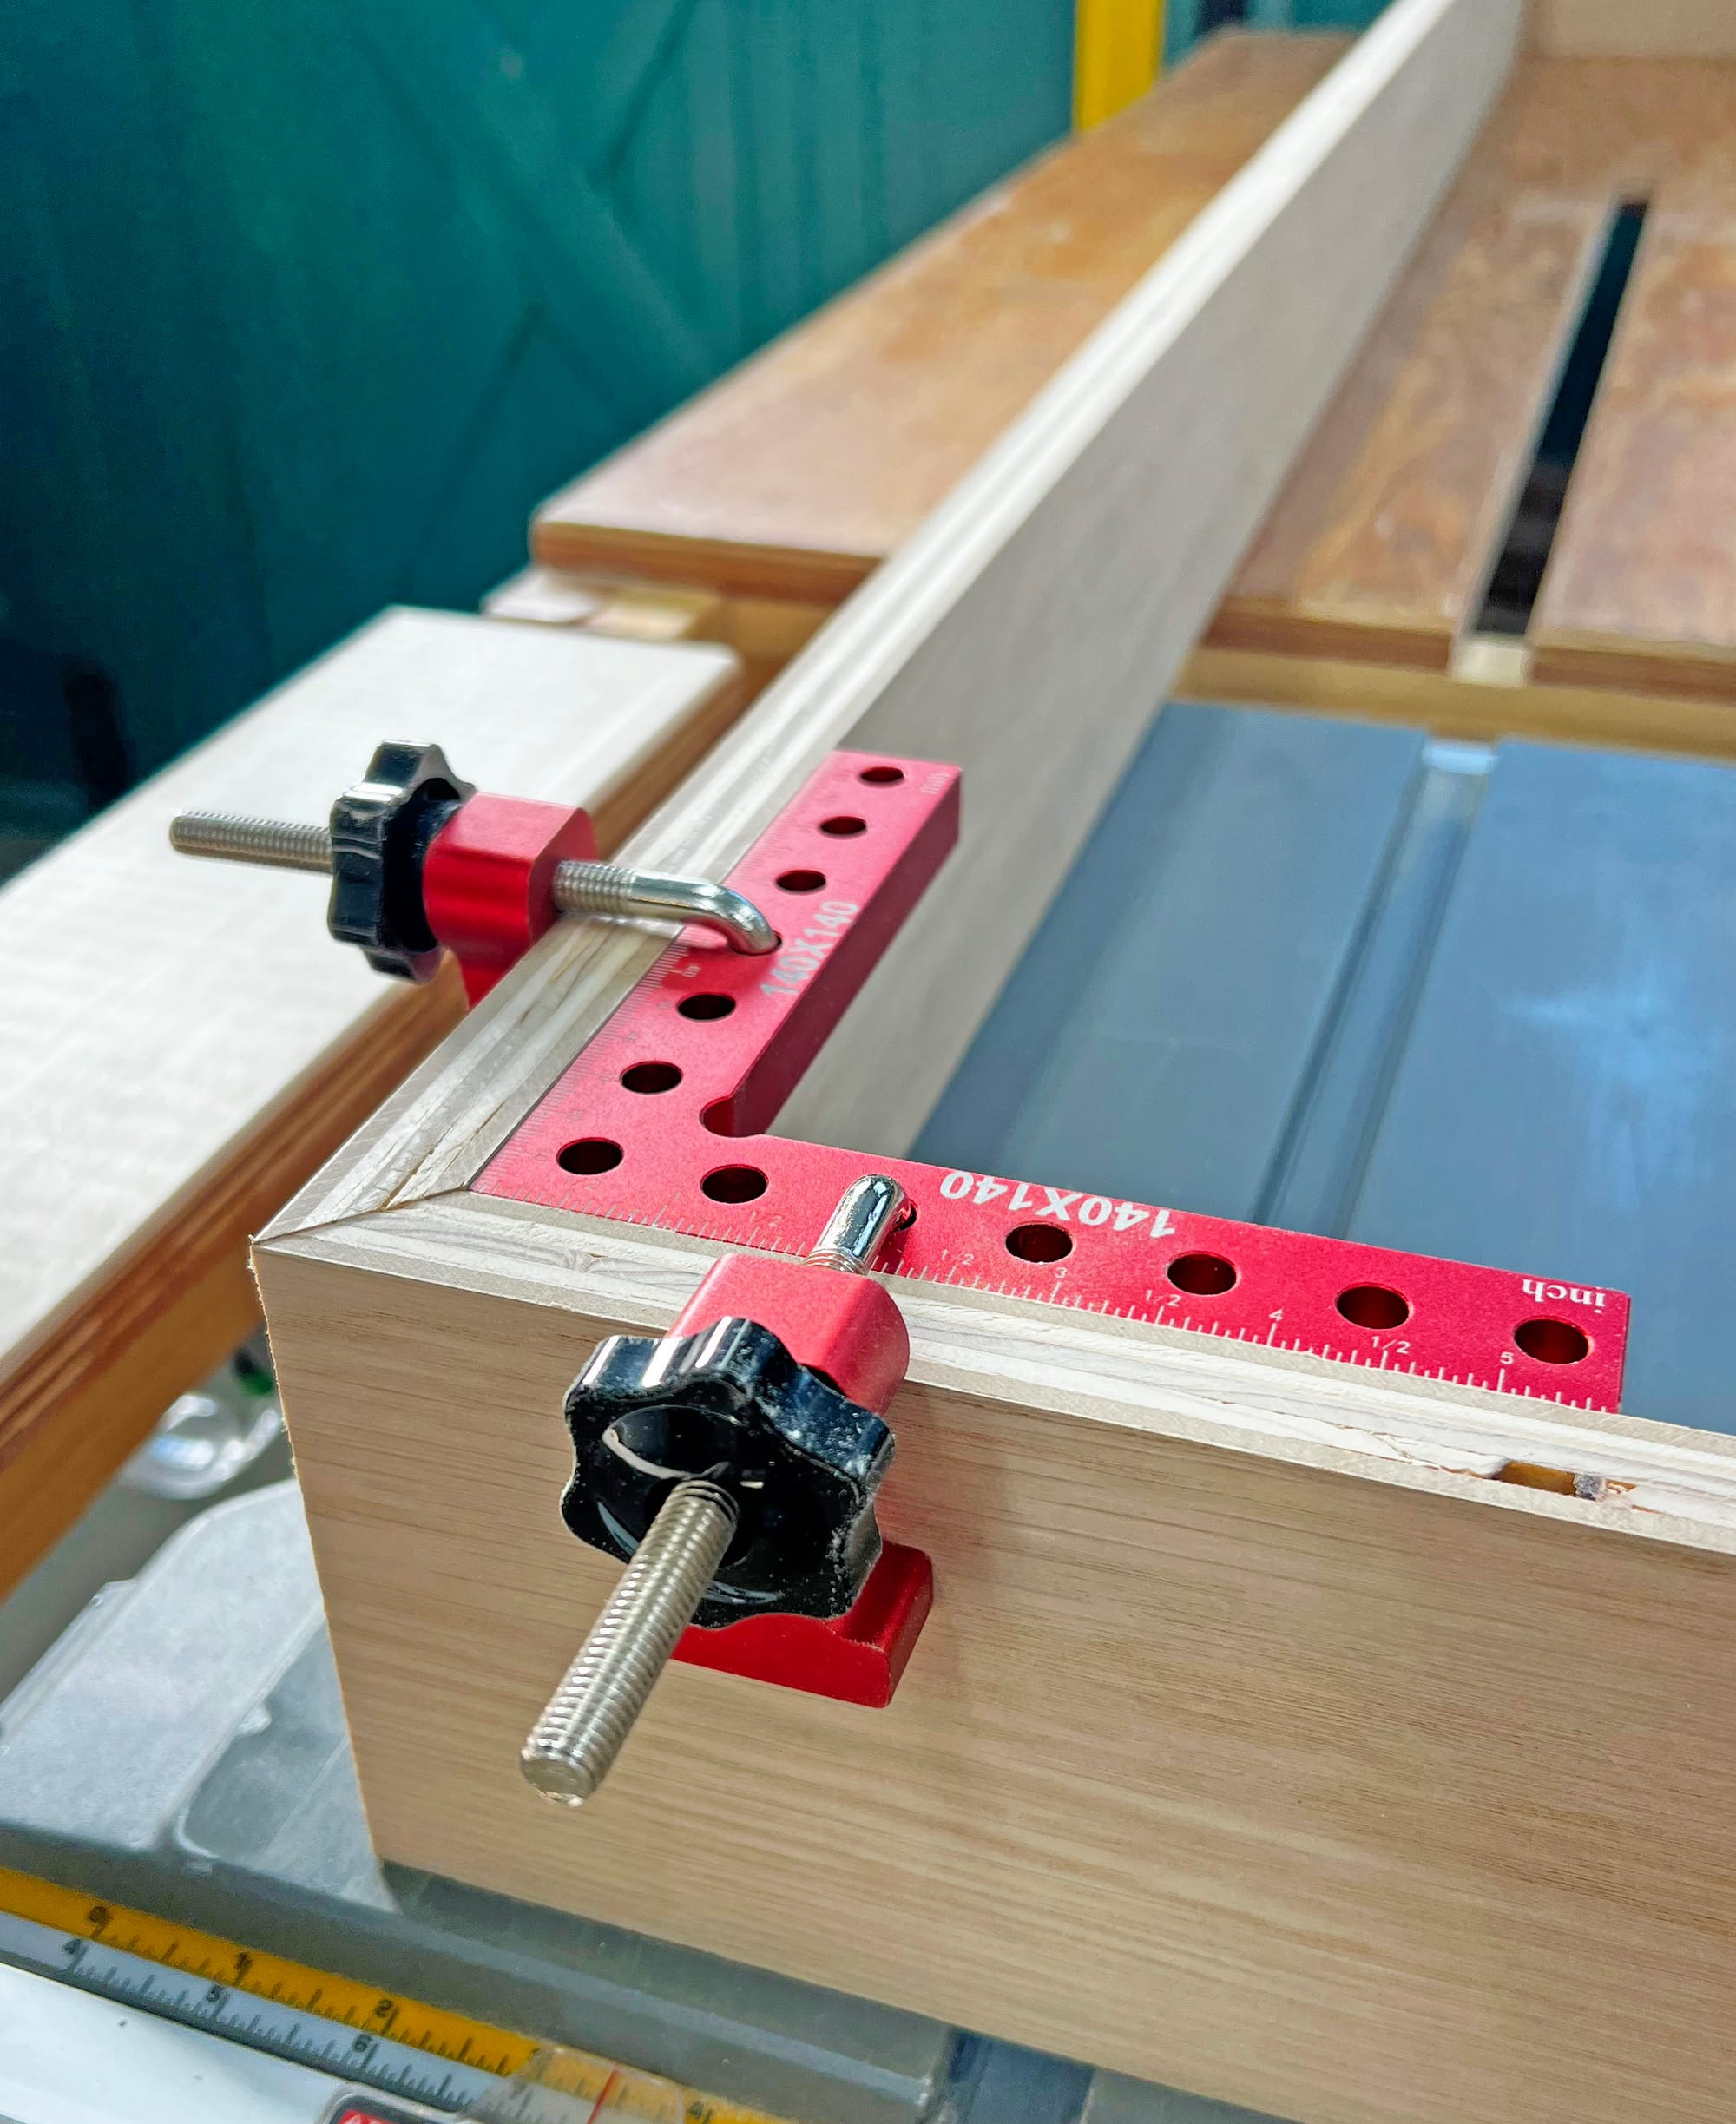
After practicing on a few scraps of plywood, it was time to drill shelf pin holes. There are hundreds of holes in six different side panels, all of which have to line up perfectly, but if you use a jig and proceed carefully it's not that hard to do.
Drilling shelf pin holes.
The more projects I do, the more I learn the value of making jigs to help hold things together.
After gluing up the three bays, it was time to make the base.
When I went to build the base, I discovered that I shouldn't have pre-cut all the plywood. The three bays I had assembled were each just a little oversize (about 1/32" each), and as a result the pieces I had pre-cut for the base were a bit too short to make the base fit properly around the bays. I had to re-cut the base pieces to make it work, which meant a bunch of extra scrap plywood.
When I built the second bookcase a few months later, I waited to cut the base pieces to exactly fit the three bays. It doesn't matter whether the final bookcase is a bit wider or narrower than planned, the important thing is that all of the pieces fit together perfectly.
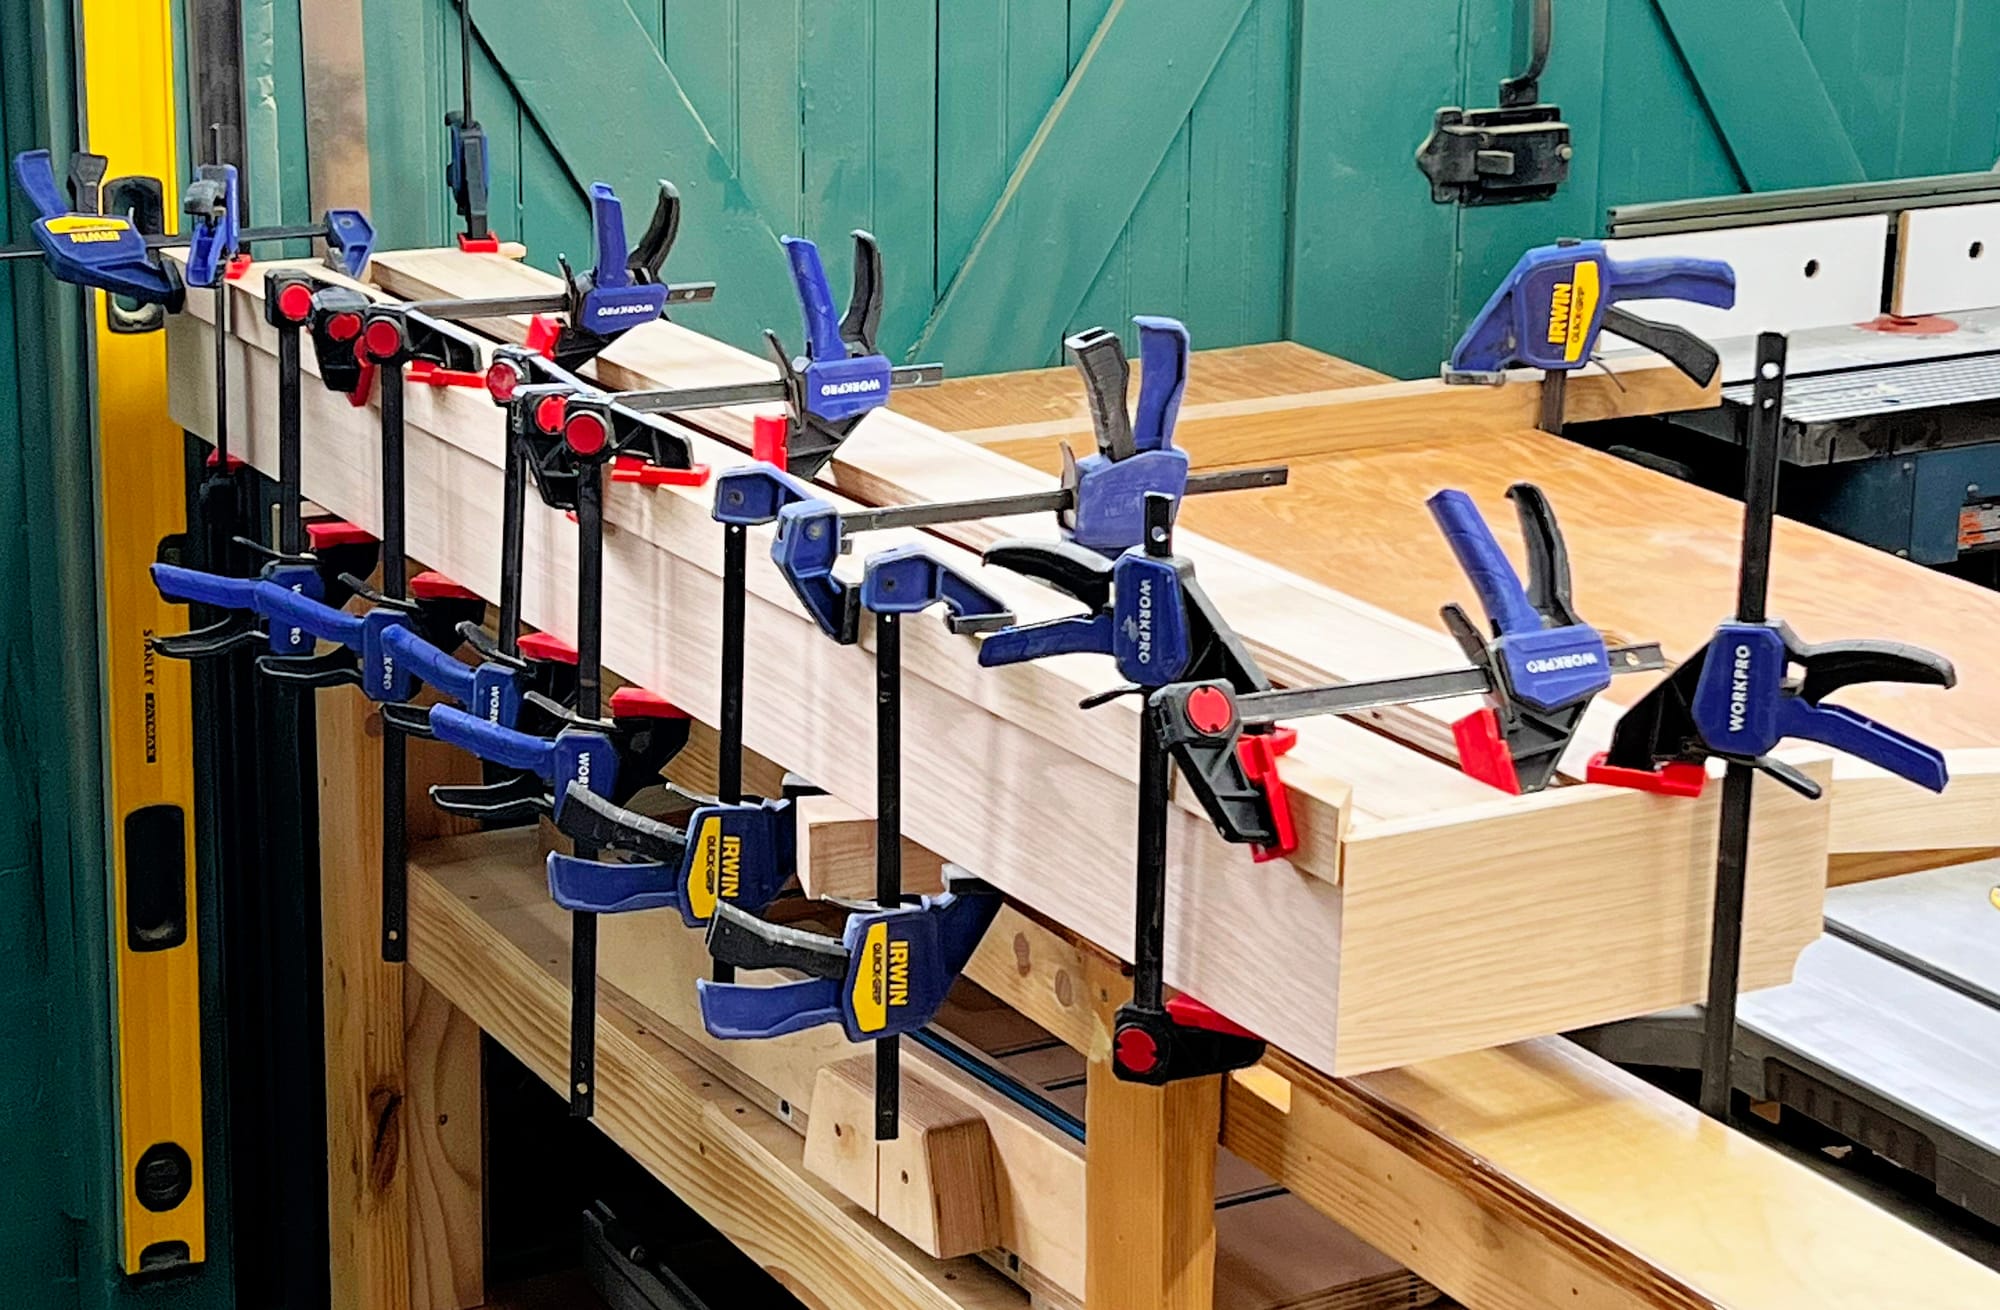
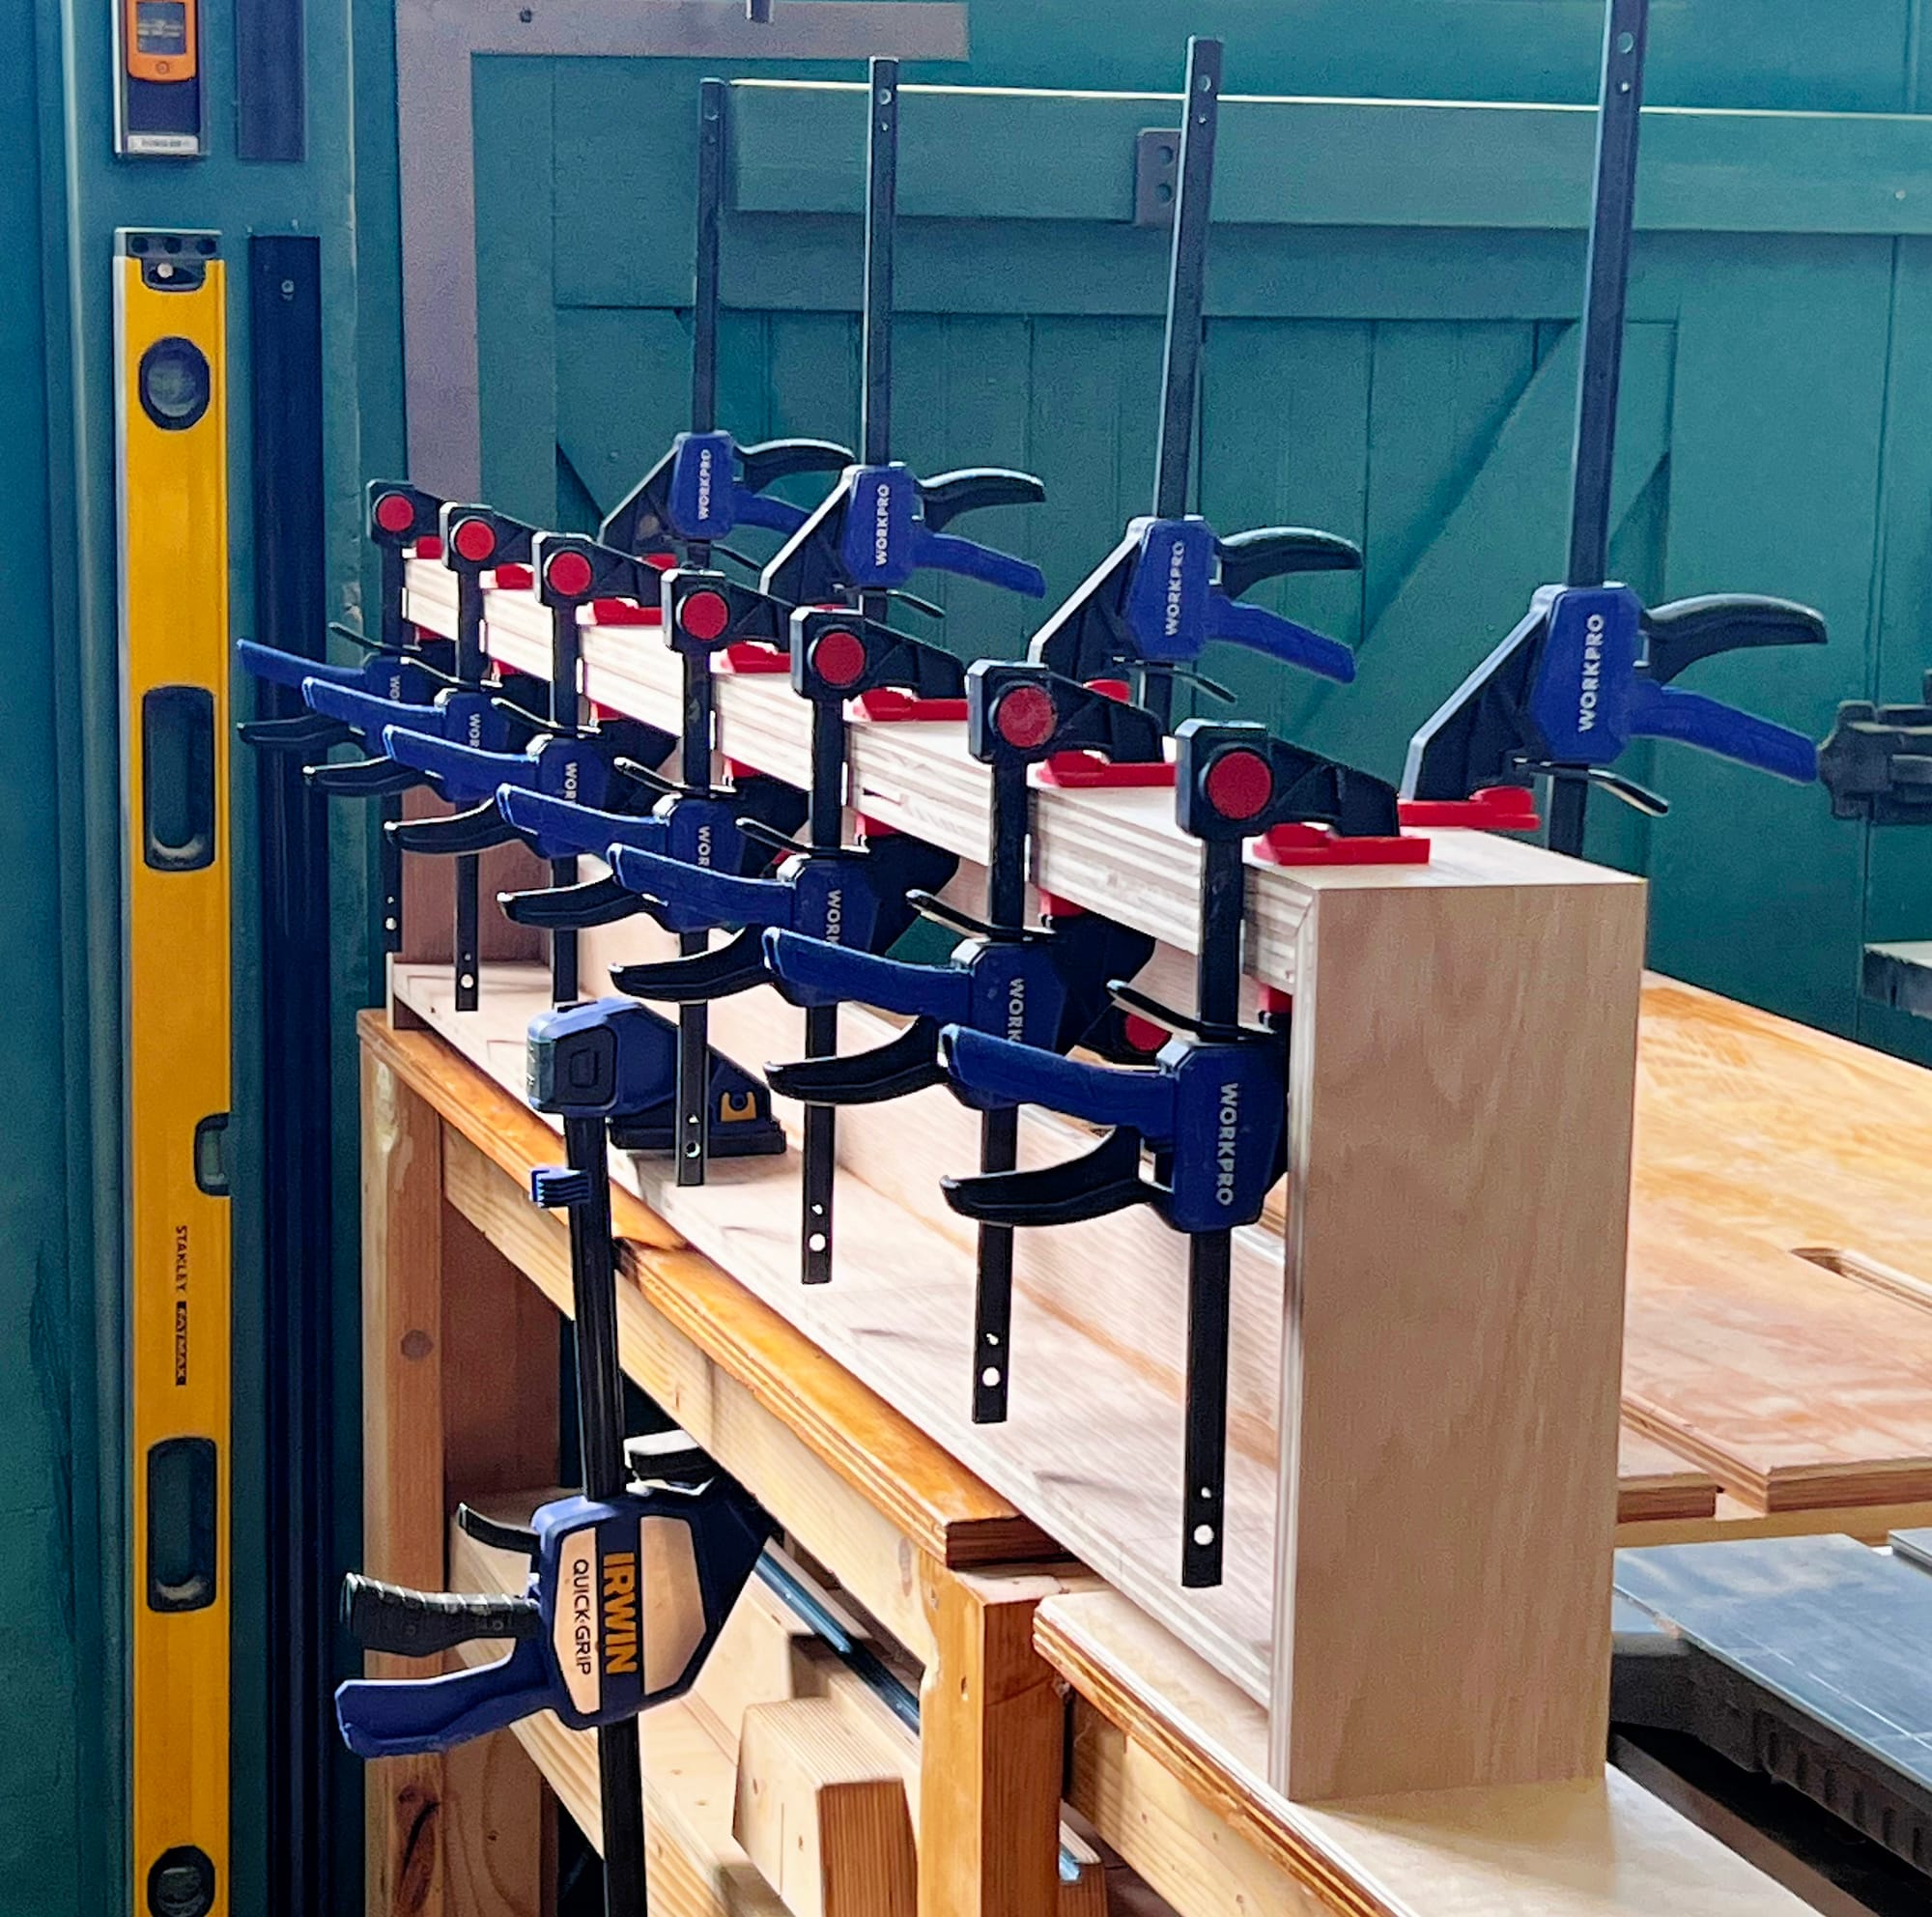
There are numerous glue-up steps in this project, and I used Titebond III wood glue, which is a great product that's easy to work with. It has a longer initial setup time than some wood glues, so you have time to tweak things if you notice a clamped piece is slightly out of alignment.
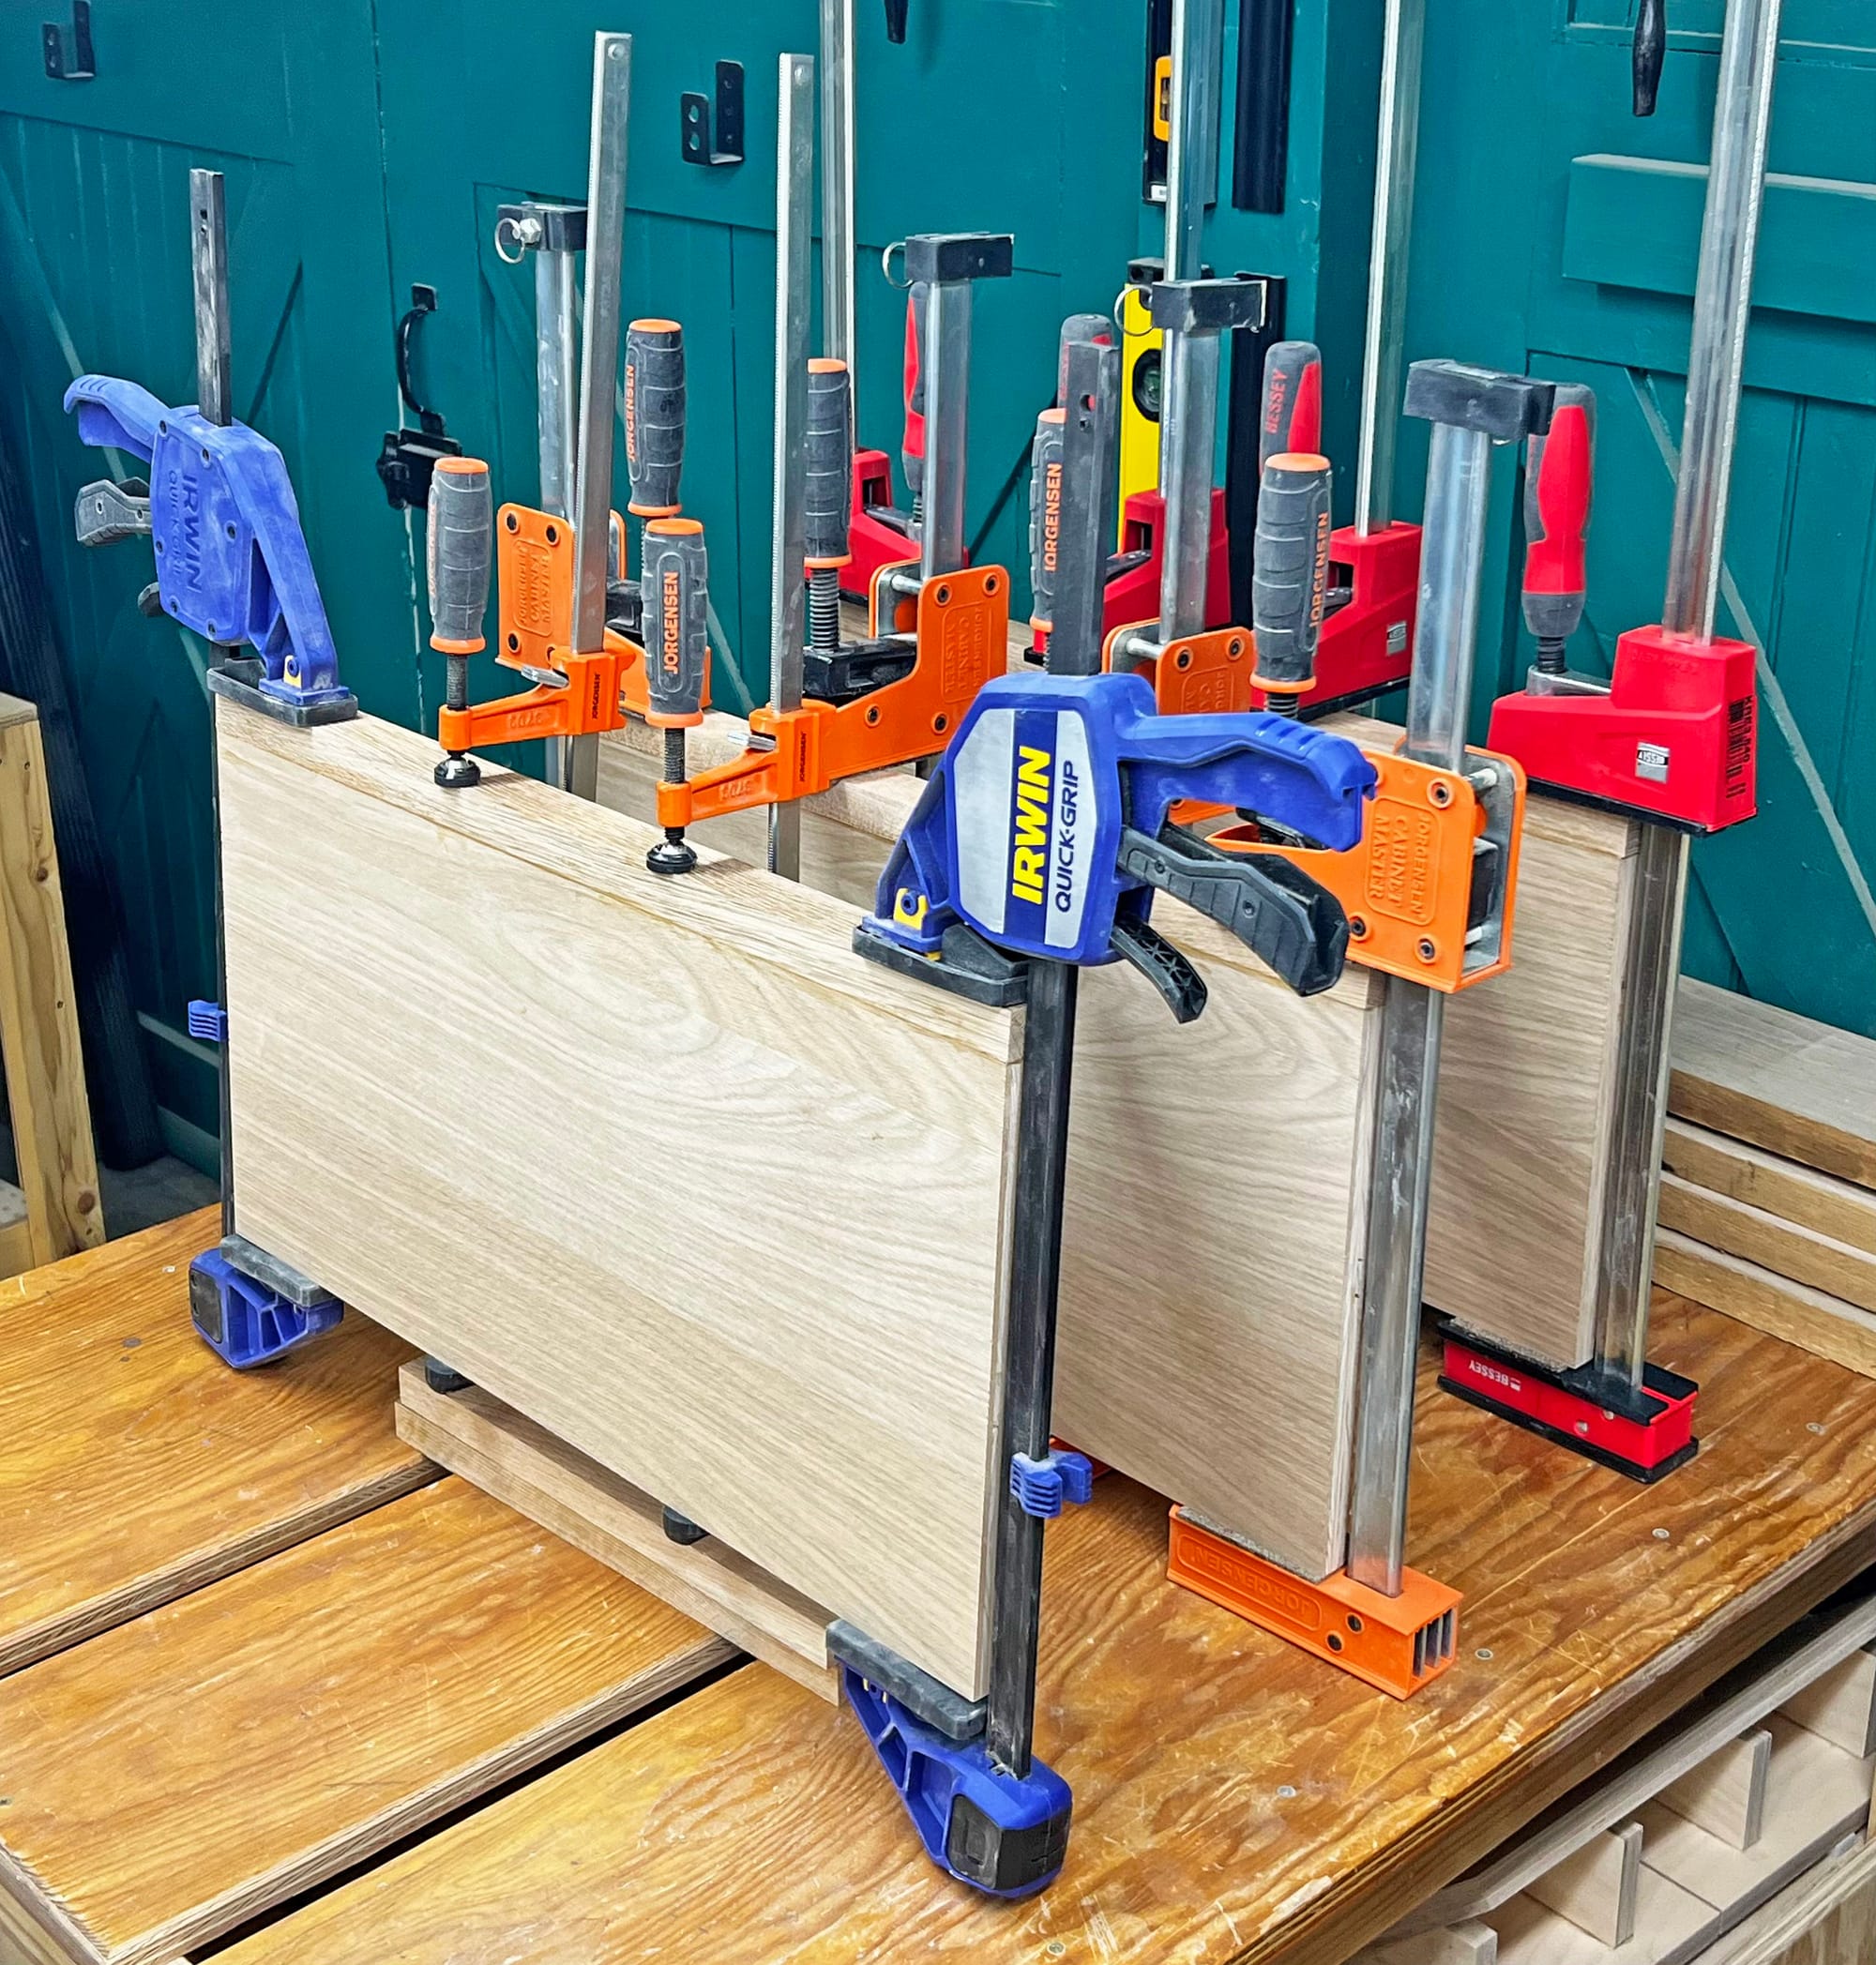
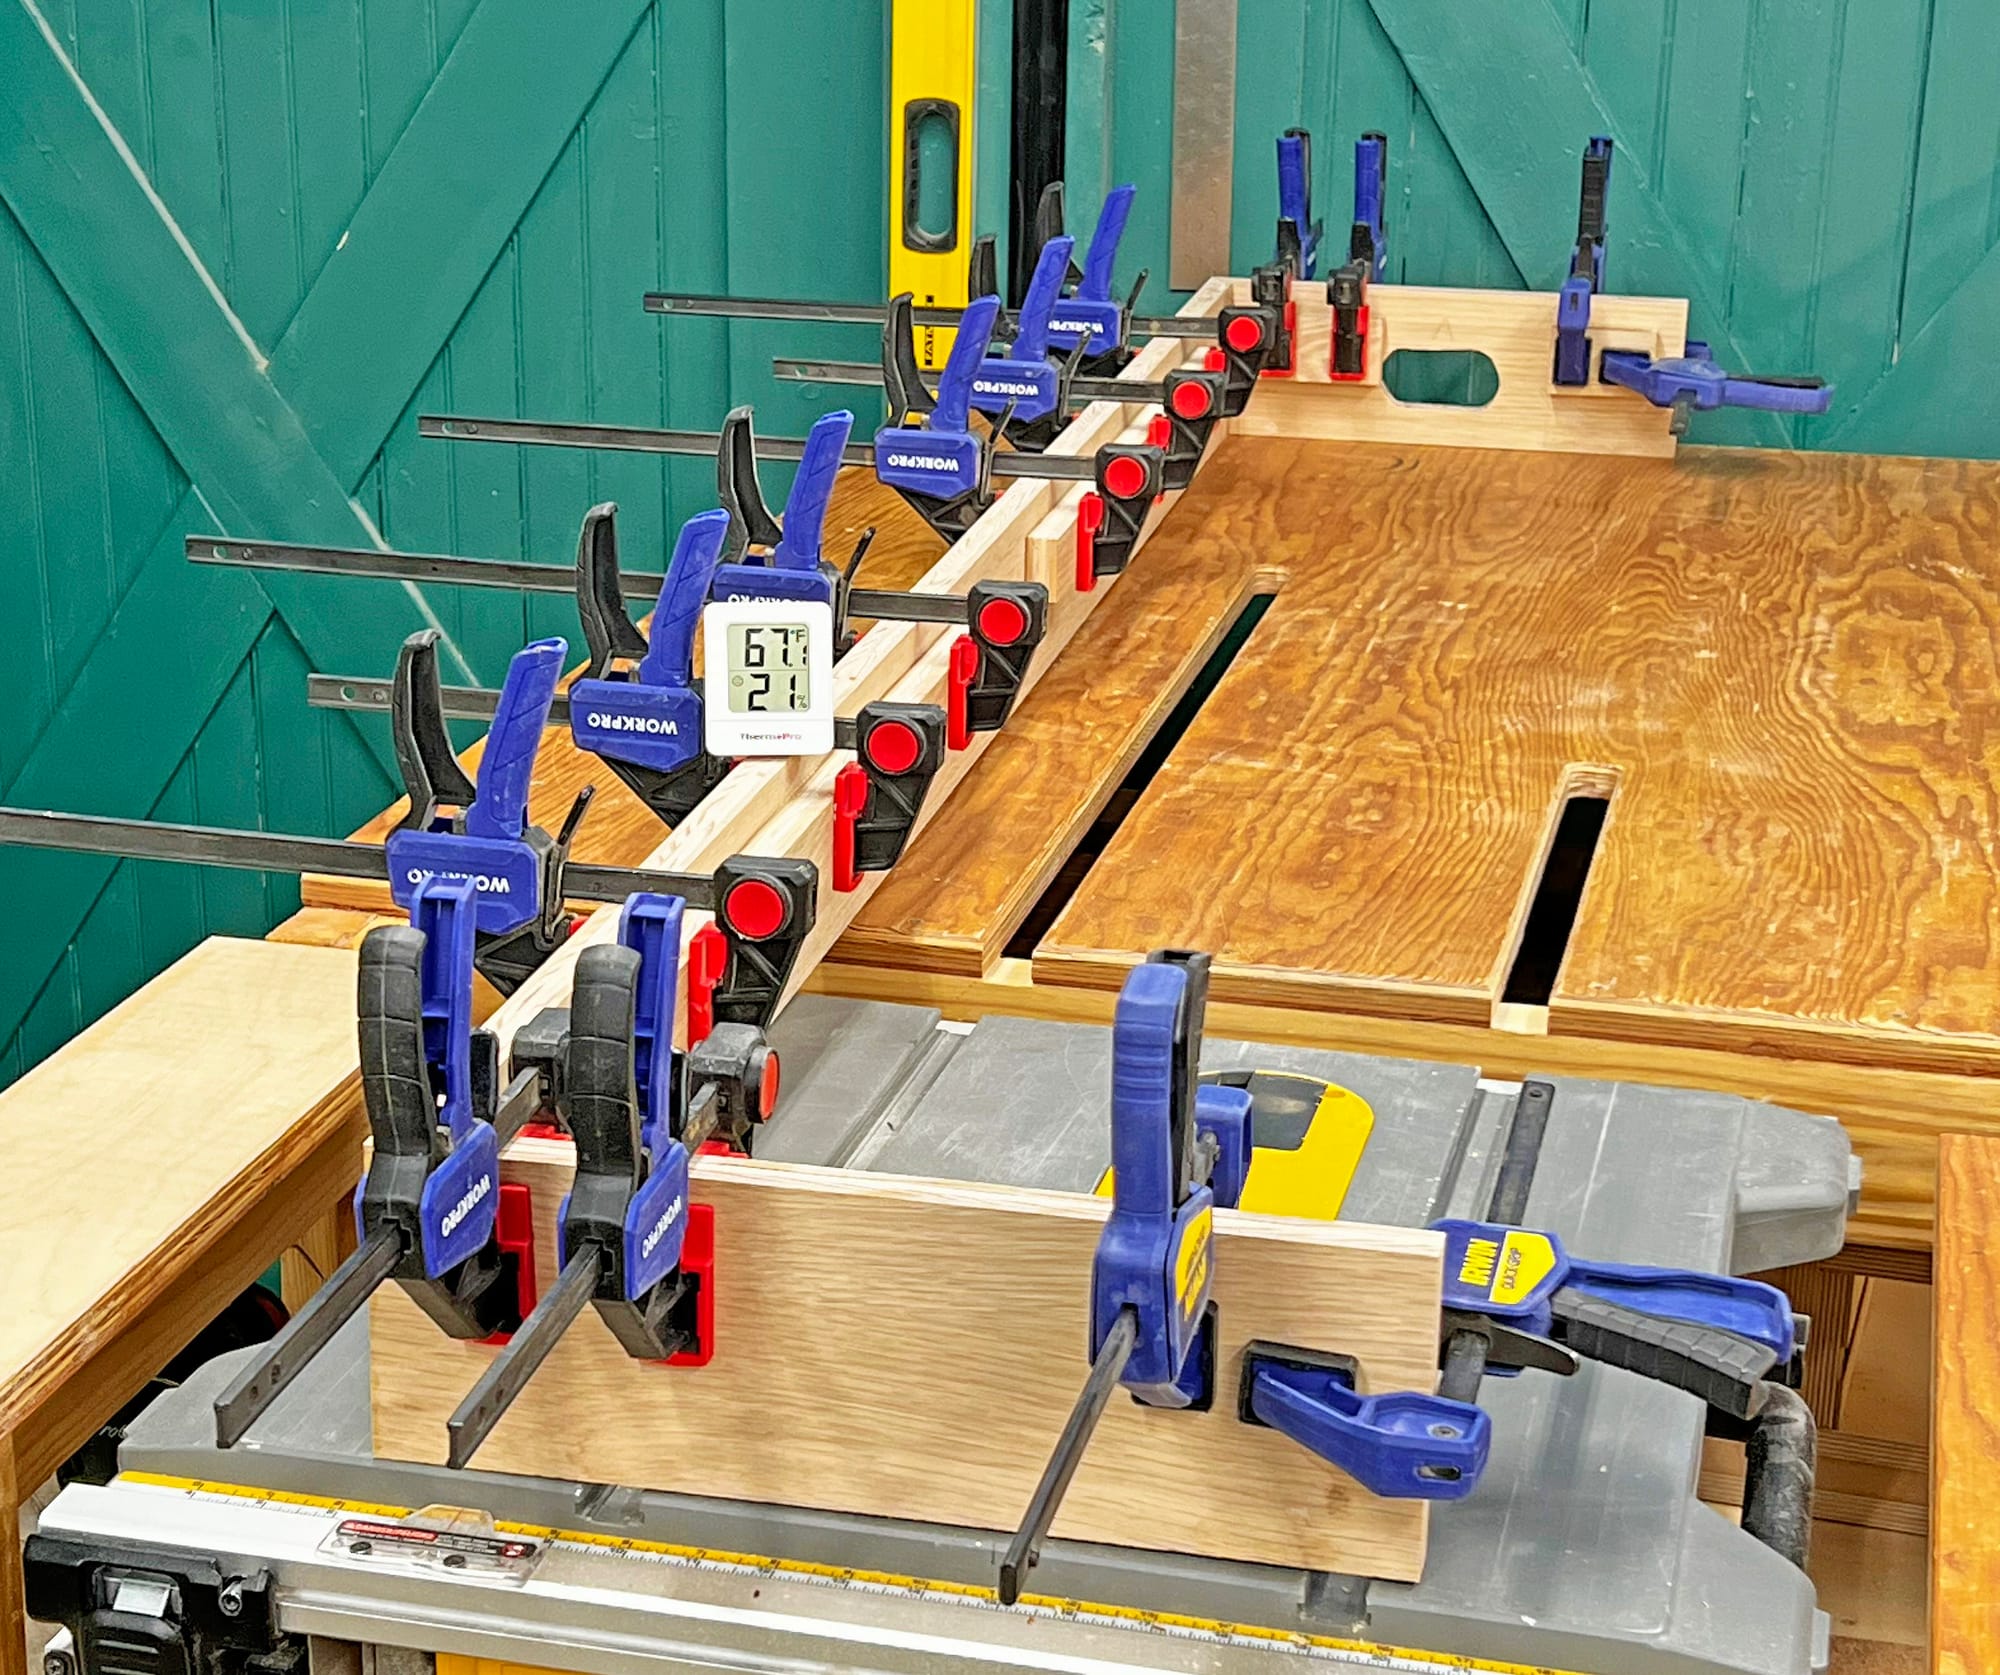
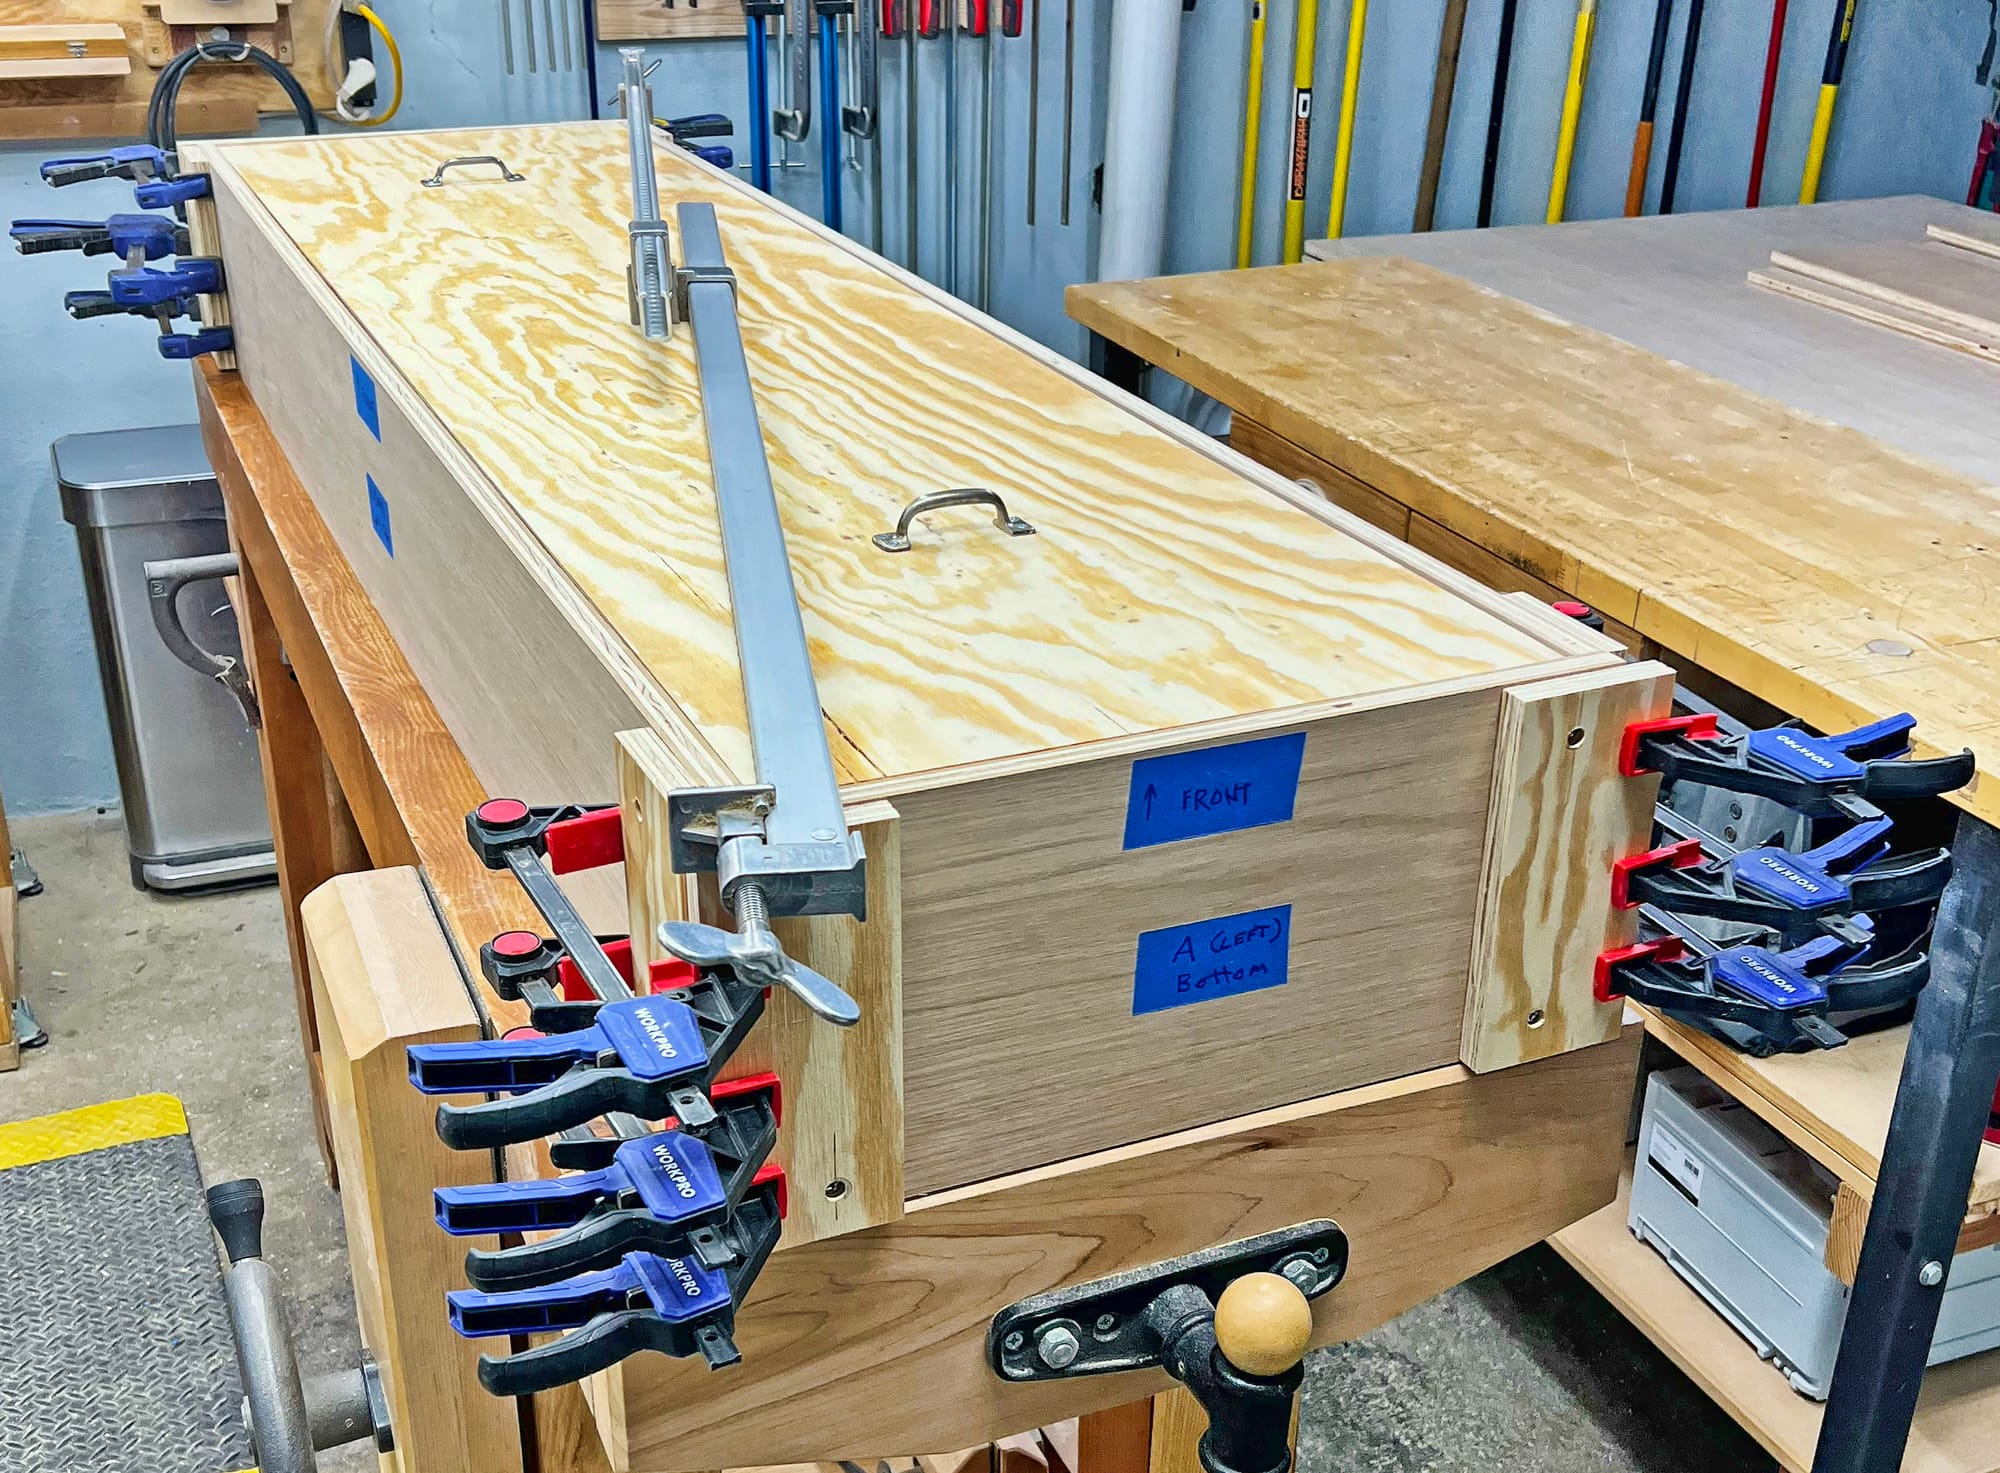
A few of the many glue-up steps. I used dozens of different clamps - I'm up to about 100 clamps, but often wish I had a few more. Note the temperature gauge in the last photo above. I have two of those cheap little temperature gauges and use them to make sure it's warm enough for the glue to set properly. The manufacturer recommends 45F minimum, and 60F or above is ideal.
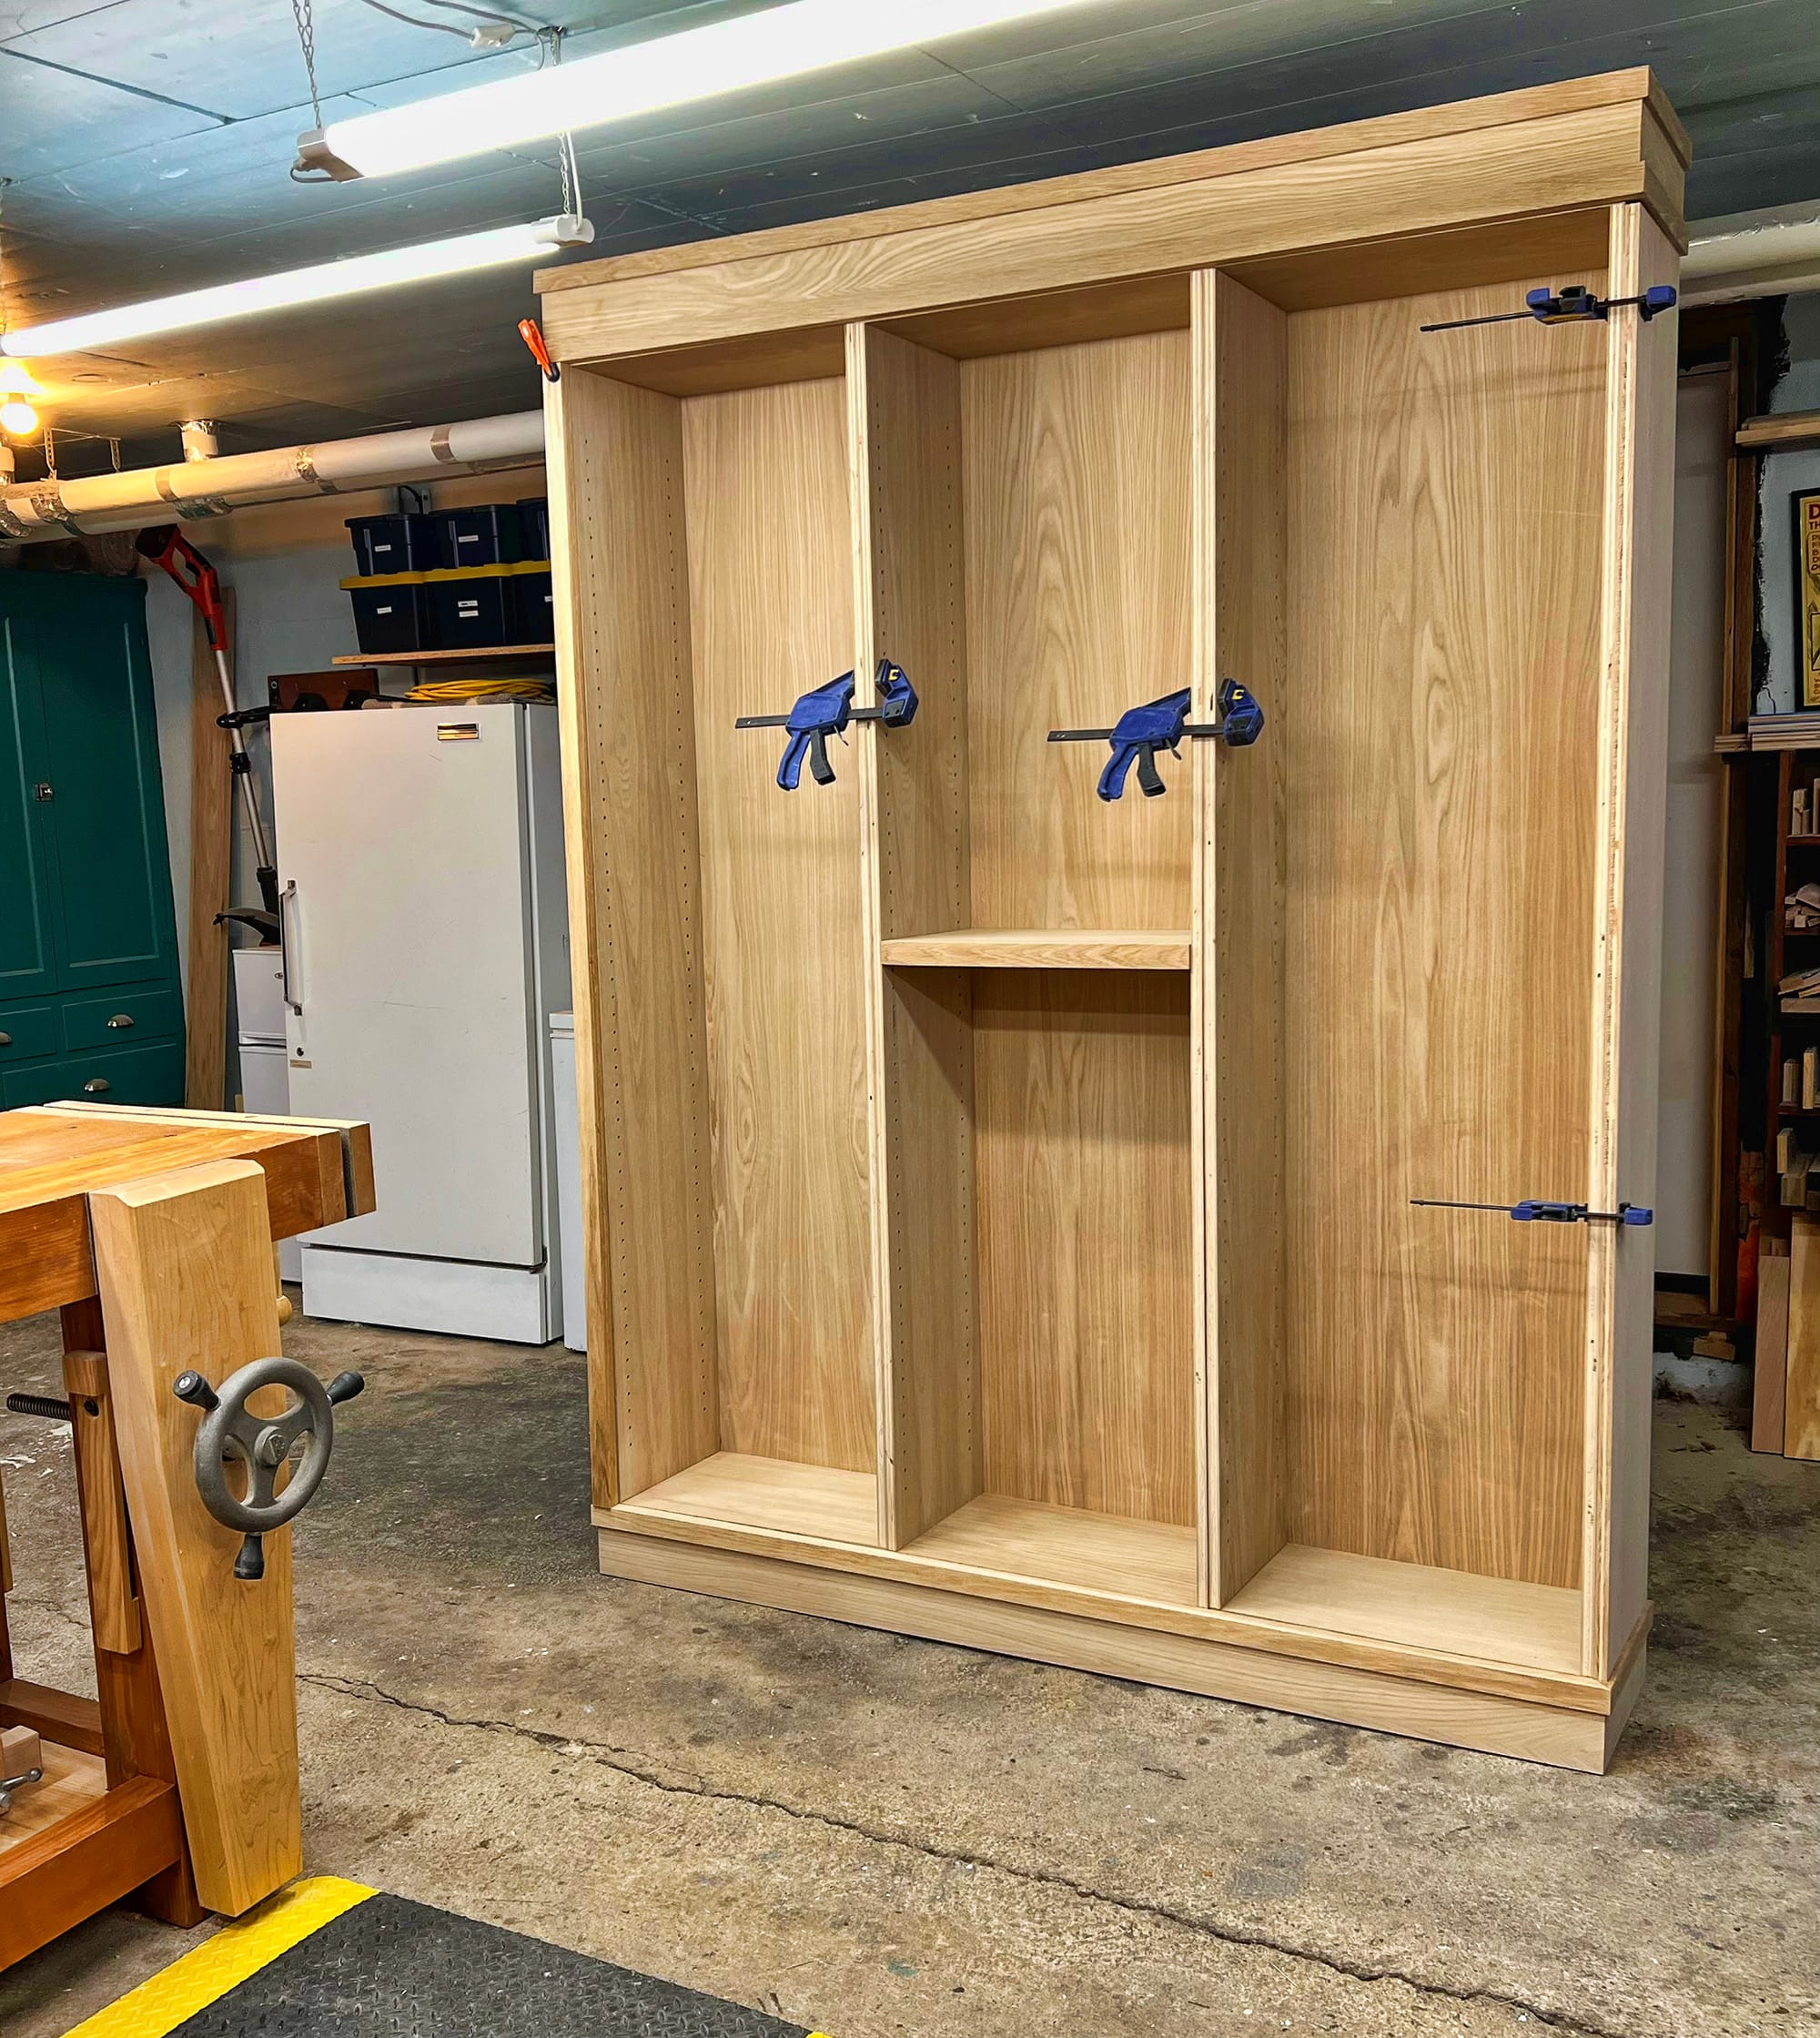
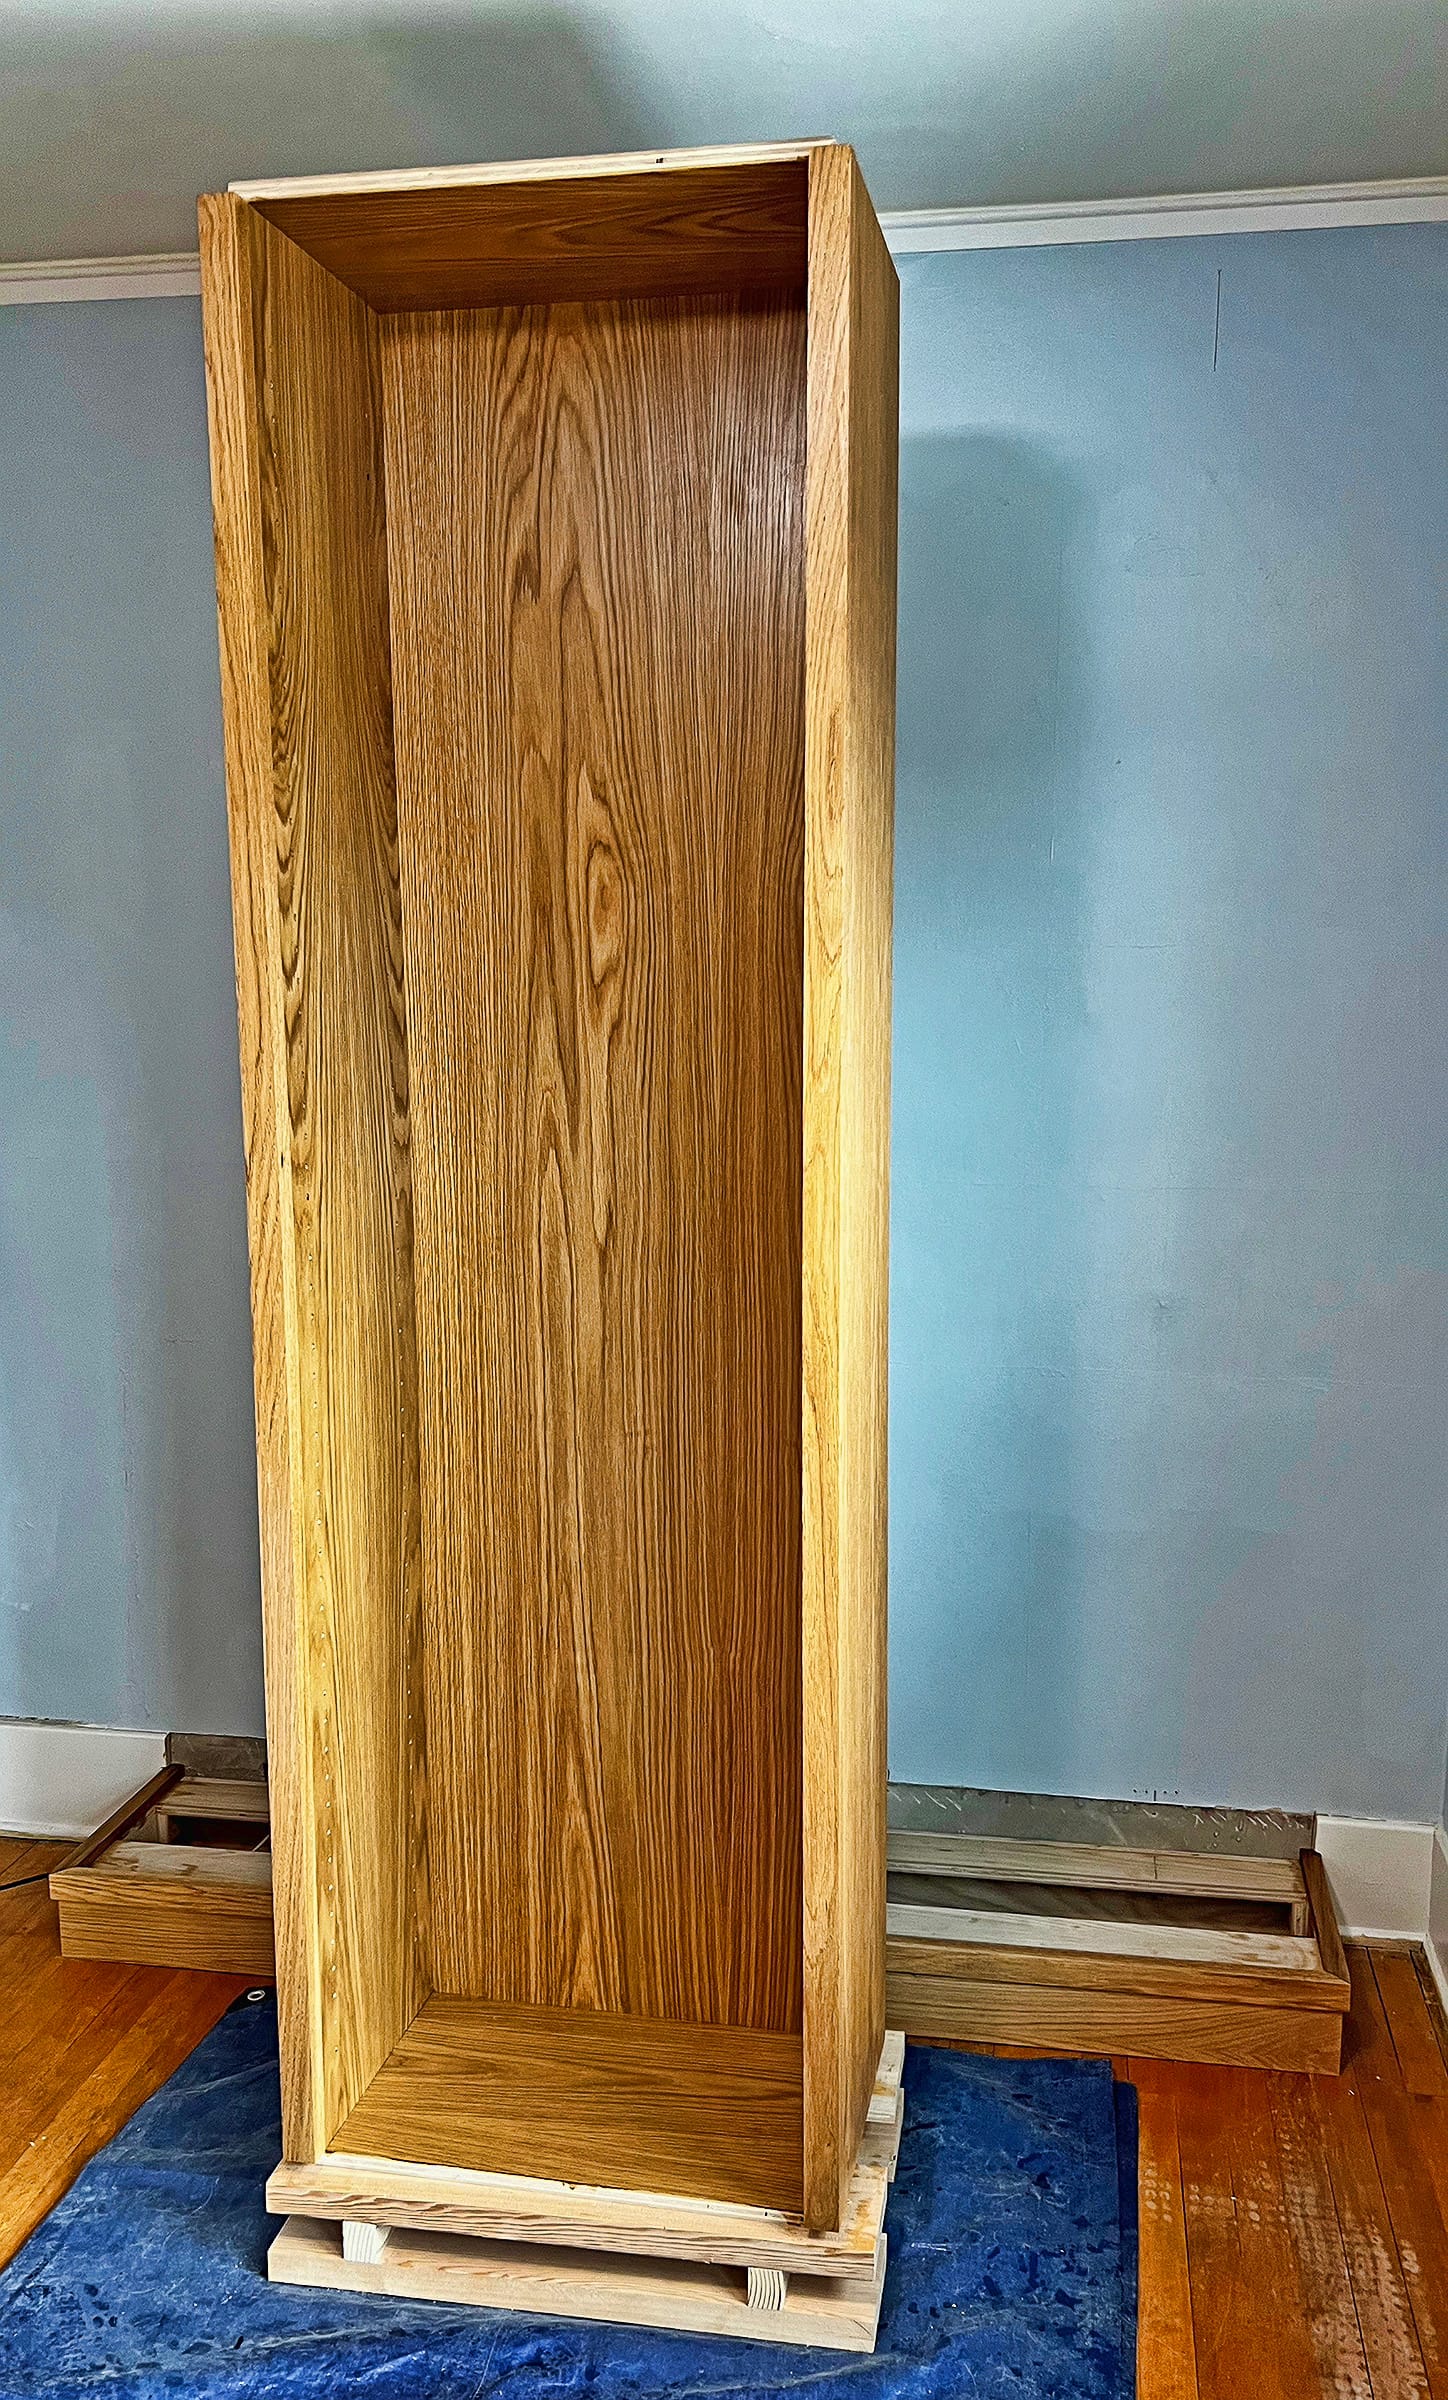
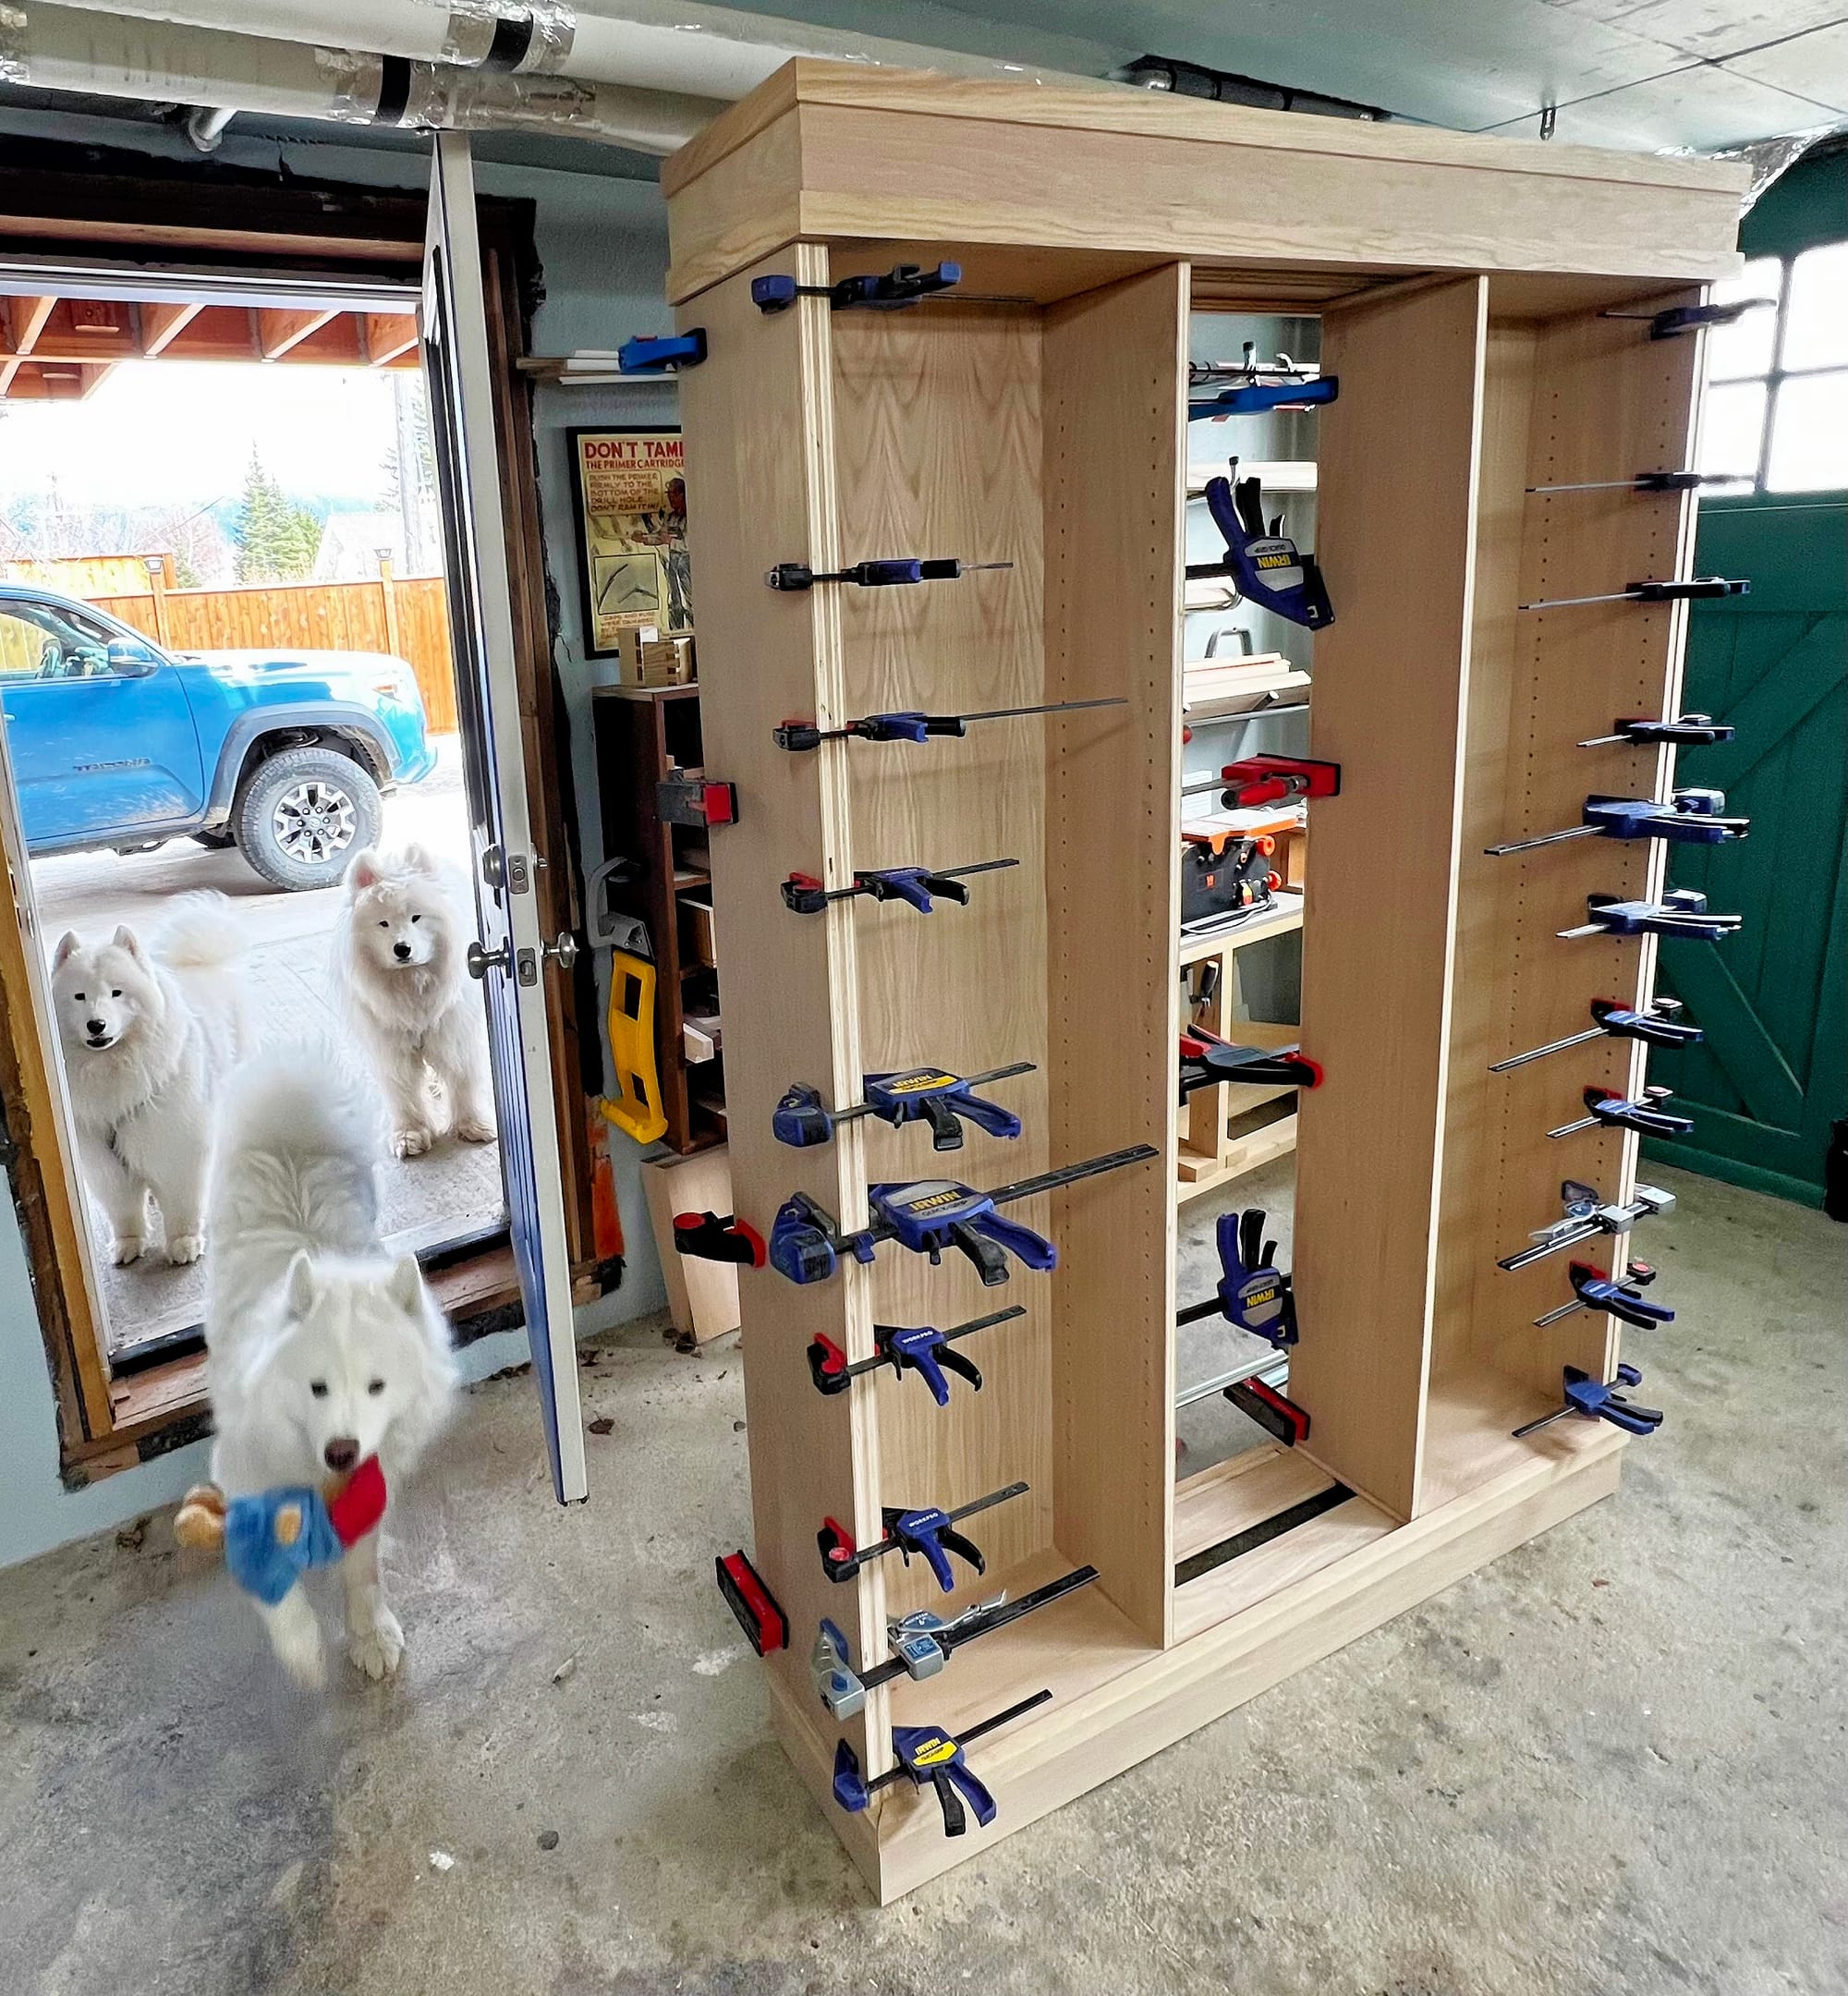
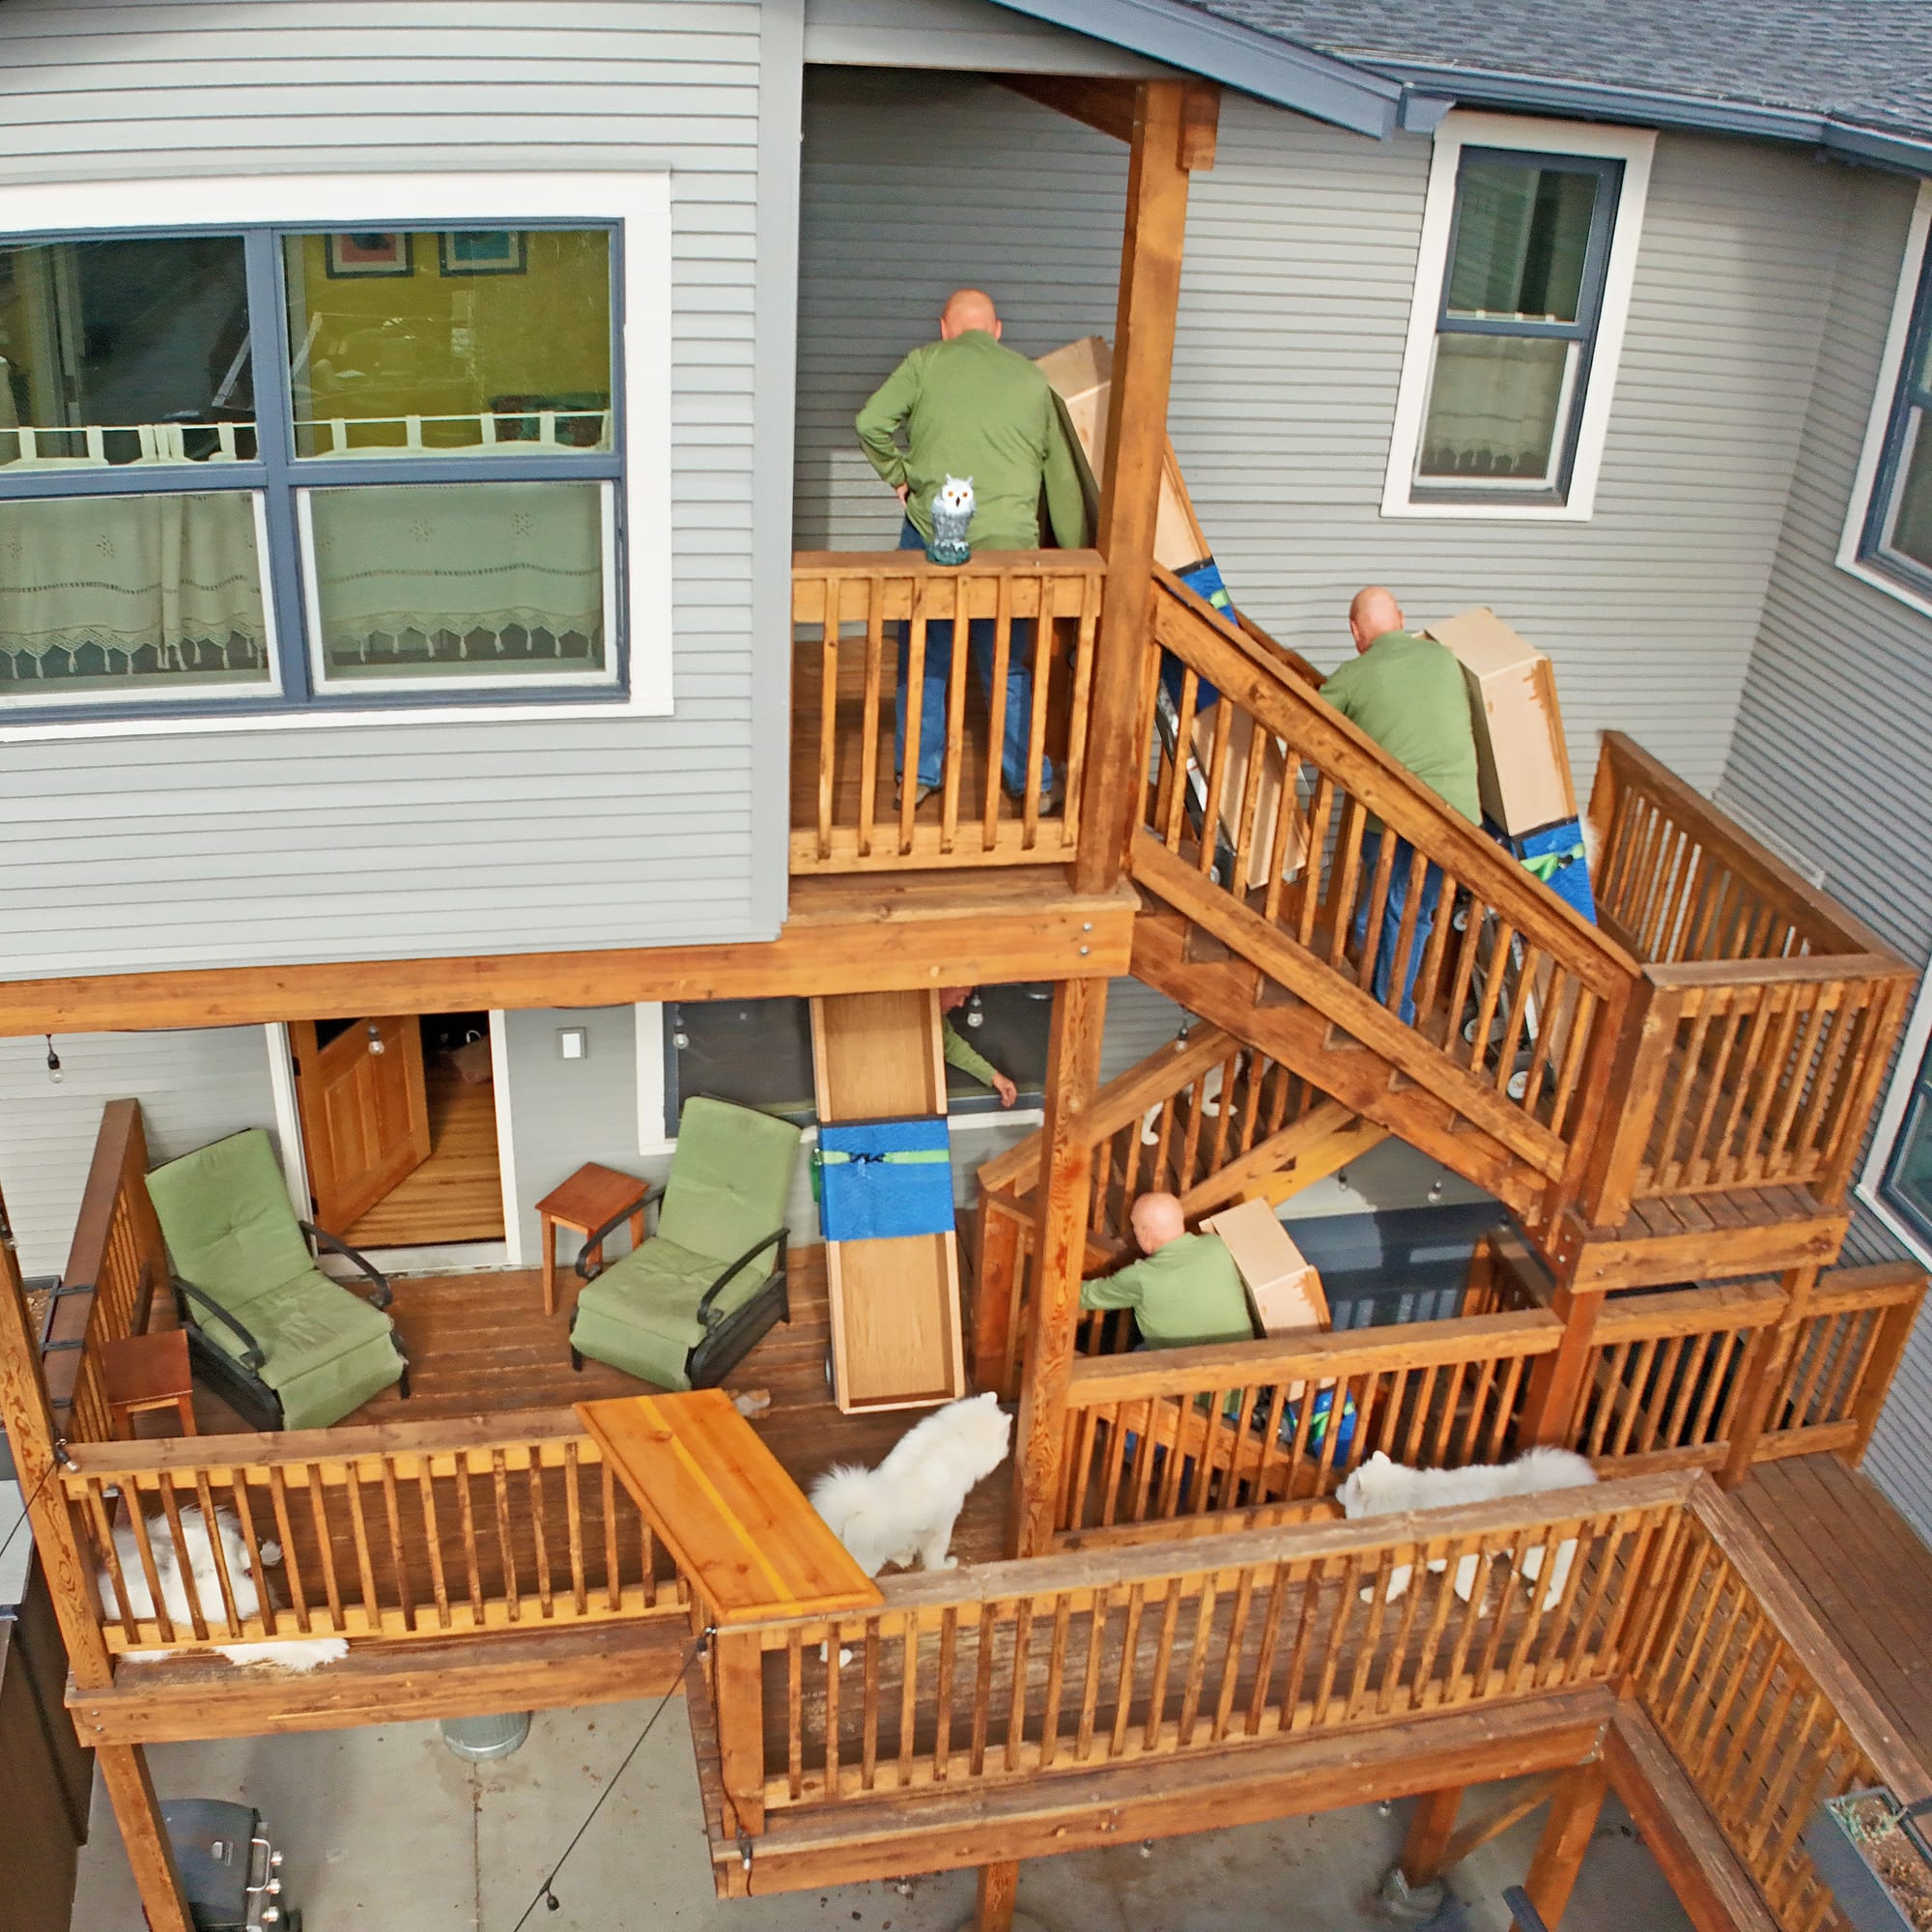
As Michael Alm notes in his how-to video, you end up assembling and disassembling this modular design many times throughout the build. By the time I actually installed the bookcase, I was an expert at fitting the components together.
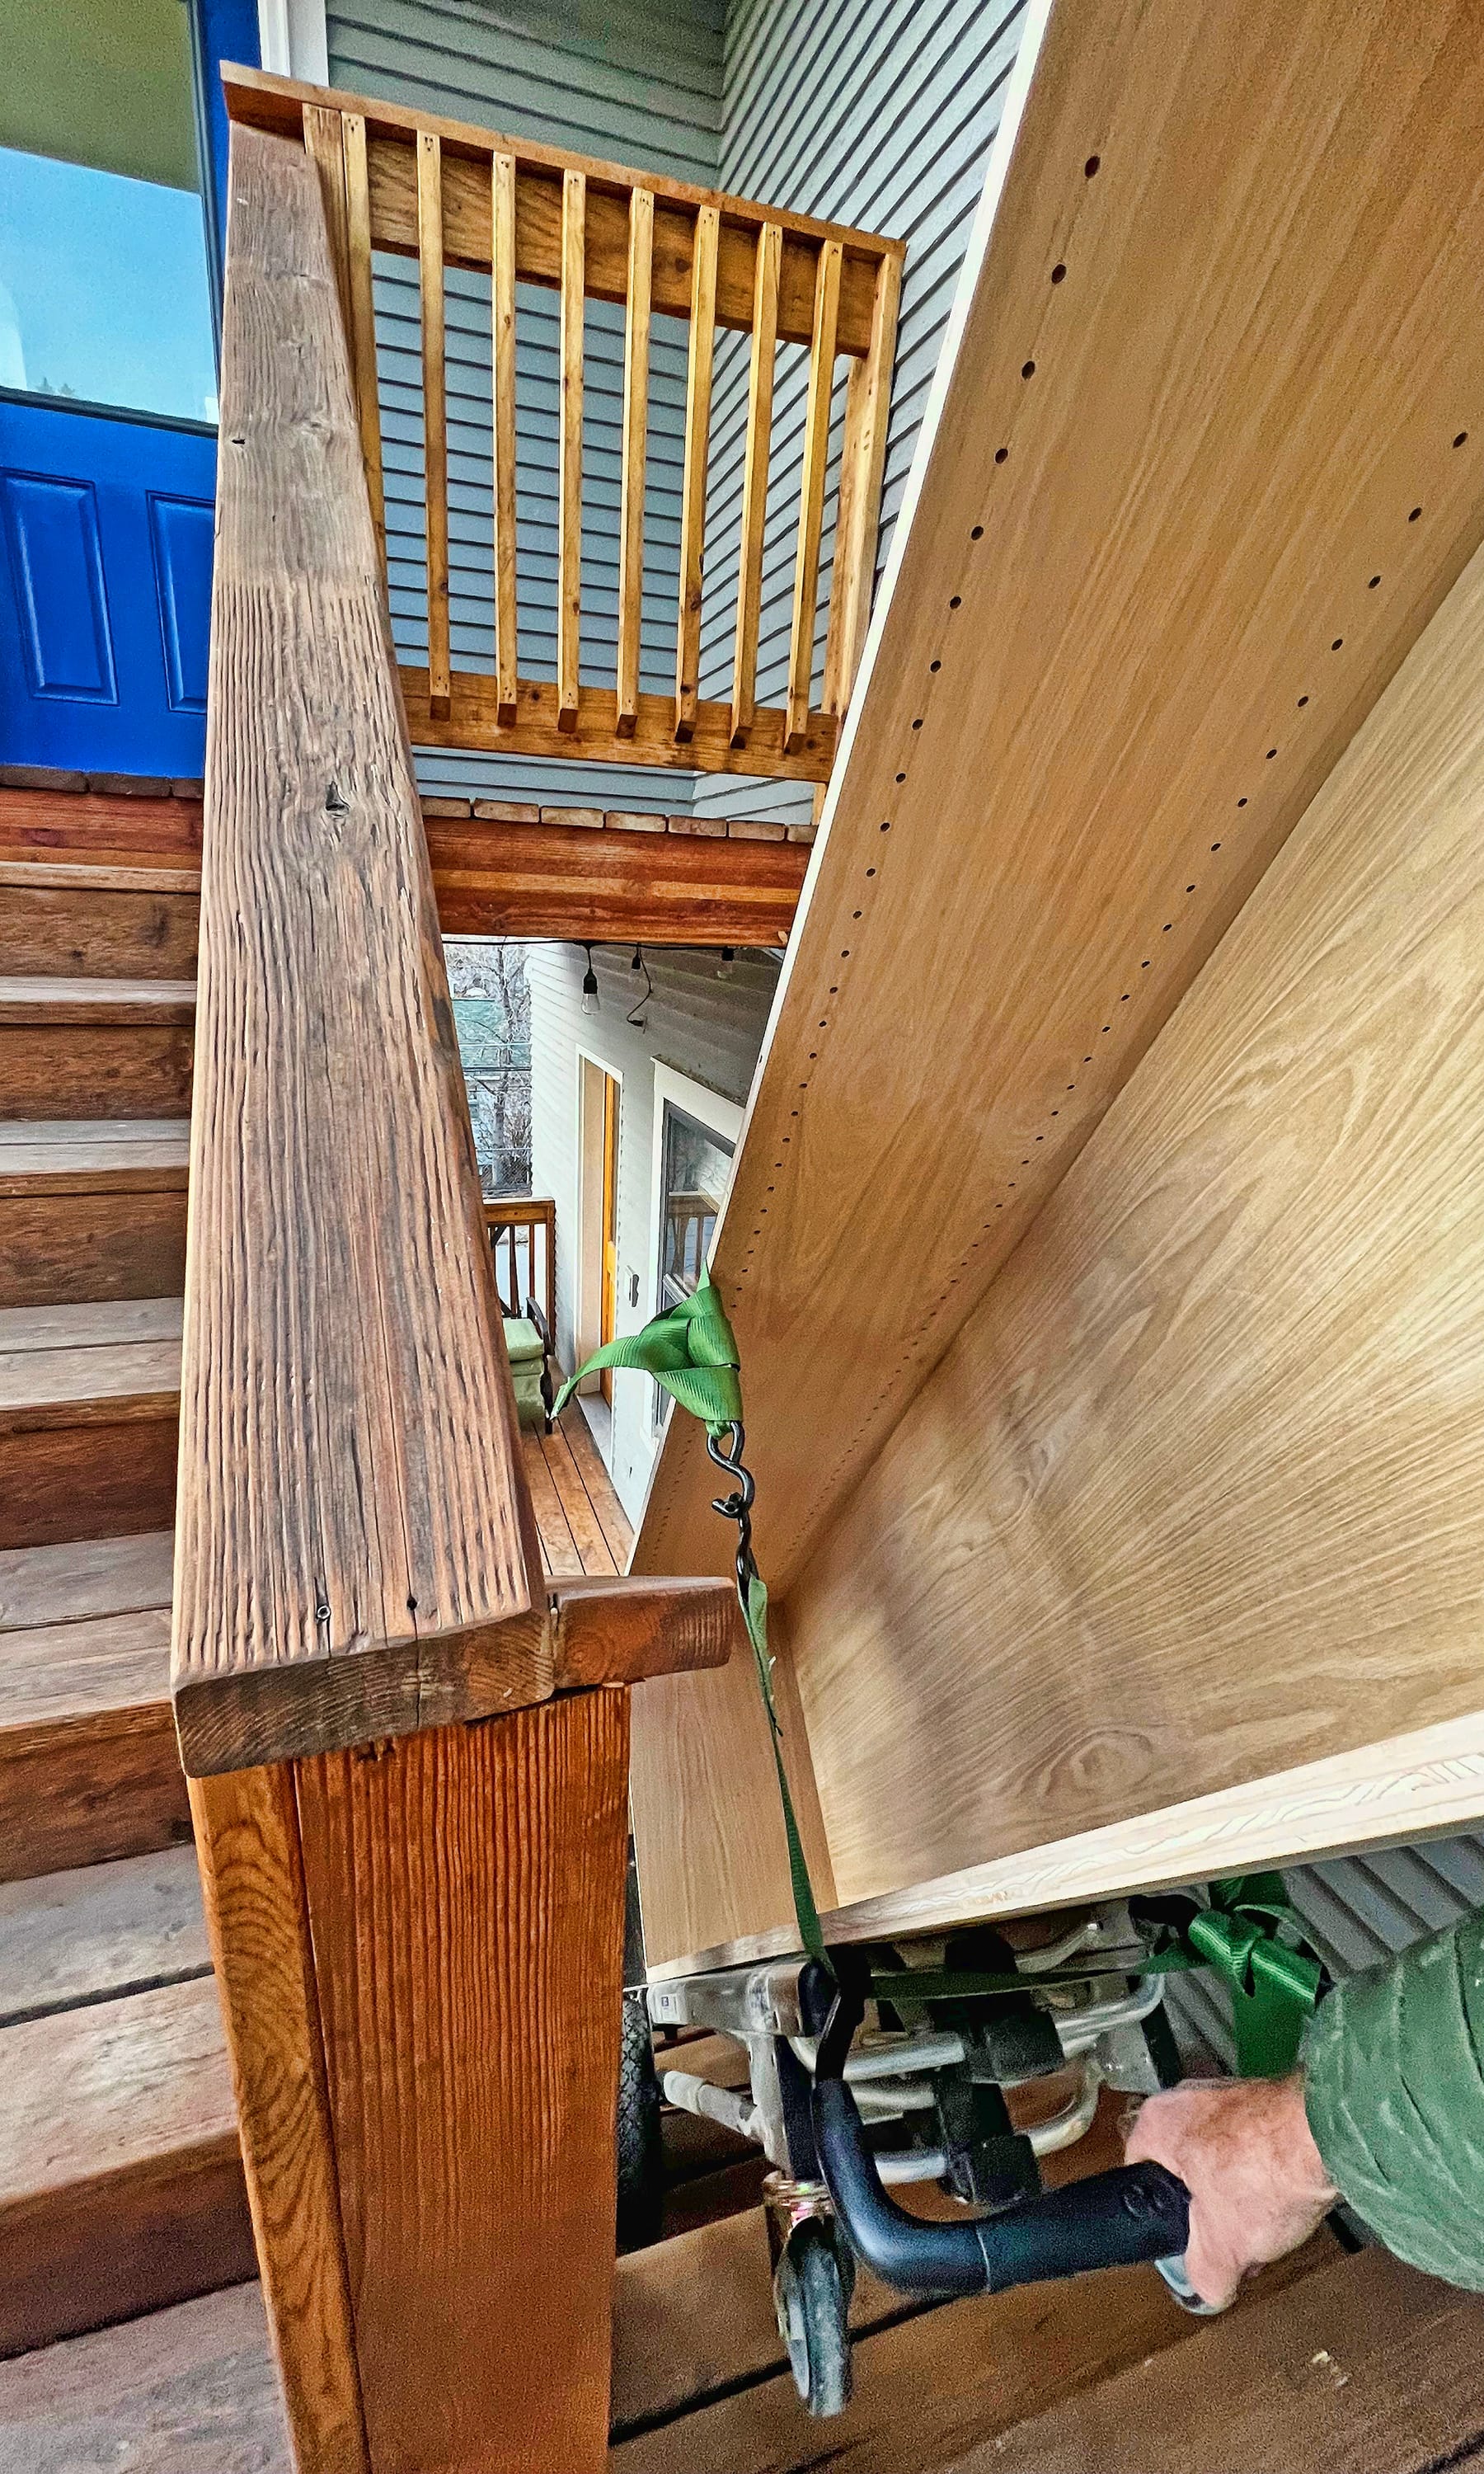
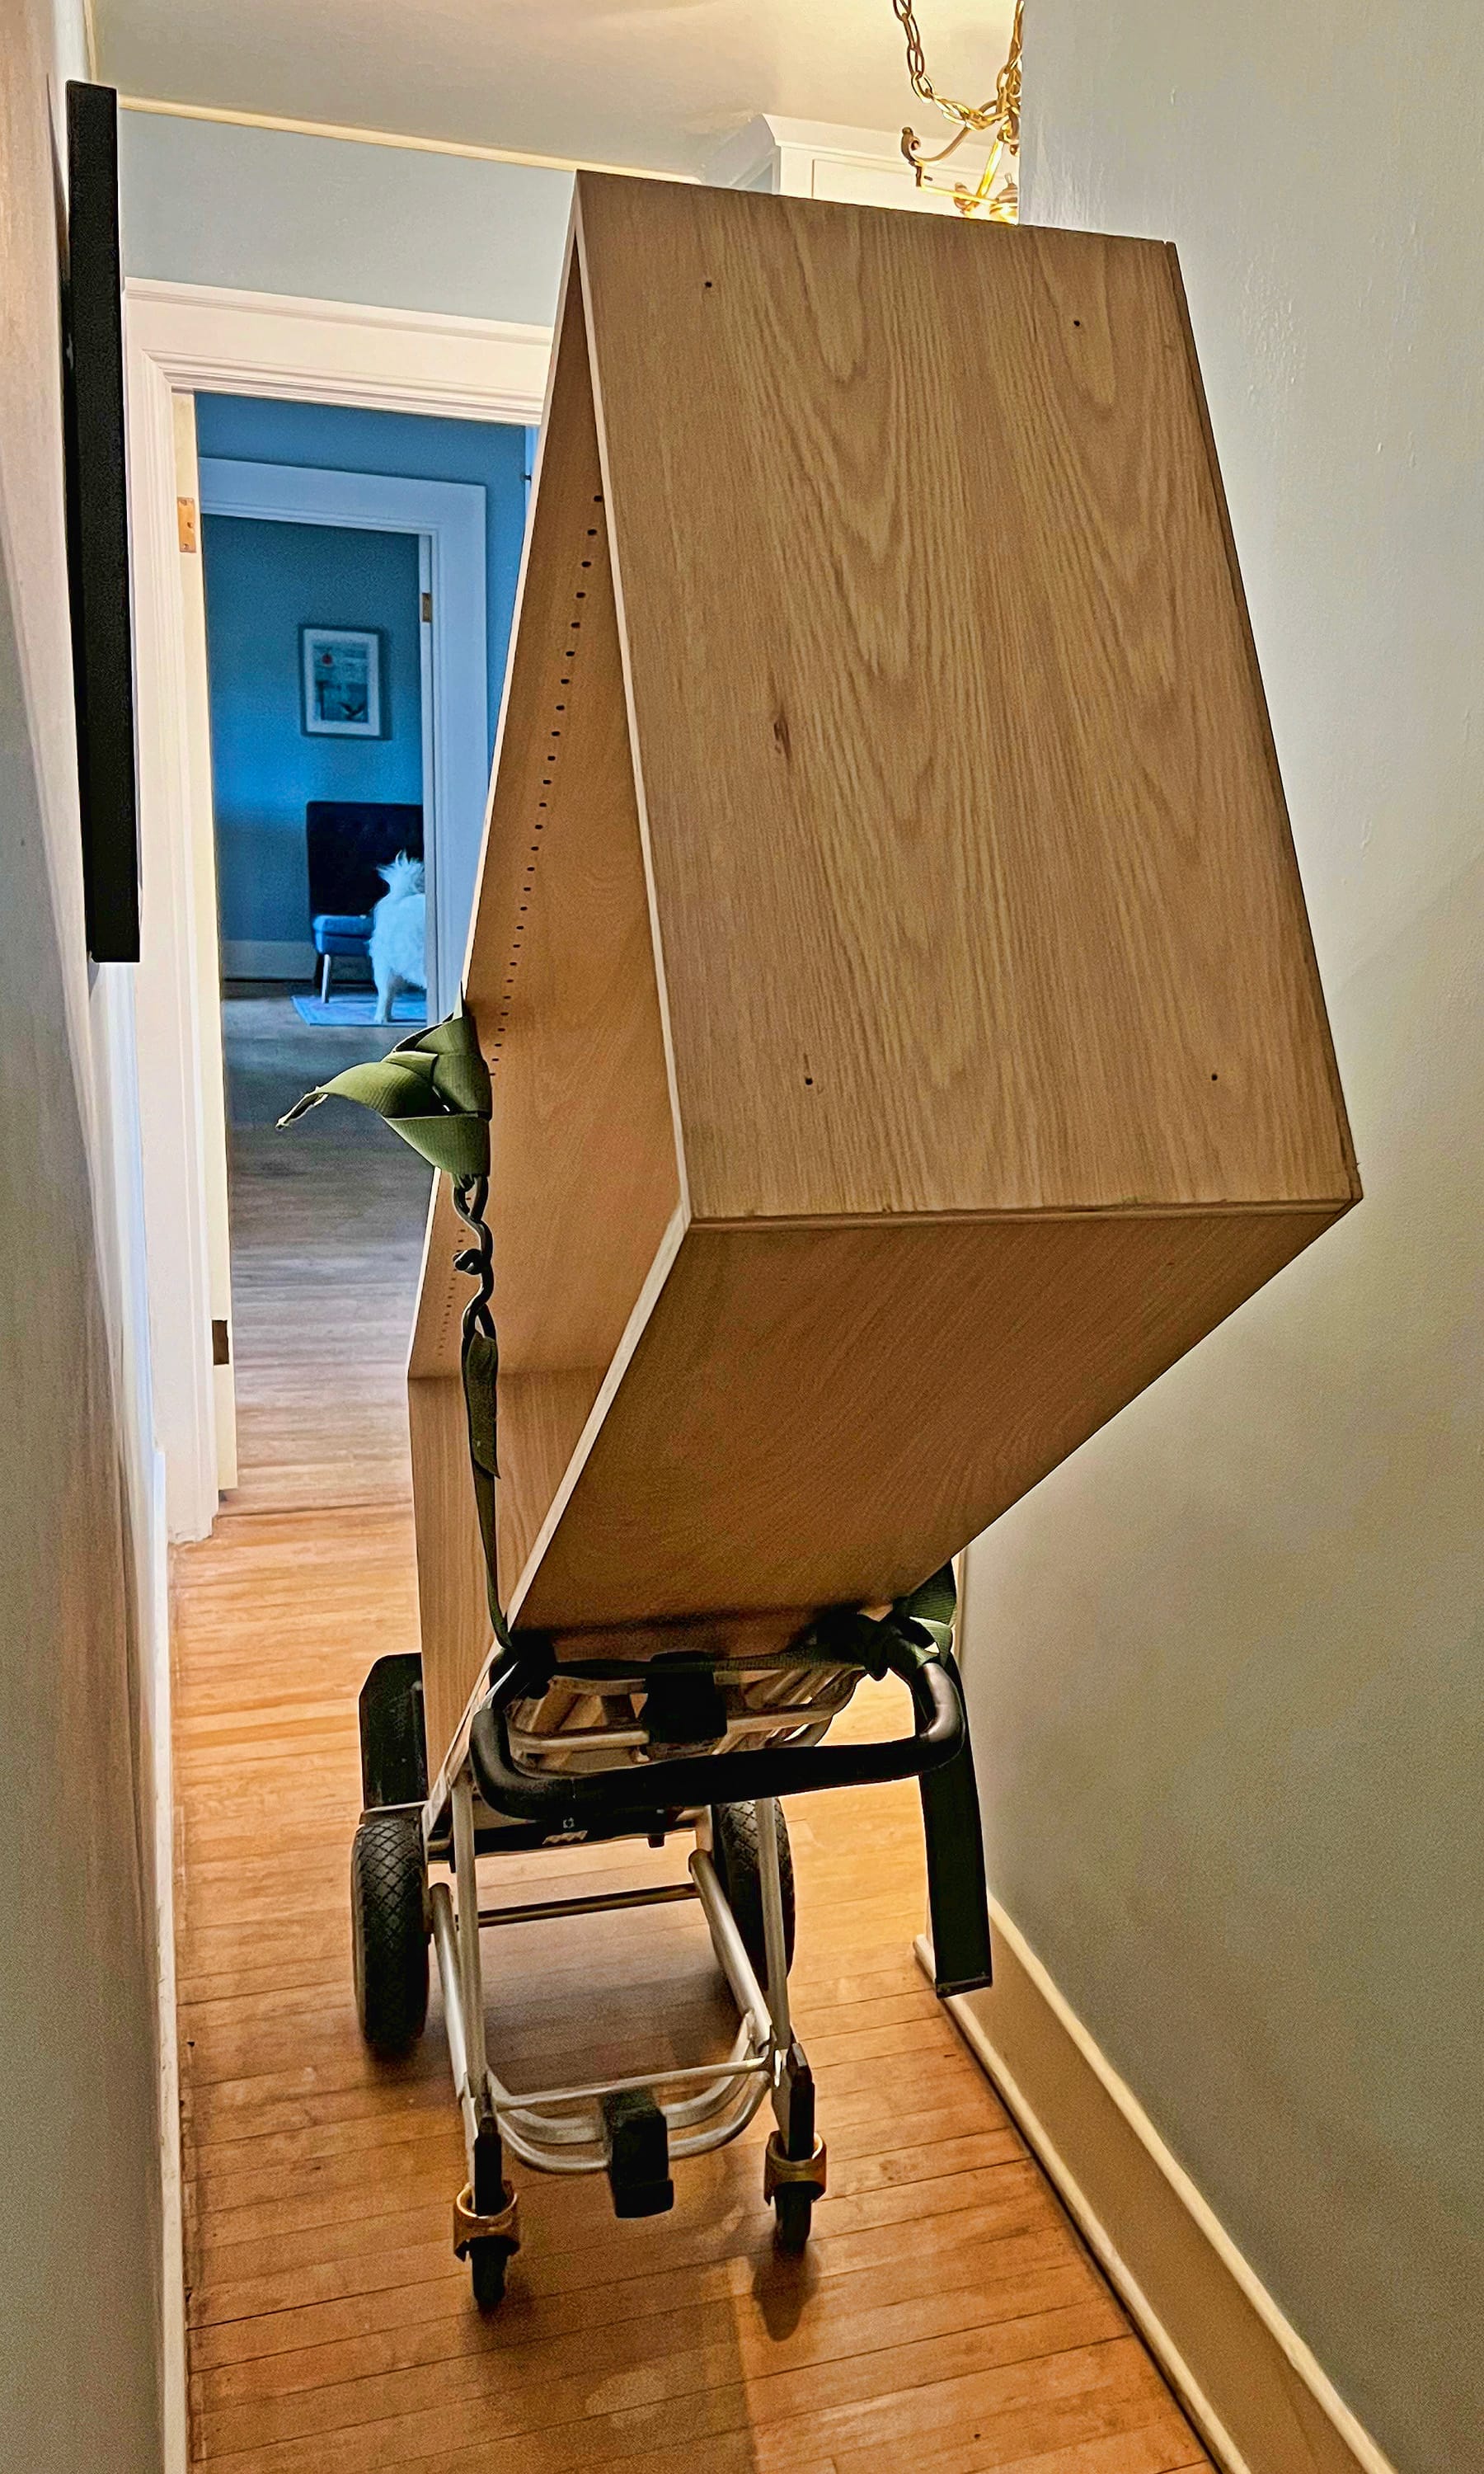
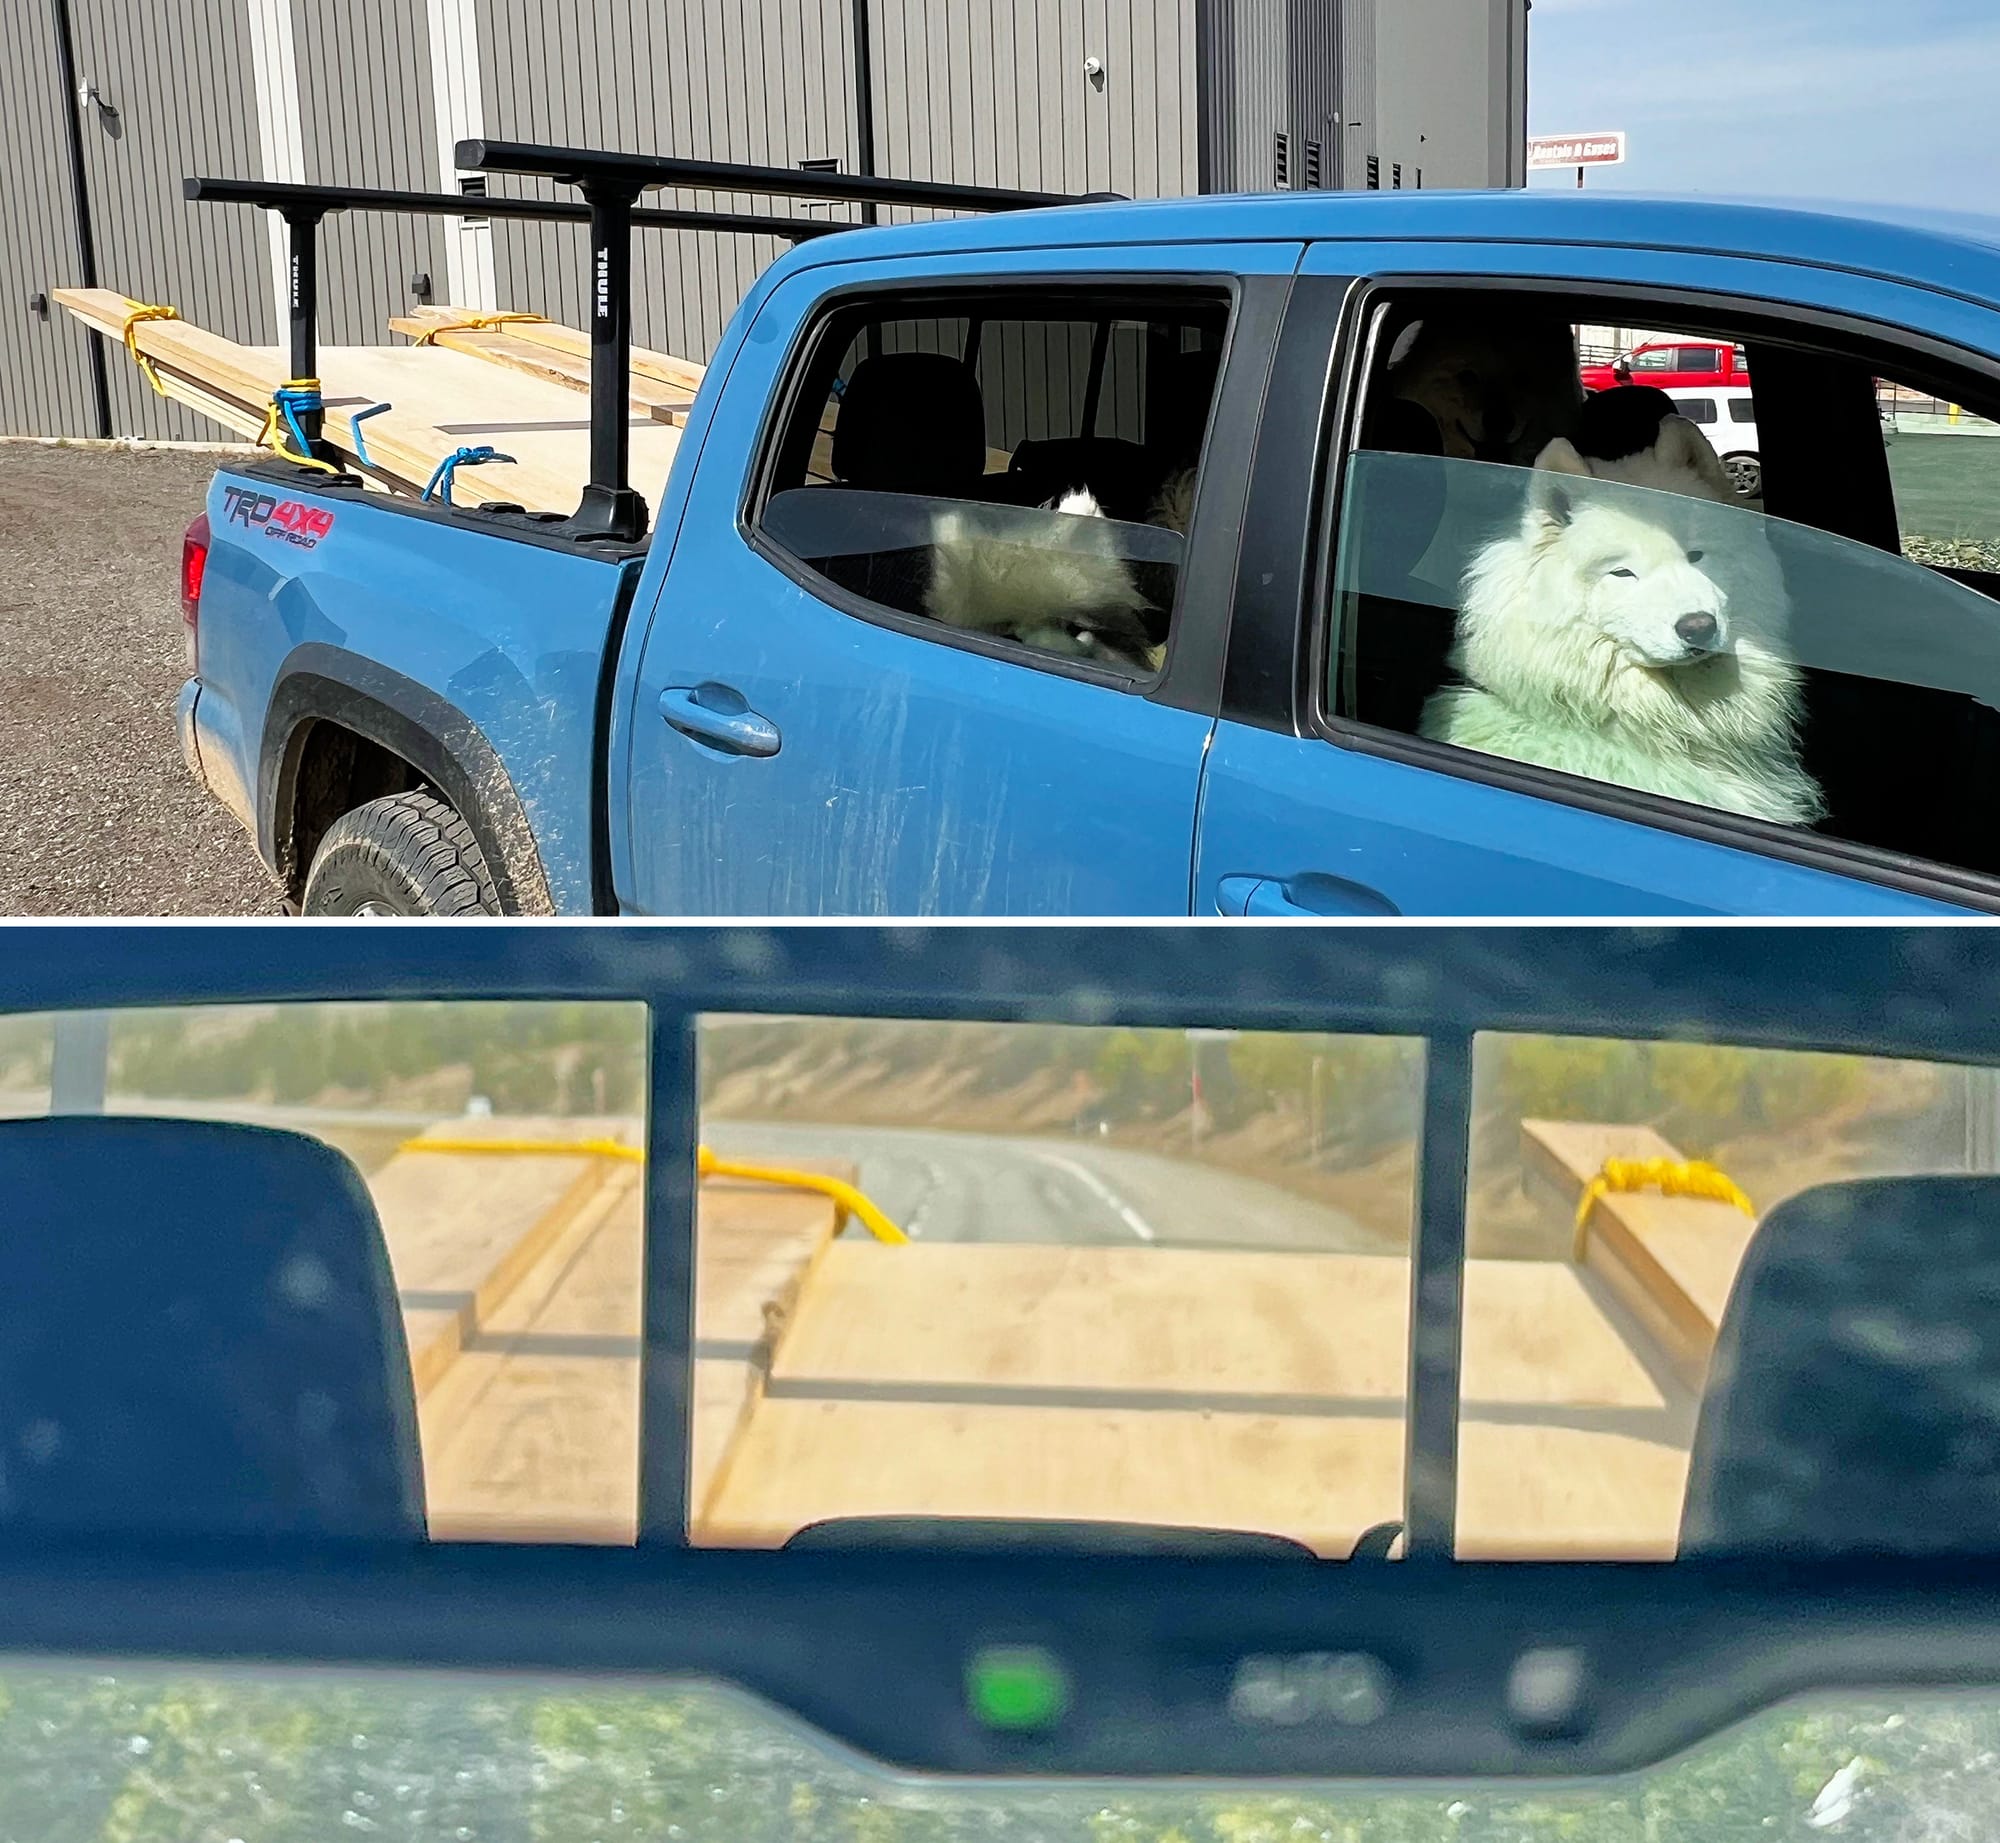
Hauling one of the bays upstairs. This is where the modular design pays off: the entire bookcase weights over 200 pounds, but none of the individual components weigh more than 50-60 pounds. With a good handcart, that's an easy load for one person to haul.
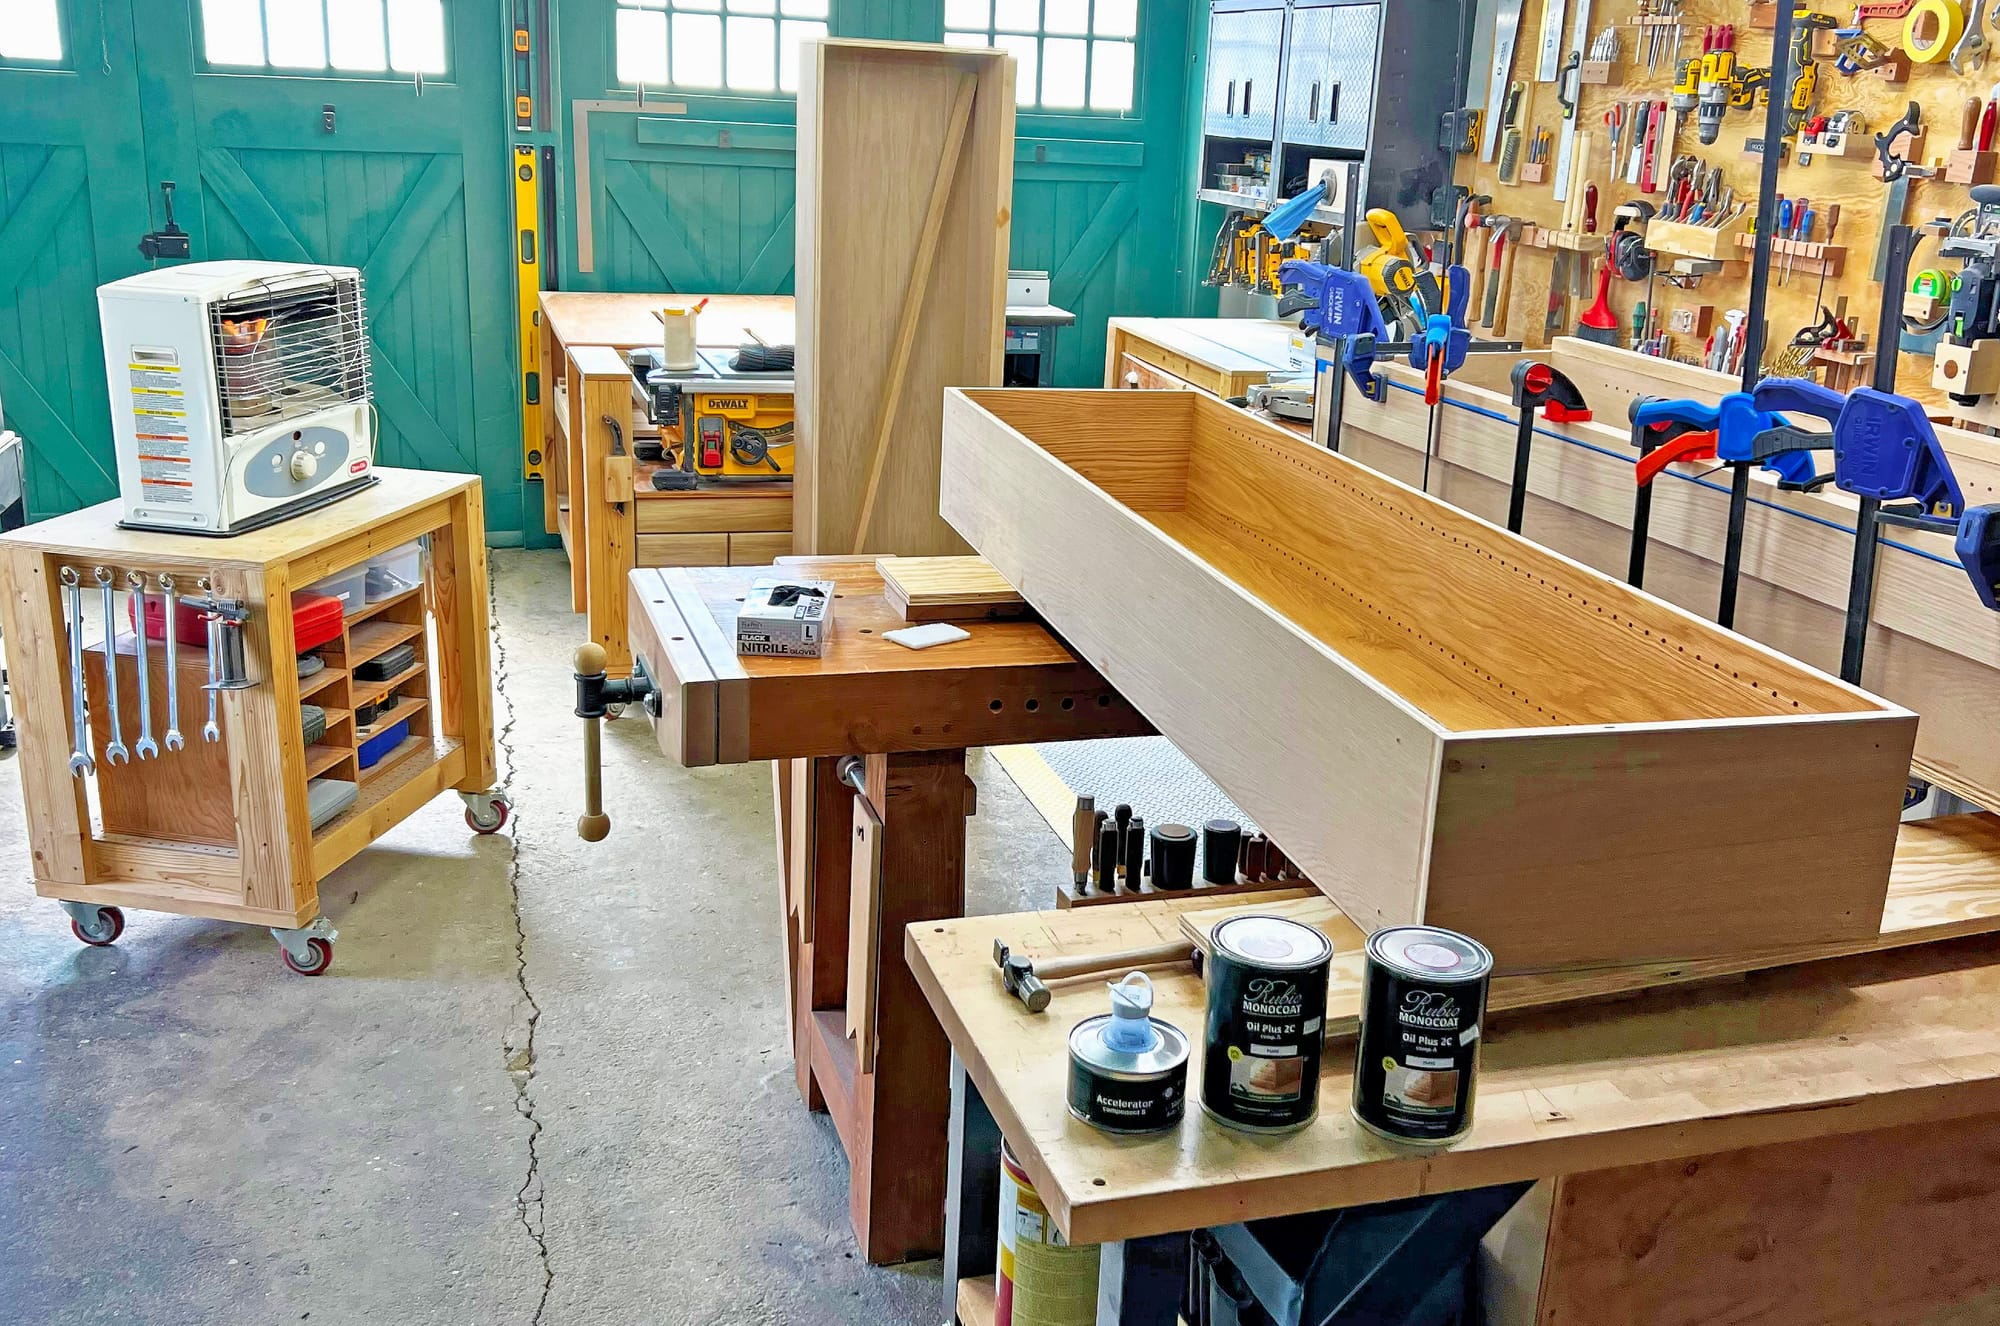
For the finish, I used Rubio Monocoat. I've grown to love this finish, and use it whenever I can. It's a plant-based hardwax oil finish that looks great, smells great, feels great, and is very tough and durable. There are a few details about how to apply it that you need to learn, but once you understand the process it goes really fast and it's easy to get consistent results.
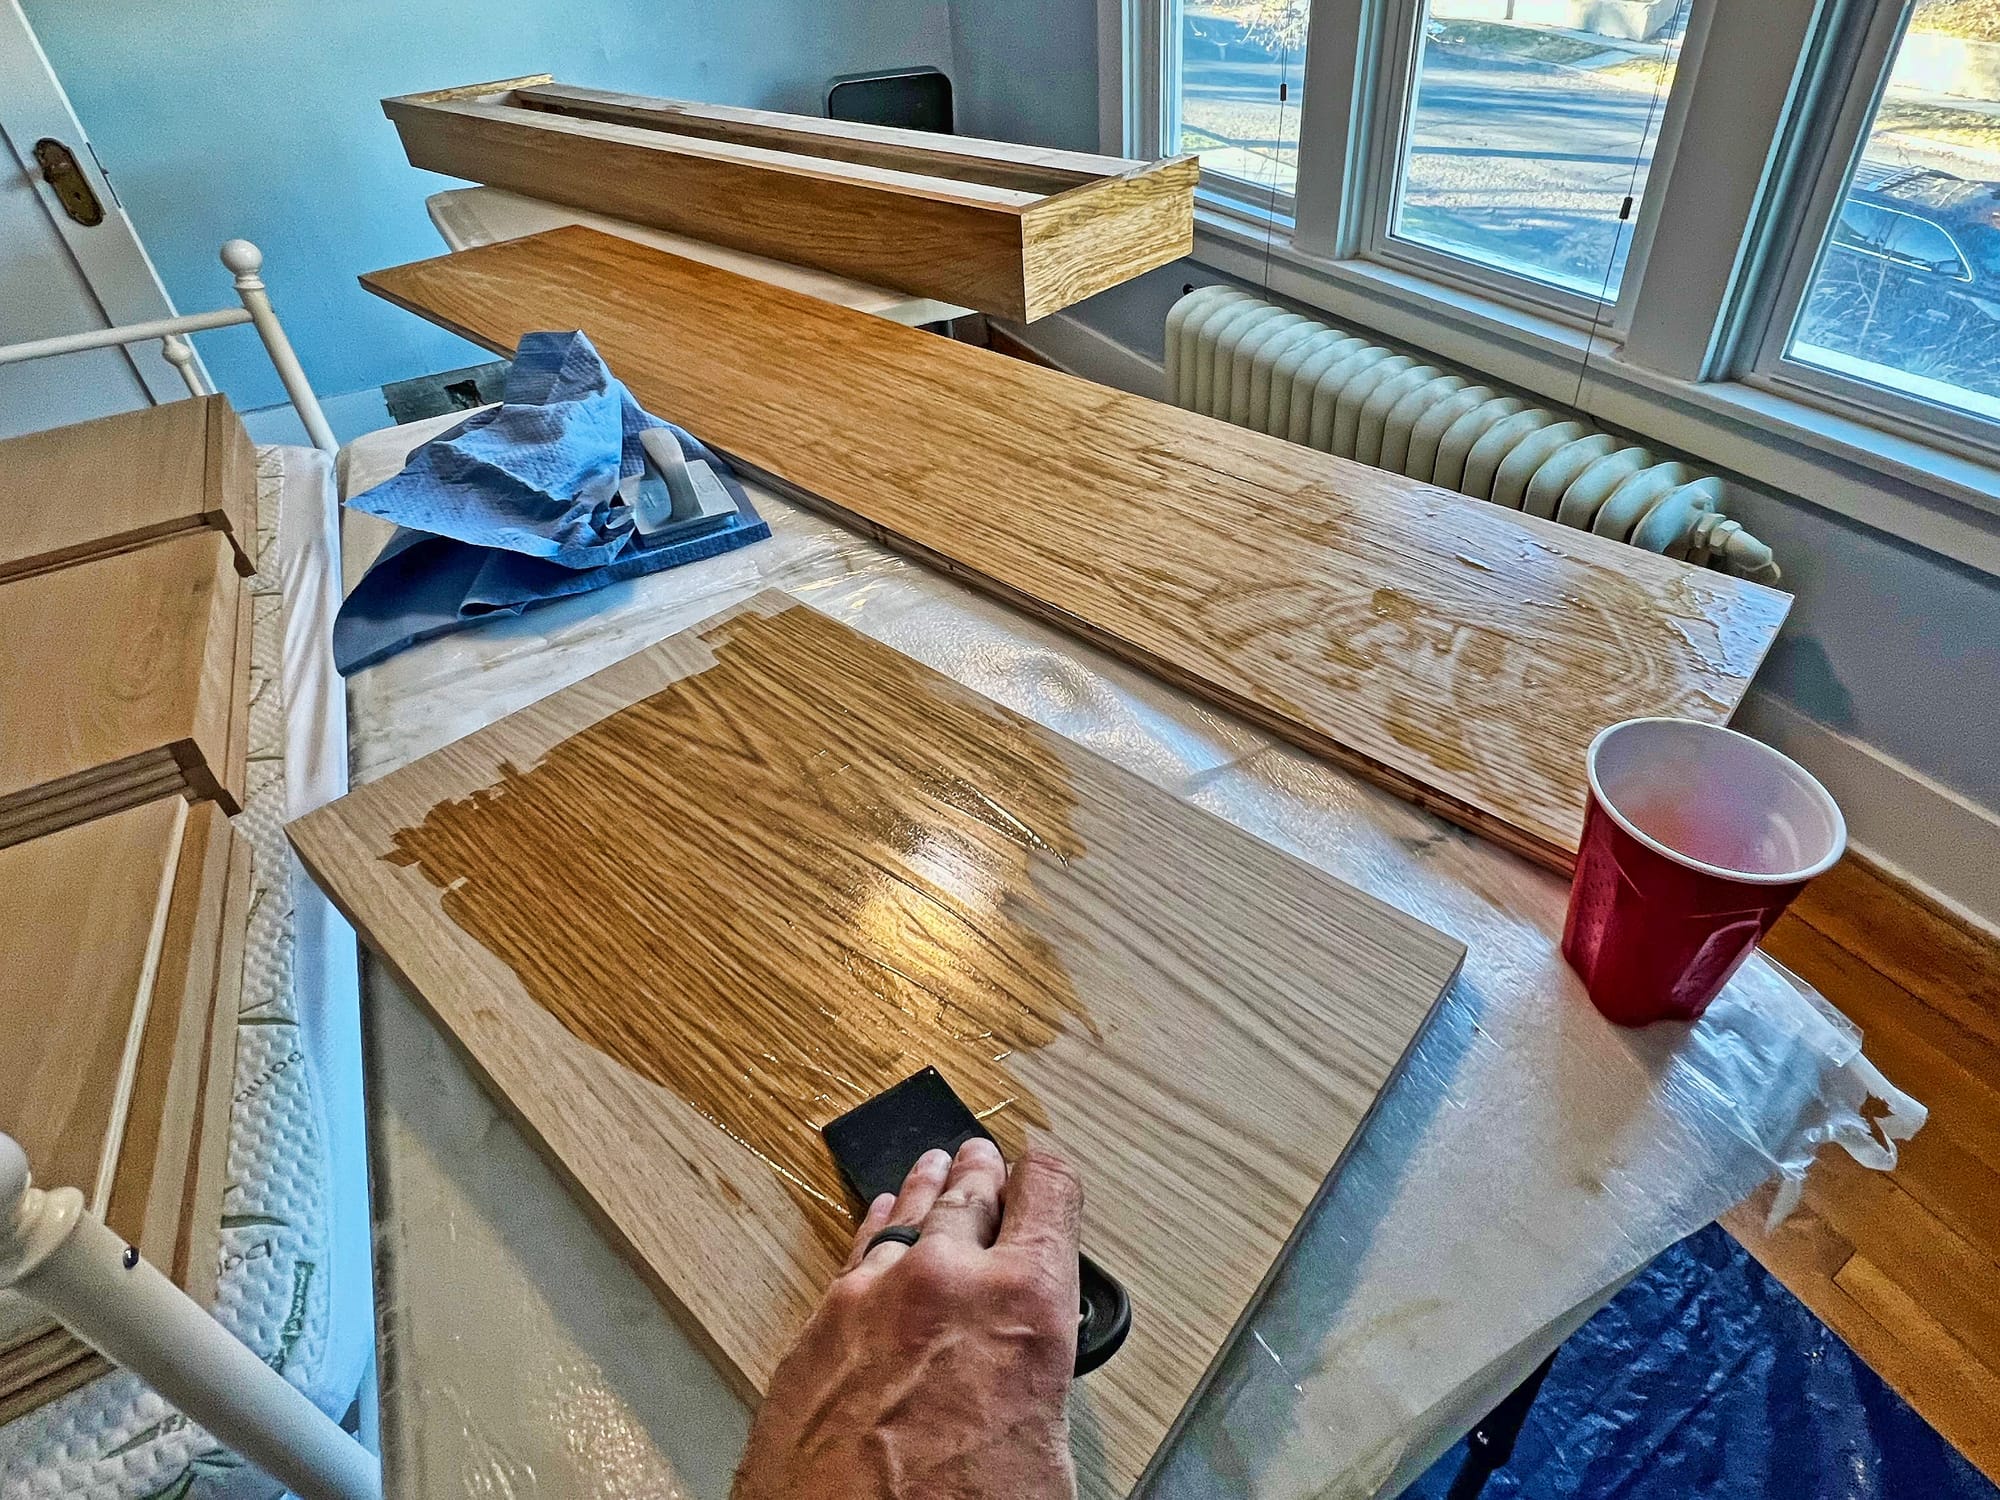
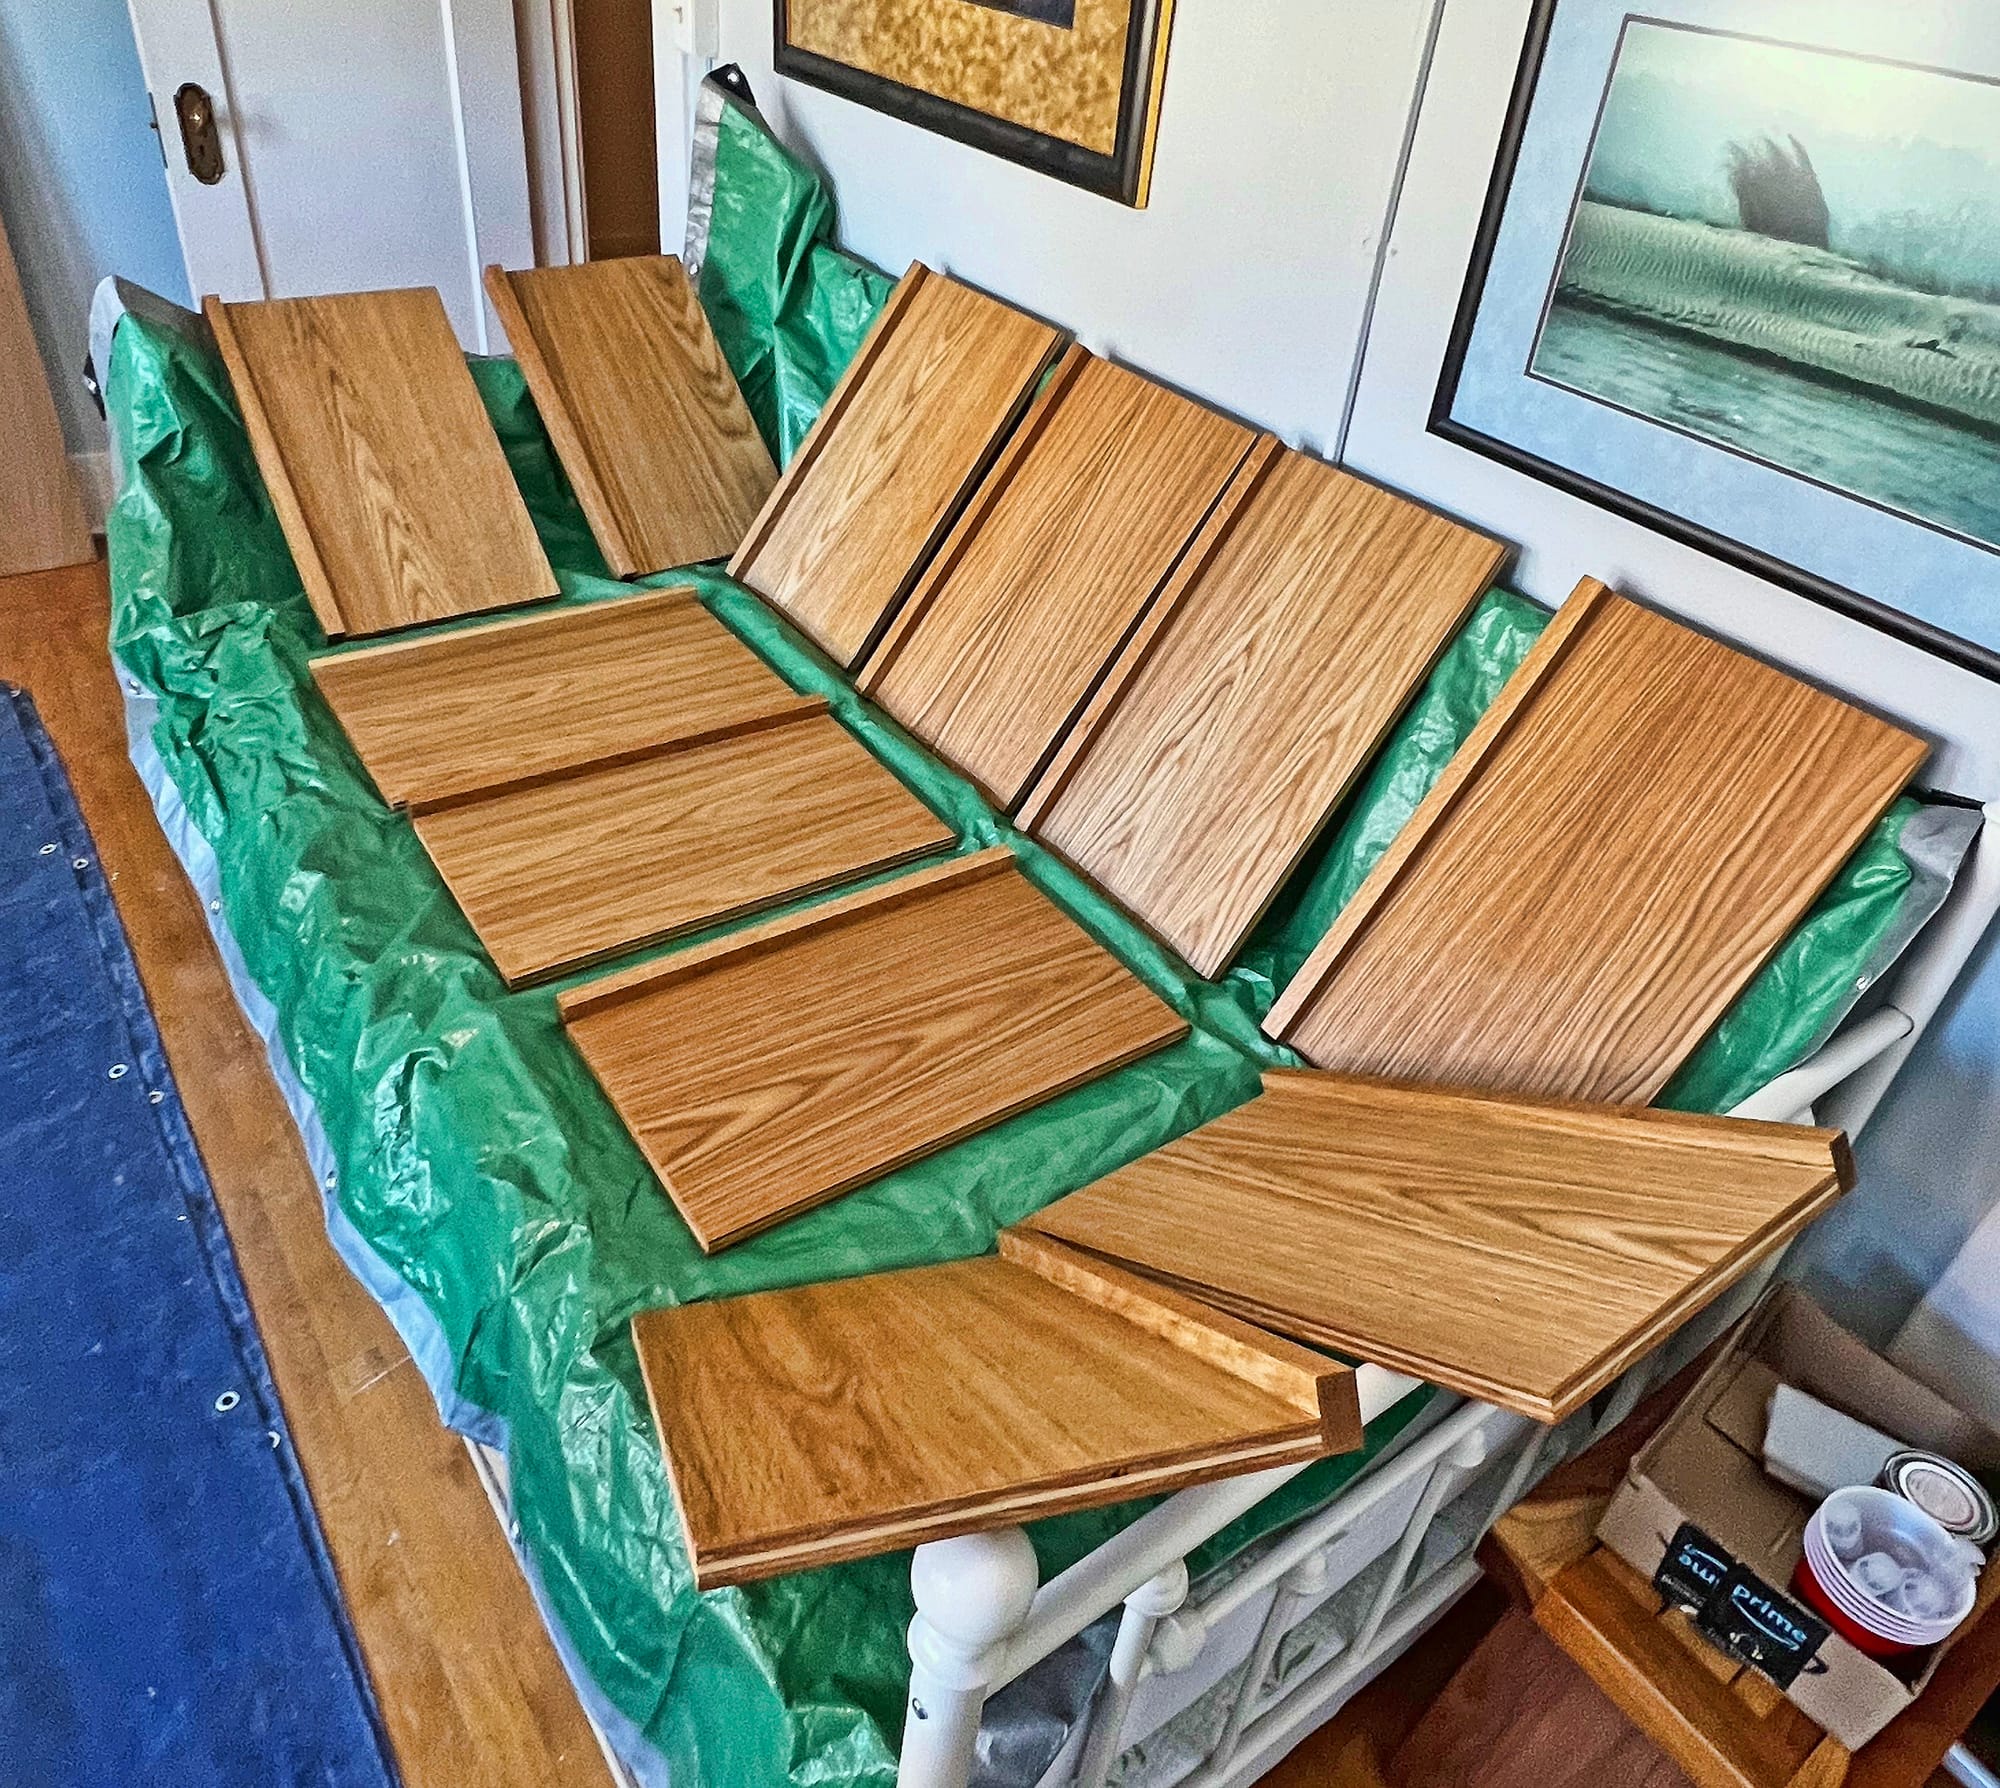
Applying the Rubio Monocoat finish. As the name implies, this finish only requires a single coat when applied properly, which saves a lot of time.
It took me six weeks to finish the first bookcase, with probably four weeks of actual working time. A few key lessons I learned:
- Build jigs! I made several custom jigs to help make key steps easier or more accurate, and I'm not sure I could have completed the project without them.
- Using a plunge router with an off-the-shelf jig is a great way to make clean, consistent, professional shelf pin holes. (I splurged on the $74 Peachtree jig, but there are others available for half that price.)
- Don't cut pieces until you have to – that way, if you need a little bigger piece for some reason, you can just do it.
- You can never have too many clamps!
Bookcase #2
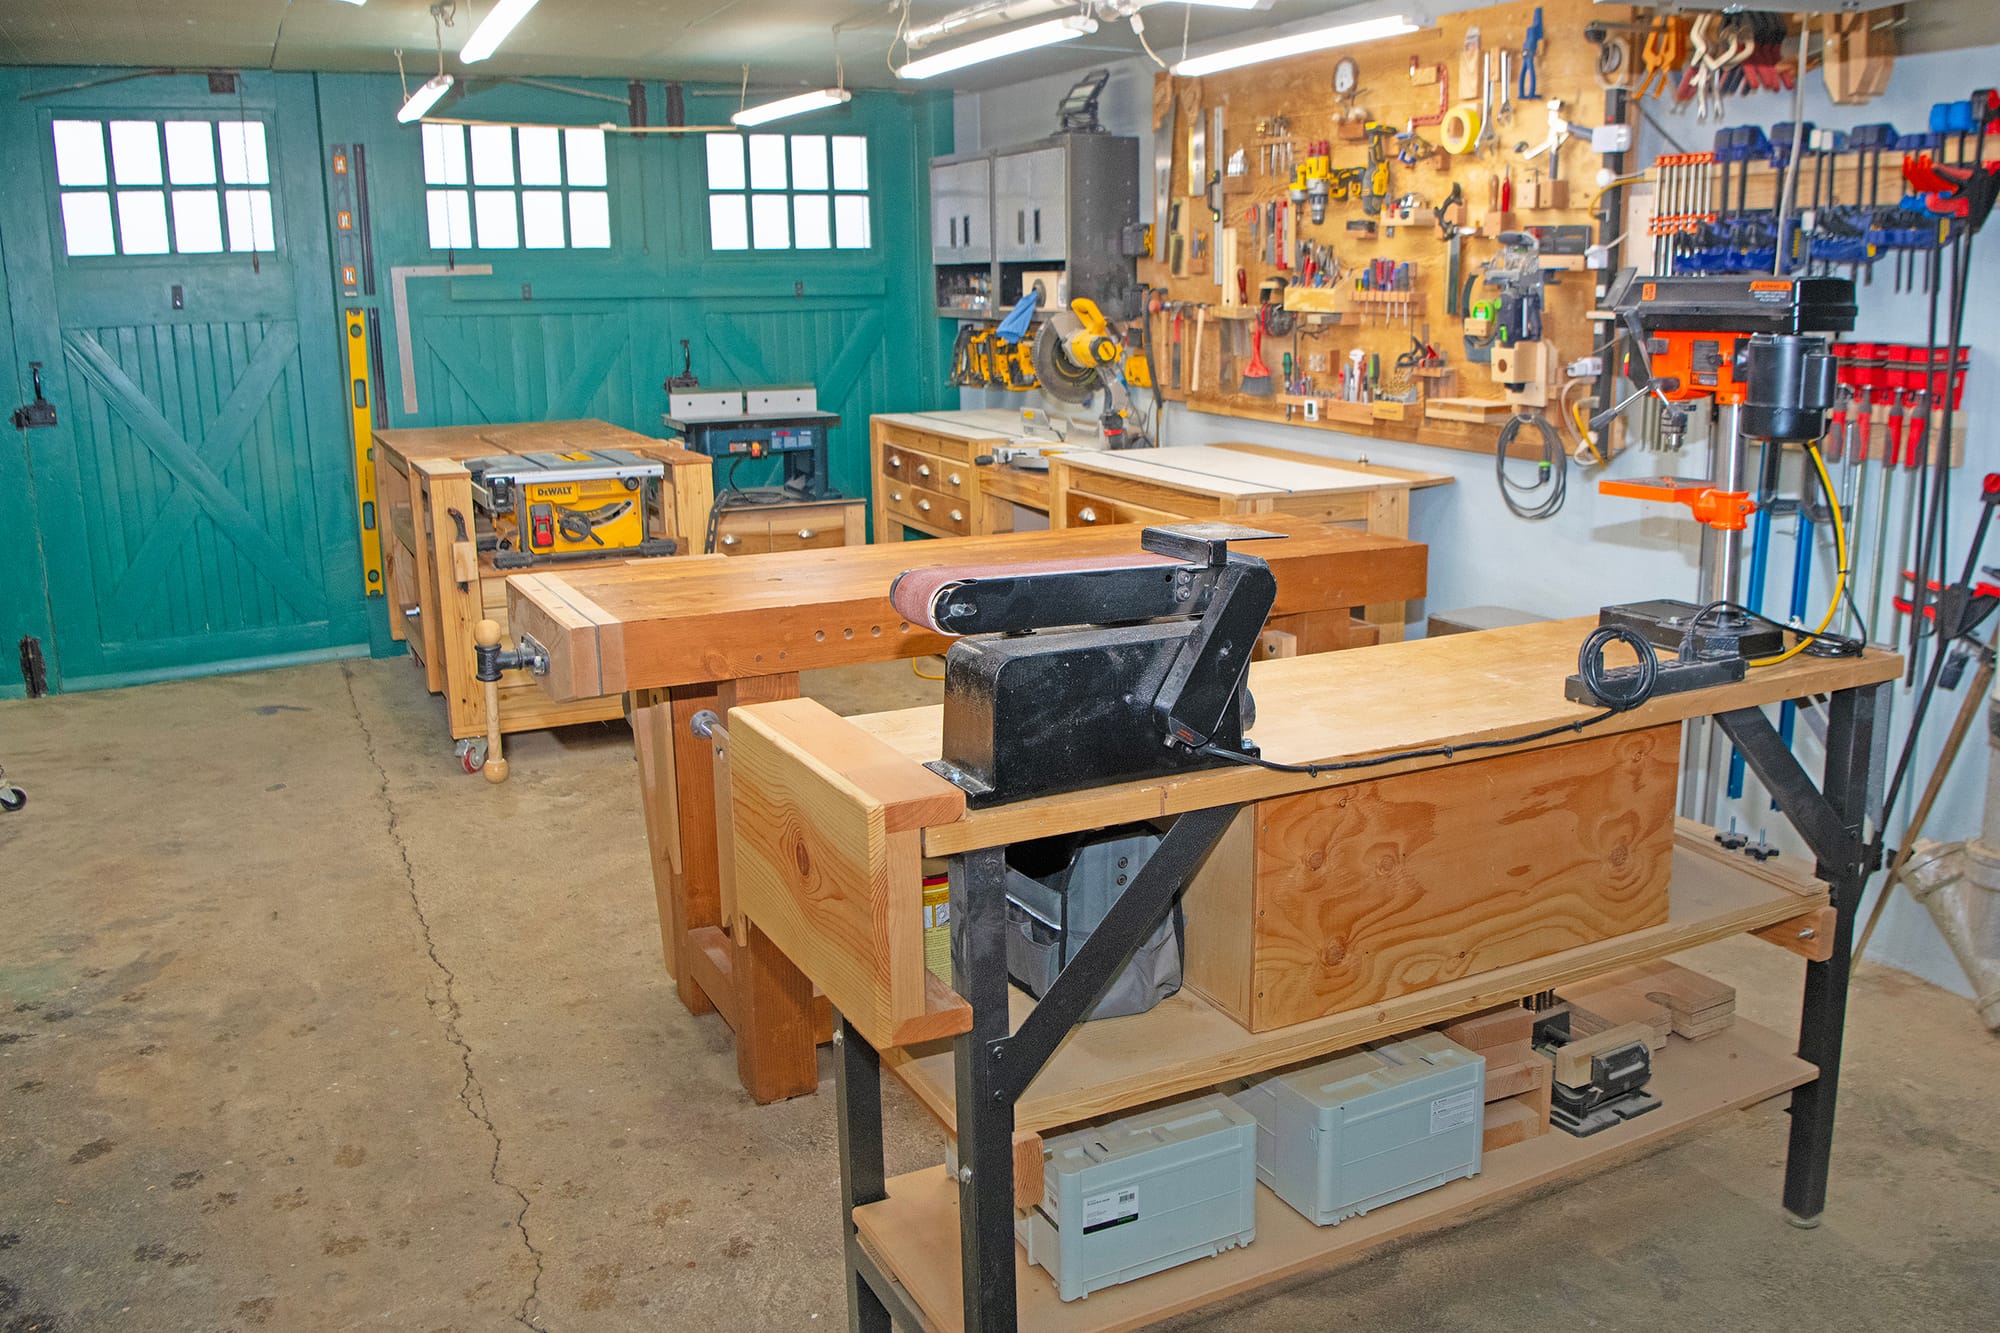
I finished up the first bookcase in early November, and then I had to wait to do the second one, because my workshop isn't heated. I don't care about the temperature myself (I've had many enjoyable below-freezing days in the shop), but it needs to be around 50F or warmer for proper drying of wood glue and the finish I'm using. I have a kerosene heater in the shop that's useful for quick projects, but I didn't feel like burning all the kerosene it would require to do a big project like another bookcase.
So I waited until mid-April to start the second bookcase. I knew that there might still be some cold weather at that point (and there has been), but I had to get started because I wanted to fit it in before my knee replacement surgery, which is coming up in mid-May.
This bookcase had a few different design considerations than the first one, because of where it's located, and it's a bit smaller than the first bookcase: 10" shorter, 10" narrower, and 4" shallower. That means I had a fair amount of leftover plywood and oak trim when I was done, which I can use on the third bookcase.
Having learned from my mistake on the first bookcase, I started by cutting up the plywood for the bays only, and didn't cut any of the pieces for the base and crown ahead of time.
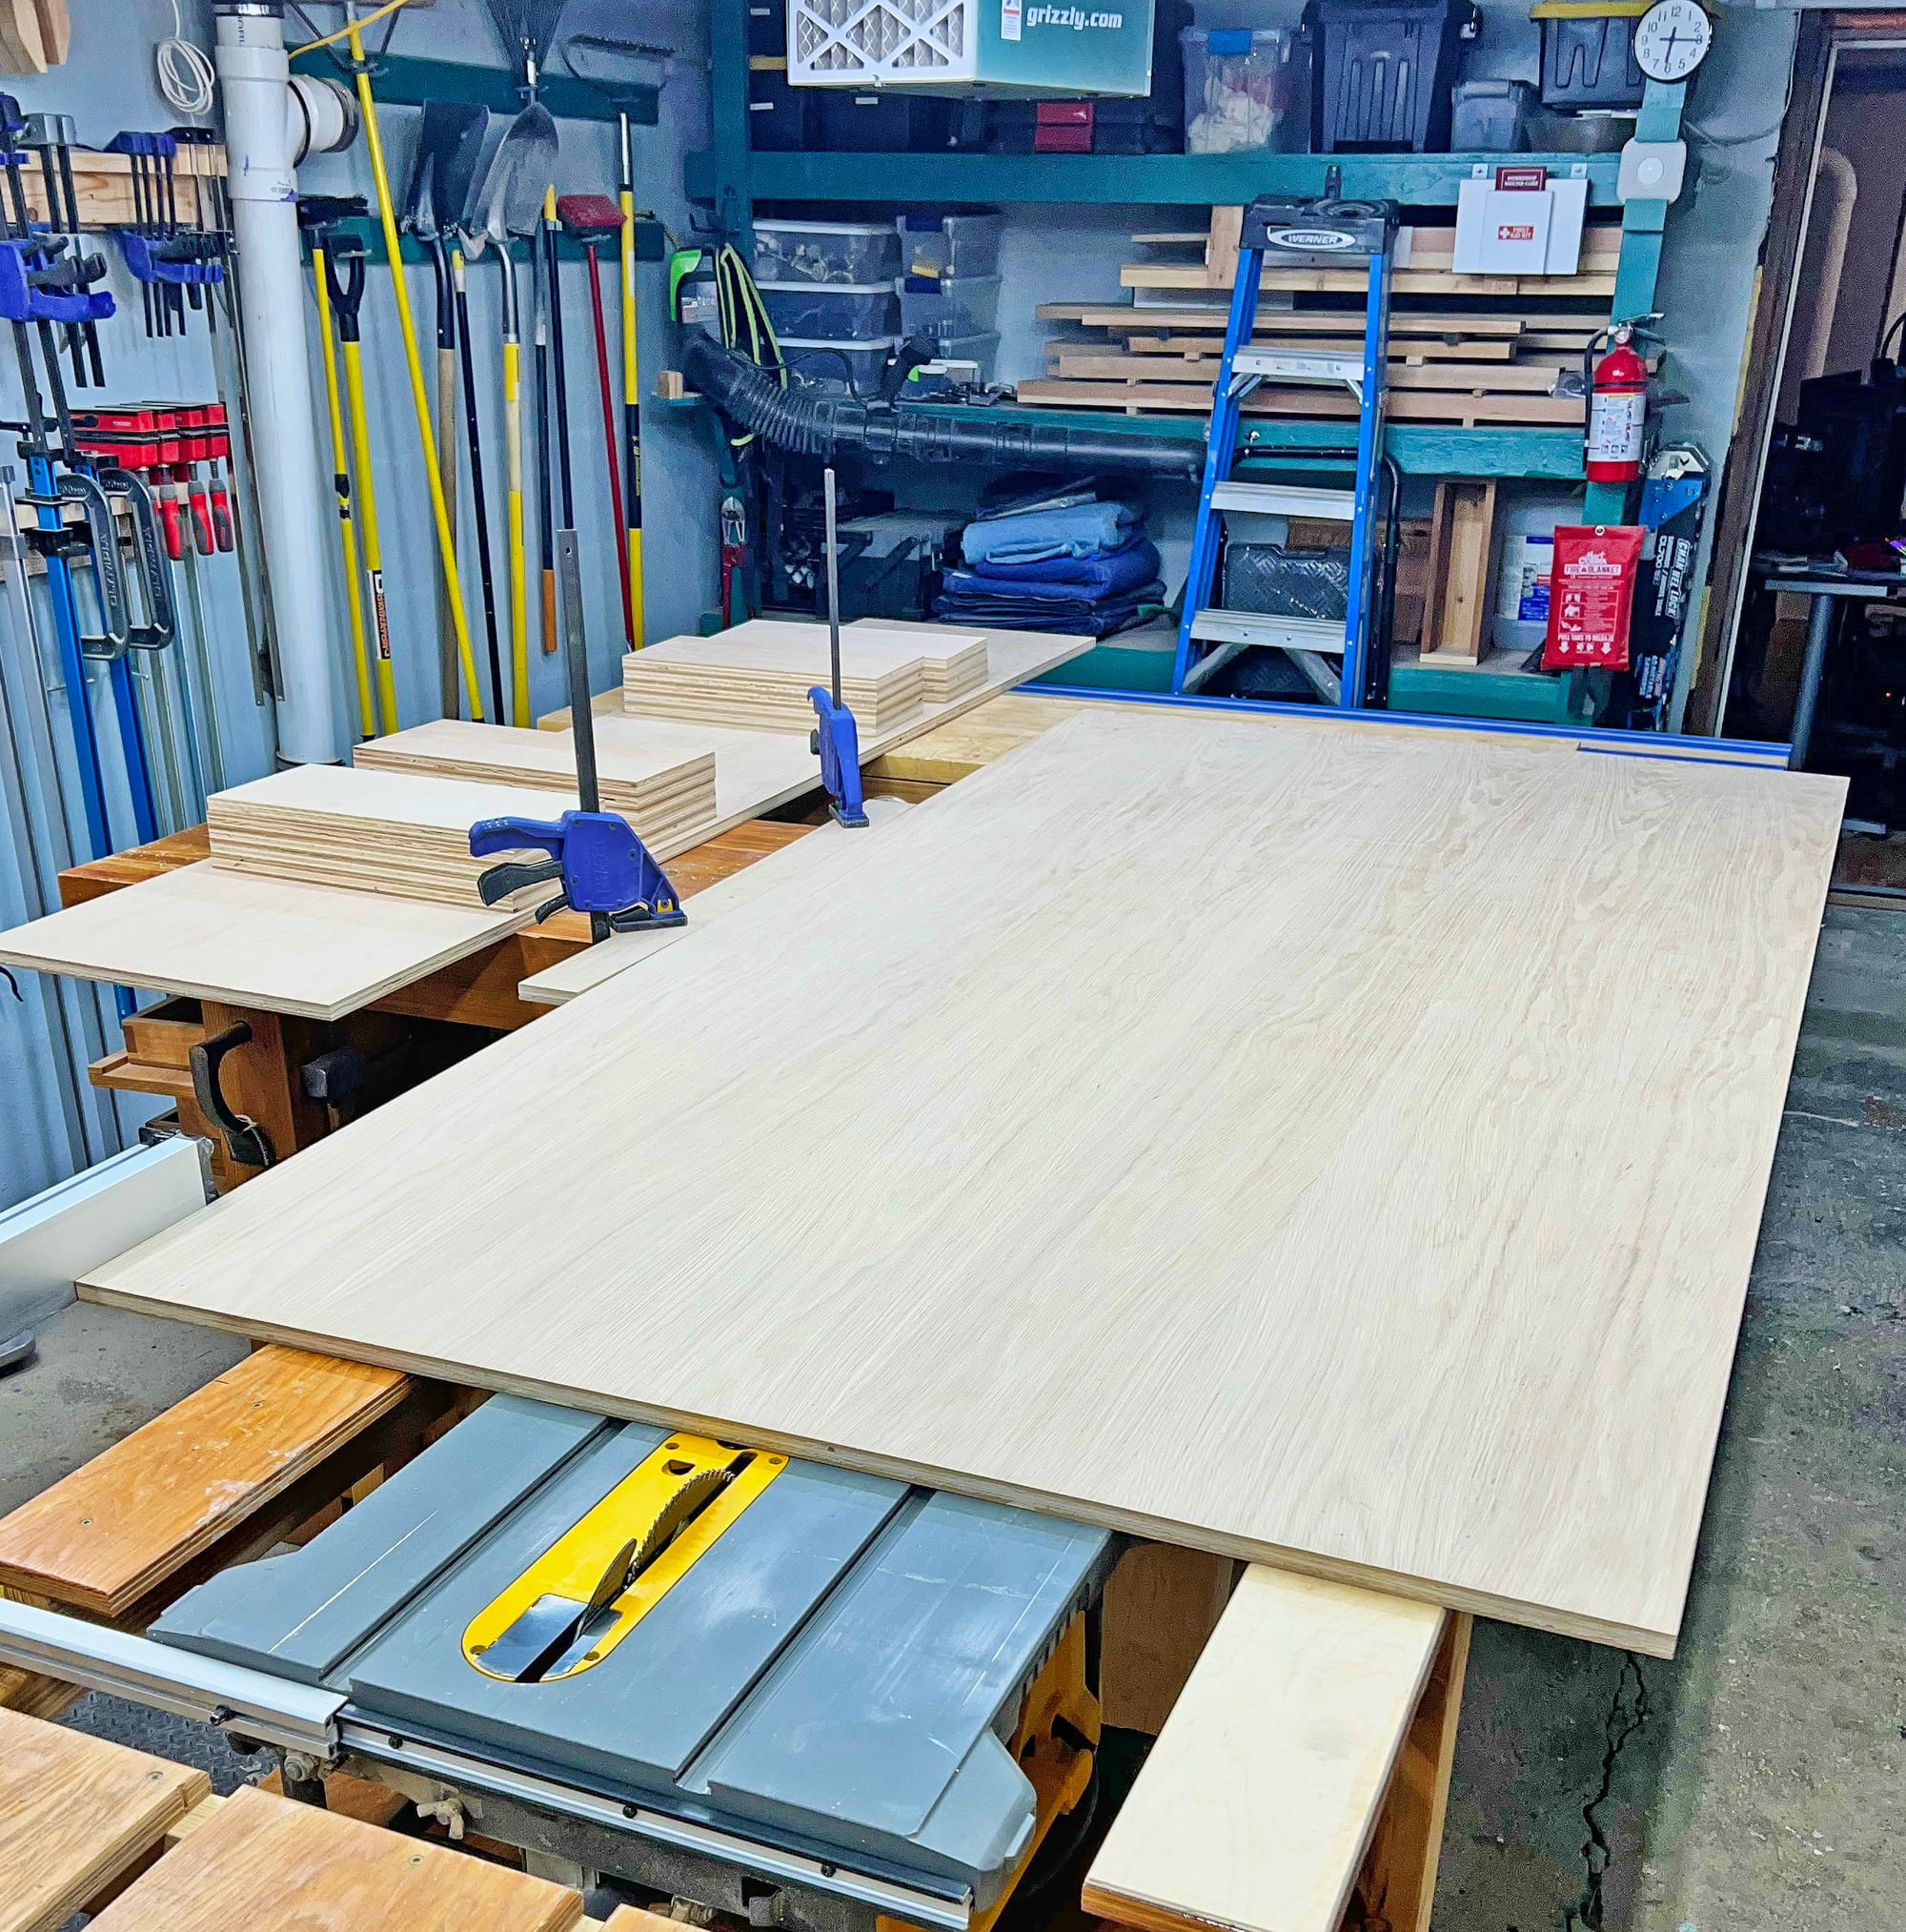
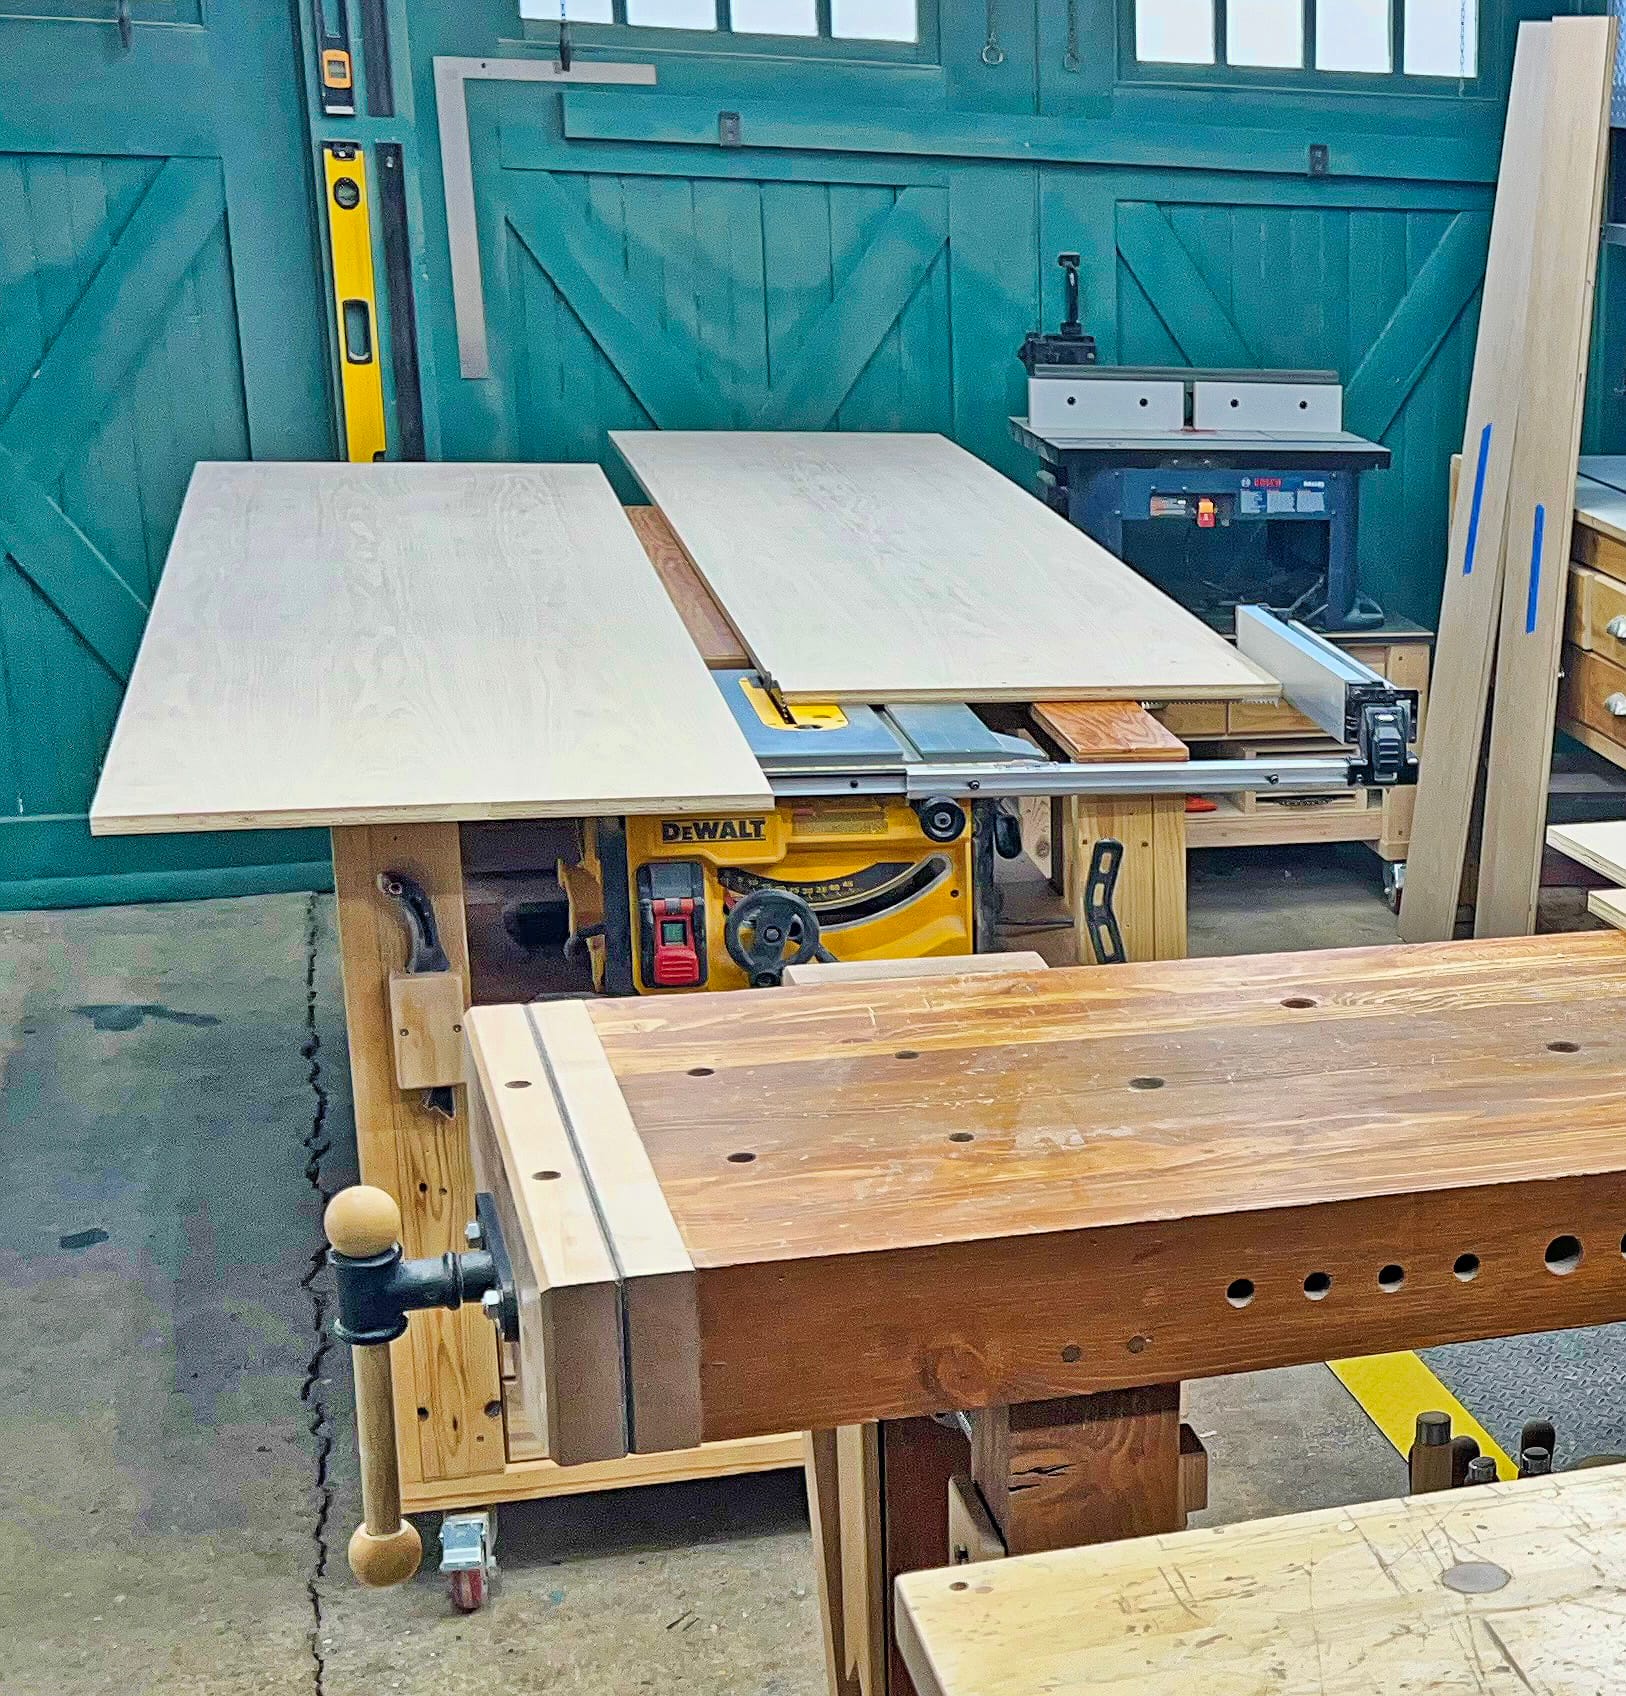
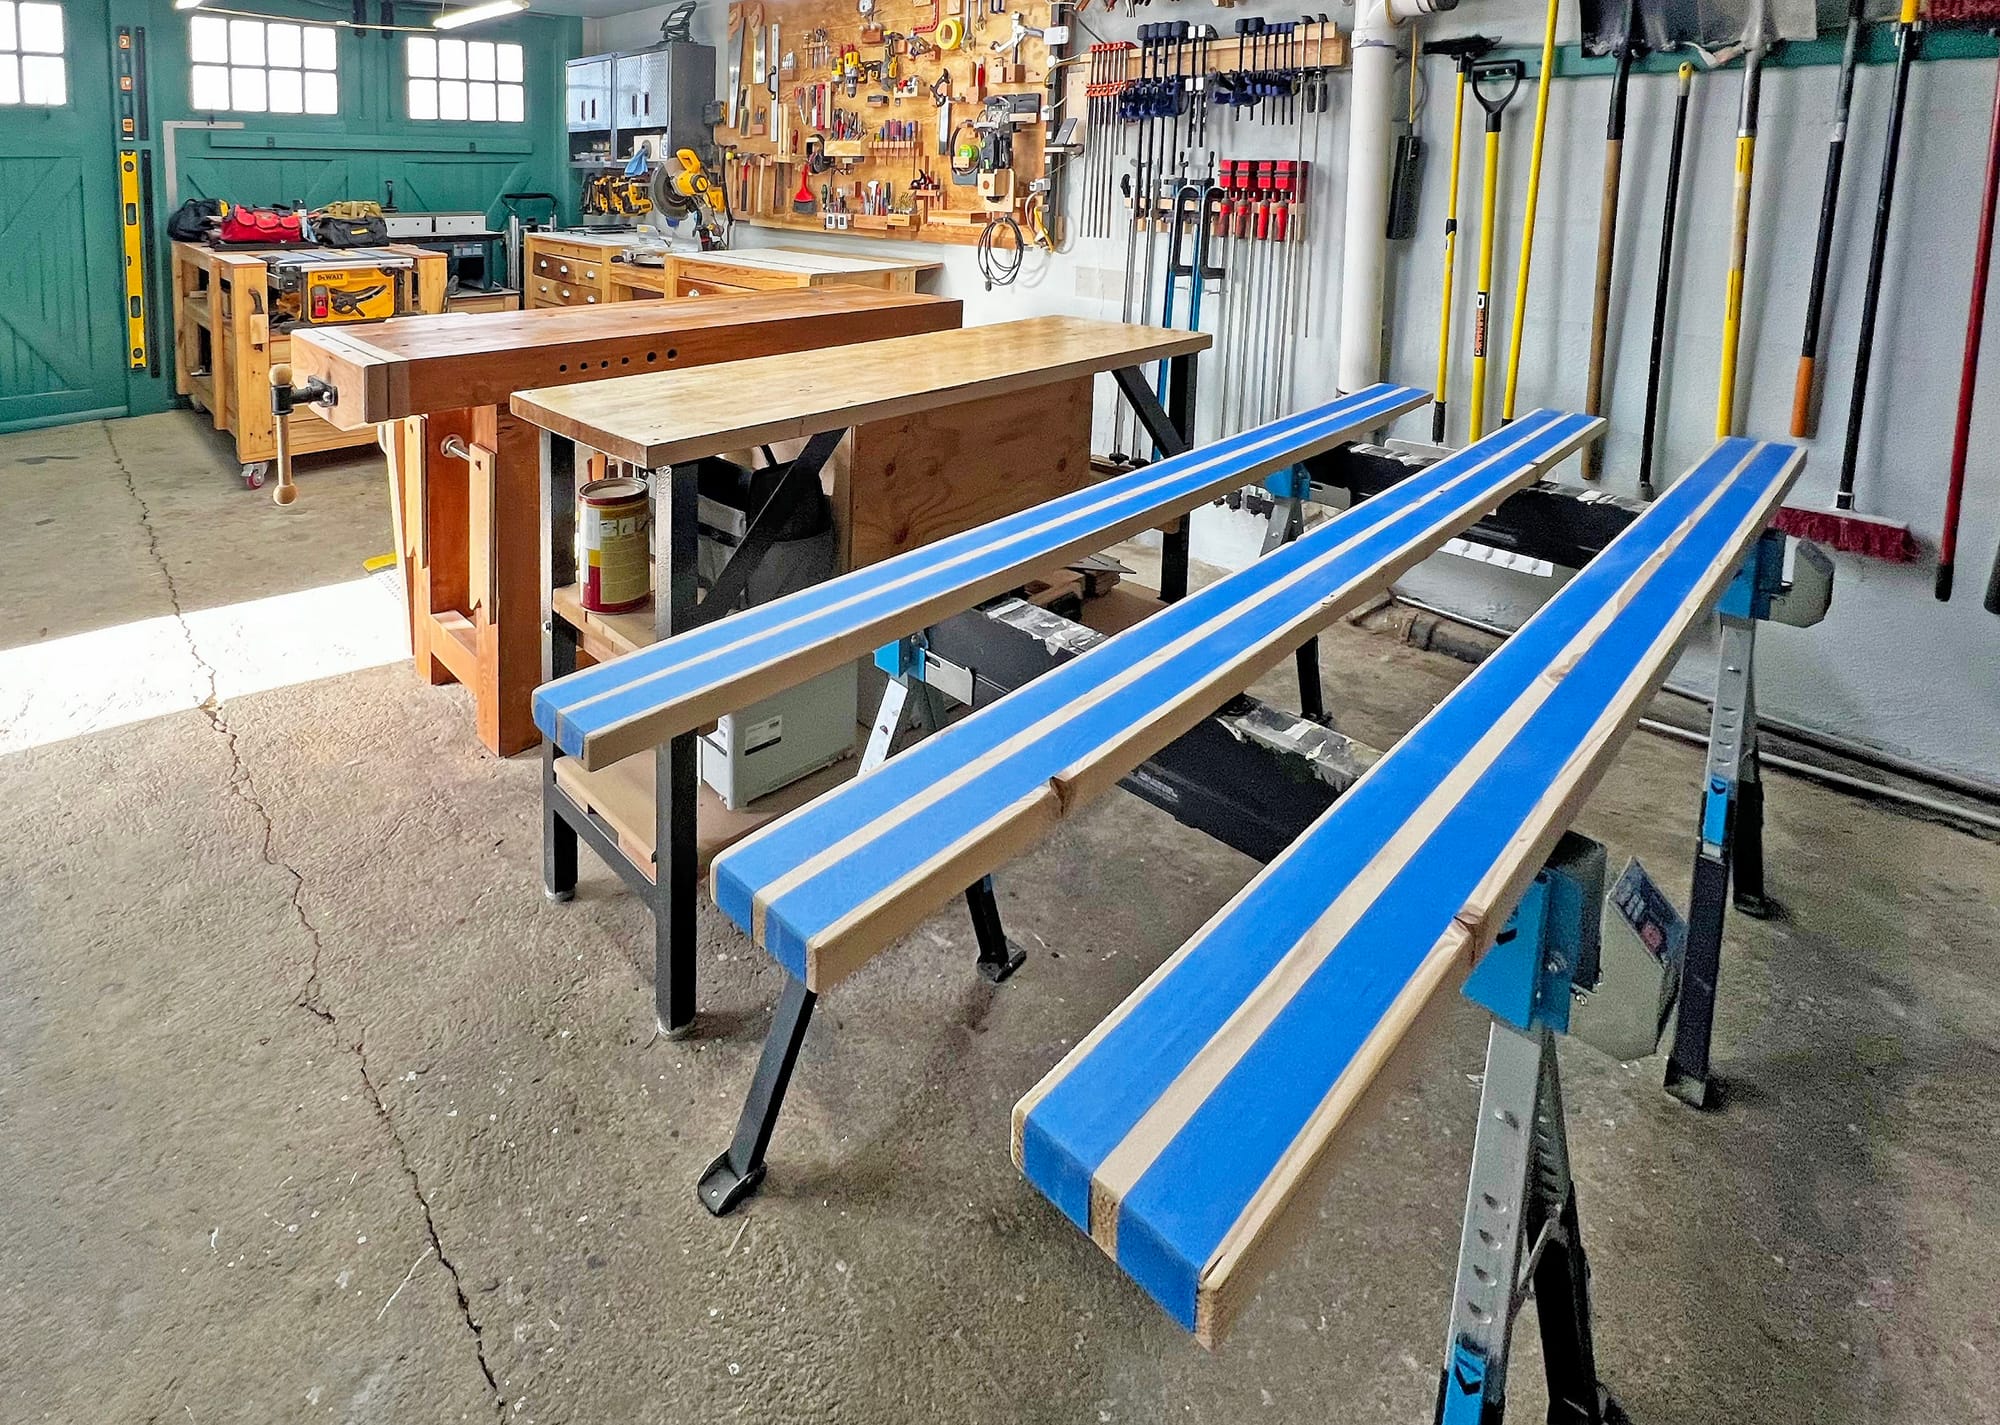
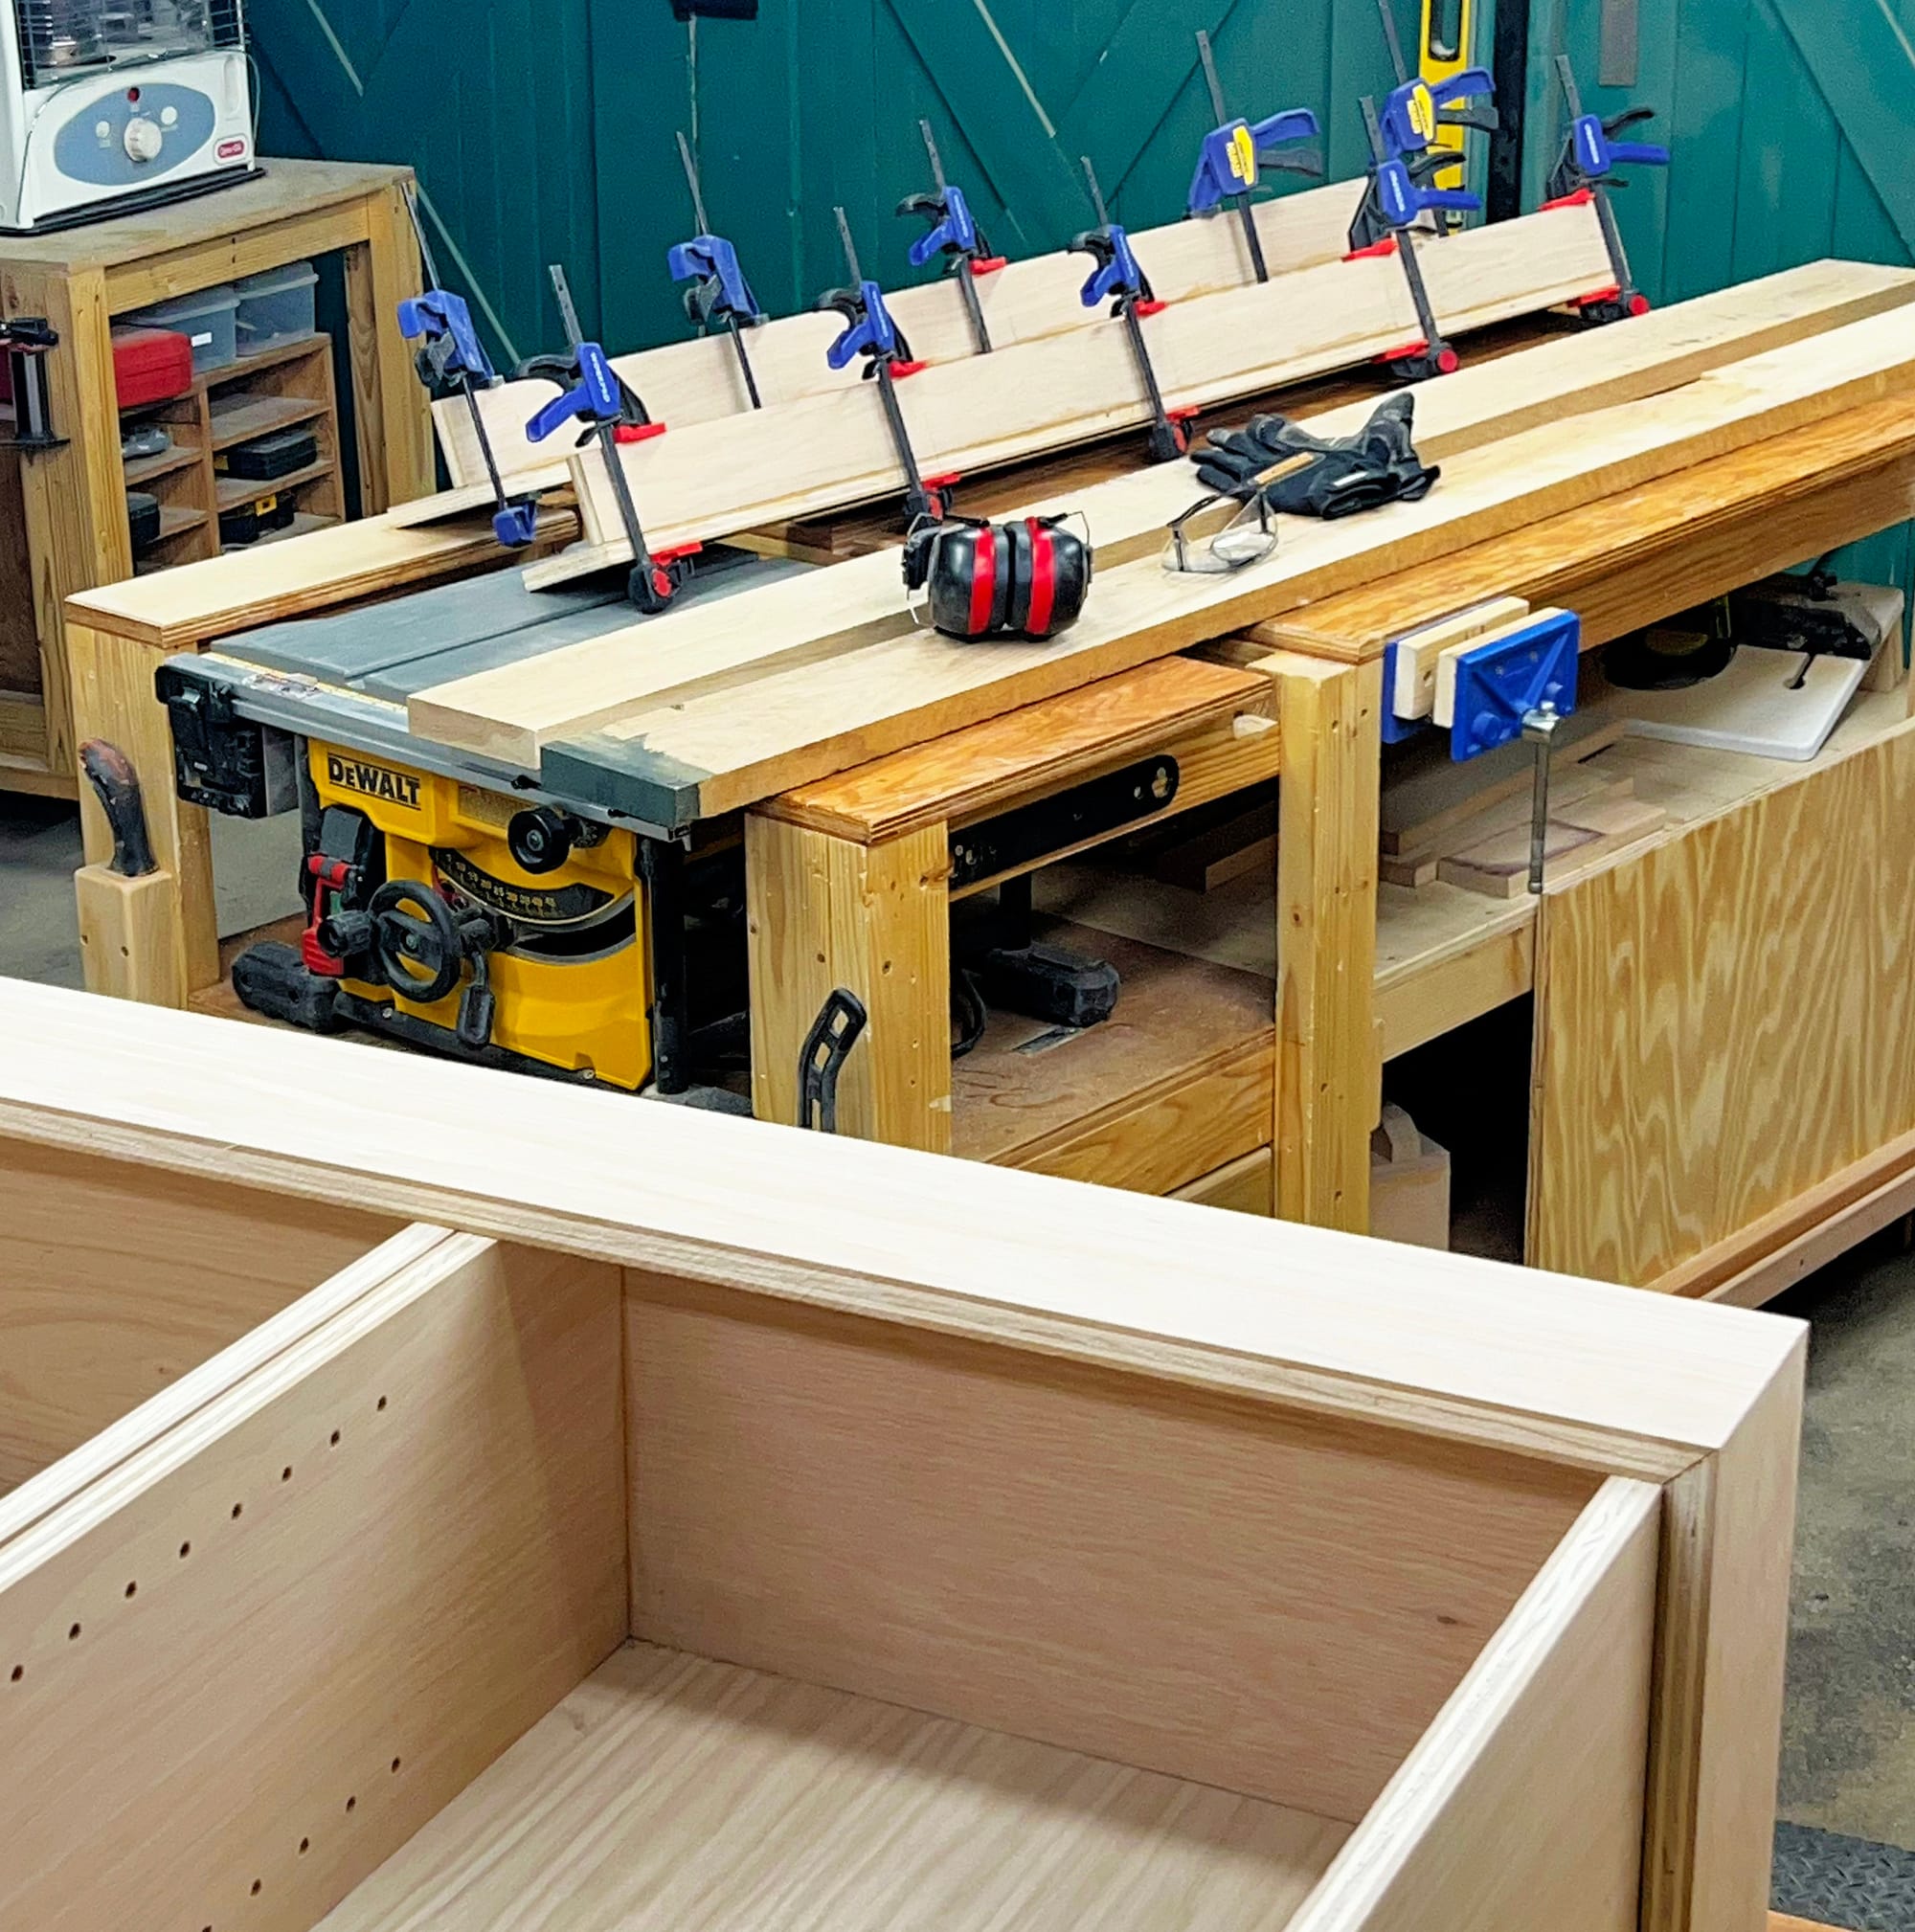
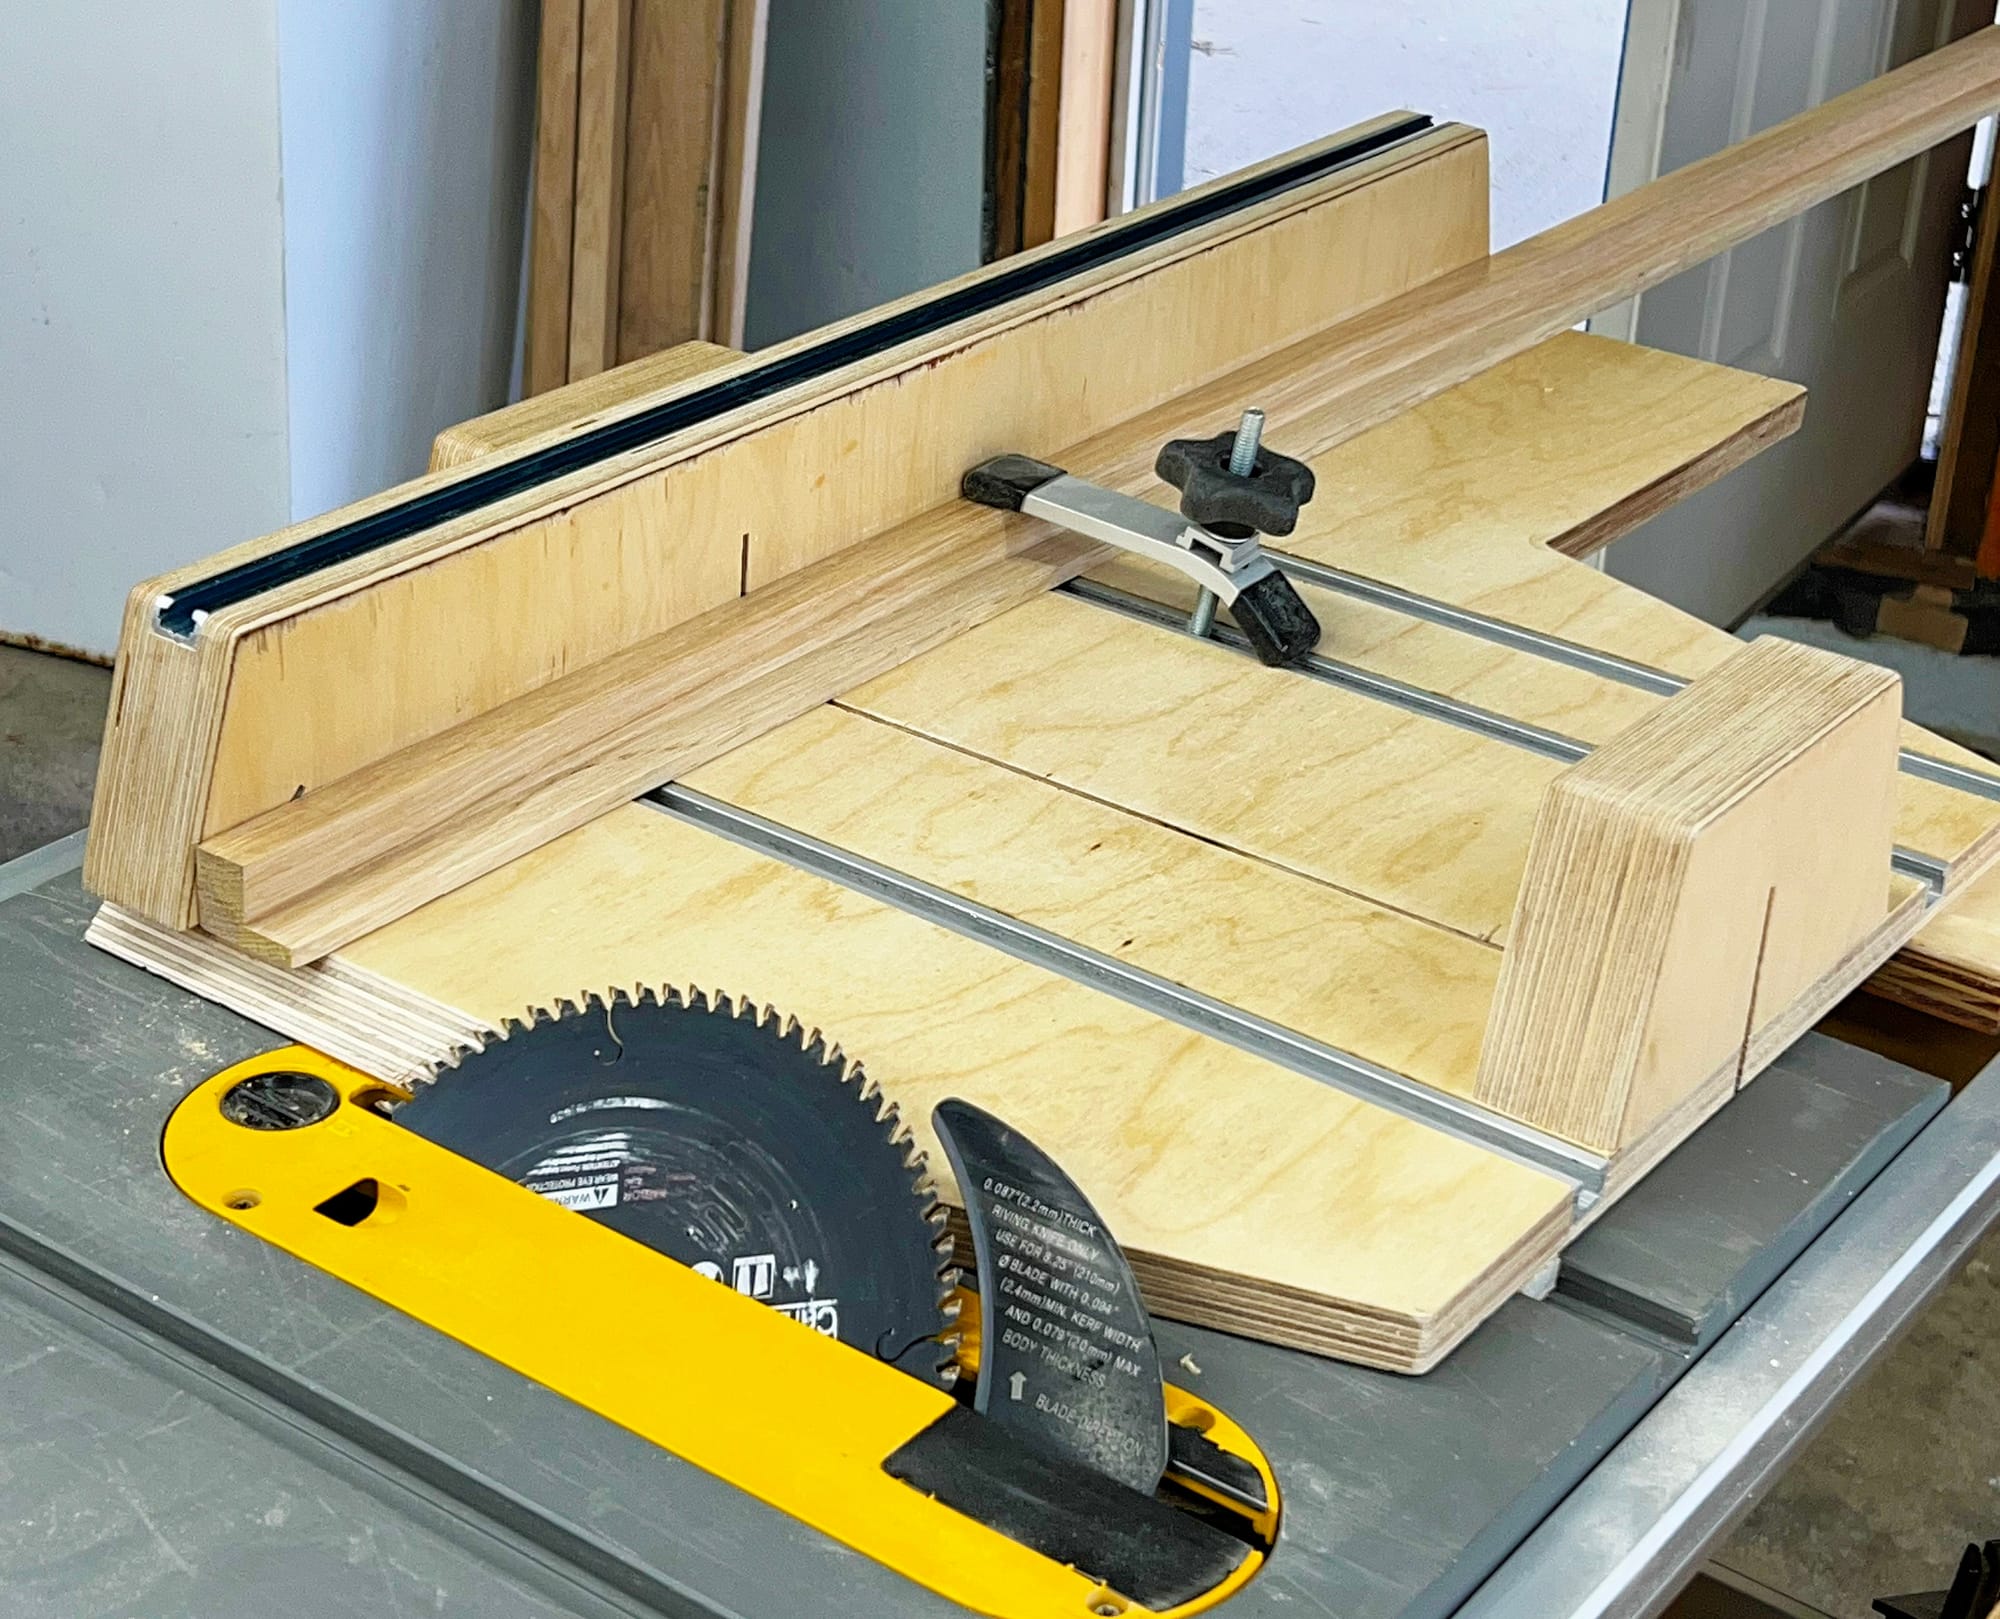
Ripping a sheet of plywood in half, using the workbenches for infeed support and a scrap clamped to a workbench as an extension of the table saw fence. I have a small job site saw, but it works fine for this sort of thing if you take the time to get everything set up properly. I've made every work surface in my shop the exact same height (39" above the floor), and that makes these sorts of operations much easier.
This time around, I decided to make an improvement on the jig for holding the bays during glue-up. I wanted better support for the diagonal clamps, and I wanted a better way to visually confirm the squareness as I adjust those clamps. With the jig I used on bookcase #1, I had to measure the two diagonals with a tape measure after each adjustment, which was clumsy and error-prone. So I made a new jig that includes a perfectly rectangular piece of plywood that's 1/8" smaller than the bay opening. During adjustments, it's easy to see whether that 1/8" gap is consistent all around, with no tape measure required.
All of the glued joints in this bookcase design are held together with Festool Domino "loose tenon" joinery. The Domino is an amazing product, and has taken the furniture-building trade by storm worldwide. It's the only over-$1000 tool I own, and worth every penny in my opinion. If you're not familiar with the Domino, here's some video of Michael Alm using one to assemble the bookcase bays.
The actual amount of work time seemed to be about the same for the second bookcase, but the overall pace was faster because I'm now familiar with the design and never needed to go back to the plans to make sure I was understanding what needed to happen next.
One of the things you learn when doing projects like this in an old house (our house was built in 1917) is that there will always be surprises and complications. Embracing and enjoying the requisite workarounds for those surprises is a big part of the satisfaction involved.
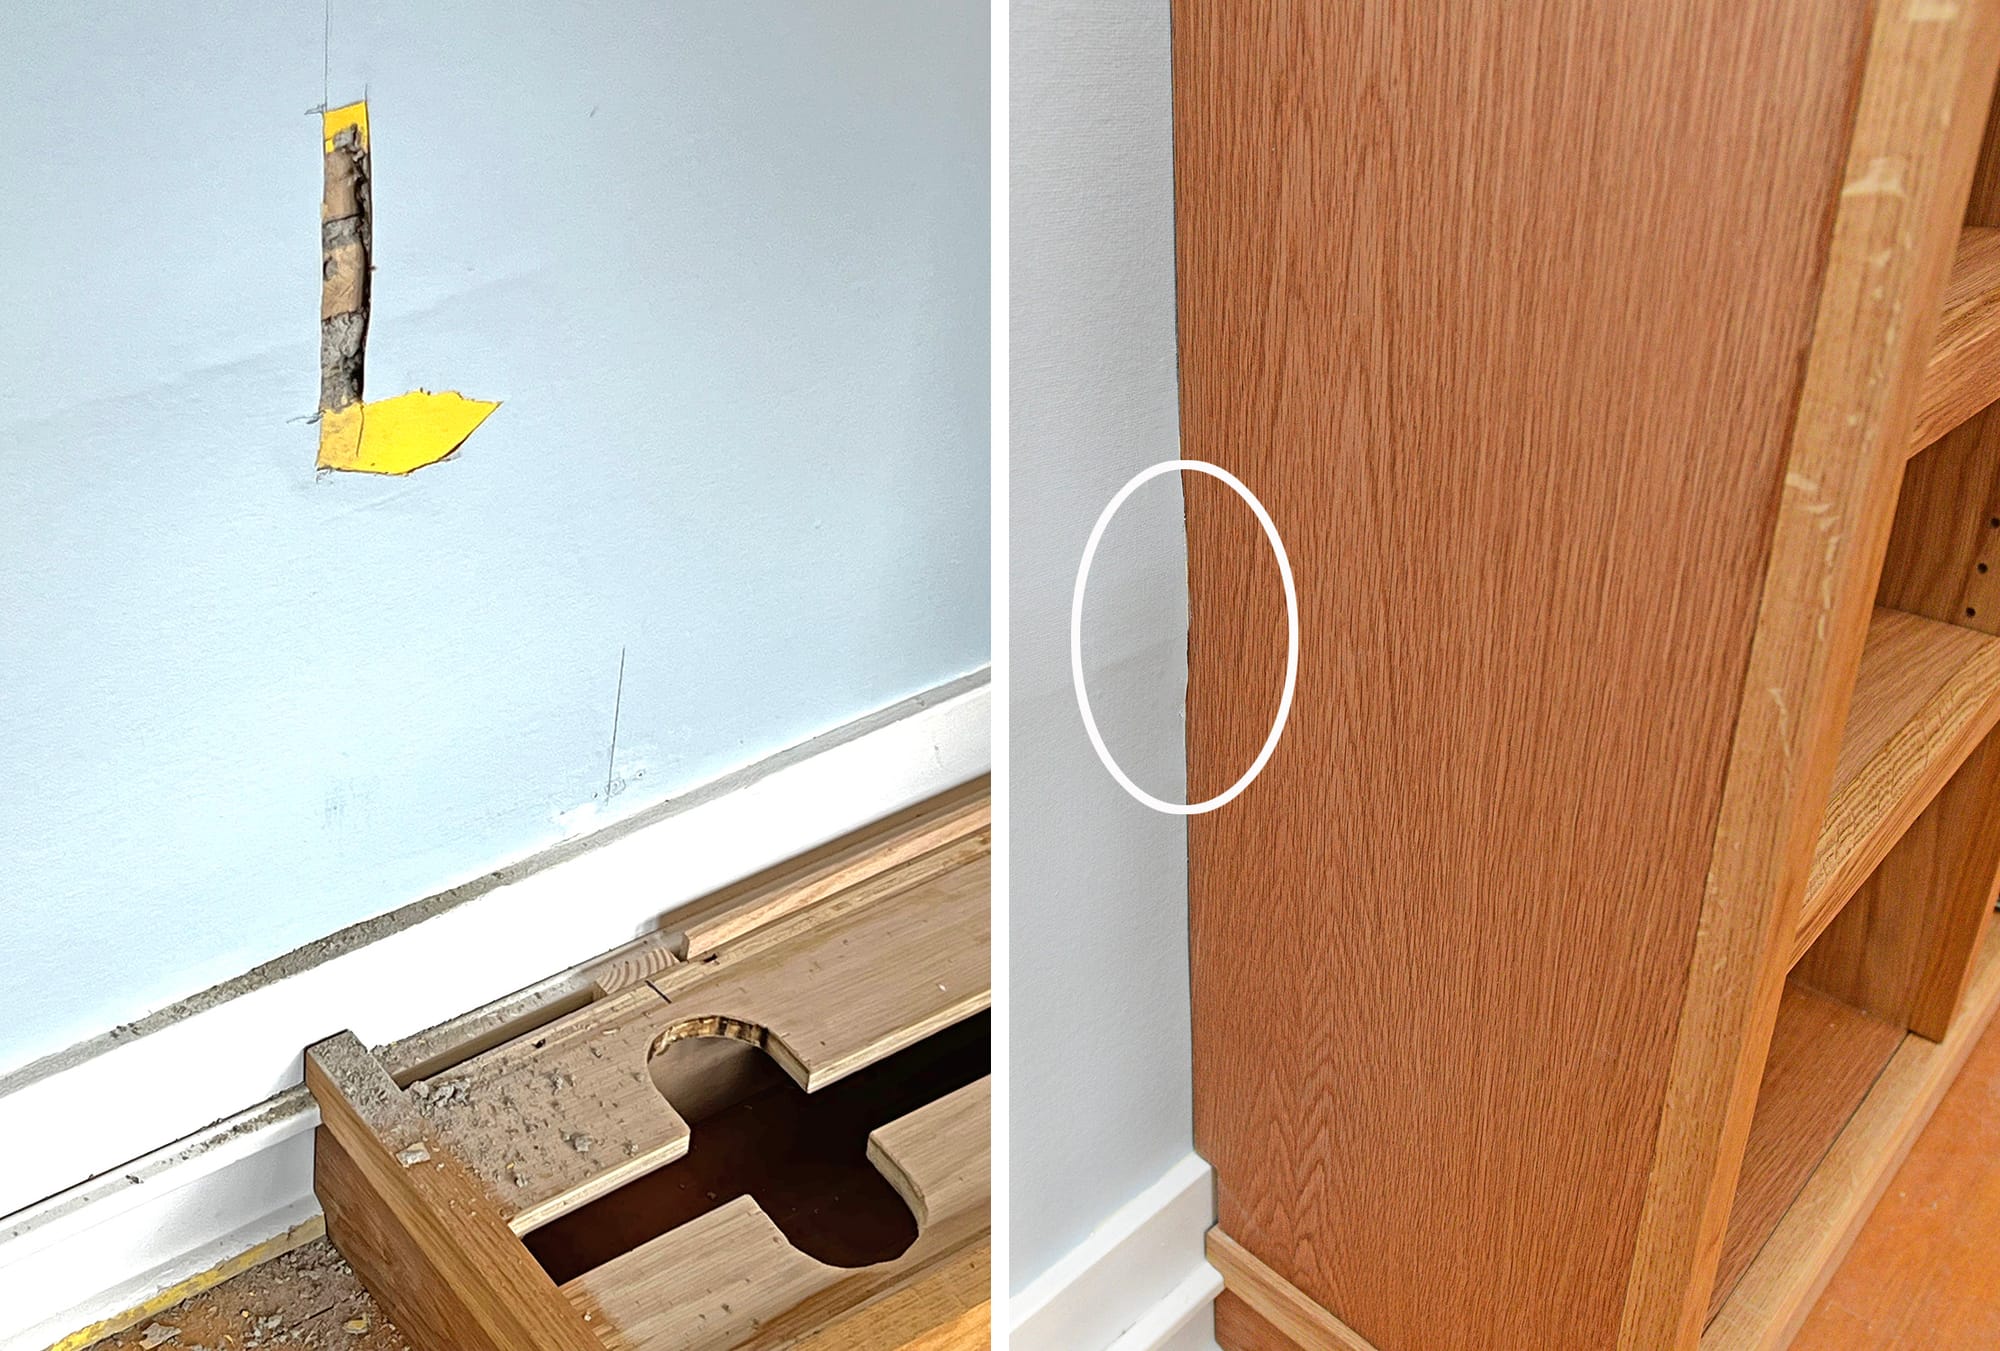
One of the surprises I ran into on the second bookcase occurred just after I hauled the left bay upstairs. When I placed it on the base, I discovered that the wall behind the left side panel wasn't straight – it had a bulge in it about 18 inches above the floor, apparently due to some long-ago damage to the lath and plaster that had been sloppily repaired. The bulge was about 3/8", pushing the left side of the bookcase away from the wall so much that there was about a 1" gap at the top.
The solution was to chip out the damaged plaster, then put new plaster in and sand it to a vertically straight surface so that the bookcase would stand flush against the wall in that groove.
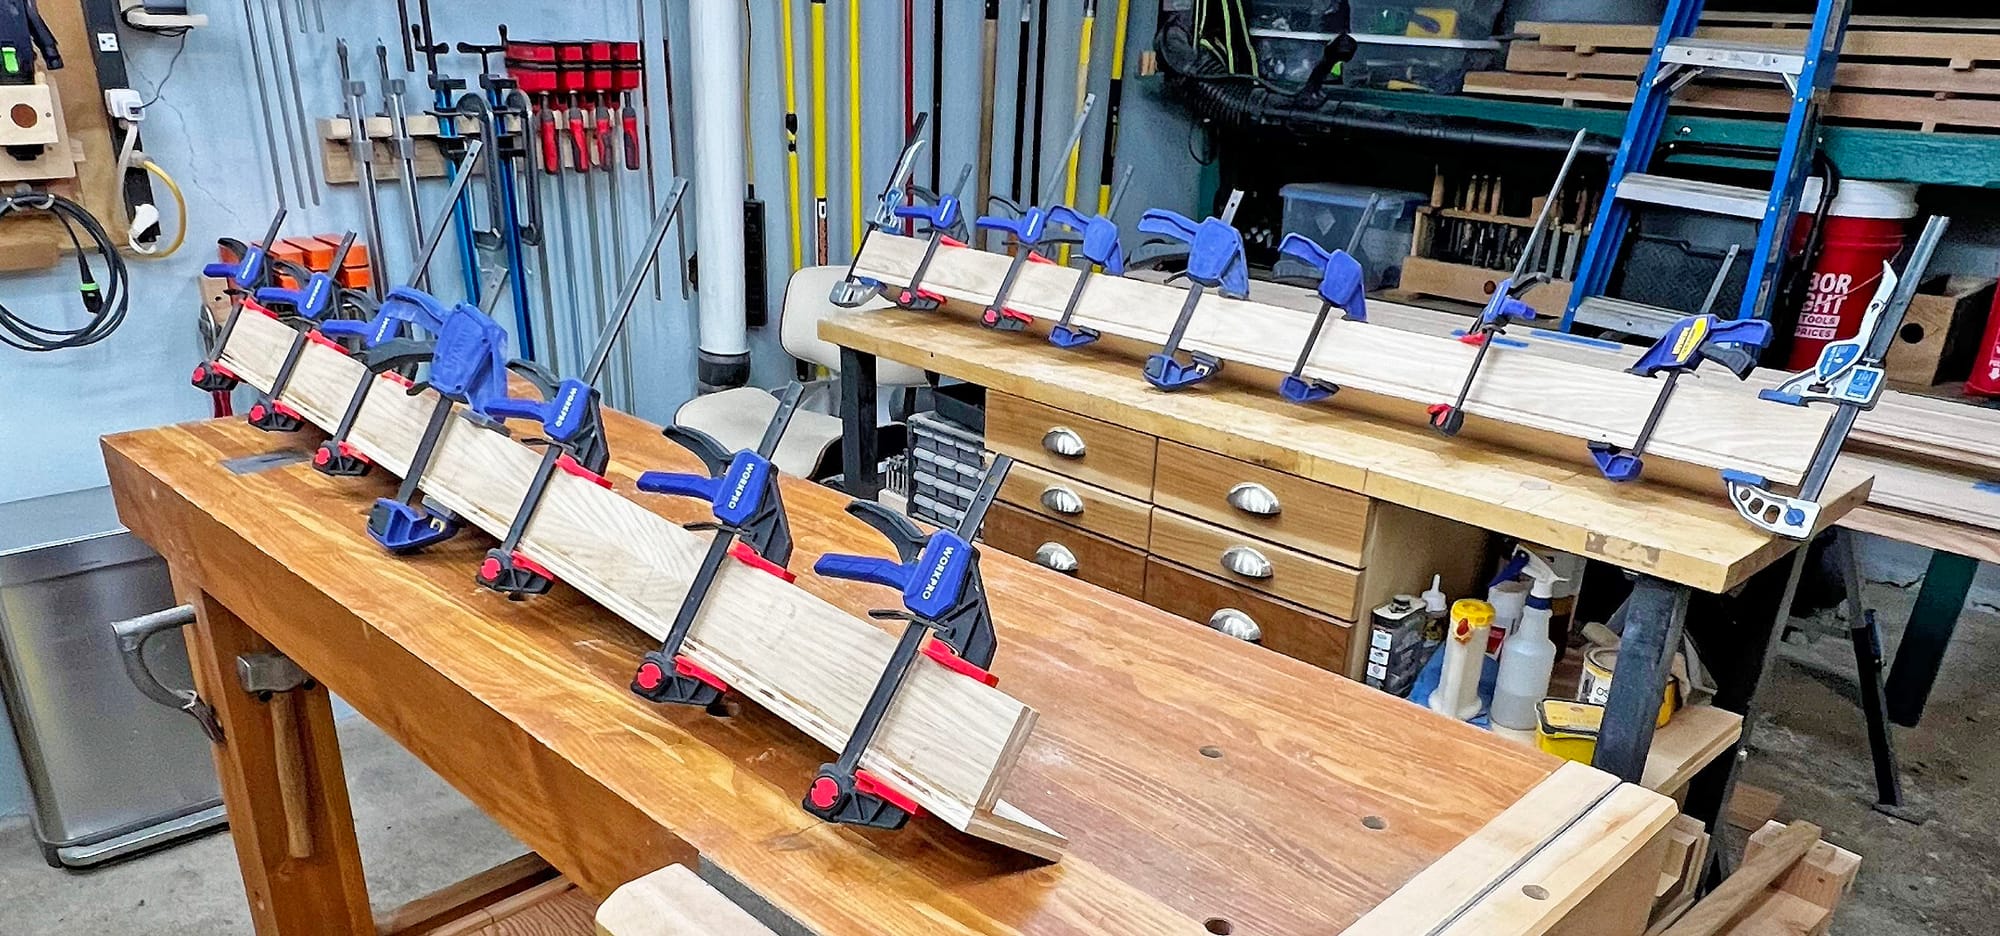
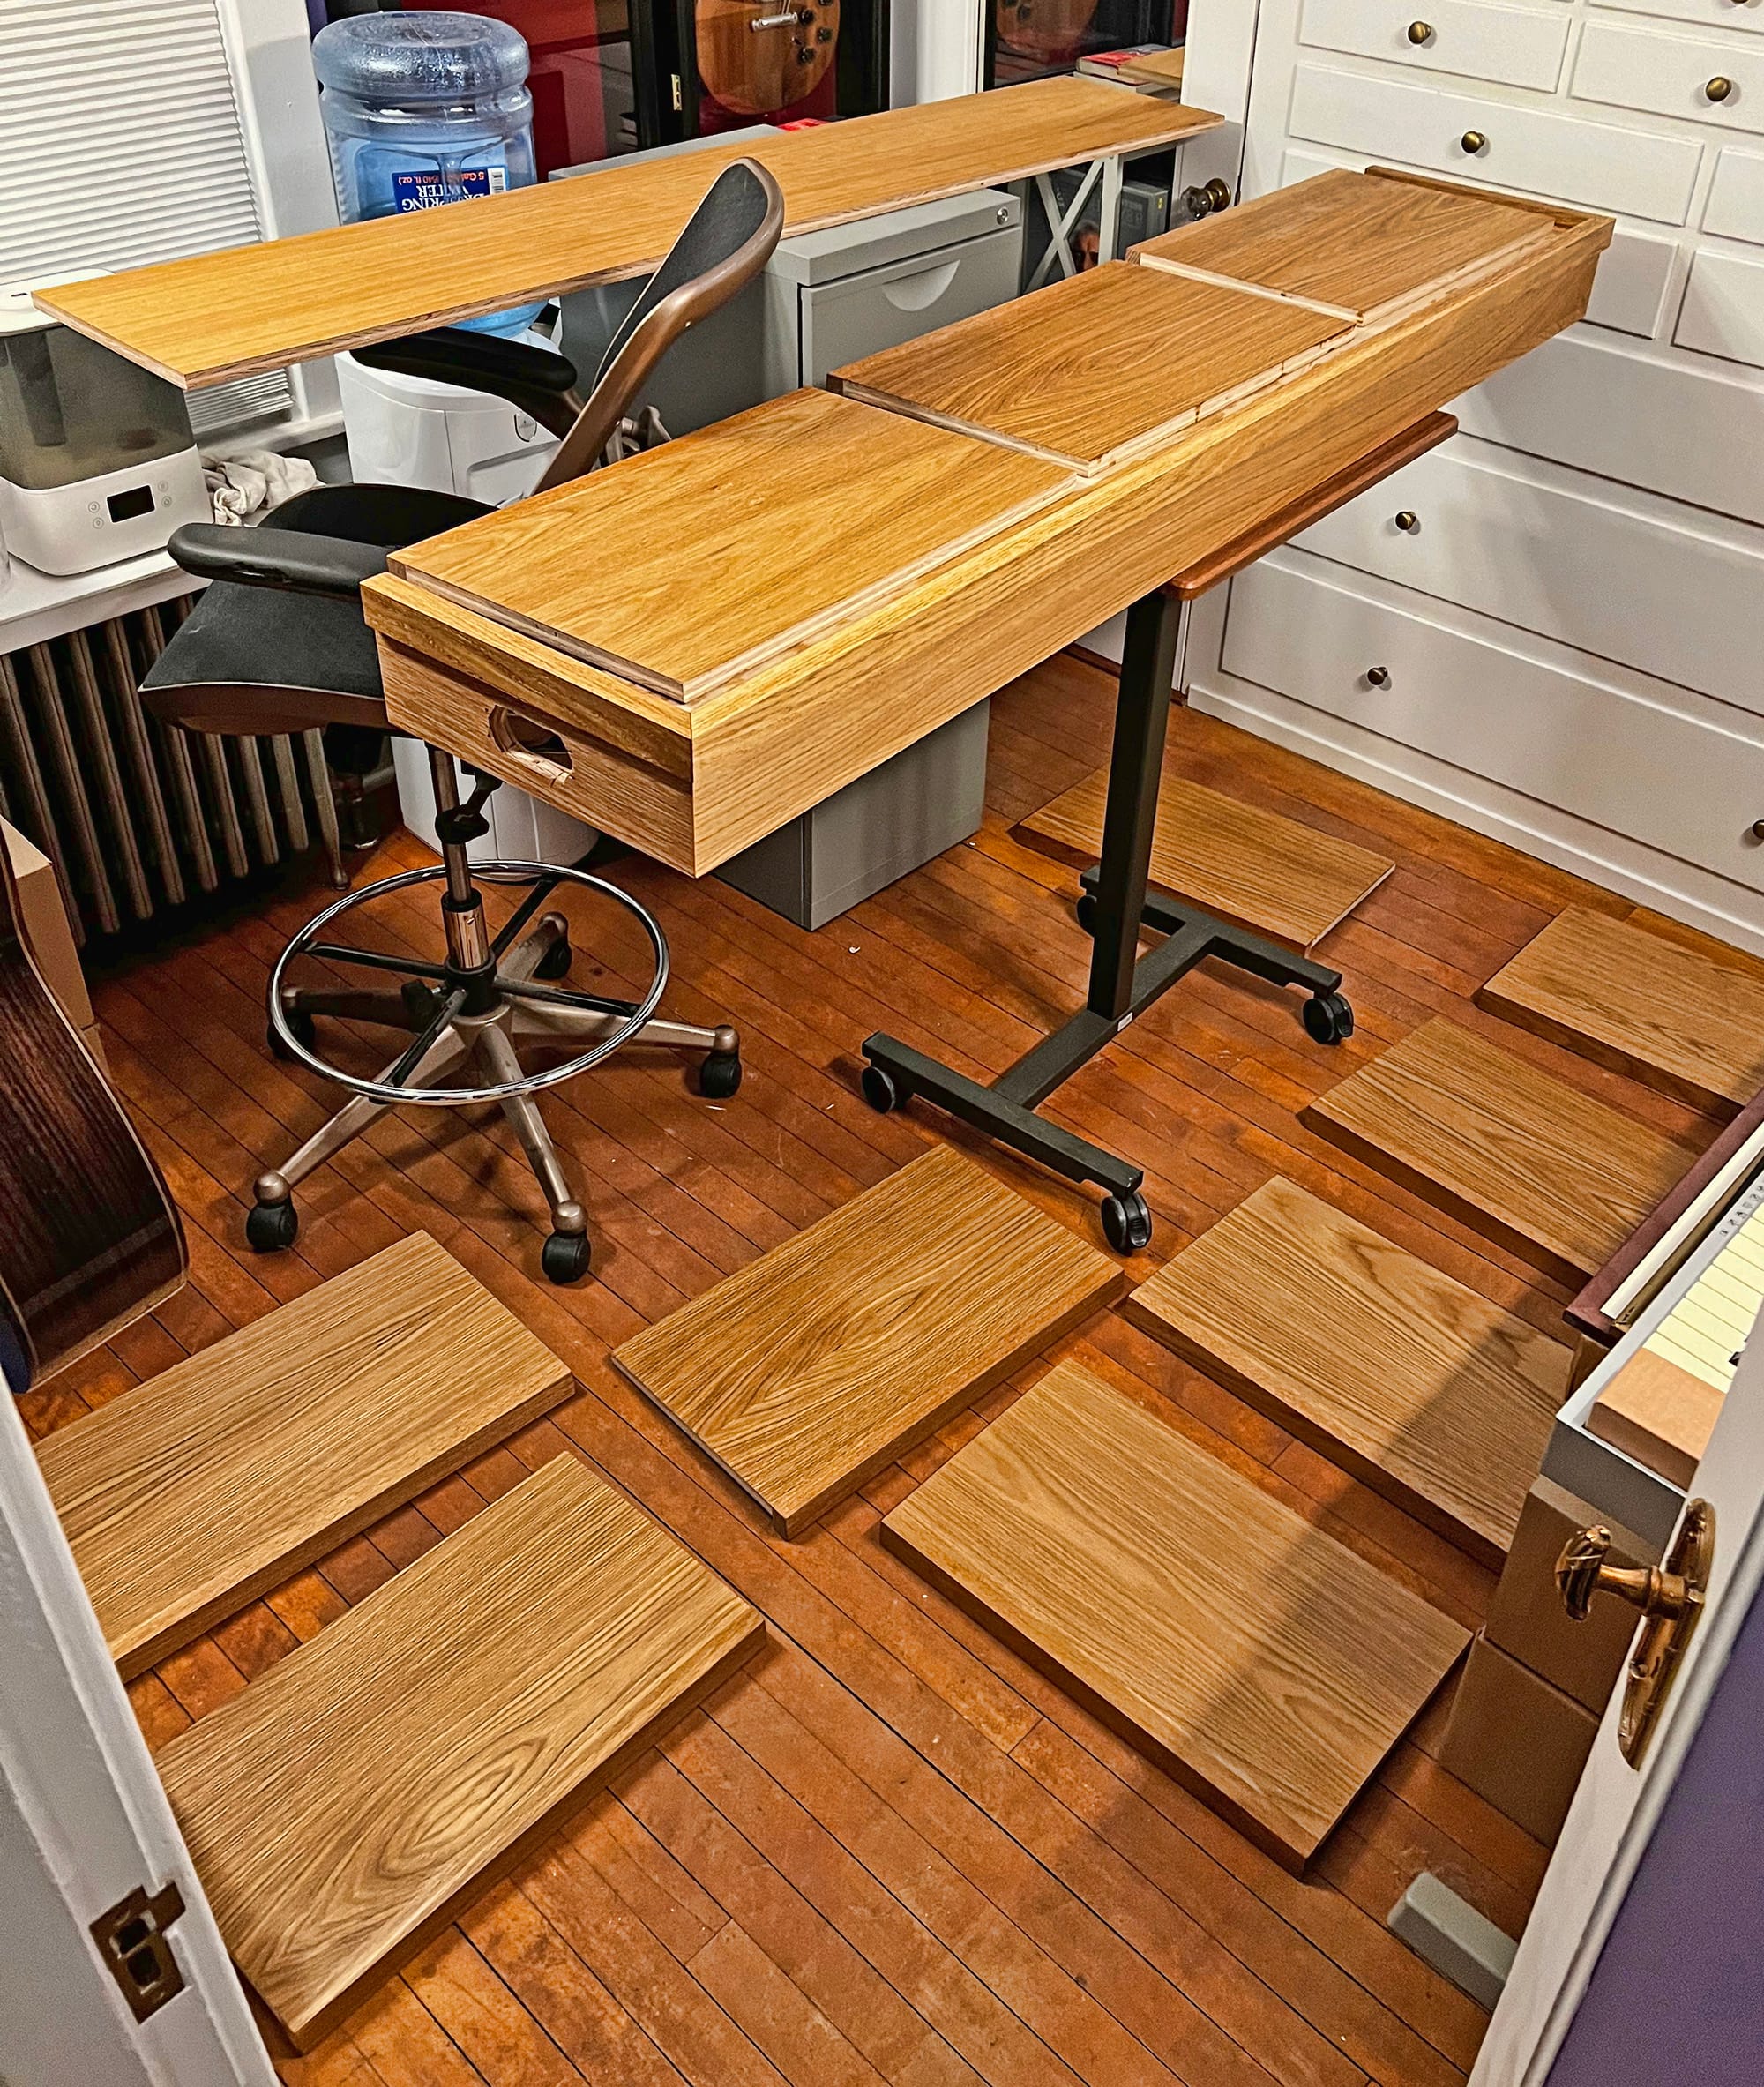
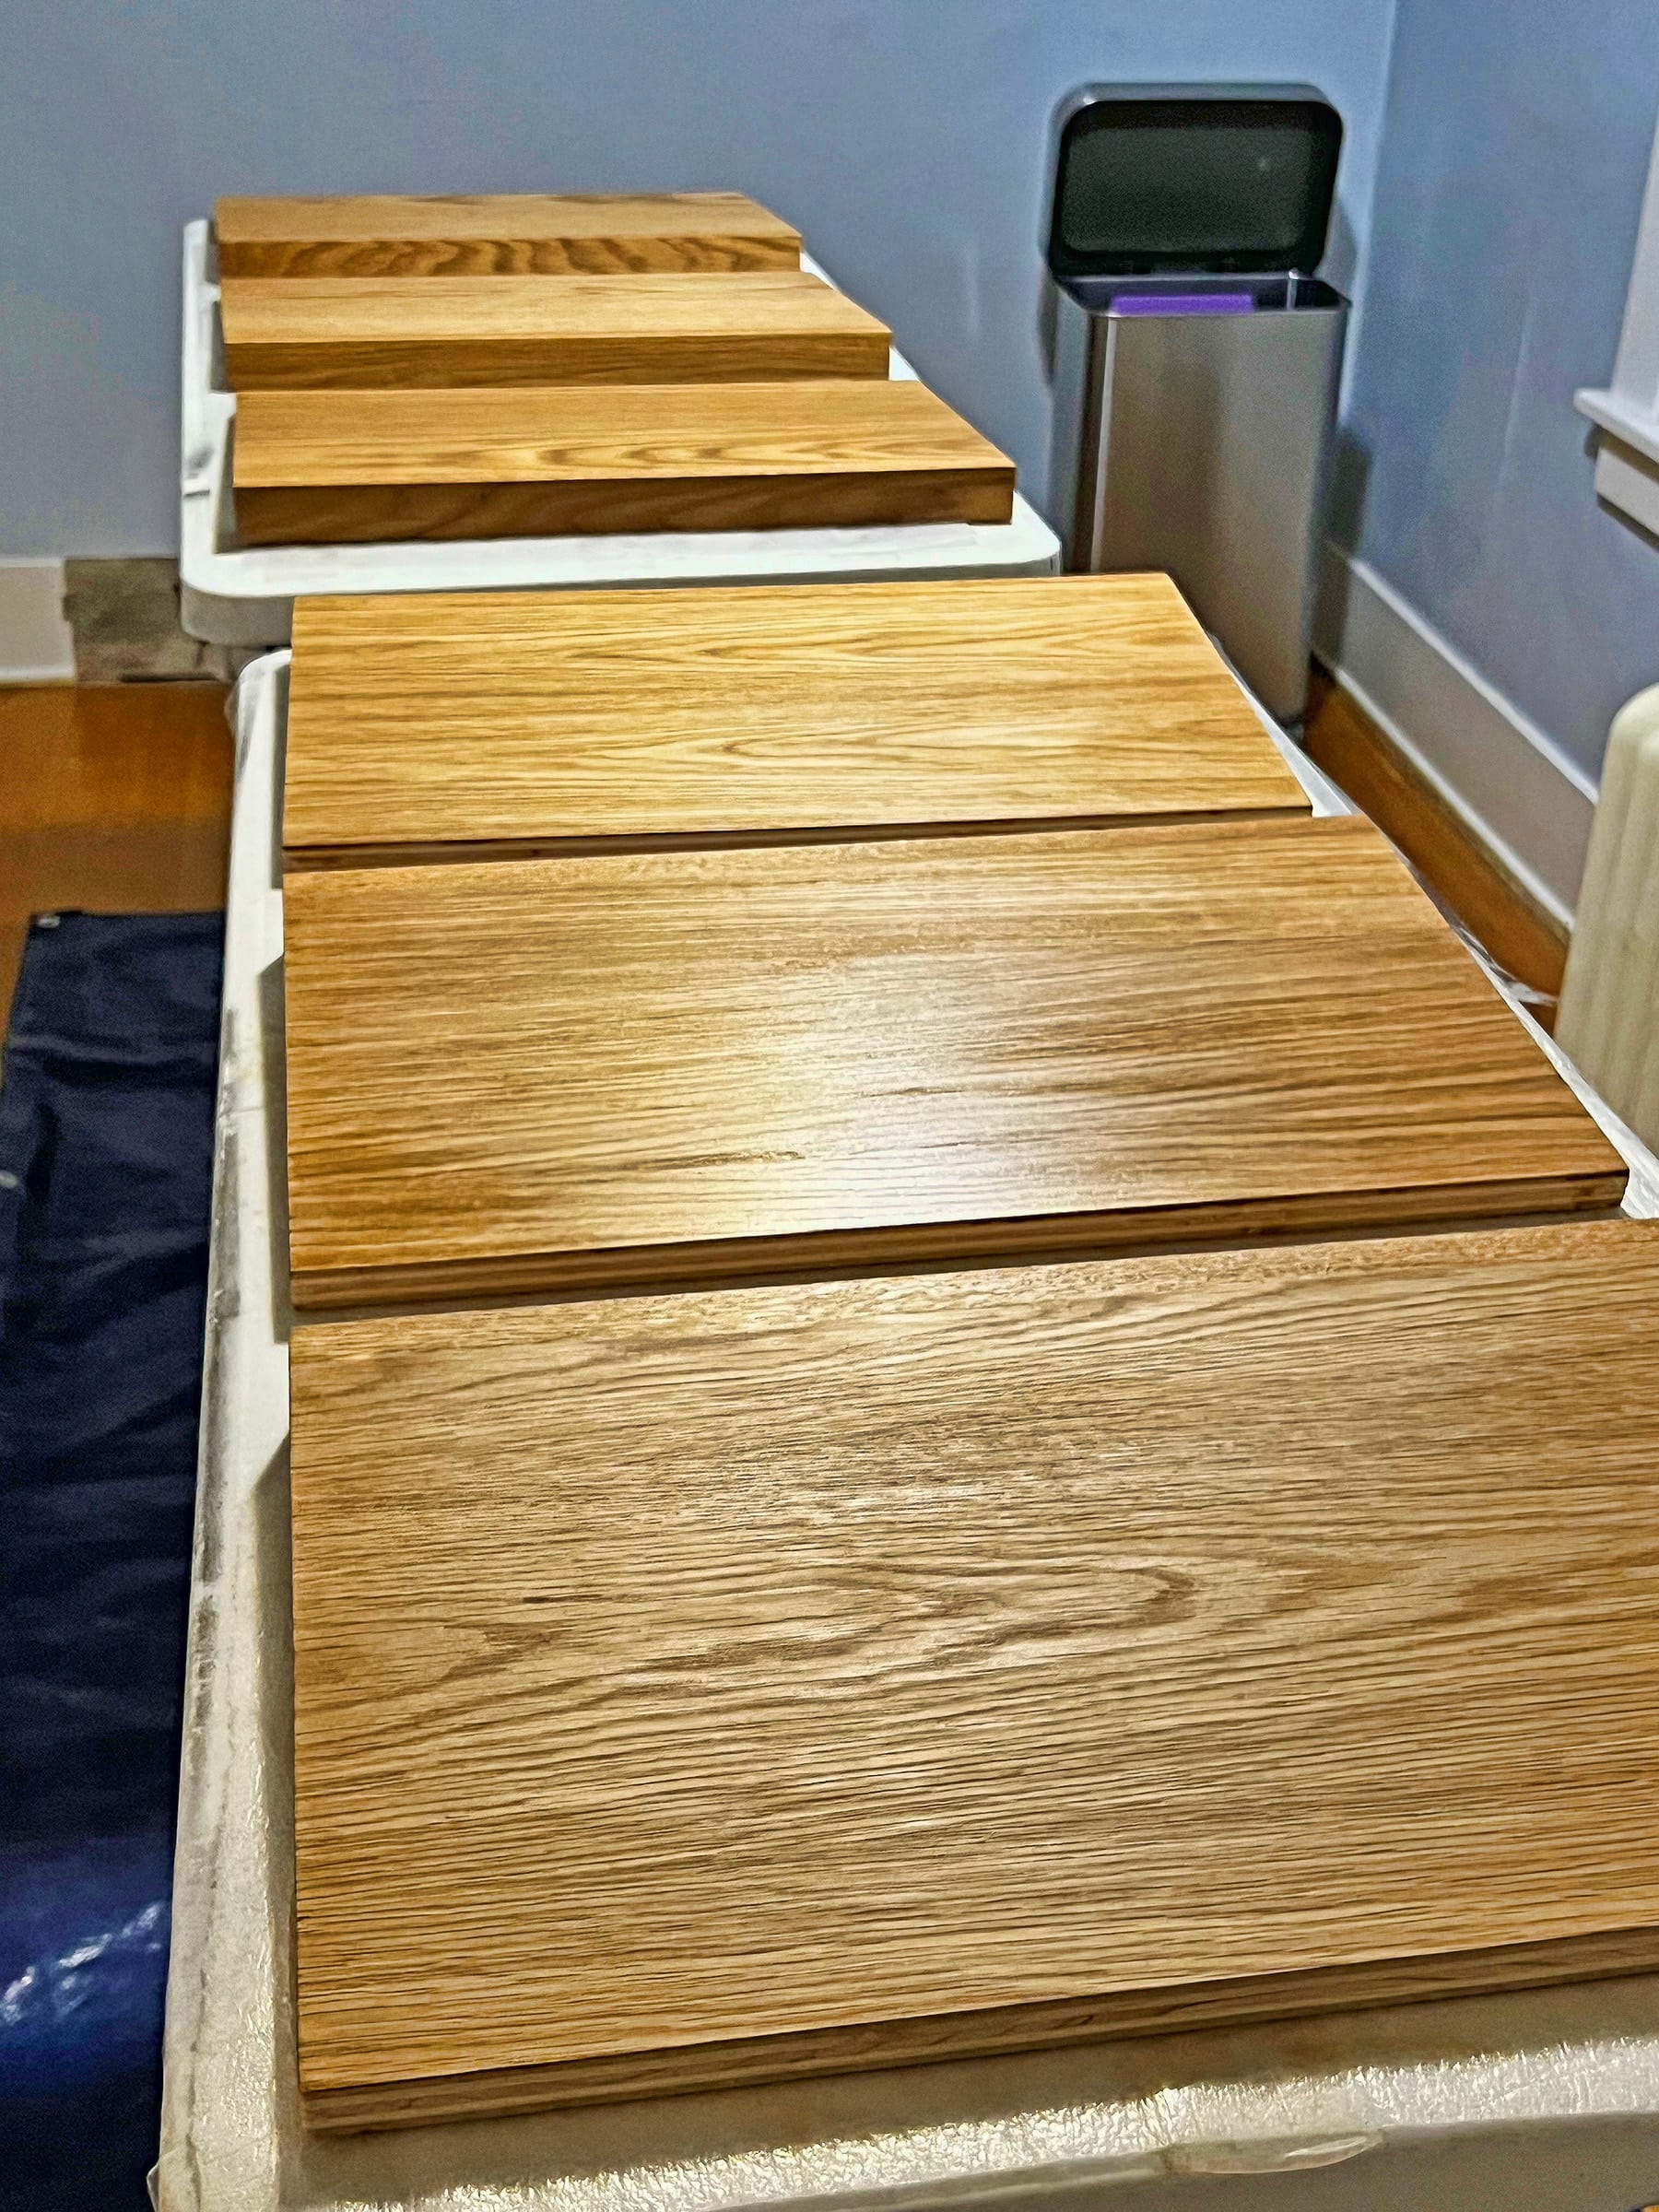
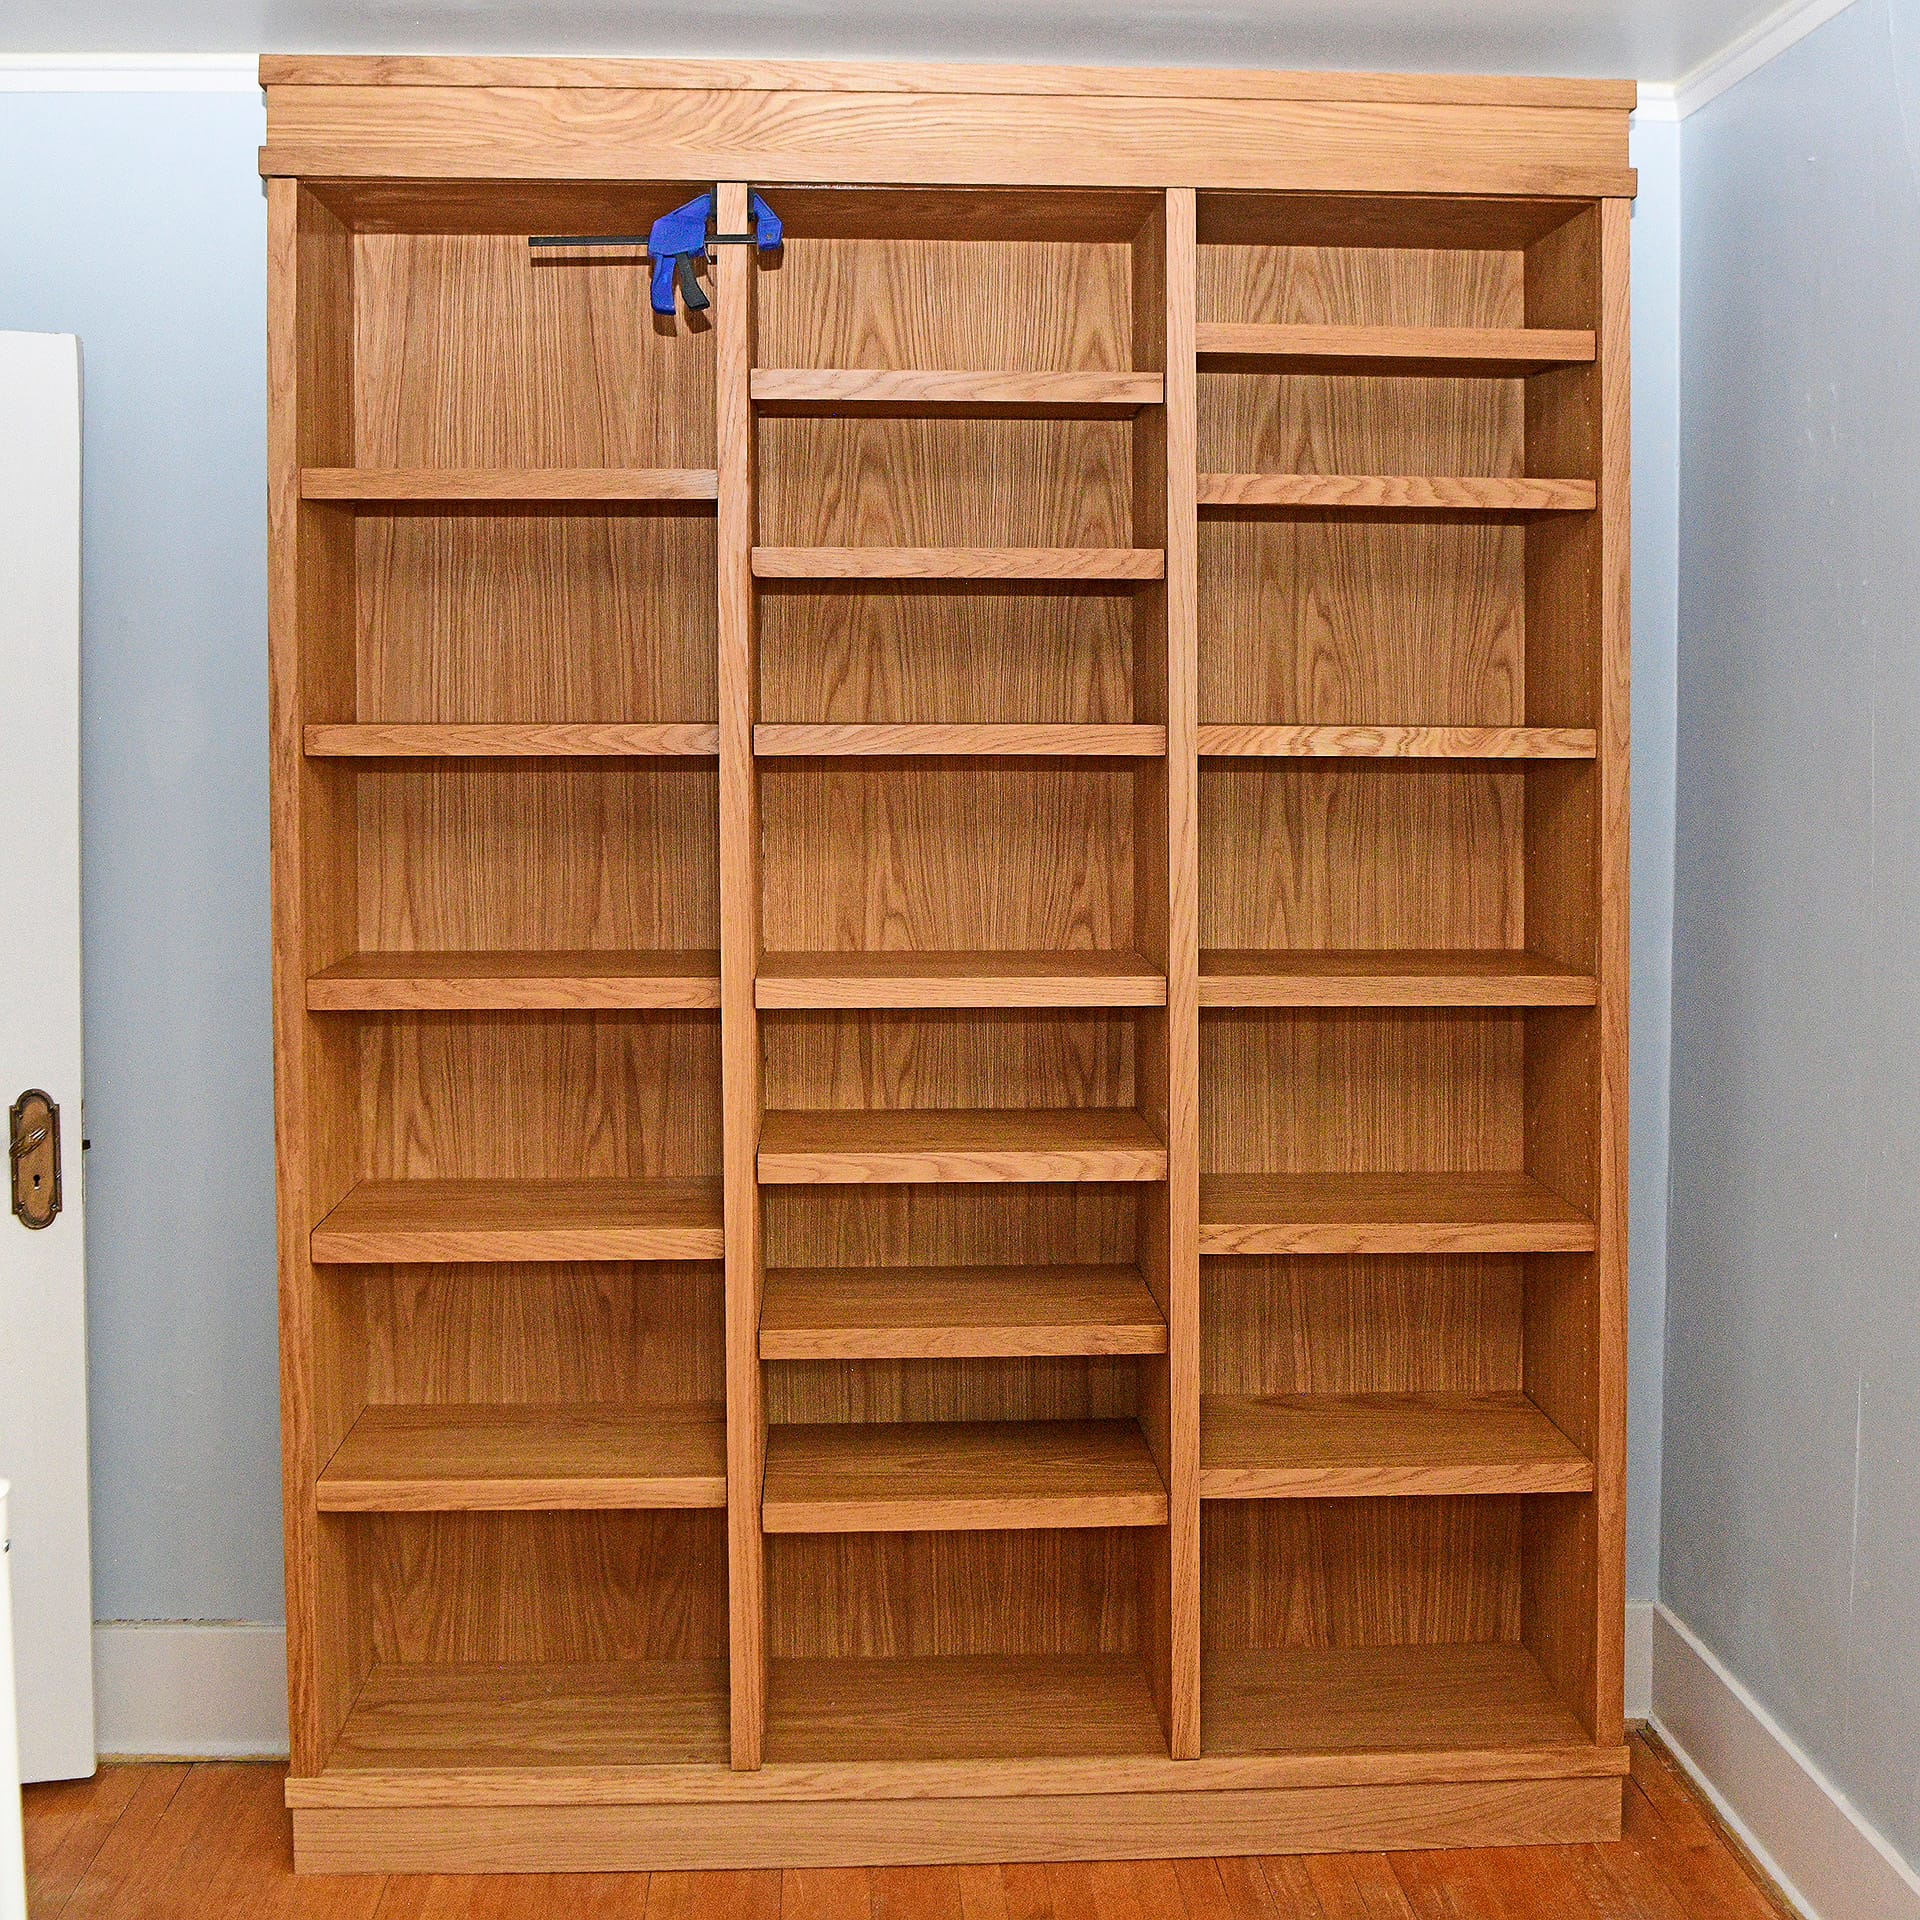
After I had all the big components done, it was time to make the shelves. We had decided on 17 shelves total, and I made them assembly-line style: cut 17 pieces of plywood, cut 17 pieces of trim, do 17 glue-ups, trim 17 shelves to exact width, sand 17 shelves, and then apply Rubio Monocoat to all of them. Making the shelves took two days total, with the glue-ups drying overnight the first night and then the Rubio Monocoat drying overnight the second night.

When it was all done, bookcase #2 was installed 24 days after I picked up the lumber. I had a three-day trip to Seattle last week, so that means I got this one done in 21 days total - exactly half the time I took for bookcase #1.
Bookcase #3
If my recovery from surgery goes well, I hope to start the third and final bookcase late this summer. That one will be lower and wider than the other two, and will span the east wall of the room, opposite the first bookcase. Whereas the first bookcase was 90" tall, 70" wide, and 14" deep, and the second one is 80" x 60" x 10", the third one will be 90" x 48" x 12".
A chair in the library
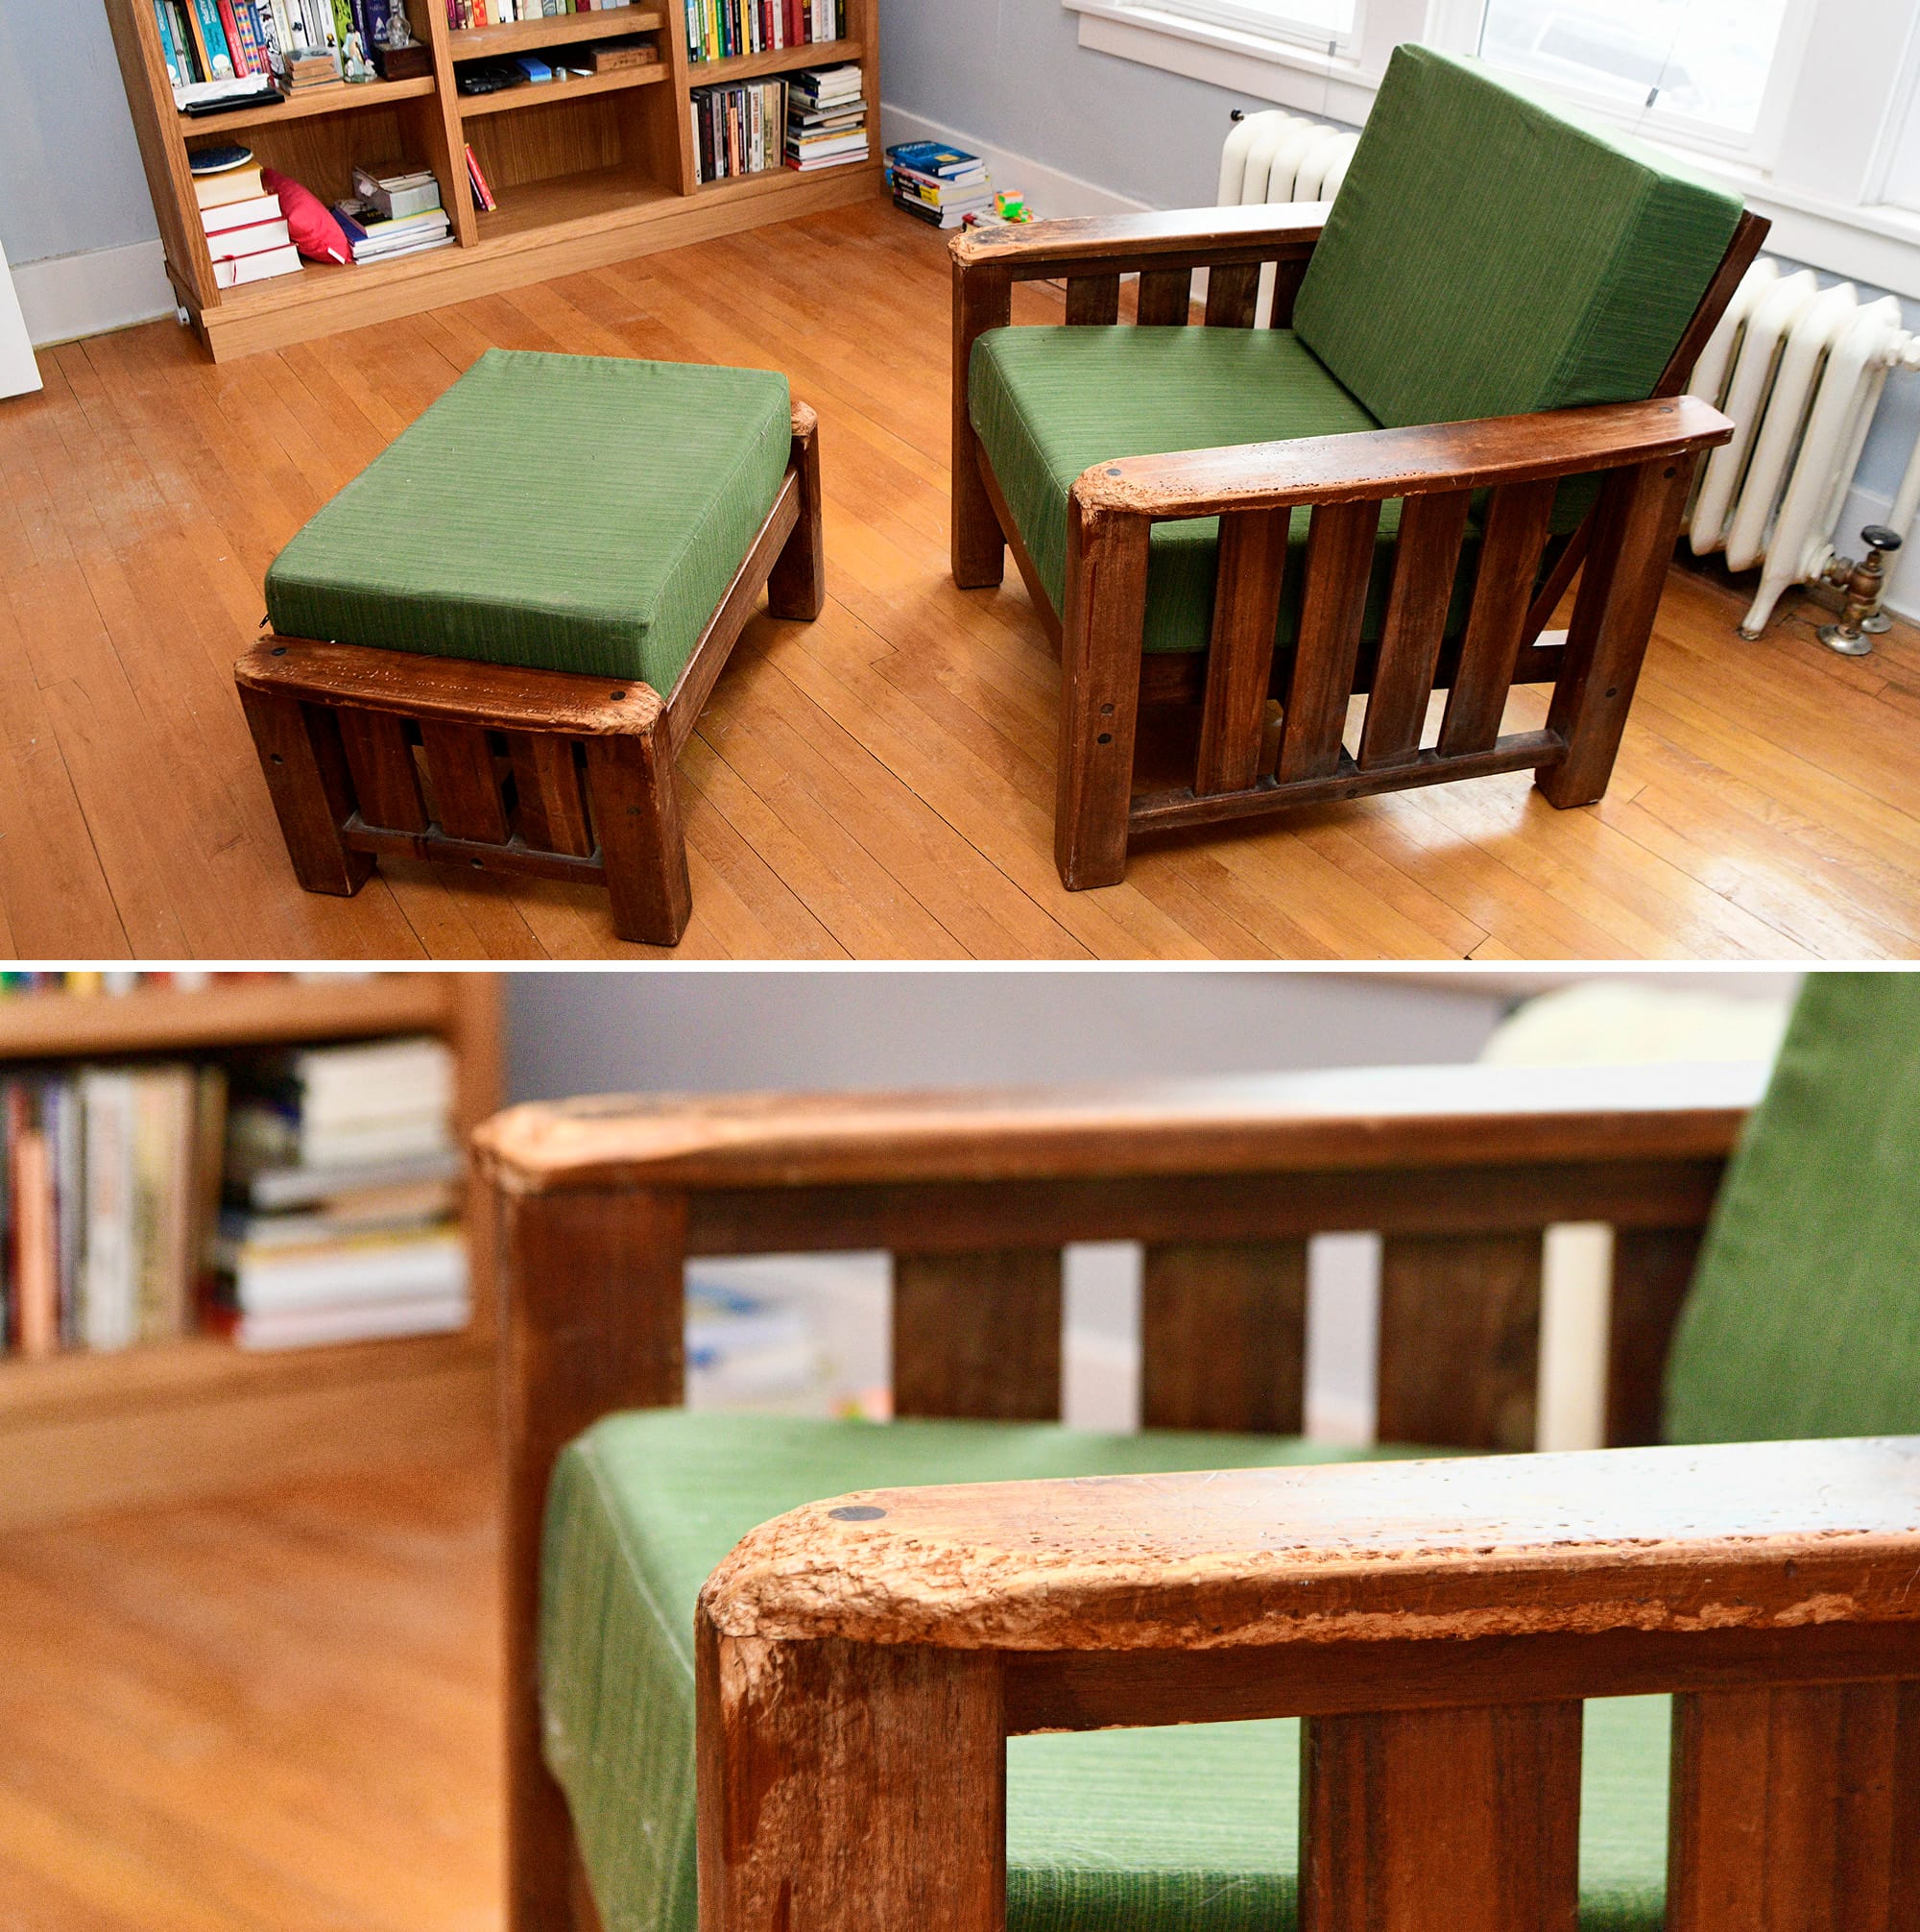
One of the reasons I made sure to get the second bookcase done before my surgery is because I plan to spend a lot of time there during my recovery, surrounded by my favorite books and reading whatever strikes my fancy each day. To that end, I've moved a chair and ottoman footstool into the library, so that I'll have a place to sit with proper posture and geometry for straightening my leg.
The particular chair I've chosen has a story behind it. In the early 90s, Mia the Malamute was in the habit of destroying padded furniture, so we got a chair and couch with hardwood frames. That did indeed protect the cushions, and Mia chewed on the arms of the chair a bit and then decided to leave it alone.
Twenty years later, our Samoyed Alice chewed a bit on the same spots, but the chair was still fairly intact. Then, in early 2020, Nancy came along. As was her style, she took to that chair, couch, and ottoman with a maniacal frenzy, and soon the corners were all a jagged mess.
This morning, after installing bookcase #2, I took a rasp to the damage on the chair and ottoman, and after eliminating all the worst spots I sanded smooth what was left. Then I used wood cleaning solvent and a wire brush to remove all the grit. After that dried, I finished it all with a coat of Rubio Monocoat.
This was my favorite chair through recovery from both of my hip replacements in 2015, and according to my surgeon I recovered from those surgeries more quickly than most. I'm hoping there's still a bit of that magic in this old battered chair, for all the hours of knee replacement PT to come. Let's do this.