Building a crosscut sled

Last week, I mentioned on the Jamie Samoyed's Pack group that I had finished building a crosscut sled. I should have realized that would be confusing, because that's a Facebook group about the lives of our sled dogs. So I've put together this post to describe what a crosscut sled is and show a few details of the one that I've recently built.
In simplest terms, a crosscut sled is just a flat surface (usually a piece of high quality plywood) that has one or more runners attached to the bottom so that it can slide across the top of a table saw. It has a raised fence along the back edge that you can hold a piece of wood against, and you push the fence and your workpiece past the spinning saw blade to make a cut.
Why use a crosscut sled?
There are many benefits to using a crosscut sled, but it mostly comes down to accuracy, repeatability, and safety.
Two factors make crosscut sleds more accurate than a table saw used without one. The first is friction. When you use a table saw without a sled, your workpiece slides across the top of the saw as the blade cuts through it. That friction can cause small vibrations that reduce accuracy or cause tearout, and sometimes excessive friction can make things go awry in ways that can be very dangerous. (Trigger warning: do not do an image search for table saw kickback injury. I warned you.)
The other factor that helps increase accuracy is the fact that crosscut sleds are typically made with great care to align the fence at a precise 90 degree angle to the blade. I've done this, and am pleased with the accuracy I now have and I've also allowed for easy future tweaking of the alignment if it's ever needed.
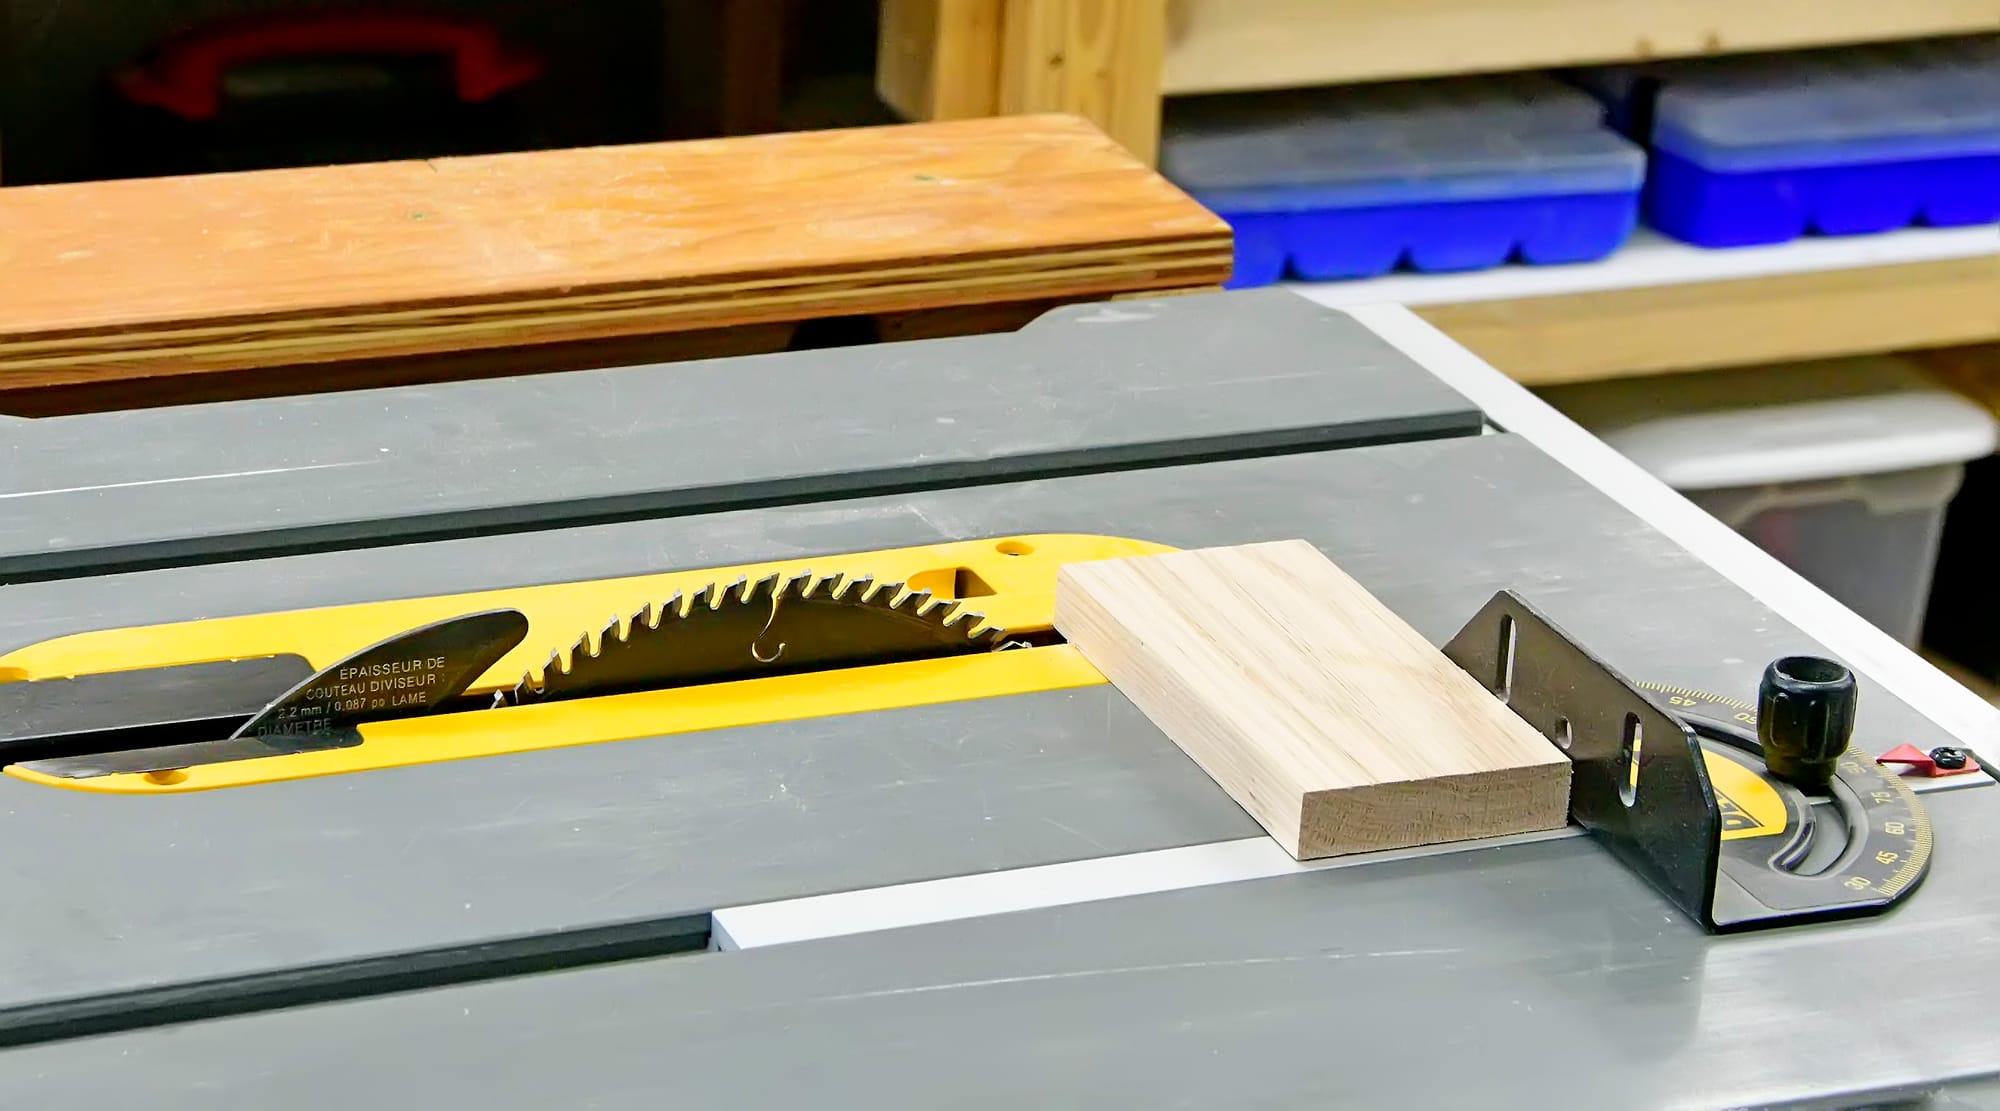
Repeatability is another benefit of using a crosscut sled. The one I built has an adjustable stop block that make repetitive cuts quick and simple.
Example of using the adjustable stop block to make multiple cuts of the same length. Measure once and cut as many pieces as you need.
And last but not least, safety is a big reason to use a crosscut sled. You can clamp your workpiece down to the sled, position your hands well away from the blade, and reduce typical table saw dangers to pretty much zero if you're paying attention.
Which sled to build? Or buy?
After becoming convinced that I needed a crosscut sled (mostly due to watching hours of videos in which pro woodworkers were using them and enjoying all the benefits outlined above), I started exploring options.
First I looked at sleds you can buy pre-made, but I discovered that the options are more limited with a portable "job site" saw like my DeWALT DWE7485. This saw is a great fit for my simple needs (and cost under $400, which leaves a lot of tool budget for other stuff), but many of the off the shelf crosscut sleds are only intended for use with bigger and more expensive cabinet grade table saws. For example, Rockler's little $200 sled has an explicit warning that it is "NOT intended for use on portable saws." I looked at a fancy $370 INCRA sled, but it has some features I wouldn't use, and it just doesn't seem right to spend more for the sled than for the saw itself.
In the end, I decided to build a sled. I've already built another simpler sled last year, but after using it for a while I've come to realize that it's the worst of all worlds: too big and clumsy for precise work on small pieces, but a bit too small for cutting large panels. So I'm going to build two sleds: one optimized for small precise work, and one optimized for cutting larger pieces.
After watching numerous videos of crosscut sled builds, I decided to go with Tamar's 3x3Custom design for my small sled. The total cost of lumber and parts was about $170, and after 20-30 hours of work (spread out over several weeks), here's how it turned out:
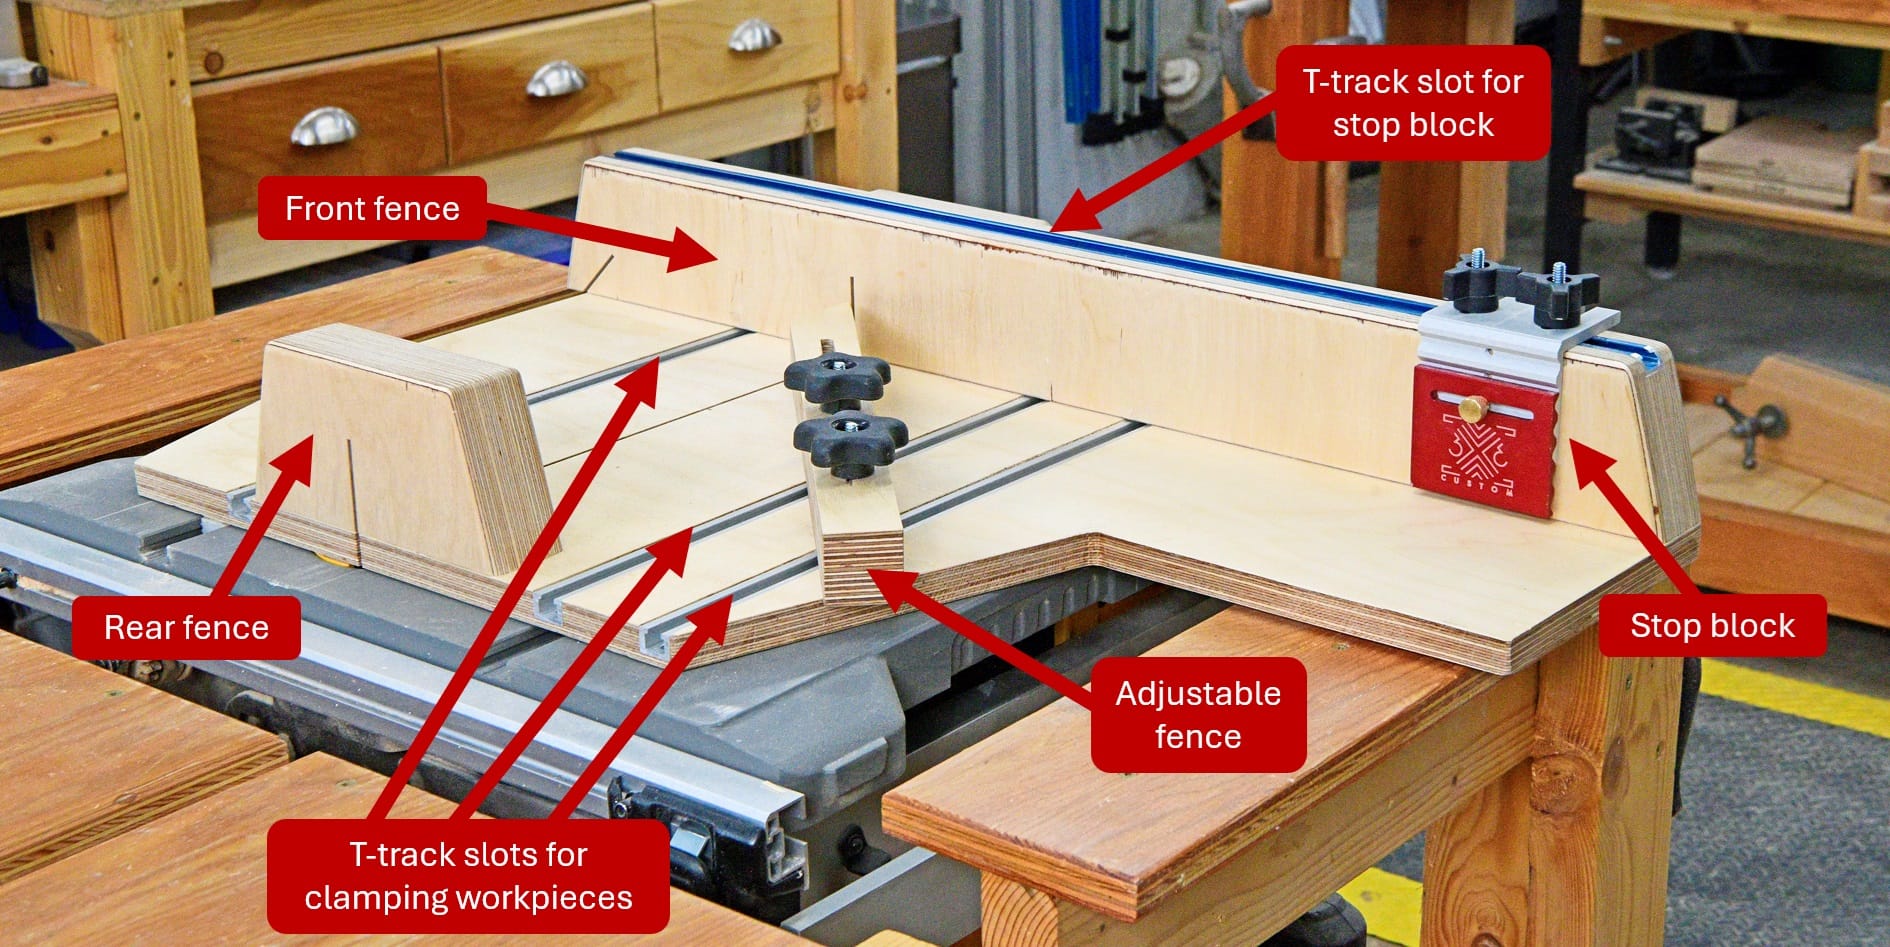
I didn't follow the 3x3 Custom design in every detail. Here are a few things I changed:
- I wanted a light sled optimized for small projects, so I reduced the base thickness from 3/4" to 5/8" (which created some challenges on mounting the T-tracks).
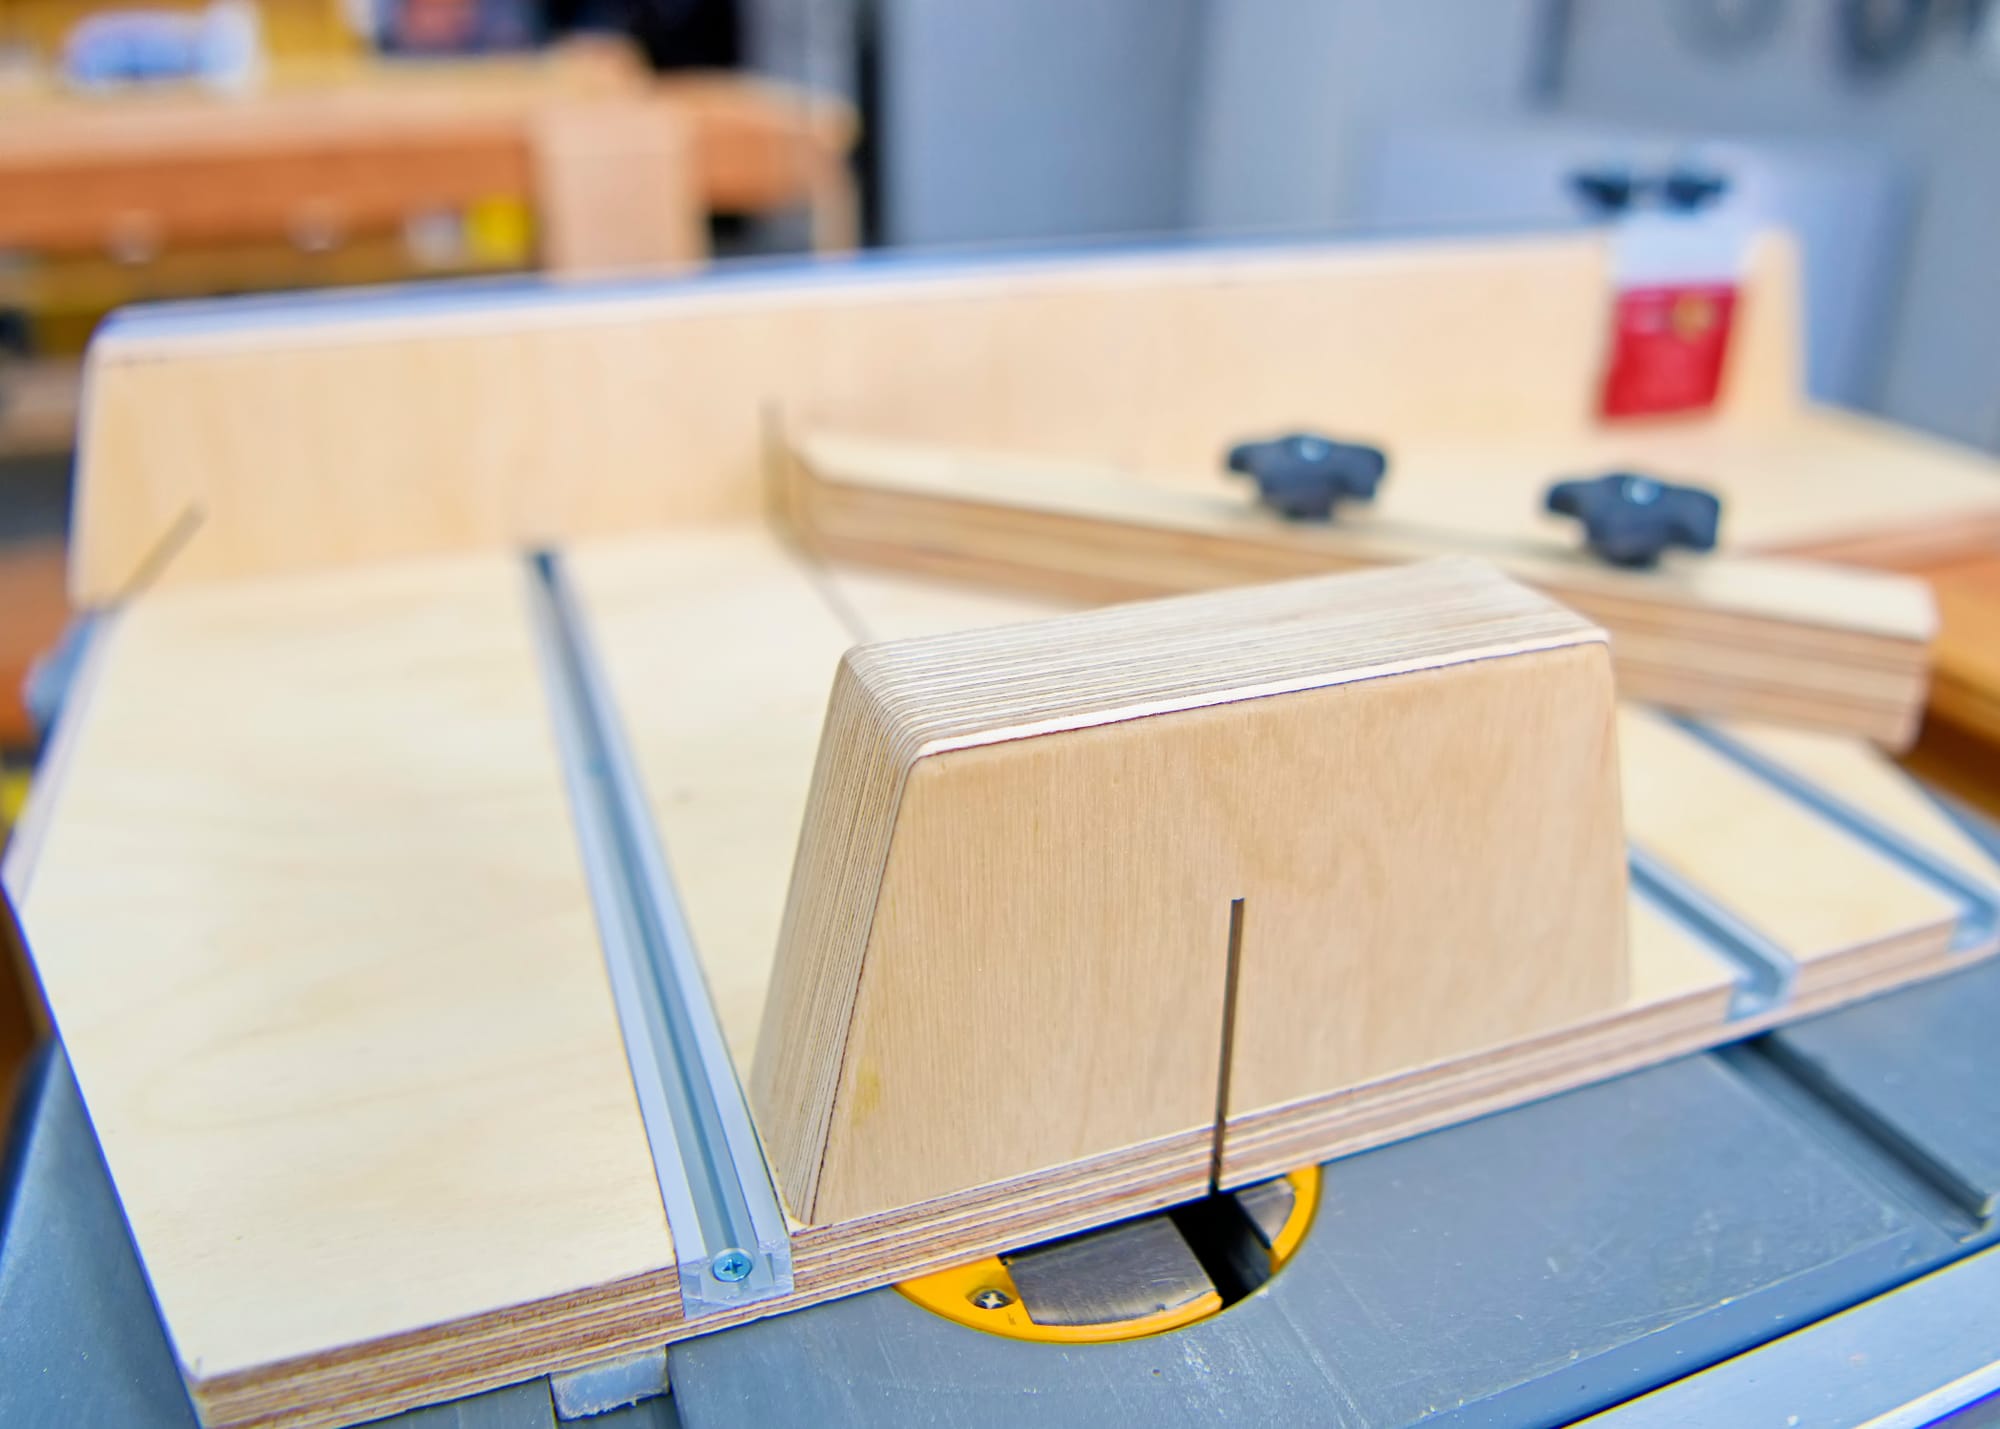
- For the fences, I laminated three layers of plywood instead of two. (see photo below)
- I didn't bother to build the removable side extension part, because I'm going to build a separate larger sled later that will handle bigger workpieces.
- I tweaked a few esthetic details, such as making the profile of the blade guard match the profile of the front fence.
It's all done now, and I'm loving how it works. I have a fine finish 60 tooth blade on my table saw, and I can now make nice smooth cuts with minimal tearout (usually none). Below are a few videos showing the new sled in action.
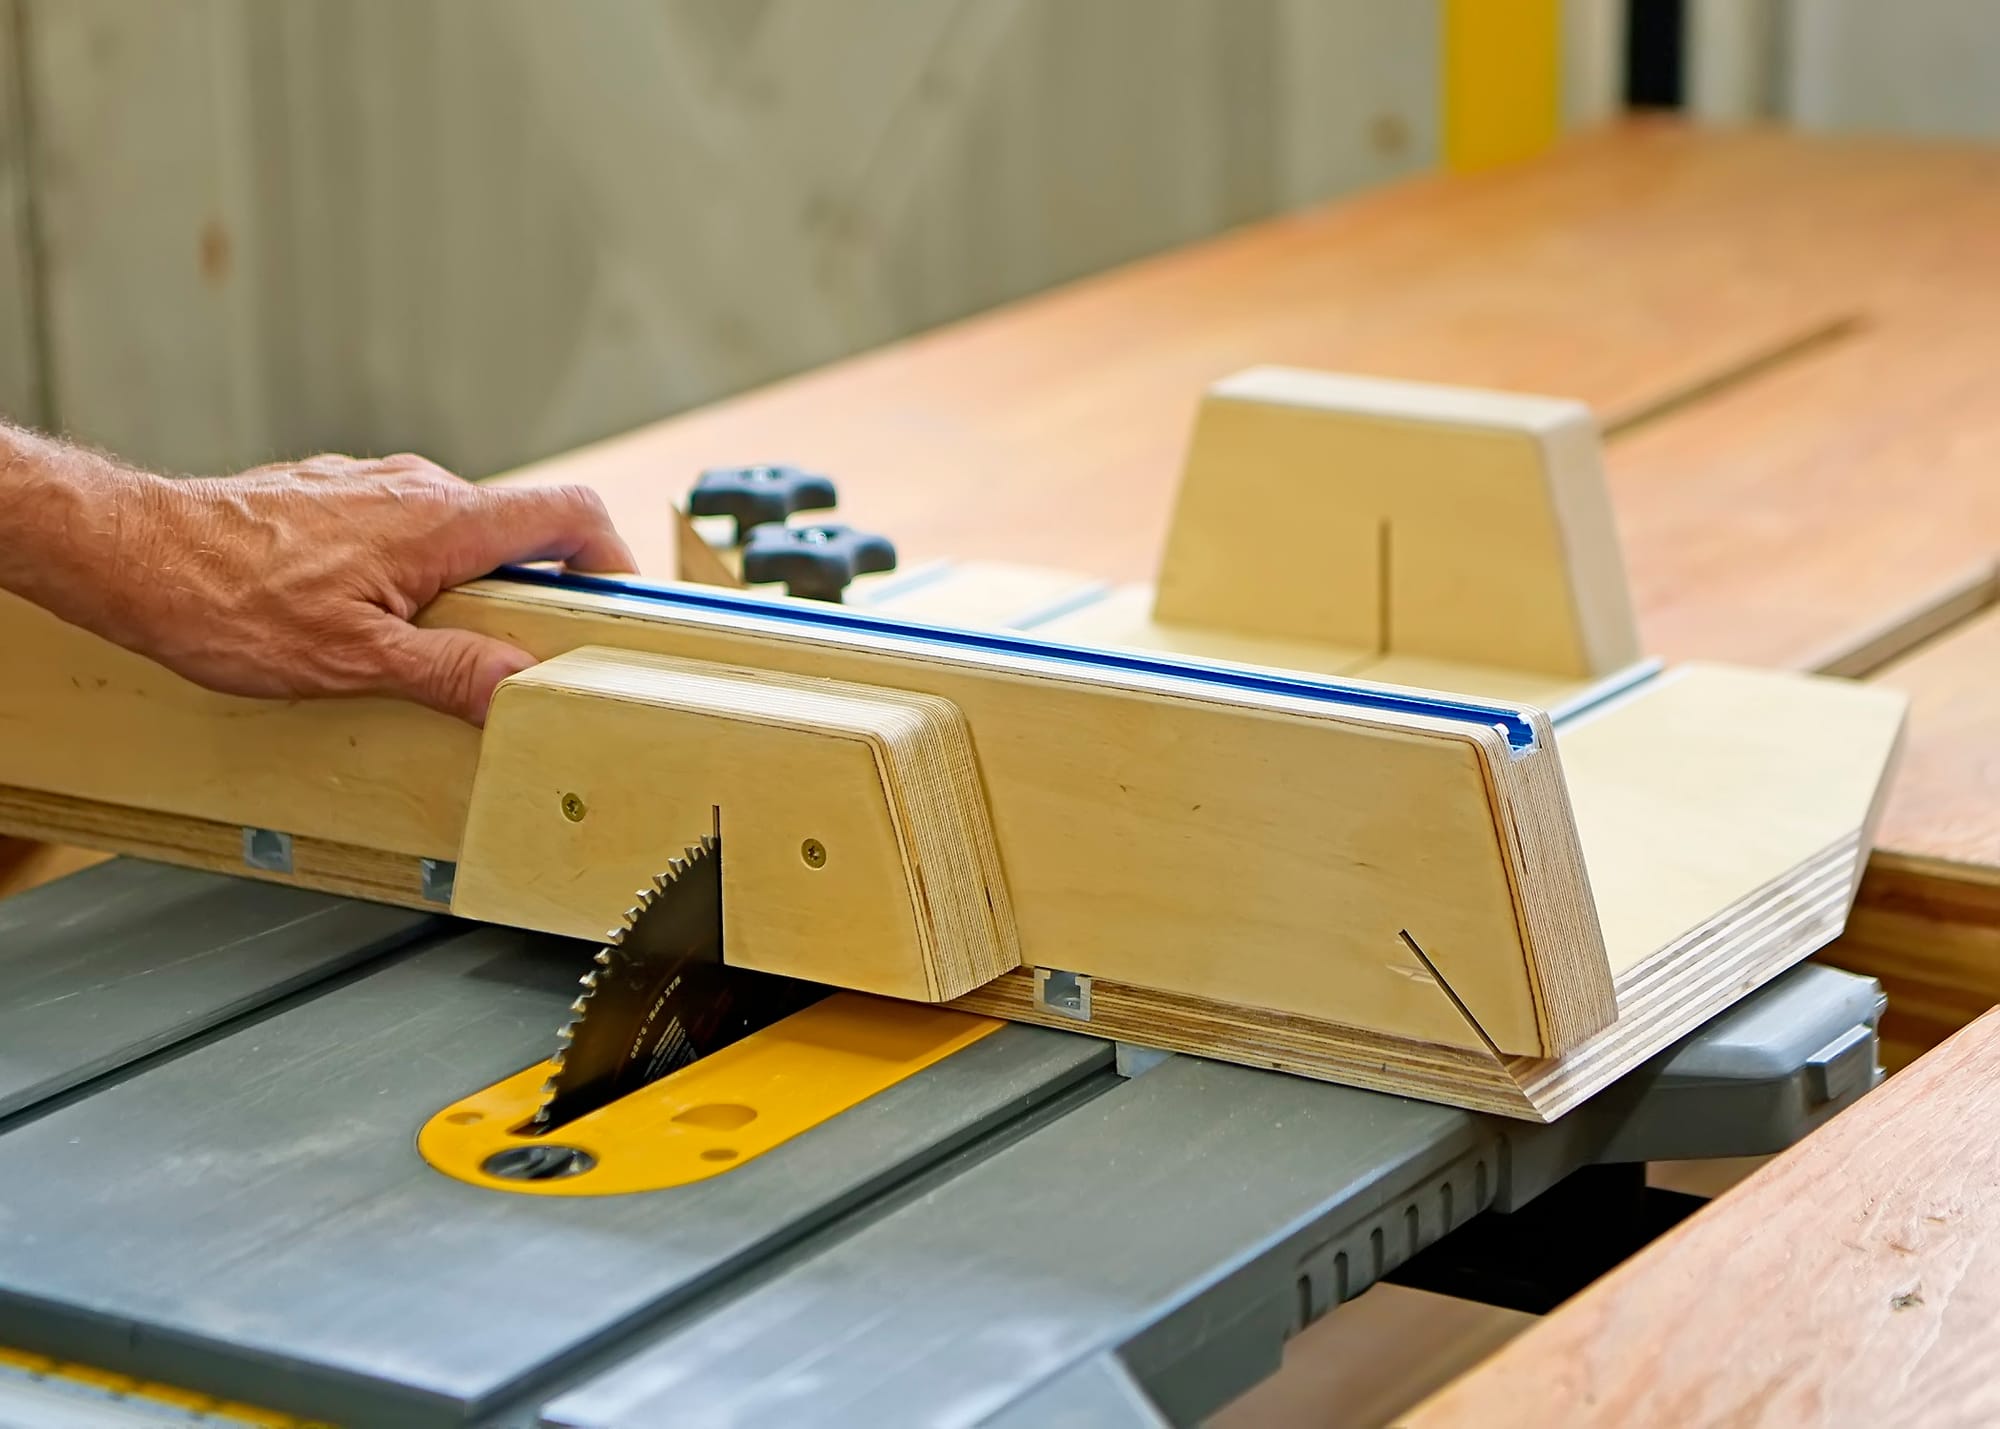
An example of the basic operation of the sled. You can hold the workpiece with your hands if you'd like, but for small pieces it's safer to clamp them down.
Example of using the adjustable fence, which can be set for repeatable cuts at any angle.
A crosscut sled makes it easy to make accurate cuts safely on odd-shaped pieces.
The edge of the sled can be used to cut at a 45 degree angle for miter joints and similar applications. Note that for this usage the single runner goes in the slot to the left of the blade (from the operator's perspective).
Fine tuning my table saw stand
If you watch closely on the 45 degree video above, you can see the sled rock slightly immediately after the blade stops moving. That's because my custom table saw stand is slightly lower than the surface of the saw itself. I did that deliberately when I built the stand two years ago, because at that time I was doing a lot of breaking down of 4x8 sheets of plywood. Those sheets weight around 70 pounds, and I was working by myself, so I decided to minimize friction even if it meant losing a little precision. After trying a few different heights I settled on the stand being about 3/32" lower than the saw bed.
These days I'm doing mostly smaller projects, and have become more concerned about accuracy, so those considerations no longer apply. Below are some photos and video showing how I have adjusted my table saw stand to make the sled slide in a perfectly level and repeatable manner.
Closeup of the problem caused by my table saw stand being lower than the surface of the table saw.
To fix this problem, I sanded down that part of the table saw stand, then cut a piece of 1/8" plywood to fit and epoxied it in place.
After removing the clamps the next day, I beveled the edges, sanded the top smooth, and rubbed in a few layers of paste finishing wax to make it as friction-free as possible.
After the fix: a smooth solid fit, with no wobbling.
I've used this sled for a few small projects in the last week, and I'm very pleased with how it turned out. I feel like my table saw work just got more precise, and also safer.
This sled isn't big enough to cut large panels, but I'm planning to build a much larger sled for those purposes soon, based on Steve Ramsey's simple design. With these two sleds, I'll be ready to dive into a couple of big projects we've been planning for a long time: wall shelves for the upstairs library, and a hardwood bar for the parlor.