Blanket Chest - BEFORE
I mentioned in my last blog post that I was planning to make a blanket chest for storing Megan's quilts in the parlor. But that plan has gone out the window, because instead I'm restoring a 19th century steamer trunk!
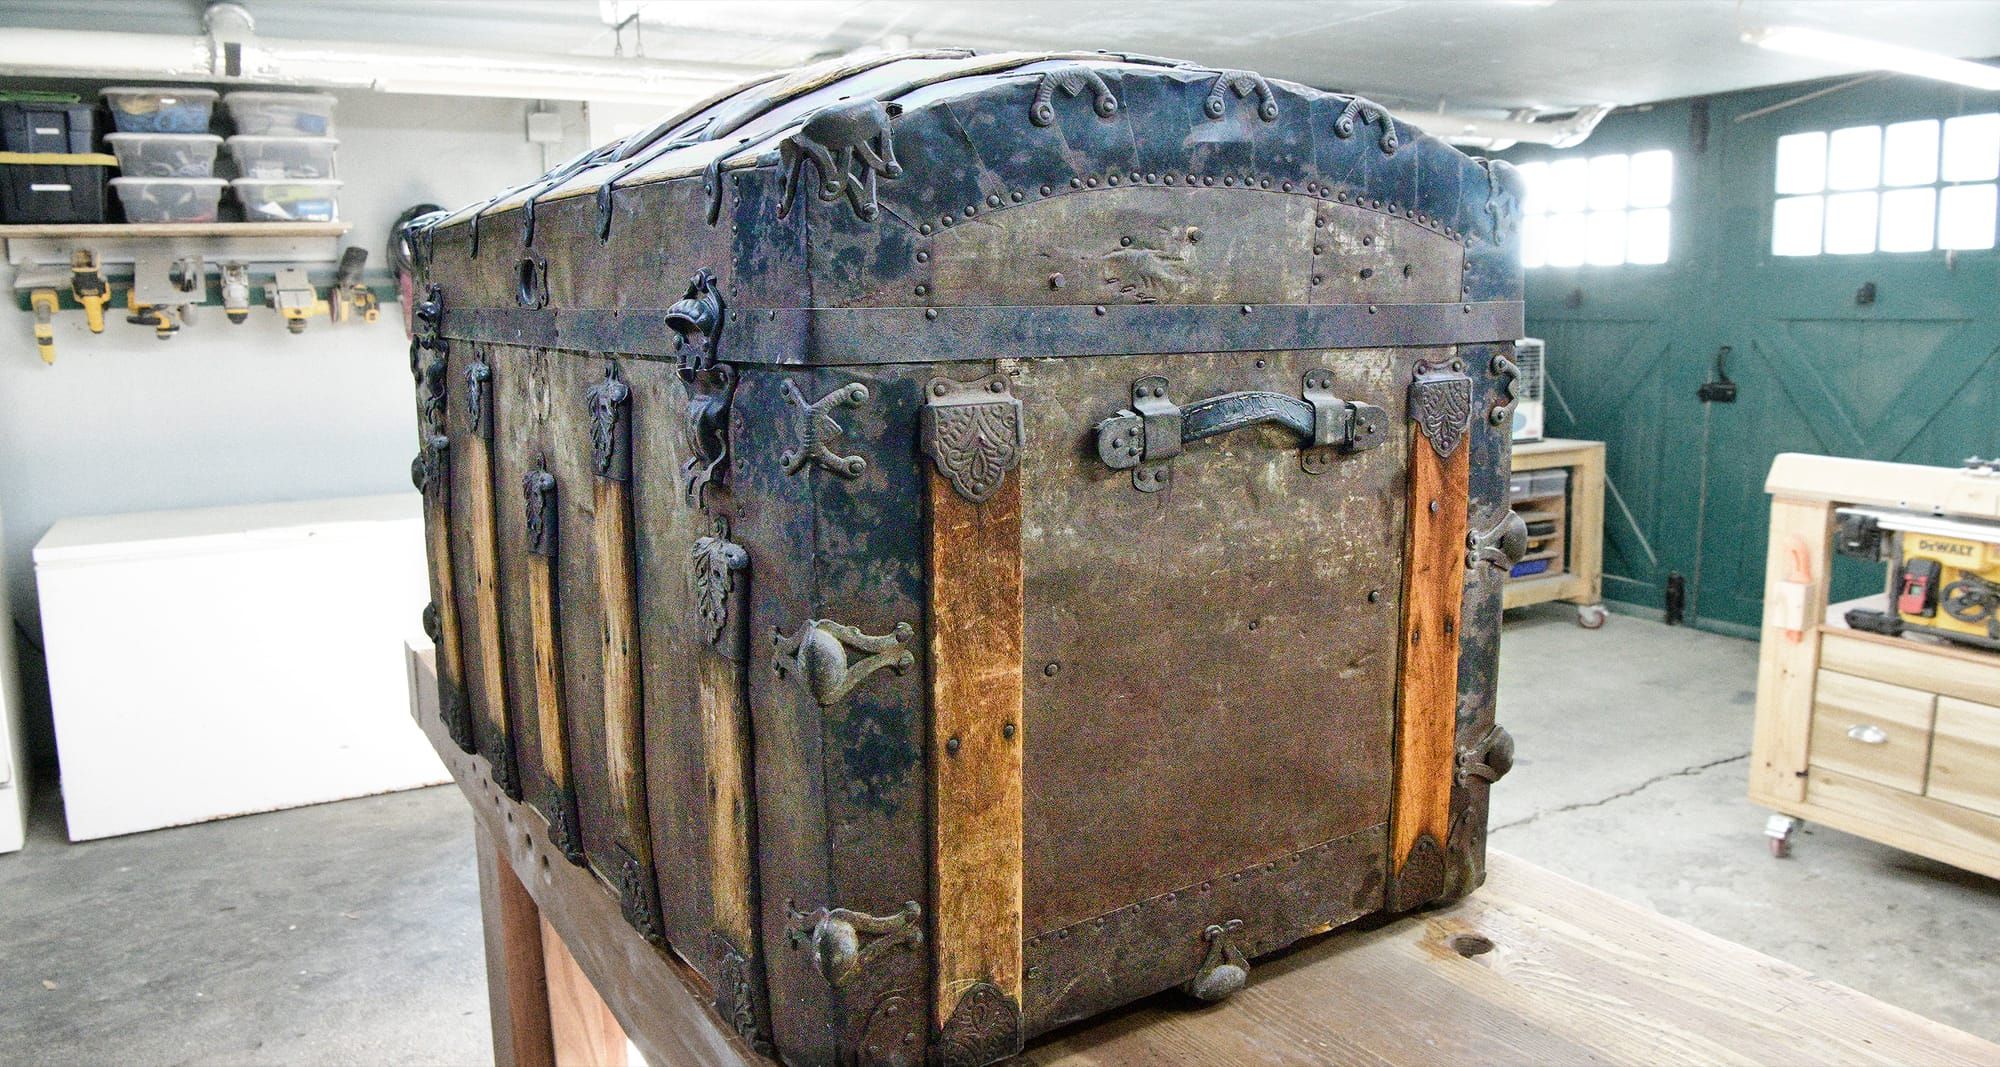
I bought it for $80 from a neighbor. It was a filthy rusty mess, and they think it had been stored in the basement of their house for a long time, perhaps since around the time of that house's construction in 1912. I've looked through a bunch of websites/articles/videos about antique steamer trunks, and based on details of this one's construction here's what I think I know:
- It was likely manufactured in the US between 1870 and 1900.
- It's a sturdy model with a solid steel exterior, but not an expensive or collectable one. Some vintage steamer trunks are worth tens of thousands of dollars (the ones that were made by Louis Vutton, for example), but this one is probably worth at most a few hundred dollars depending on condition.
- Some trunks have identifying features that show whether they were originally intended for steamship travel, railroad travel, or stagecoach travel, but this one has none of those details. So it's a general-purpose trunk that could have been used for anything. Based on the number of deep dents and scratches it has, it's clear that it got around a lot before settling down to rust and decay in the basement of an old Craftsman home in Butte, Montana.
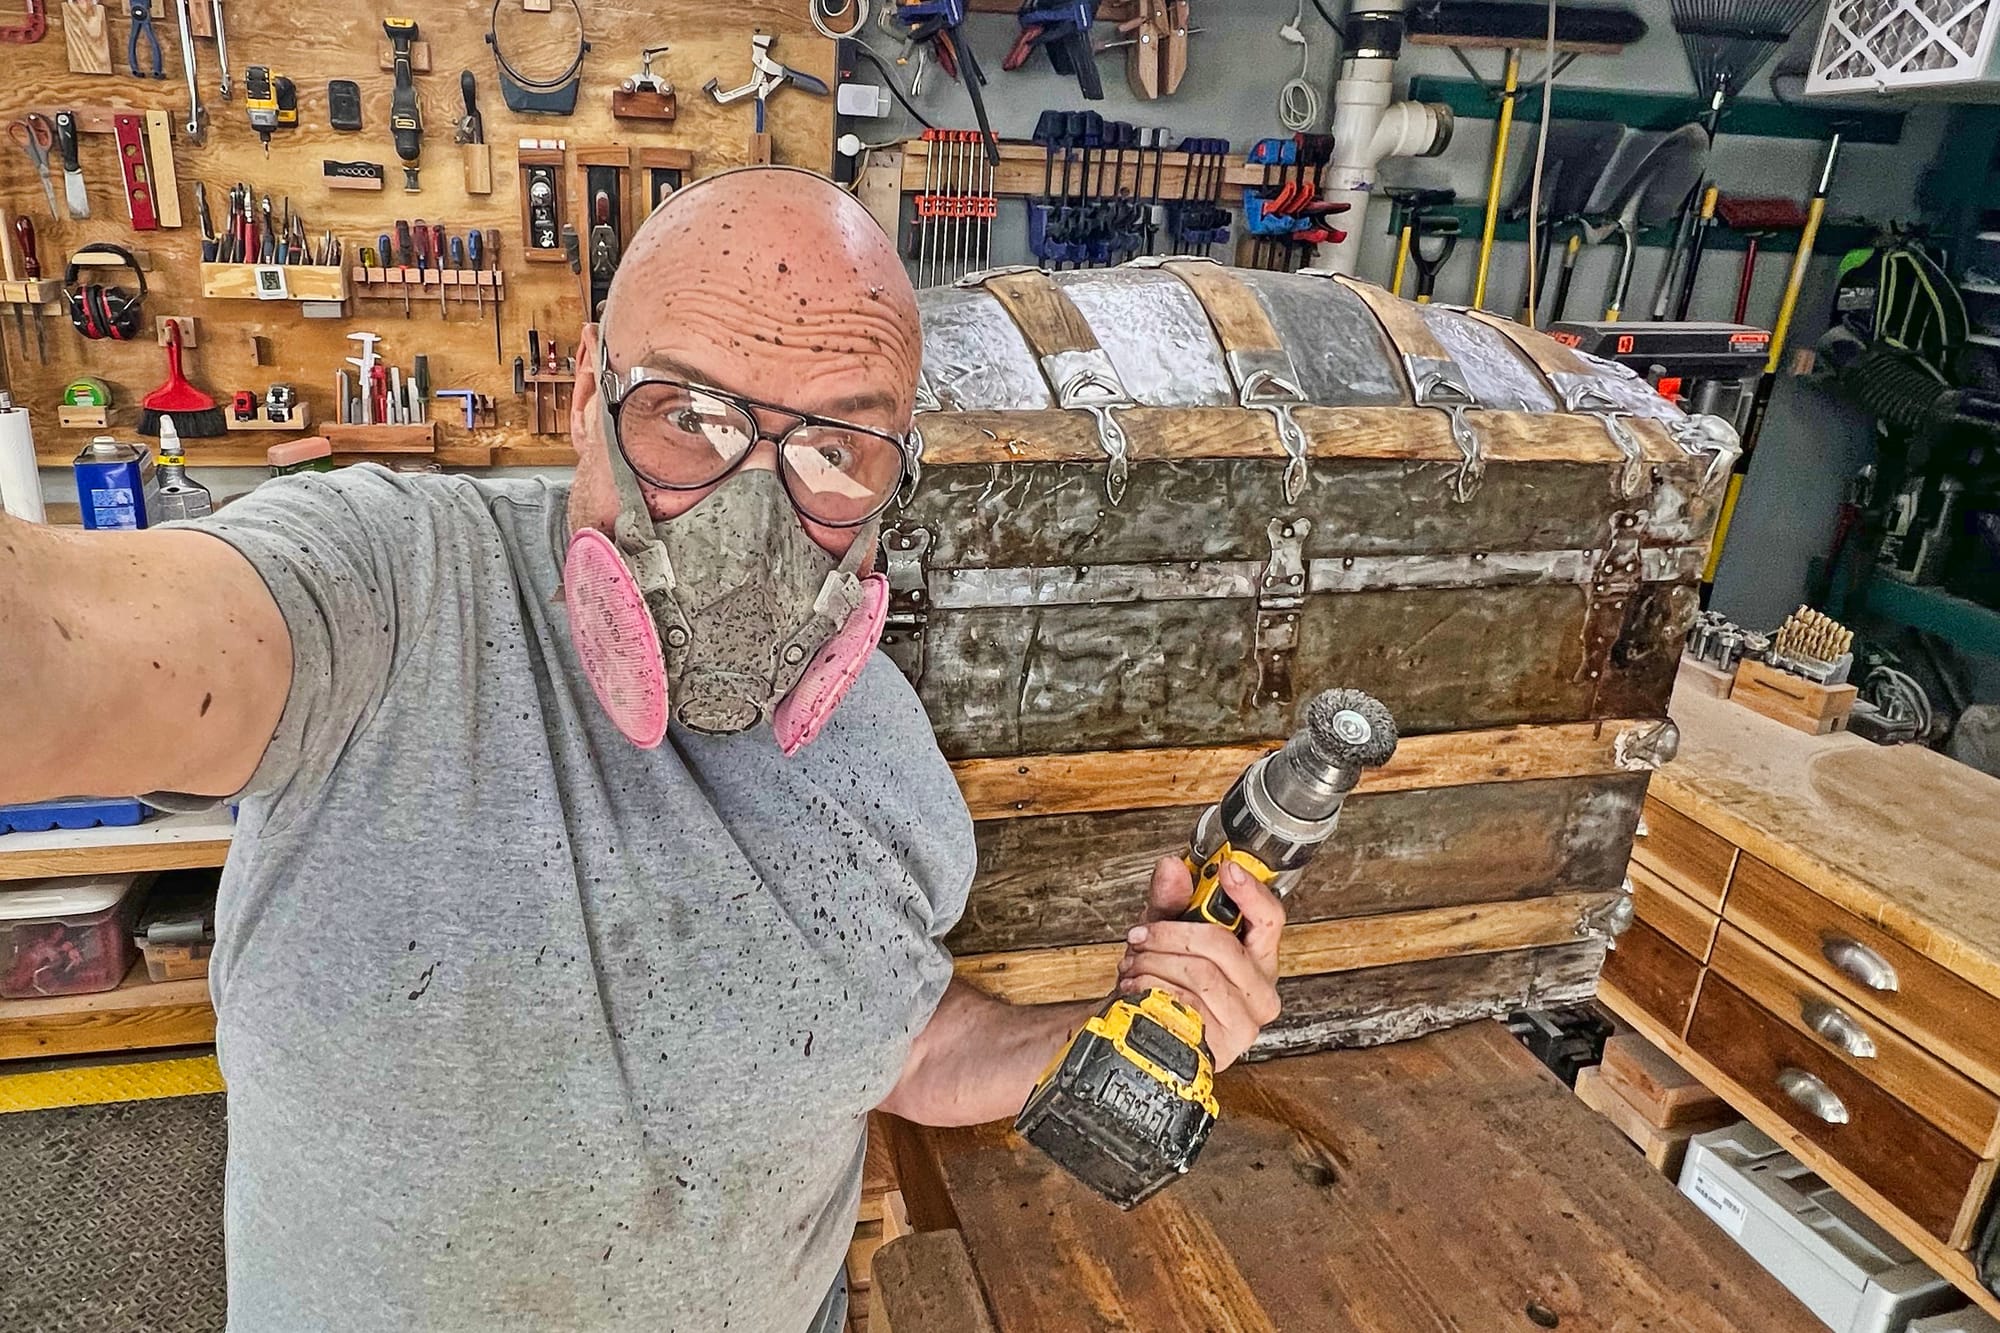
I brought it home late Wednesday evening, and when I set it up on my workbench bits of debris and flakes of rusty metal were falling off the bottom, and it smelled like rust and rot and motor oil. This is going to be a time-consuming project, definitely more work than building a simple blanket chest, but Megan and I are excited about how it will look in our parlor once it's cleaned up and ready to use.
I often forget to take "before" photos of projects I work on, so I'm doing this blog post as an extended "before" photo. There will eventually be an "after" post to go with it, but based on how it's going after the first three days, and the time I have available to work on it, I'm guessing that I'll be working on this through the fall and perhaps well into the winter.
The following are a few random details of what I've found and/or planned so far ...
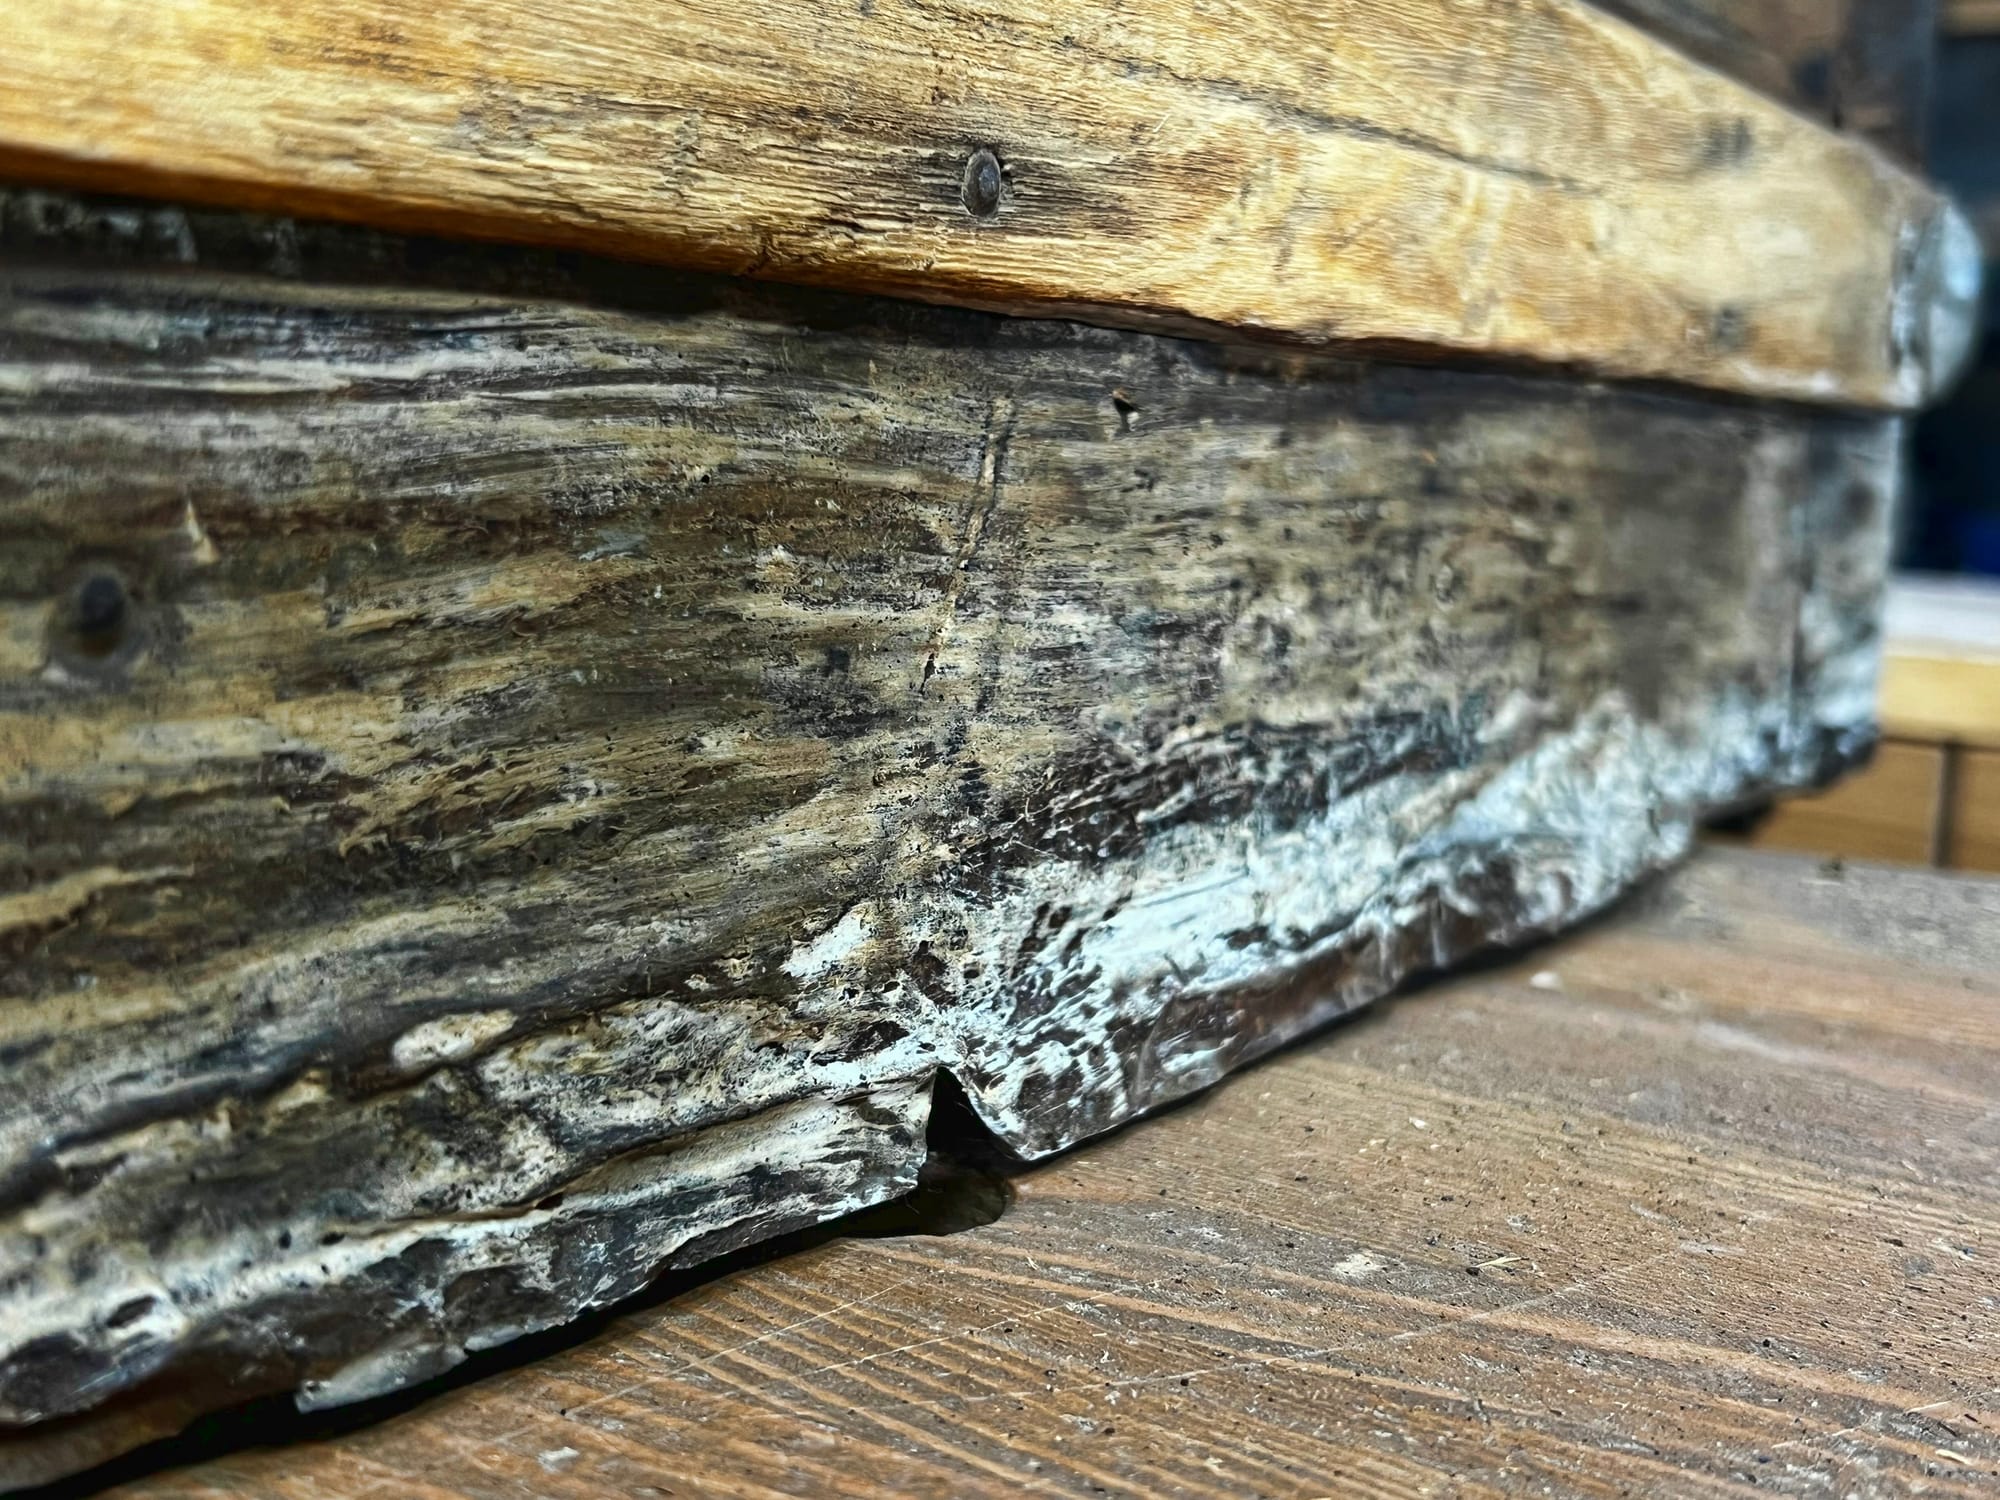
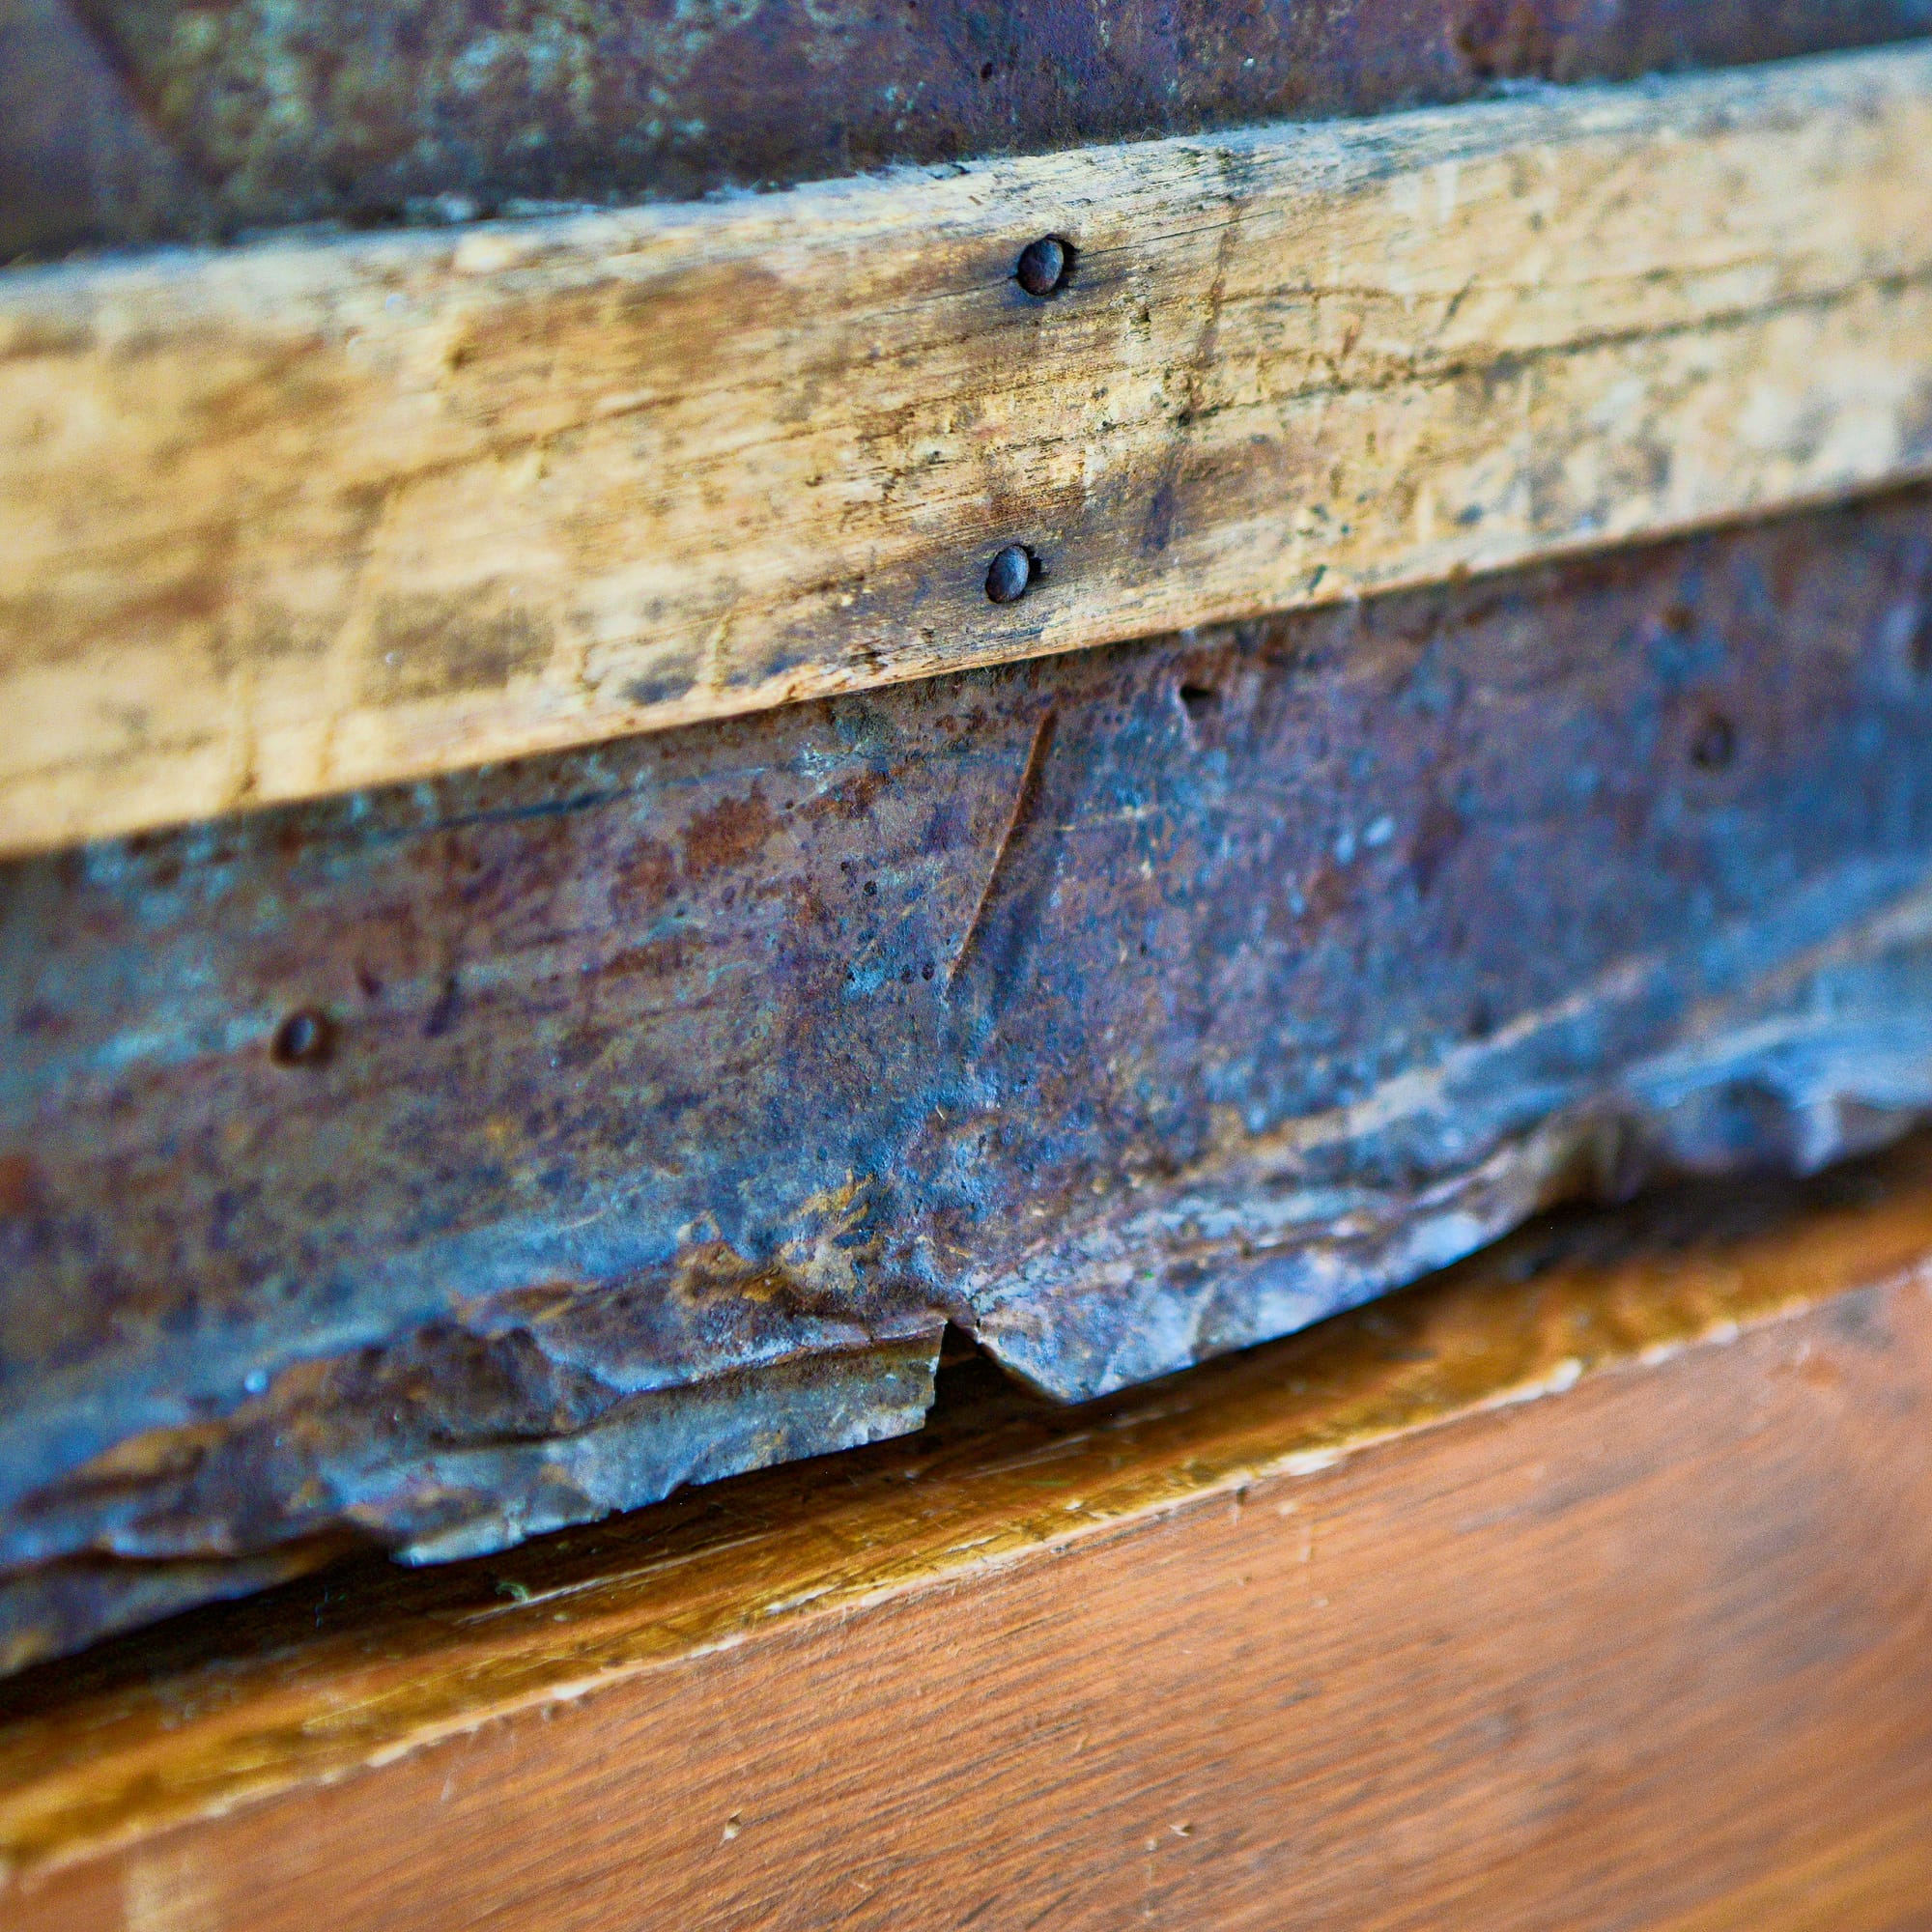
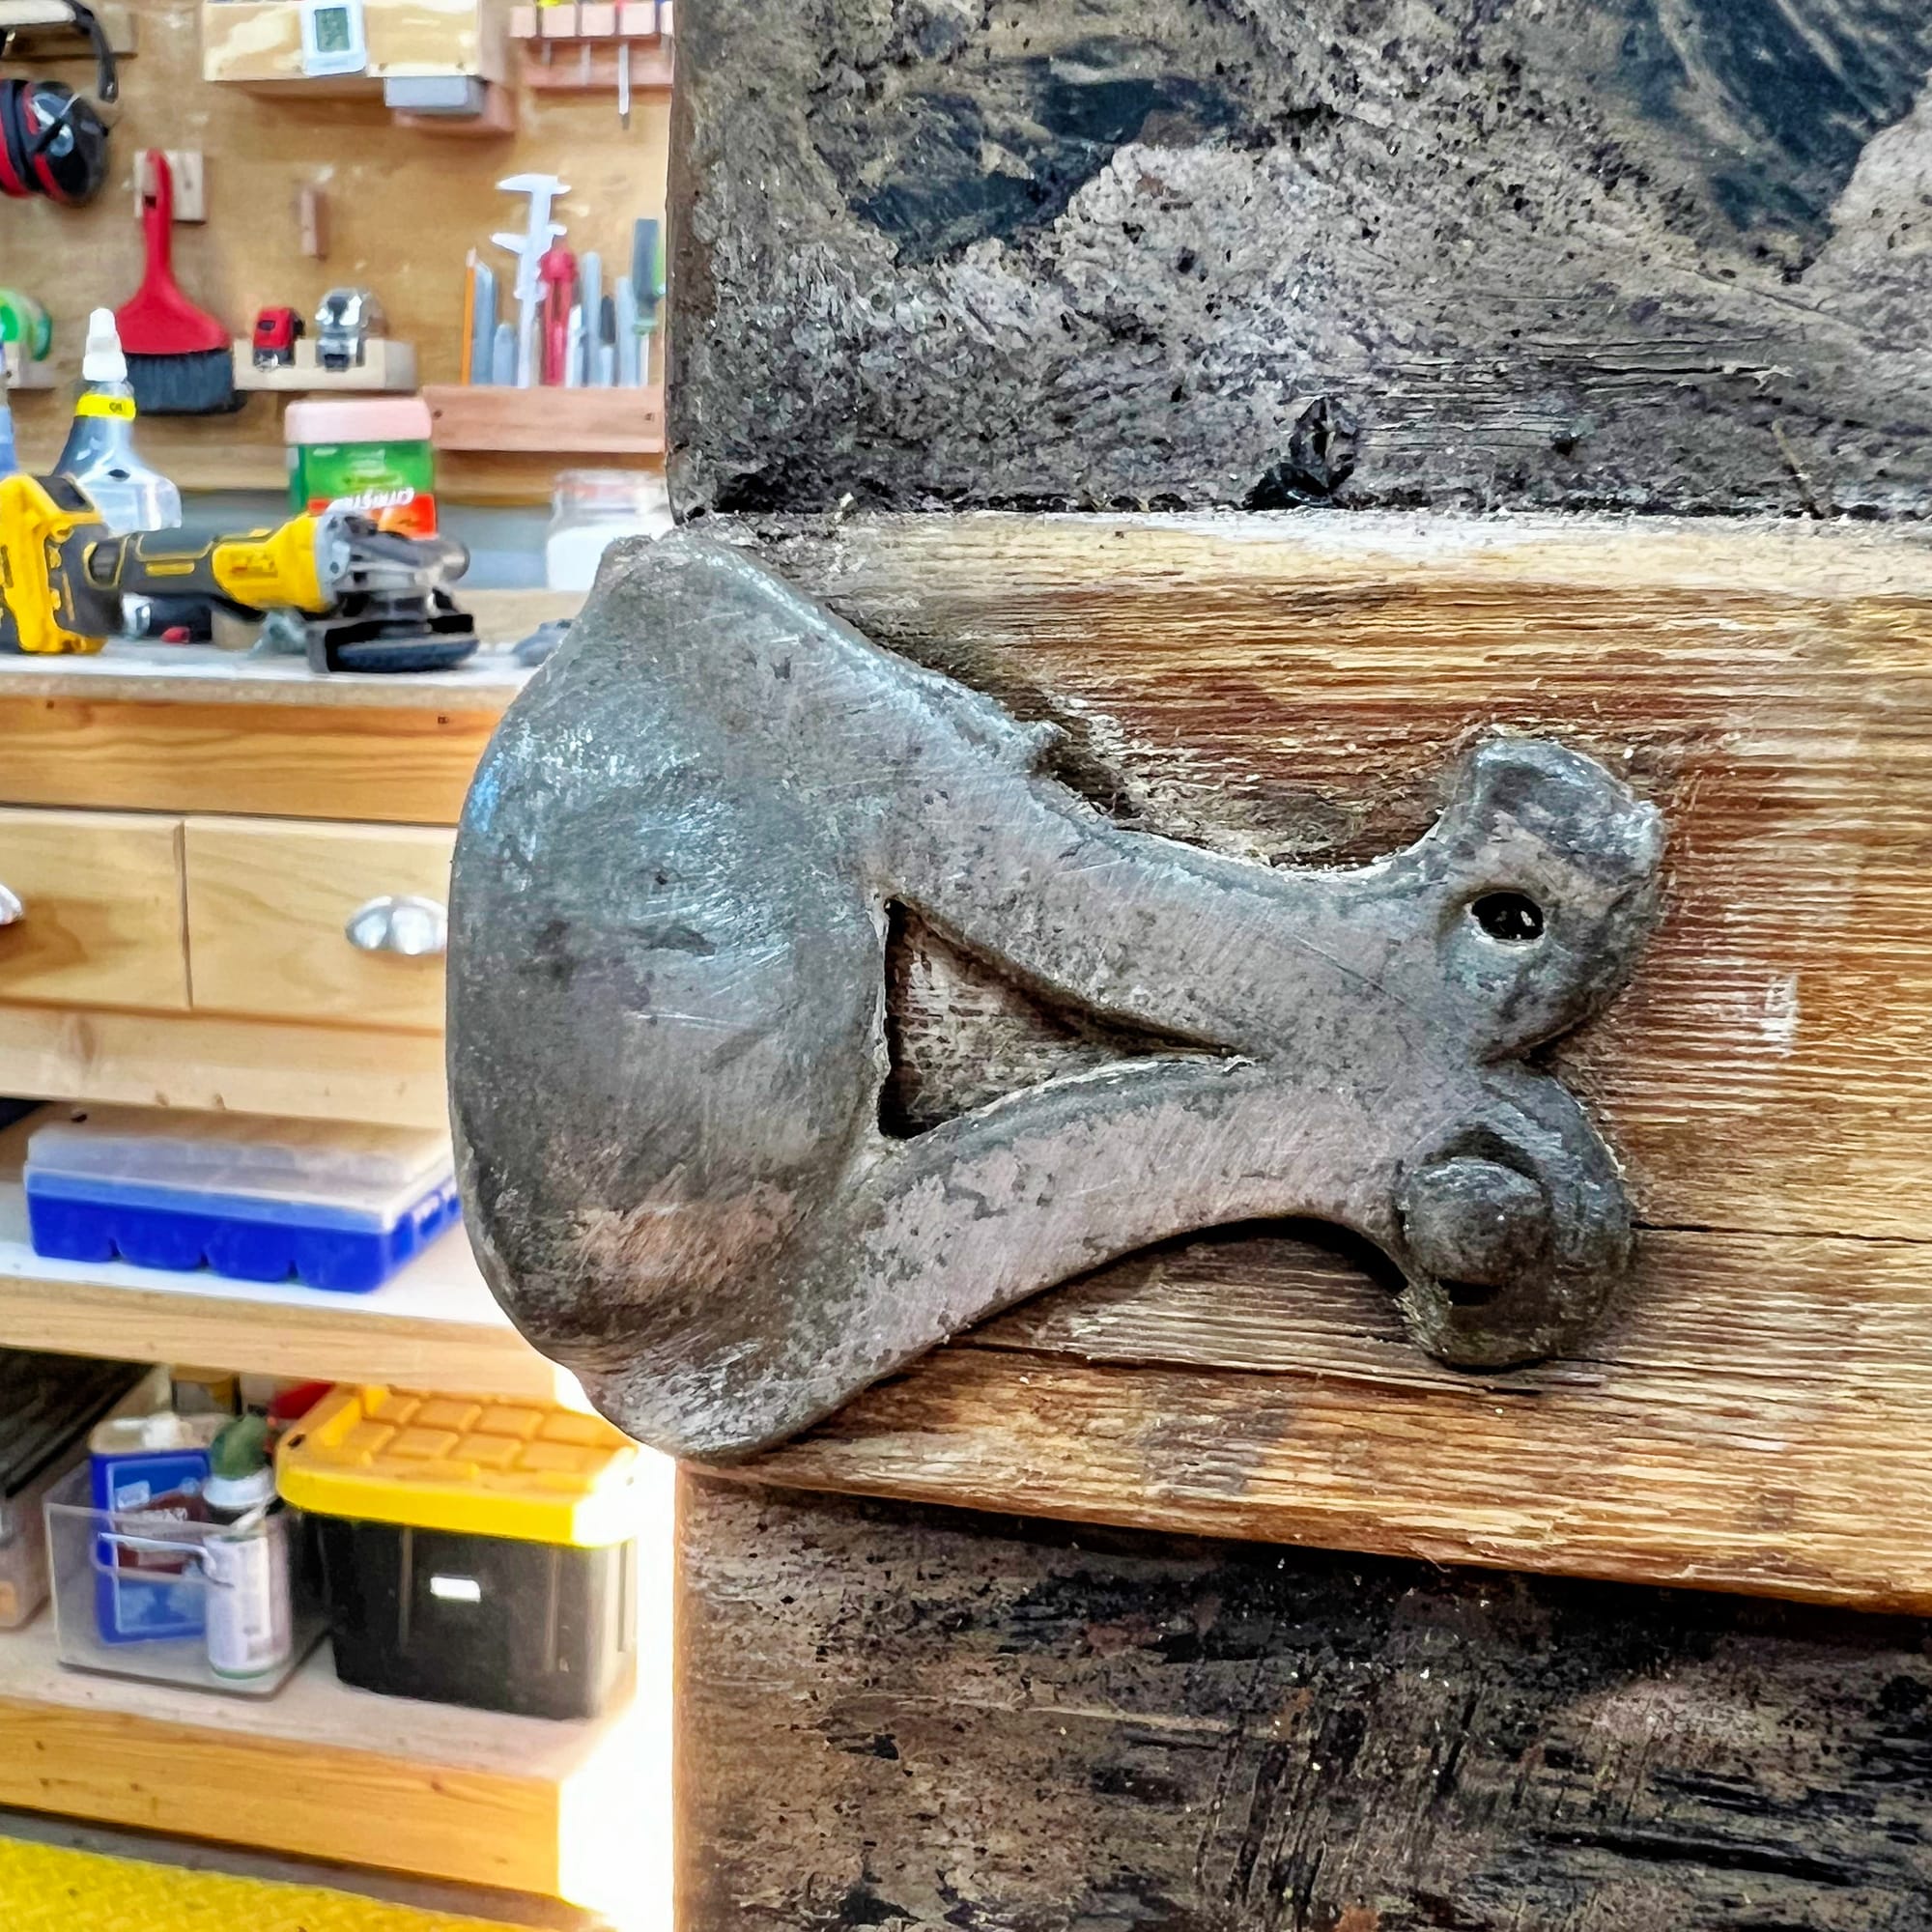
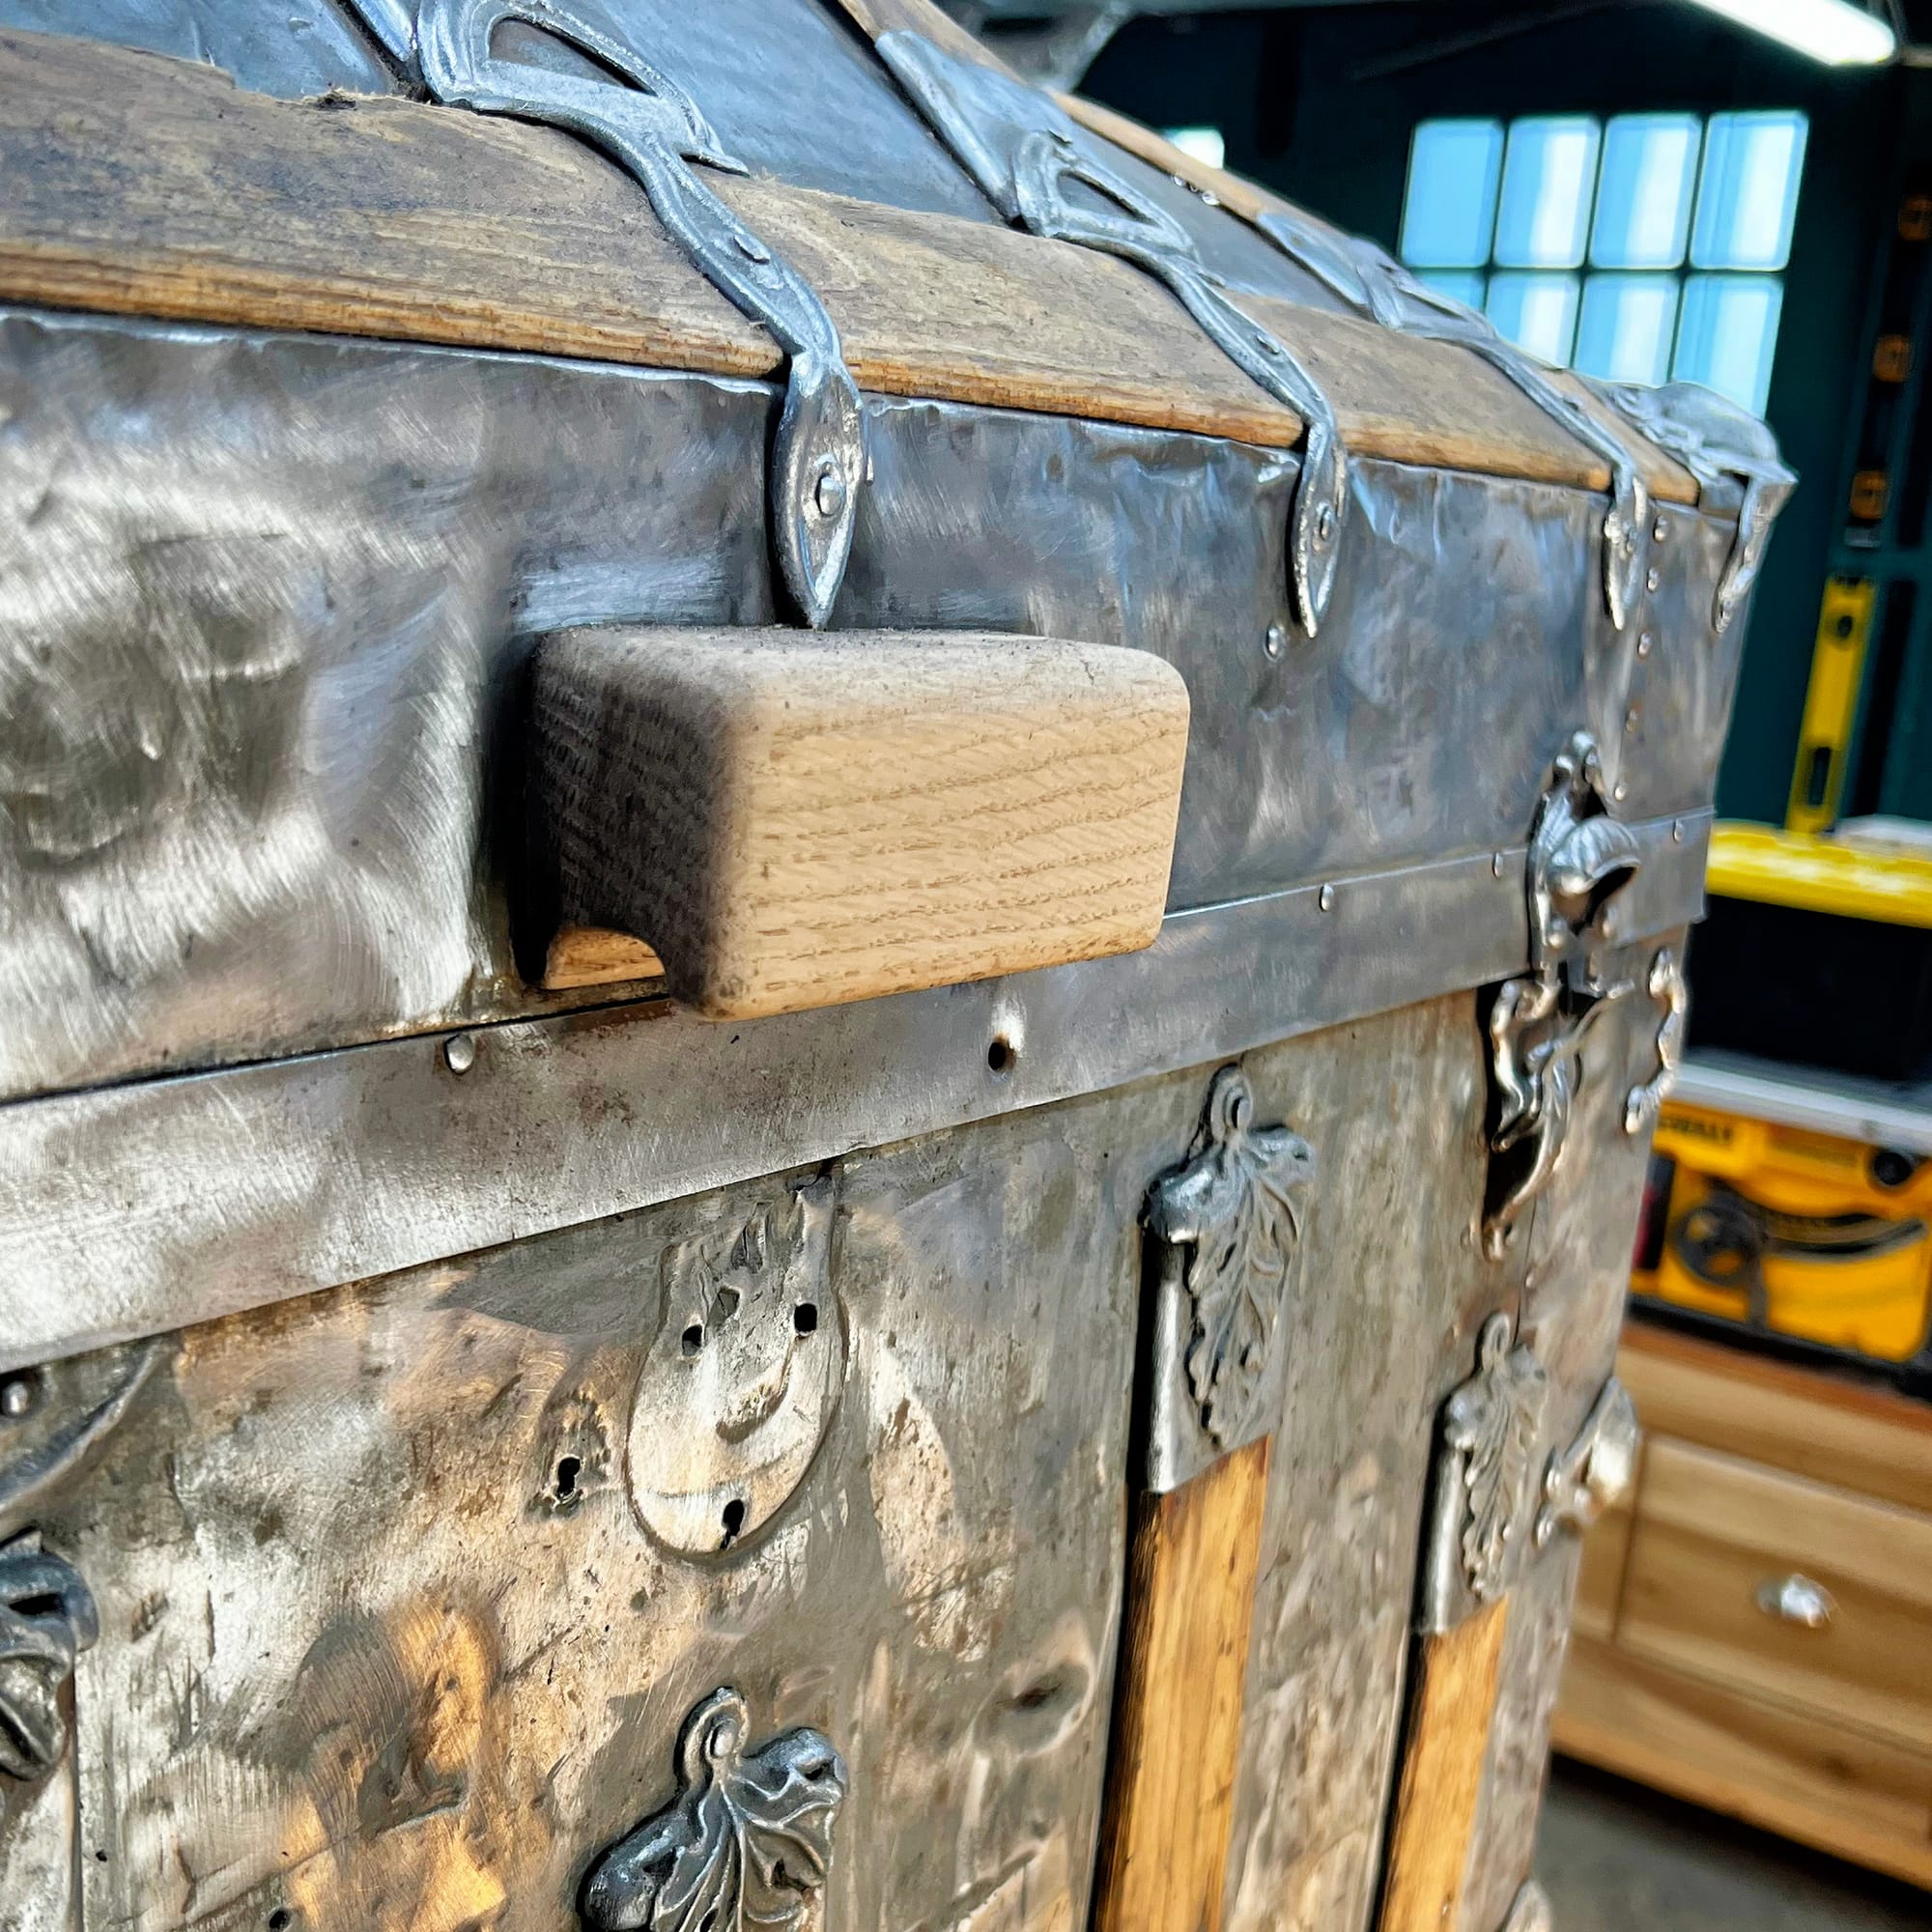
There are many dangerously sharp spots on the exterior. I'm pounding and filing some of them smooth, but the base is rusted out and jagged all around, so I'm going to build some hardwood trim to go around the bottom edge to make it smooth and clean and safe.
There were originally four small iron rollers under the corners, but one is missing and another is damaged and doesn't turn. I need to shore up the base anyway (because the metal is rusted through in spots - looks like it was sitting in standing water at some point), so I'm going to remove these rollers and add two sturdy hardwood runners with smooth plastic casters that don't damage our wood floor in the parlor.
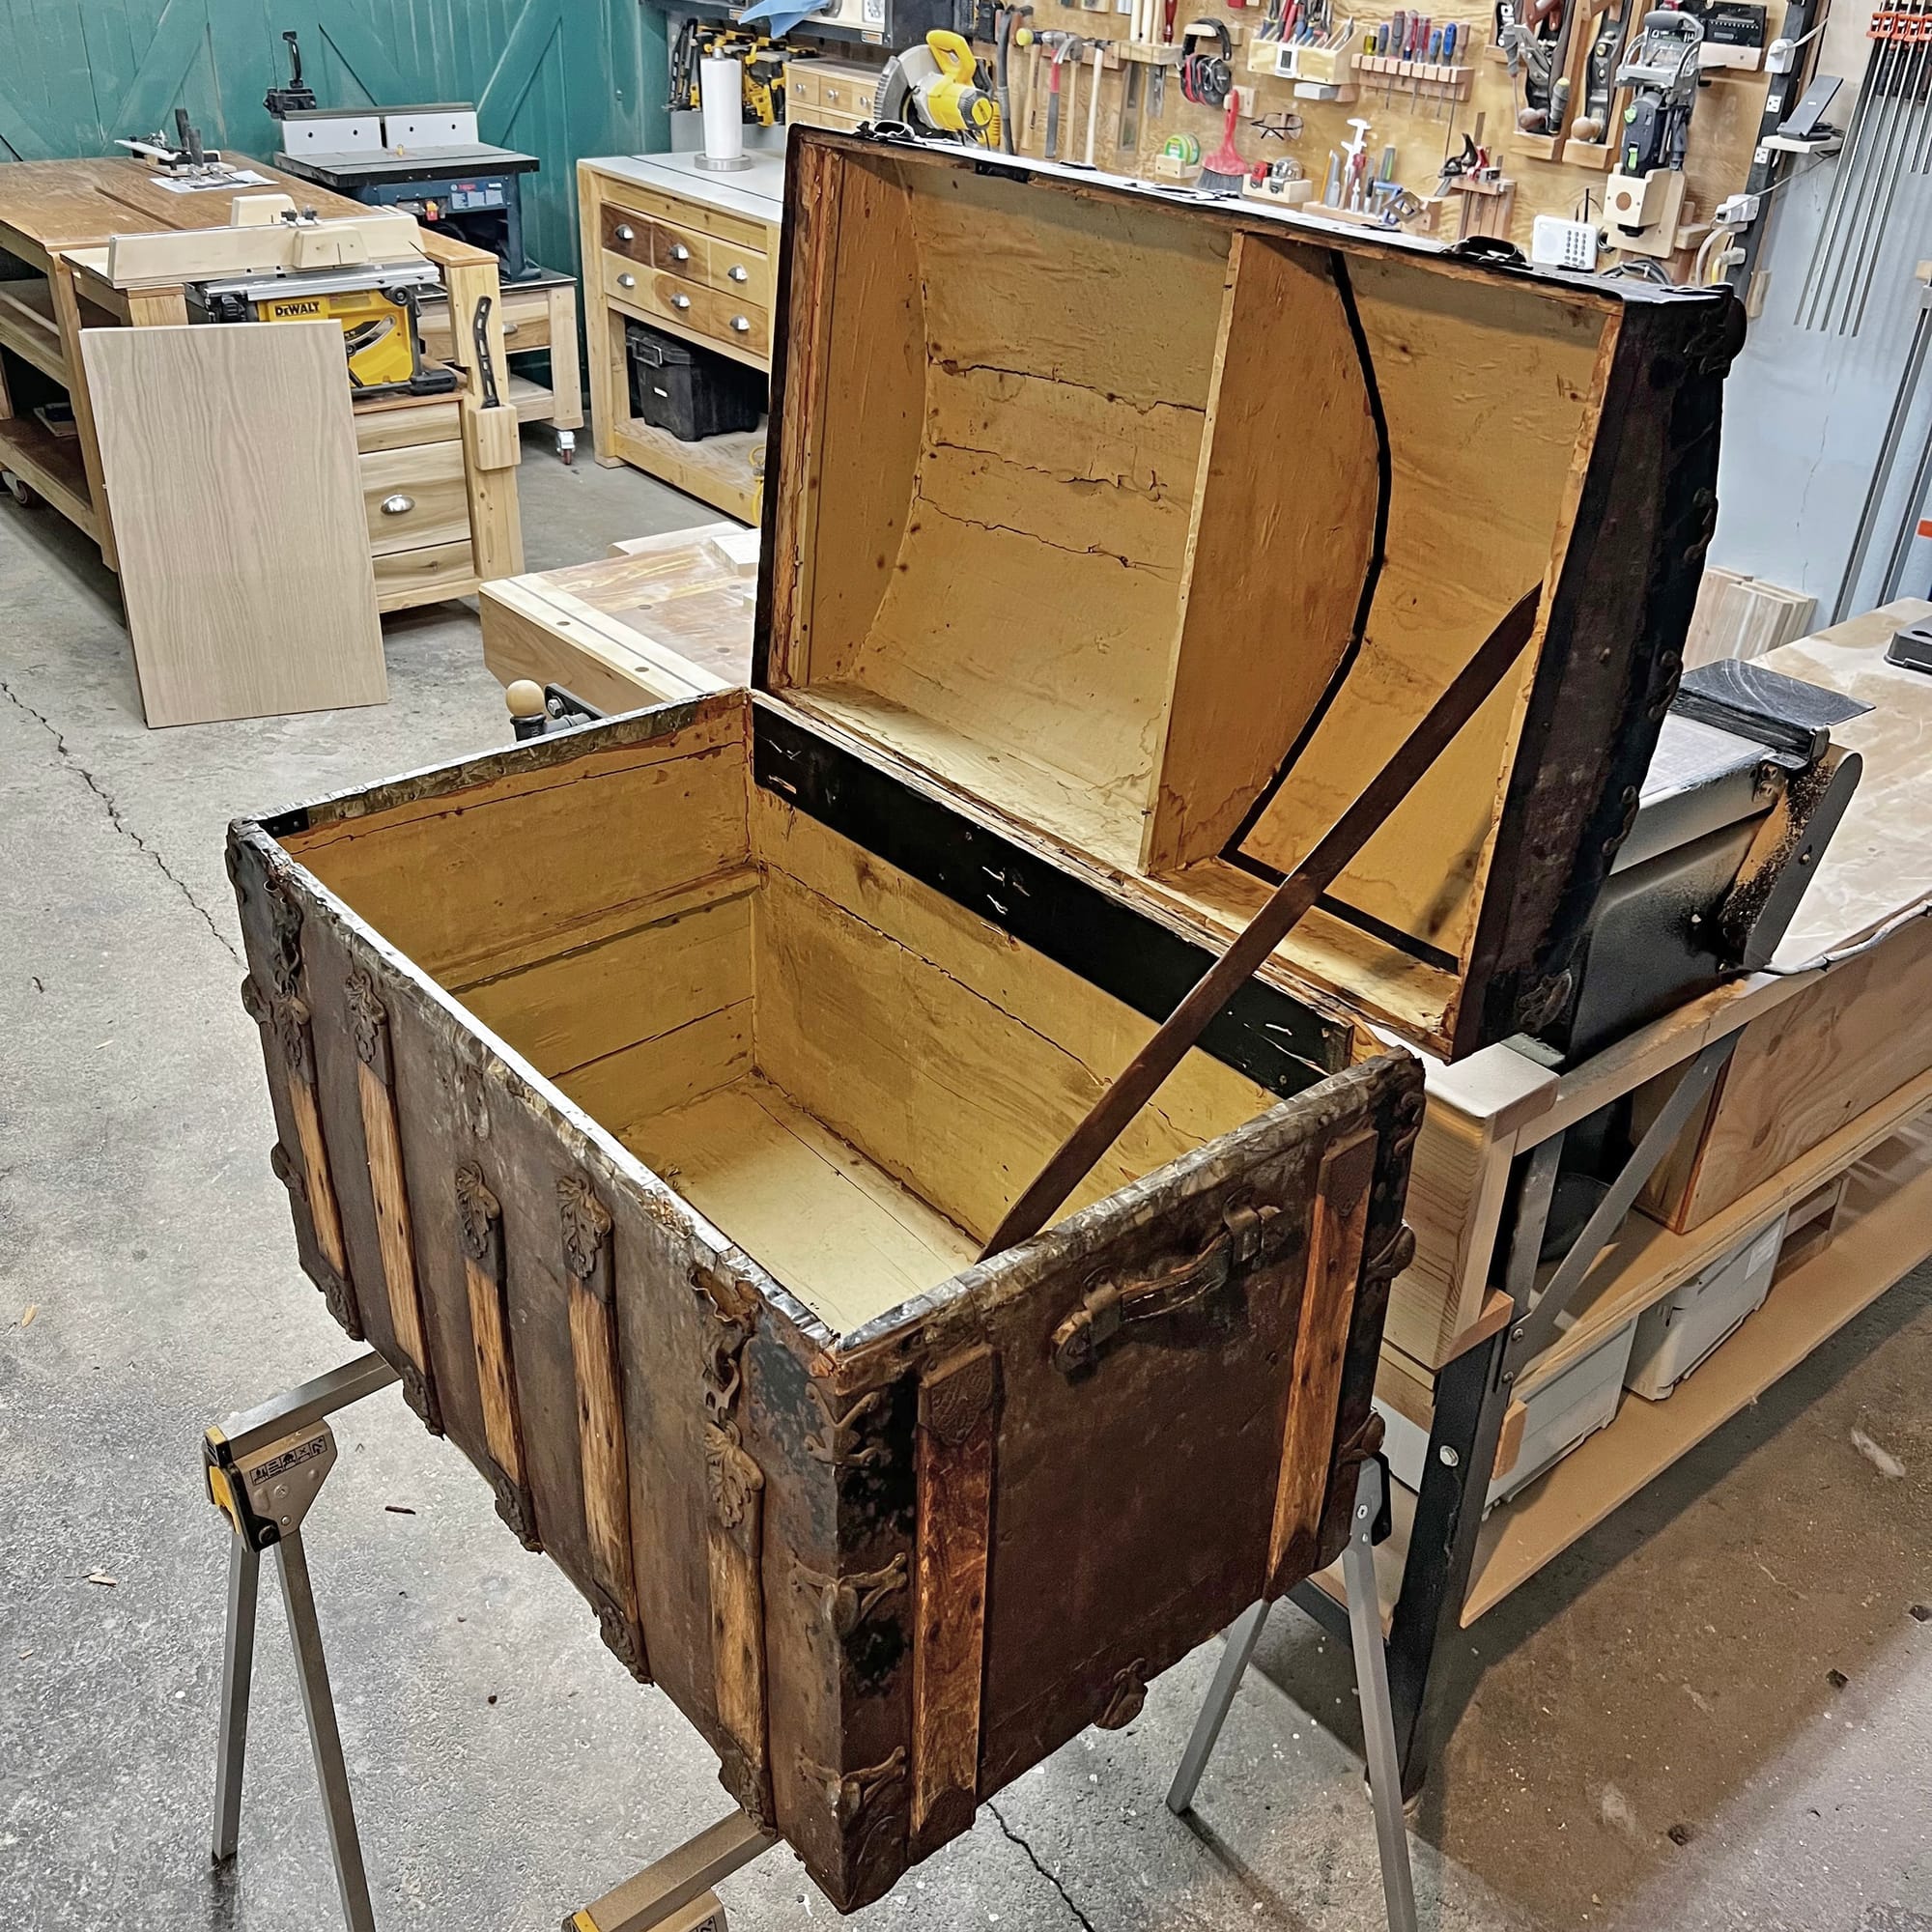
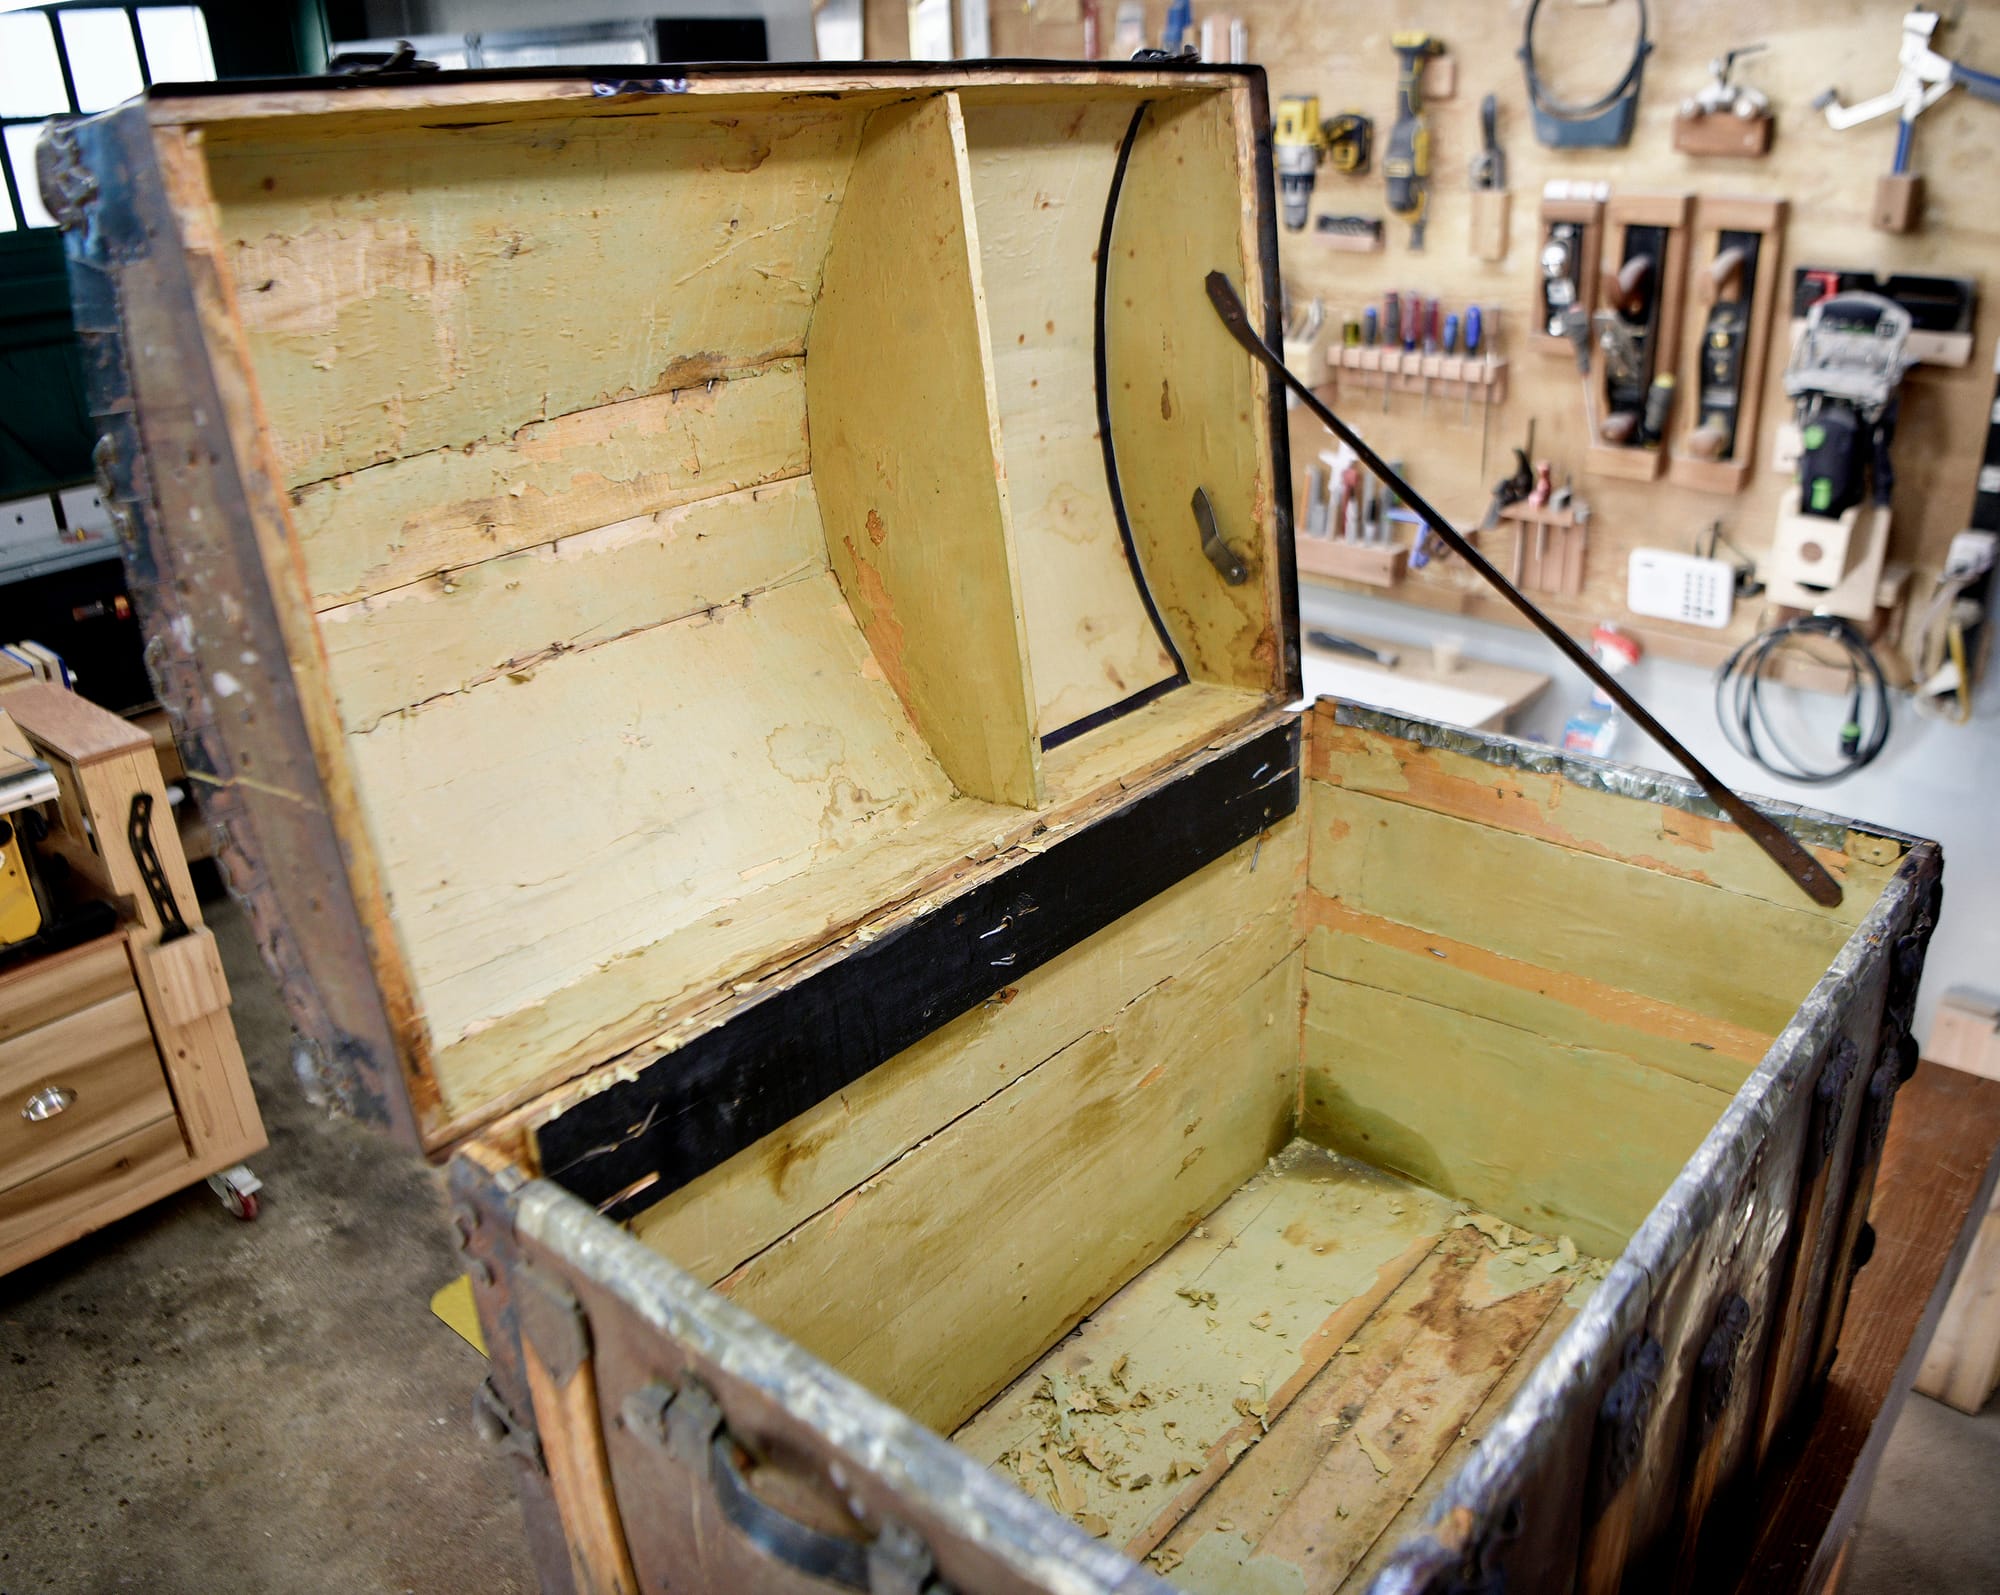
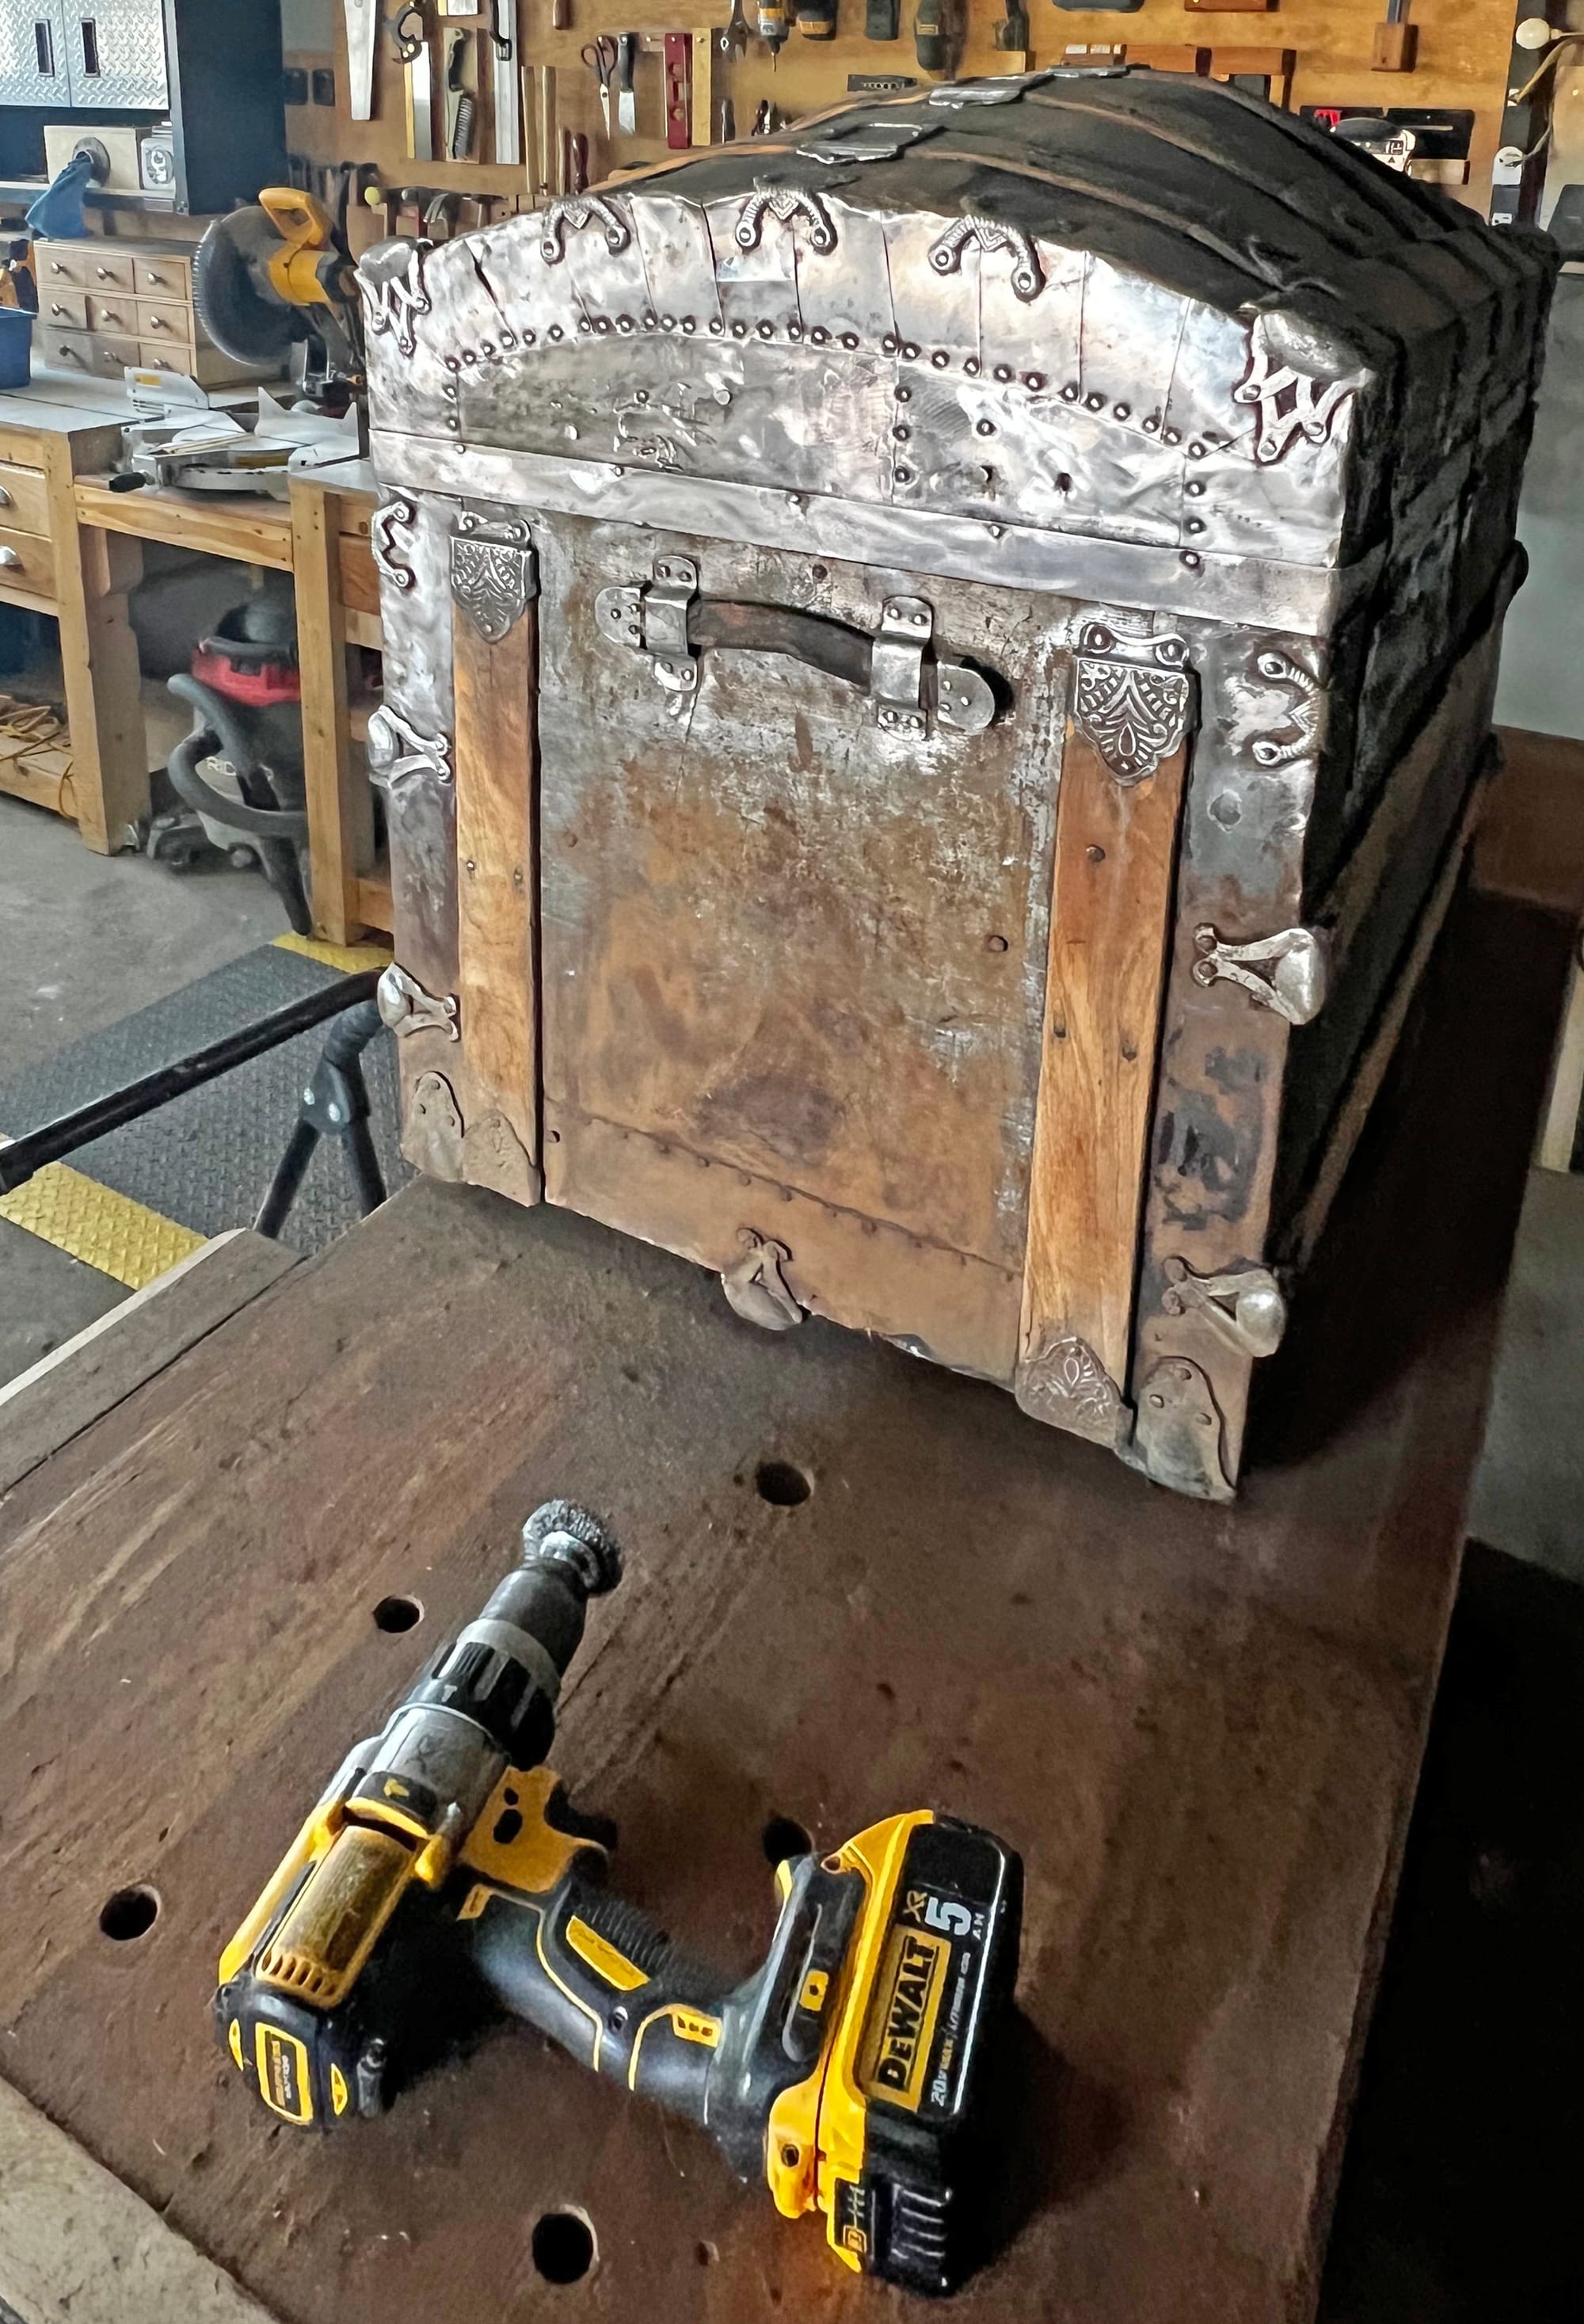
First look at the interior. The leather strap to hold the top open is in great shape, and the leather handles on the ends are in good shape, too. It's possible for one person to lift the trunk when it's empty, if your arms are long enough to reach around the sides to both handles, but when it was fully loaded two people would have lifted it with those handles.
Our goal is to use this chest to hold the quilts that Megan has been making, and the interior is going to need a lot of work before then. It needs some structural work (that black board was a makeshift repair of a large crack across the back, for example), and it smells pretty bad inside from 150 years of decay and deterioration. So I'm going to remove the lining paper and scrape and sand the interior down to bare cedar, and then we'll have a decision to make. If the nice smell of aromatic cedar returns, and the case is sturdy enough after I do some repairs, then I'll leave it with the original bare cedar. But if it still smells bad, I'll paint the original cedar to seal it up and then line it with fresh 1/8" cedar veneer.
From the research I've done, it looks like this was built as a men's steamer trunk, because the paper glued on the inside surfaces is a solid color - women's steamer trunks were typically lined with floral patterns, and men's steamer trunks with solid colors.
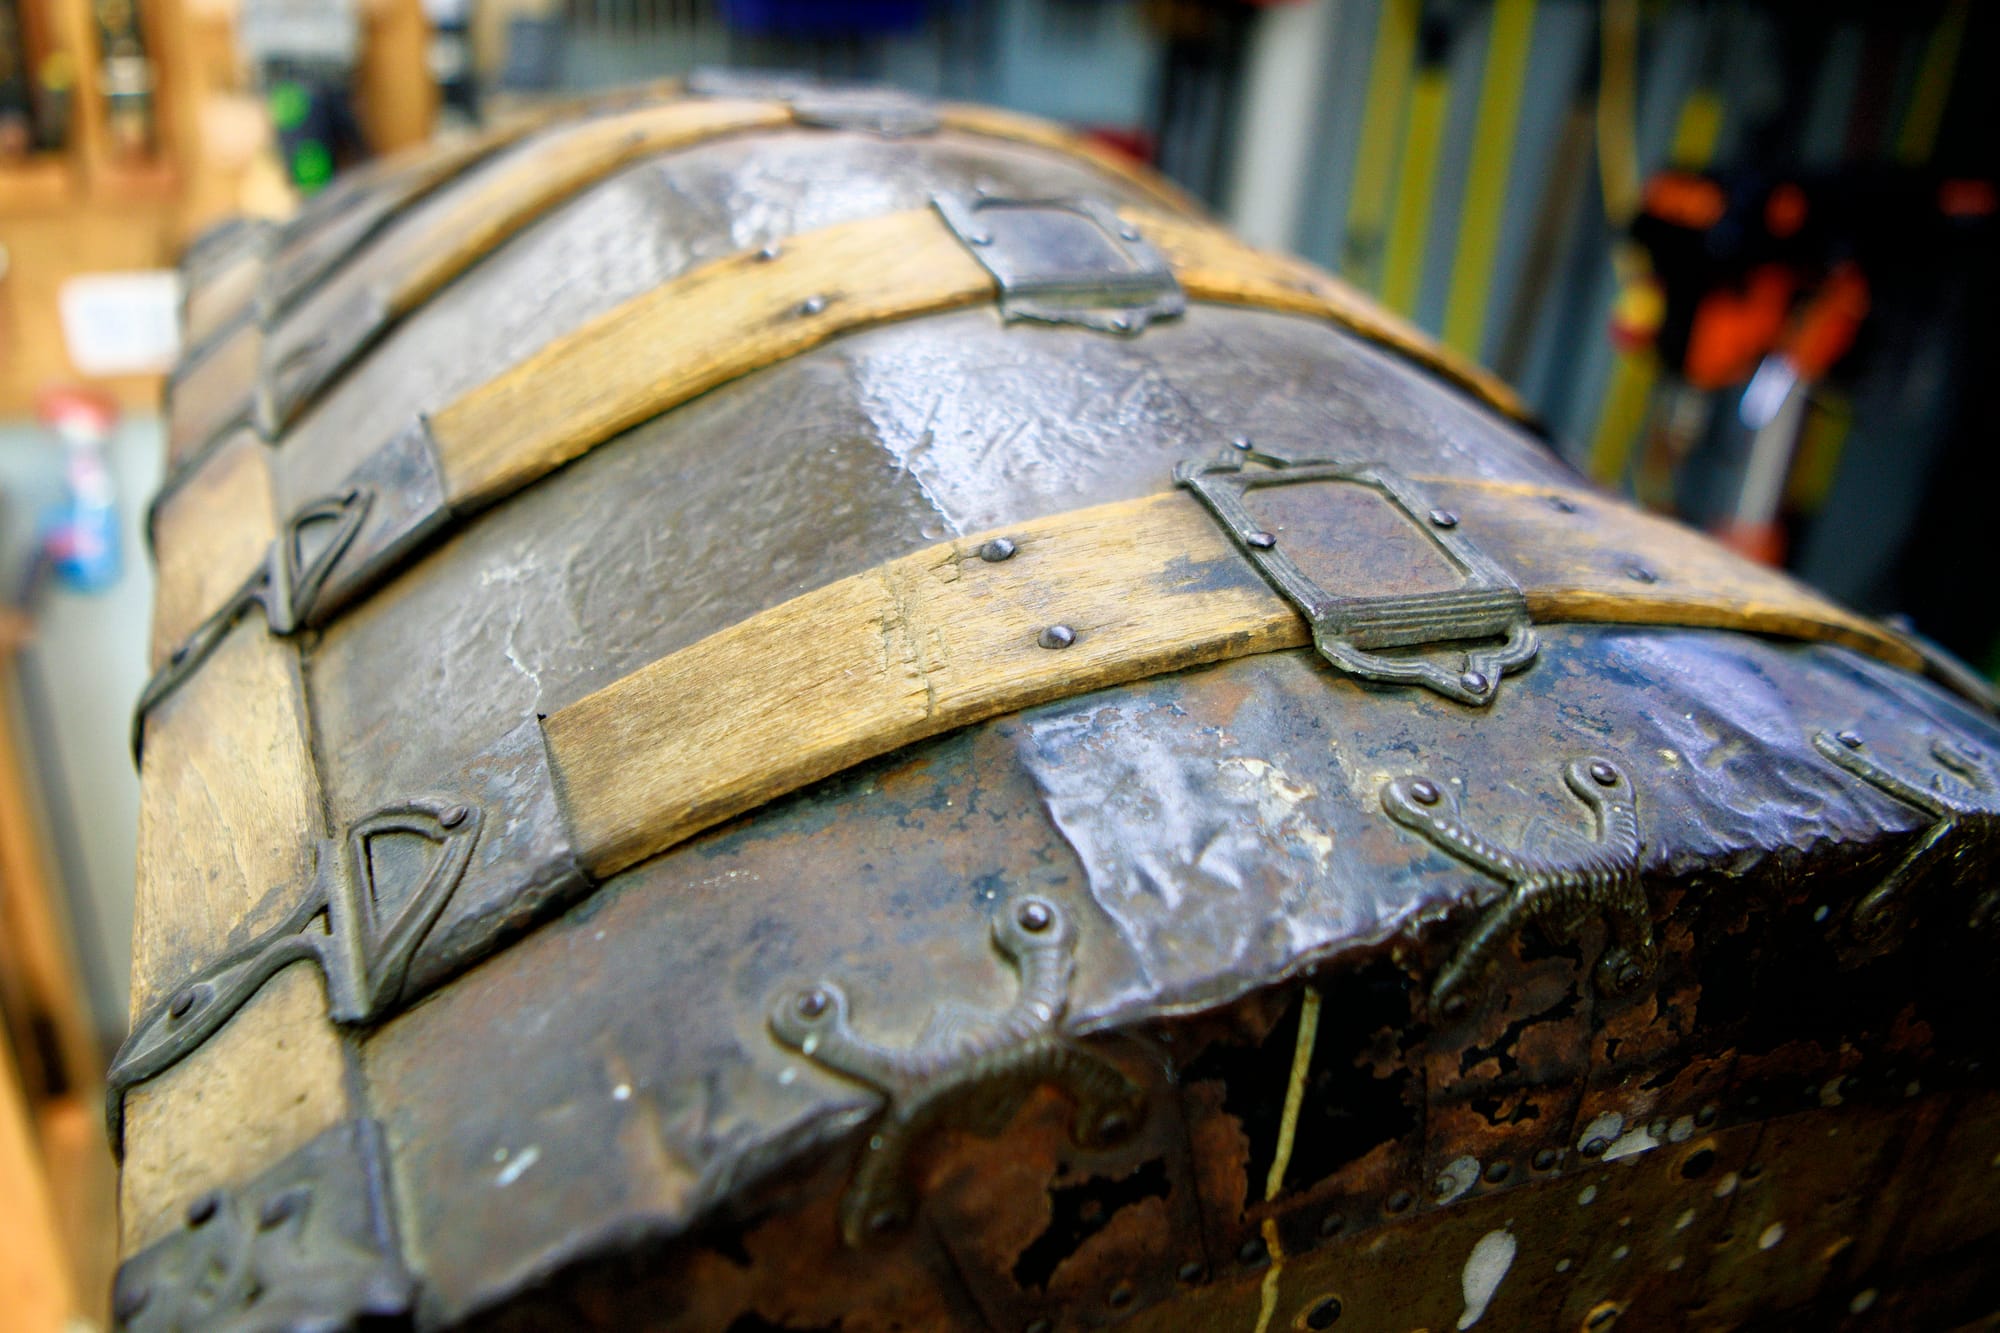
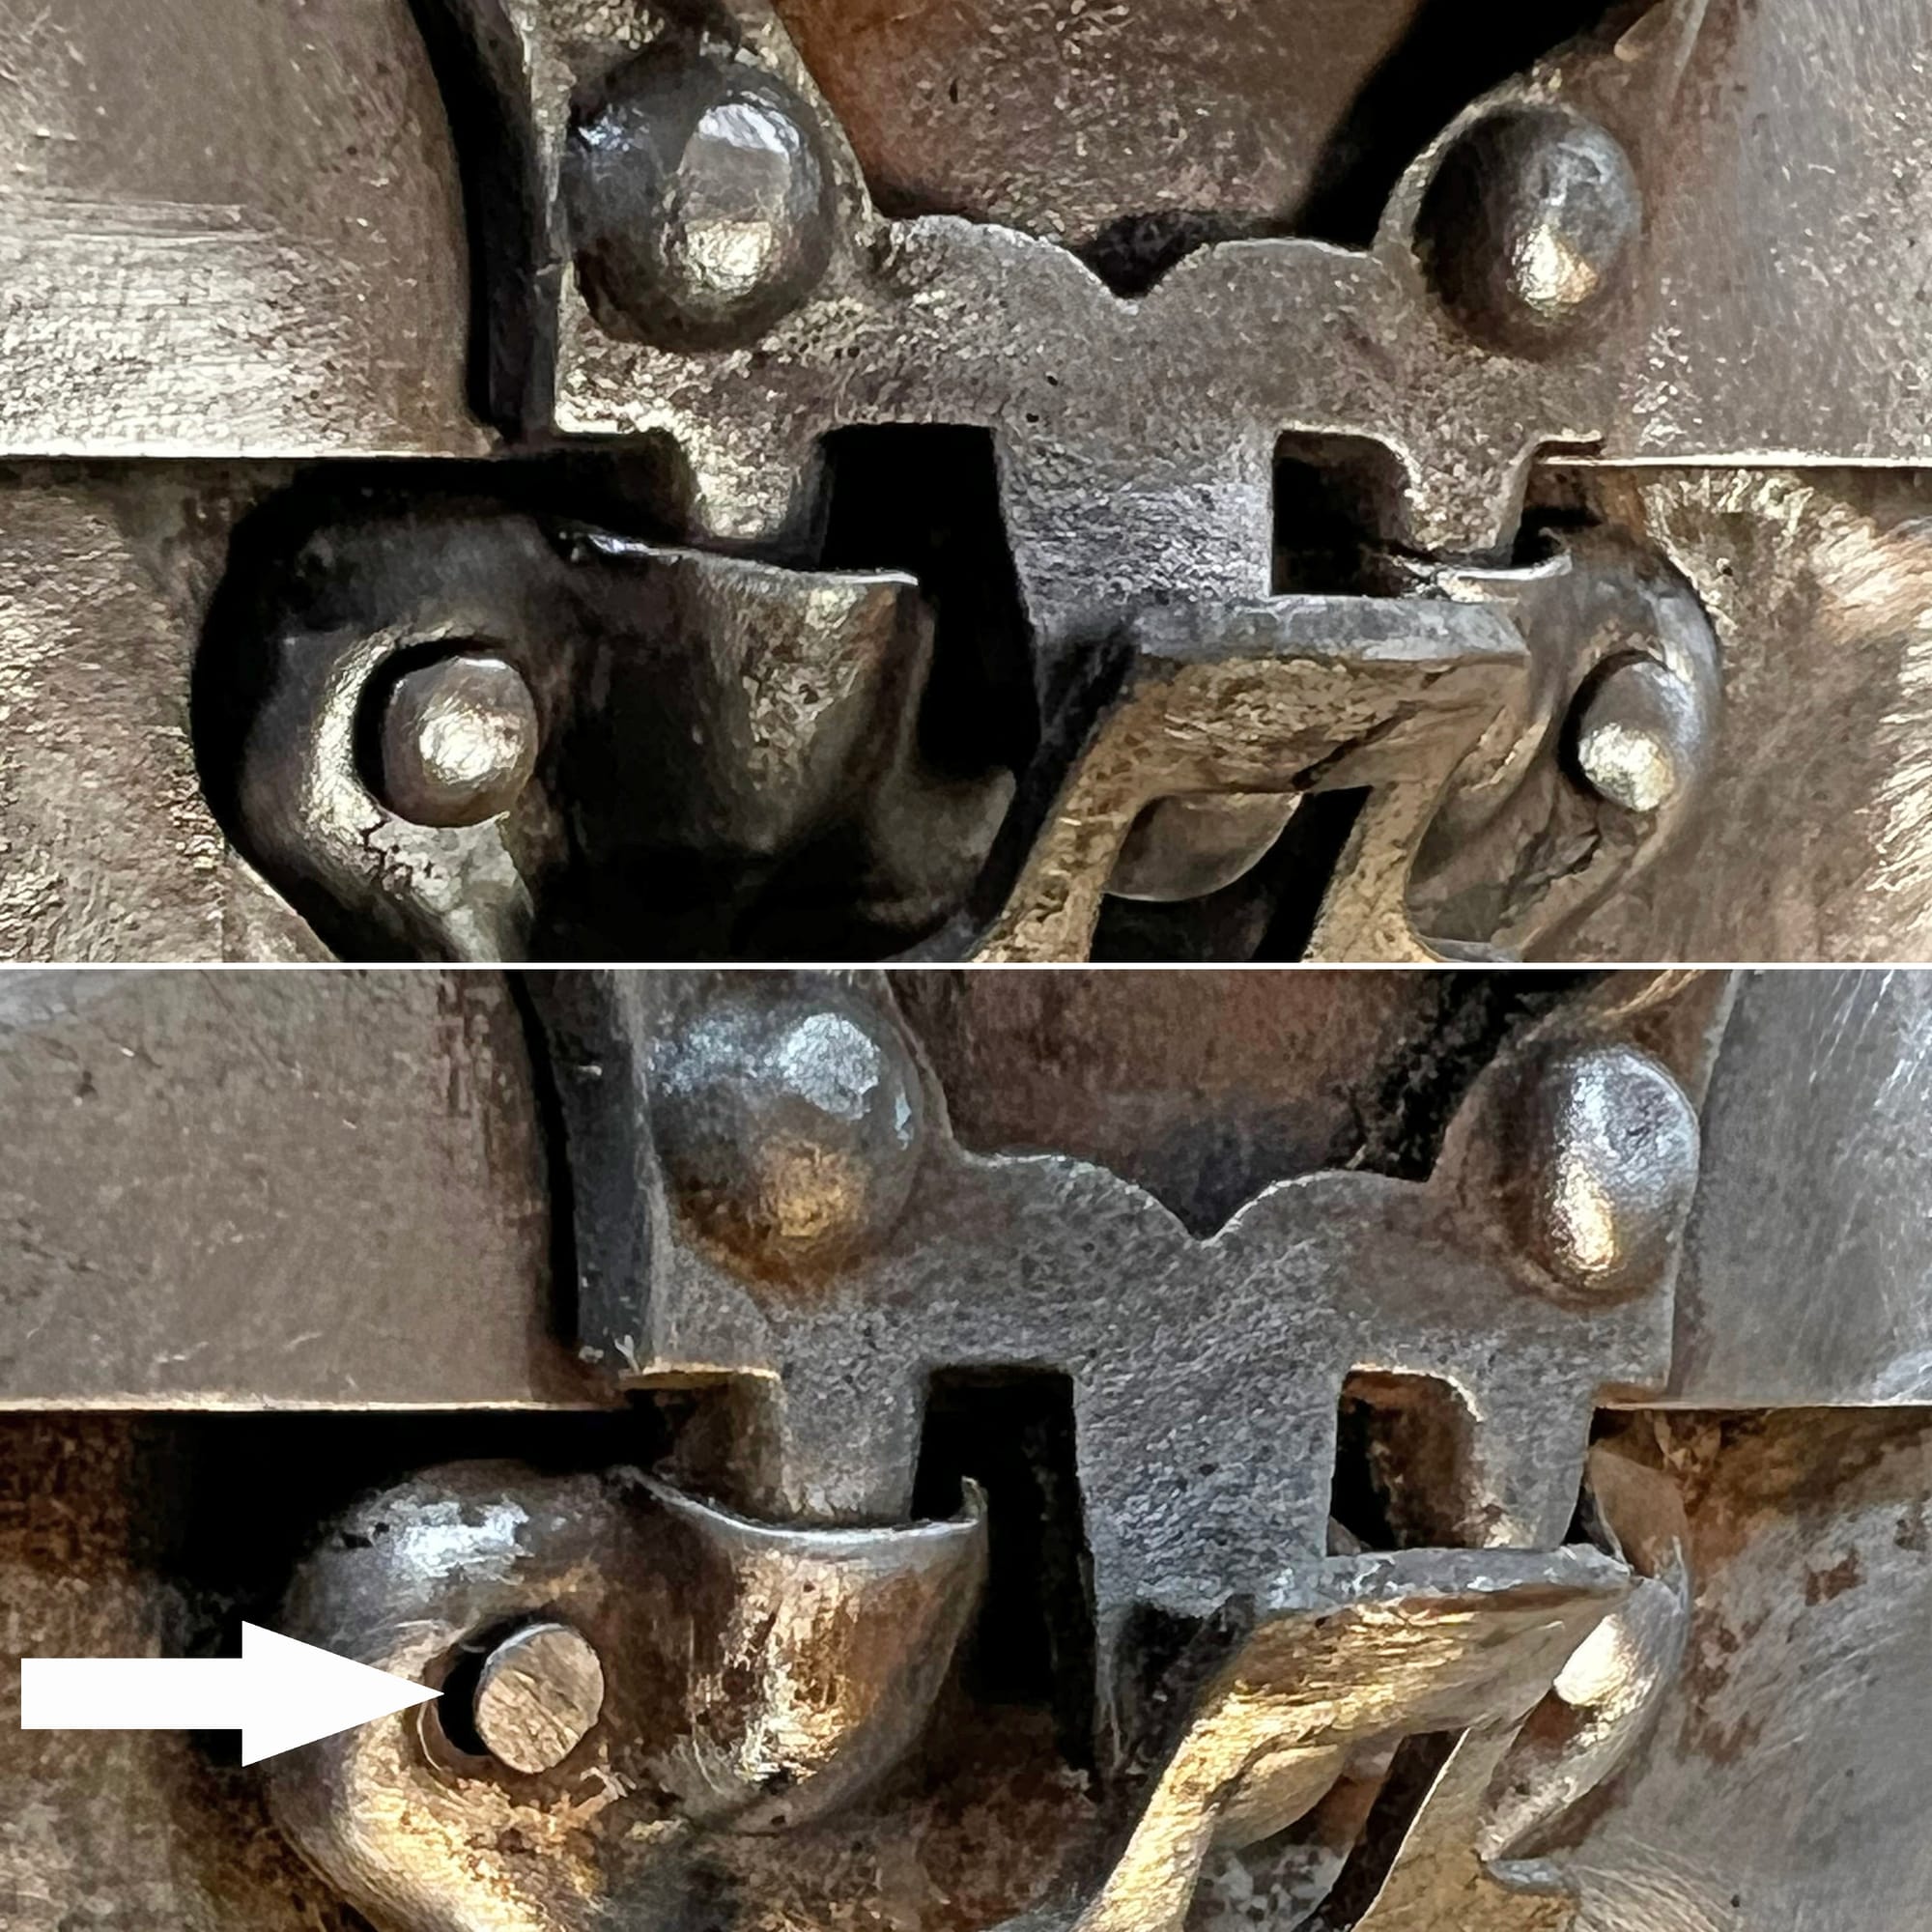
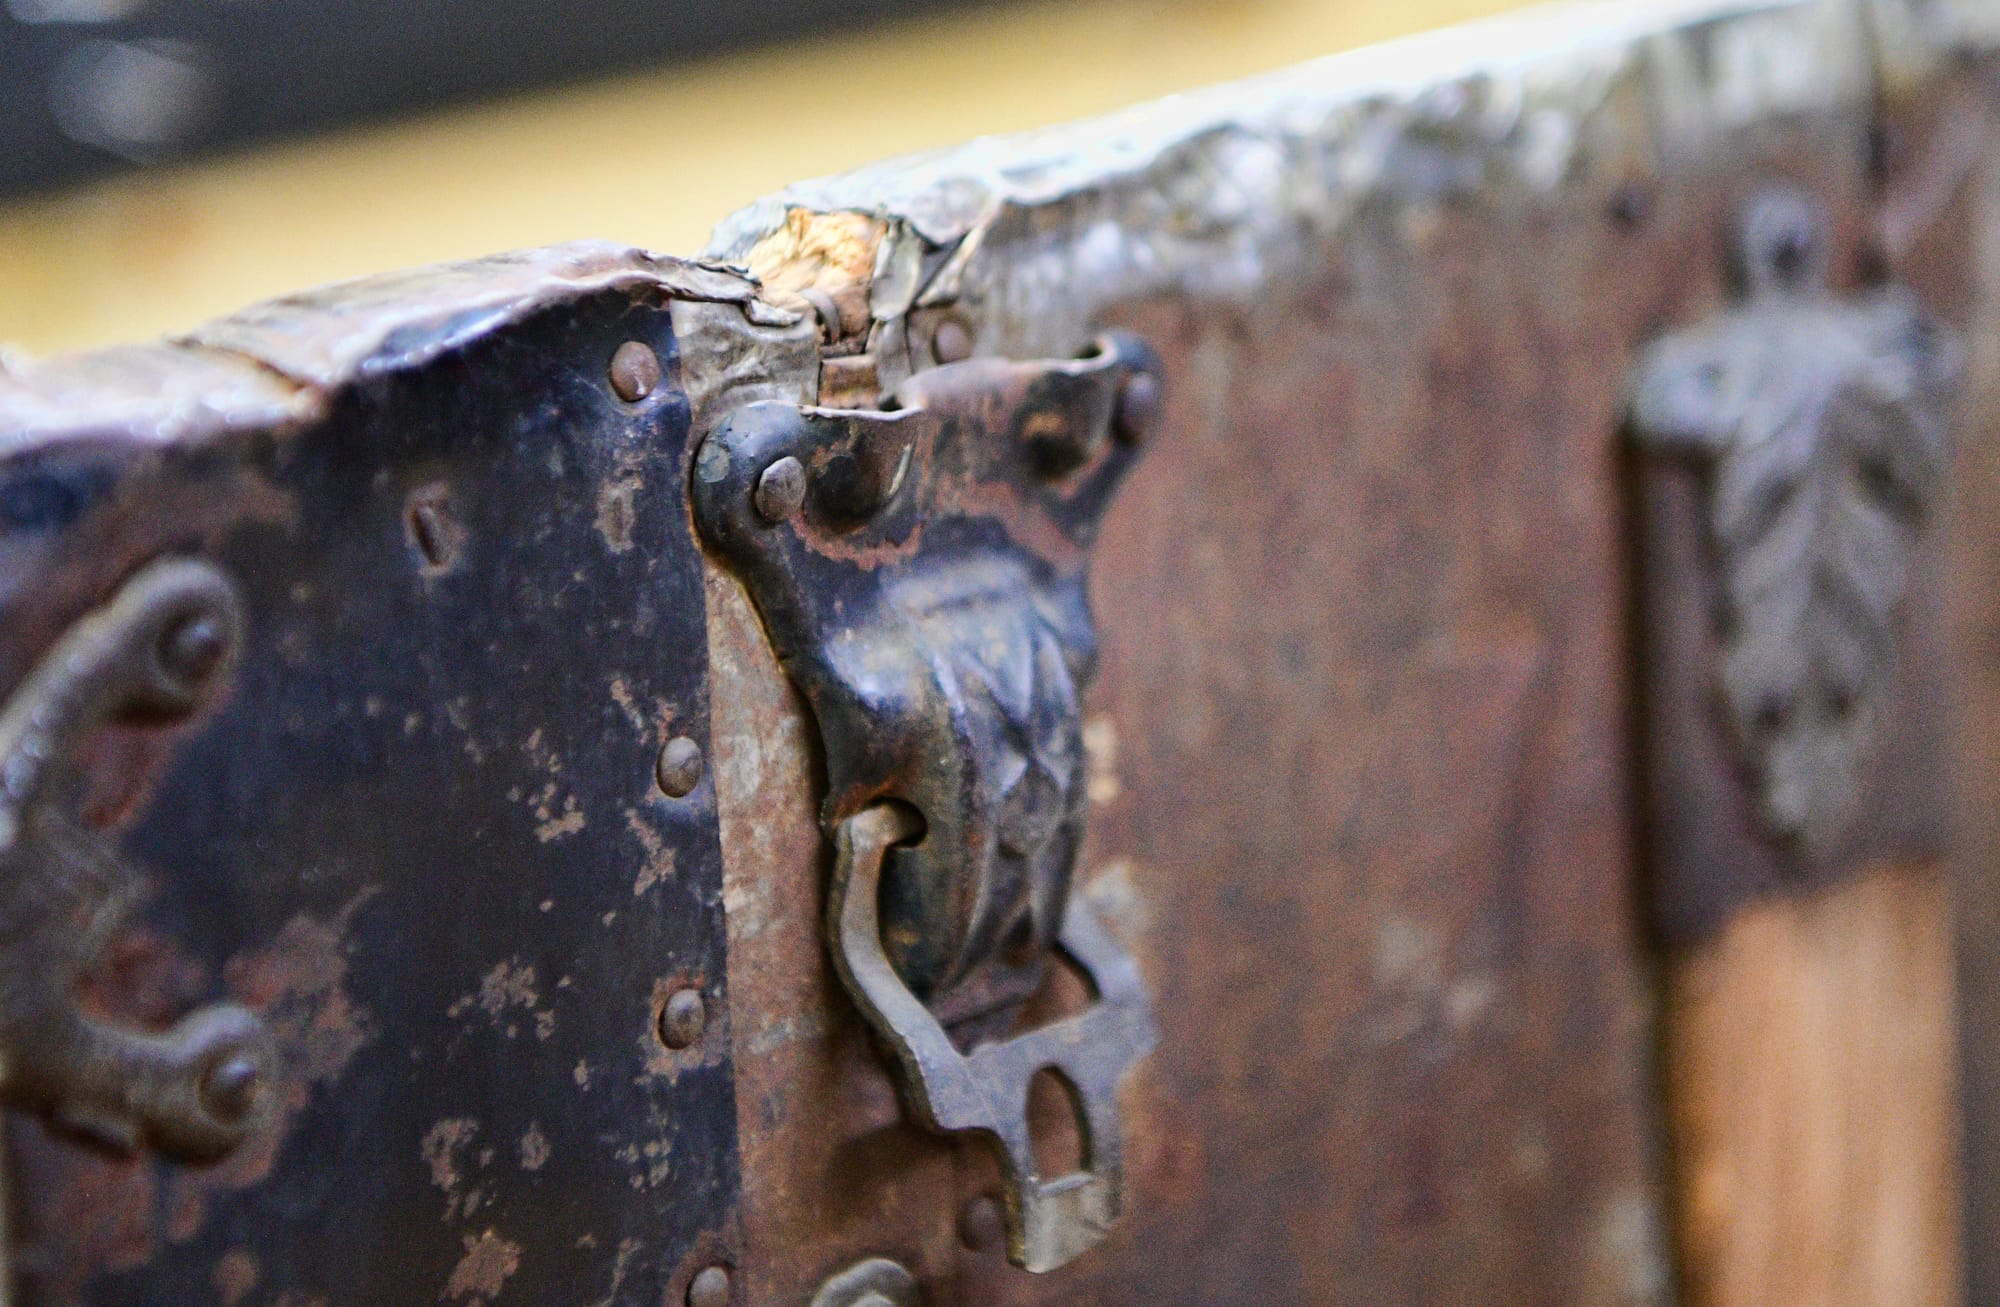
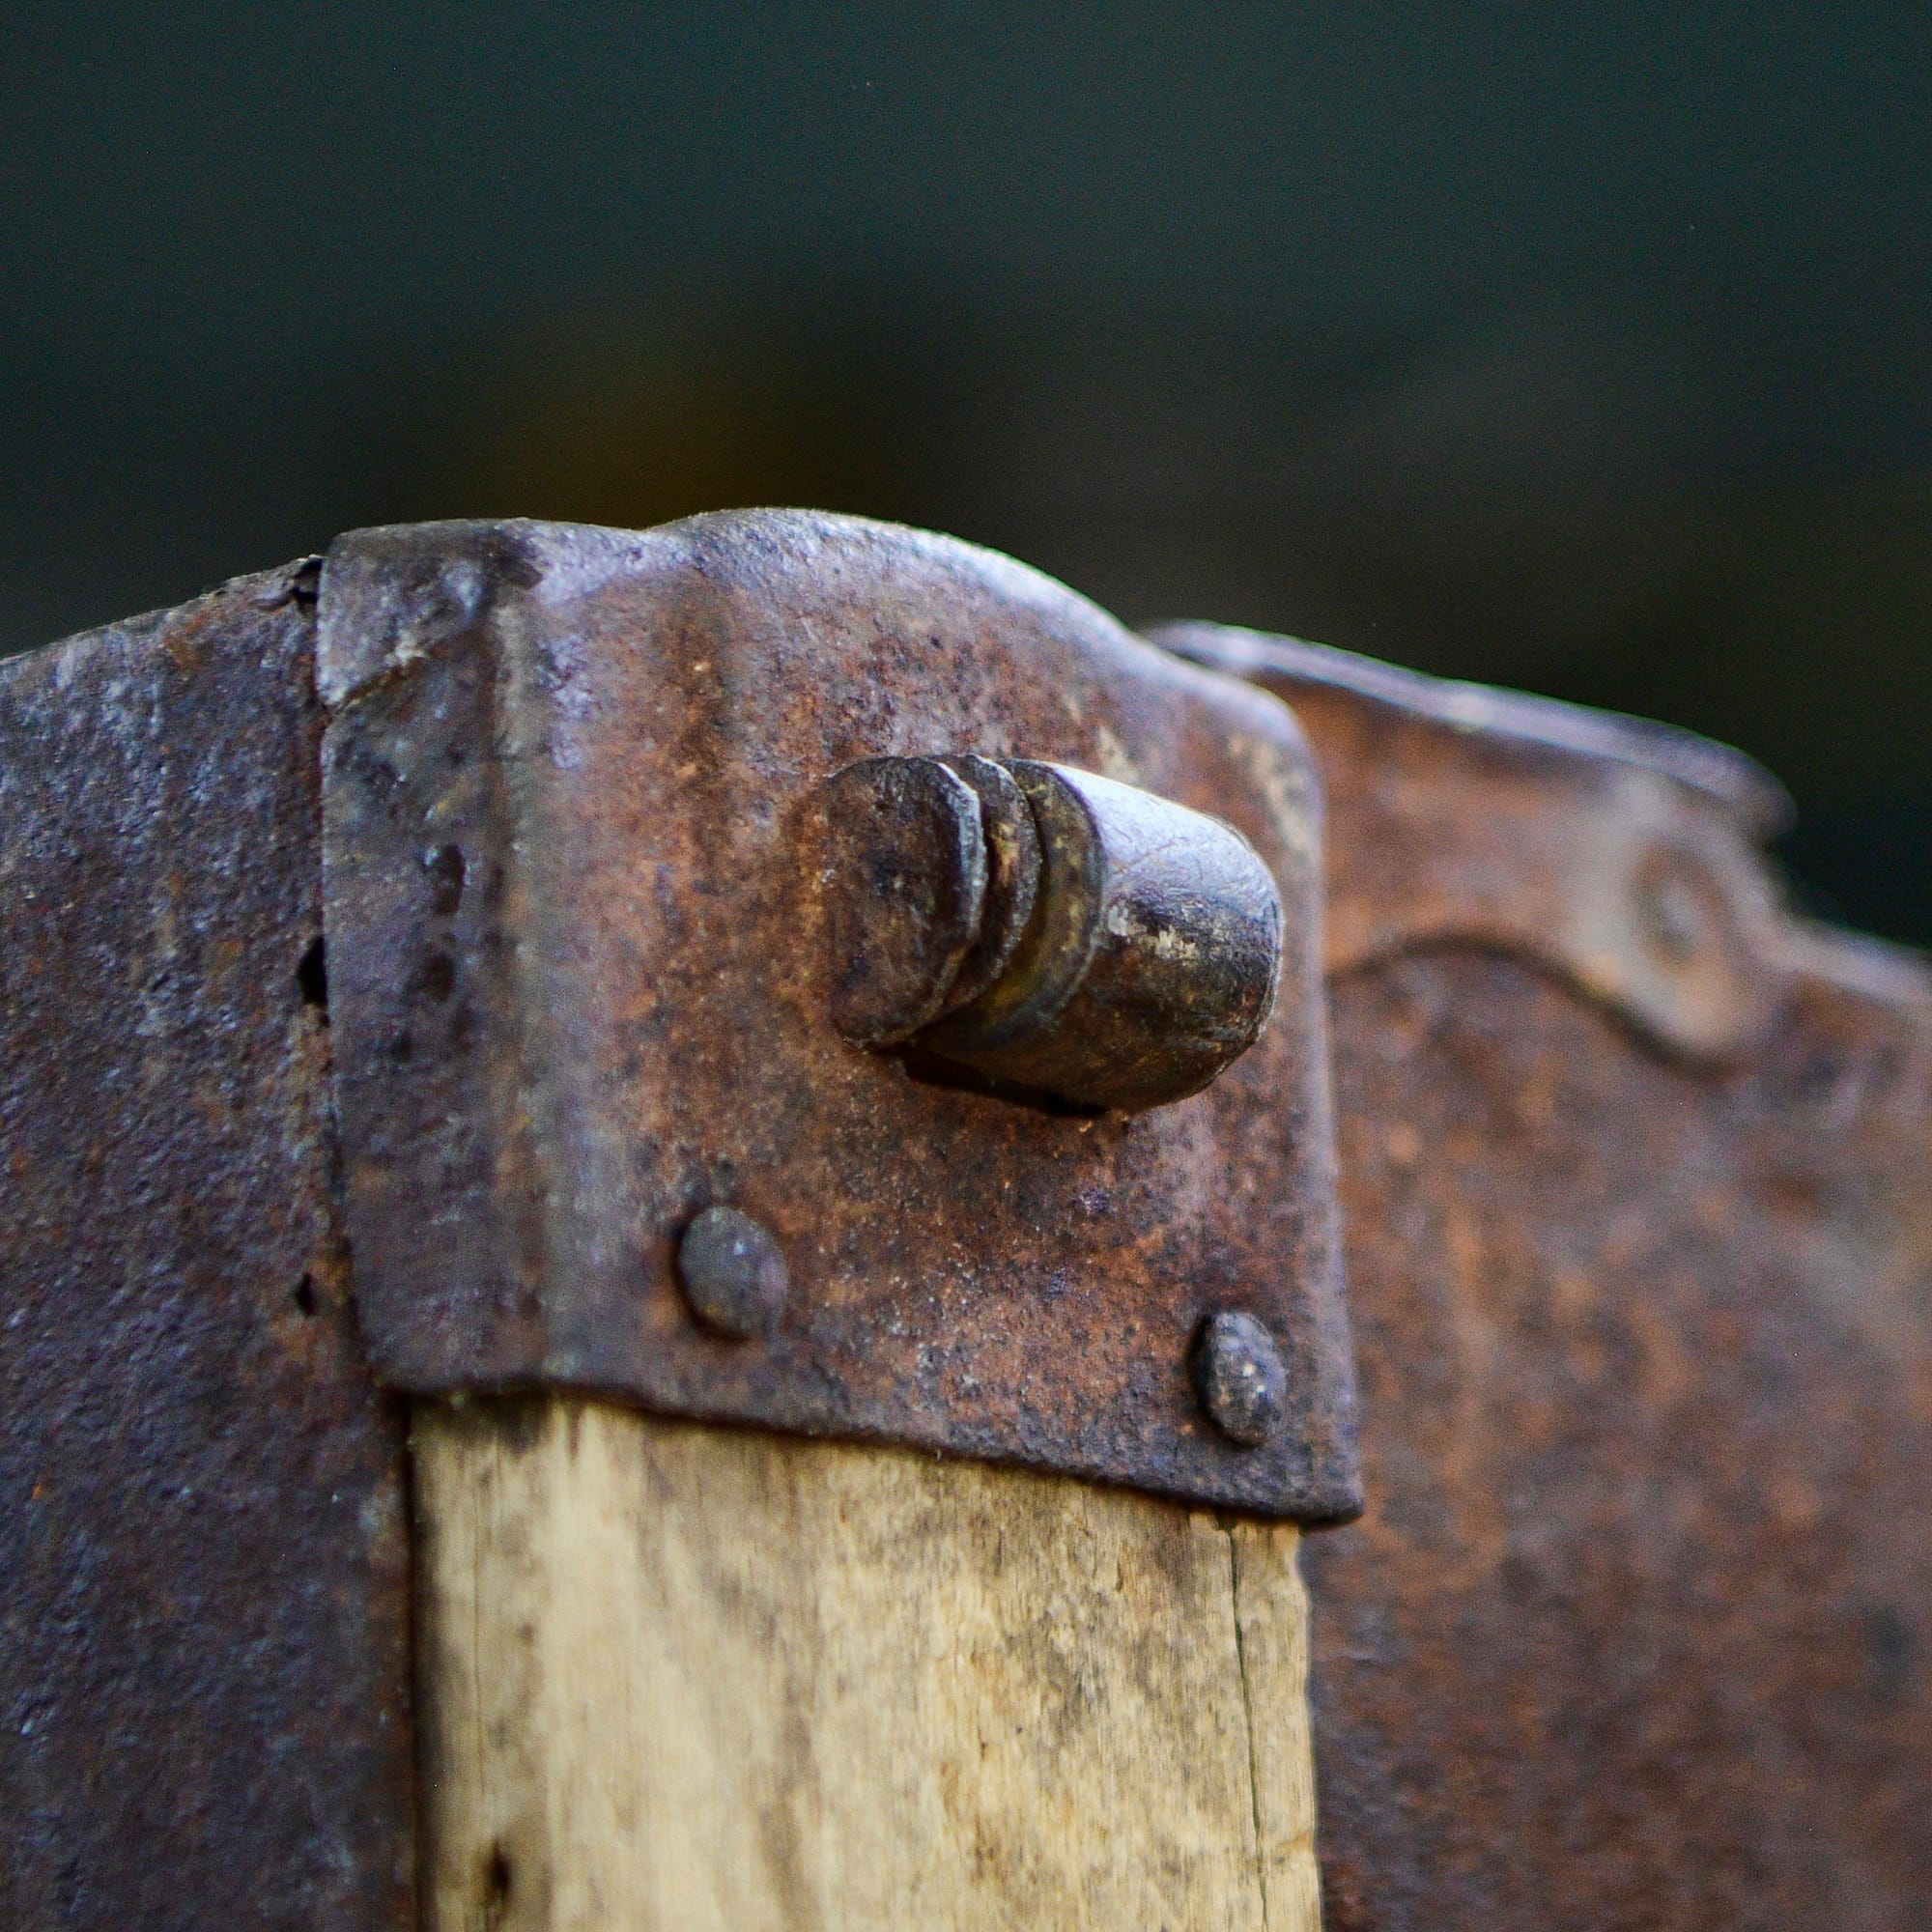
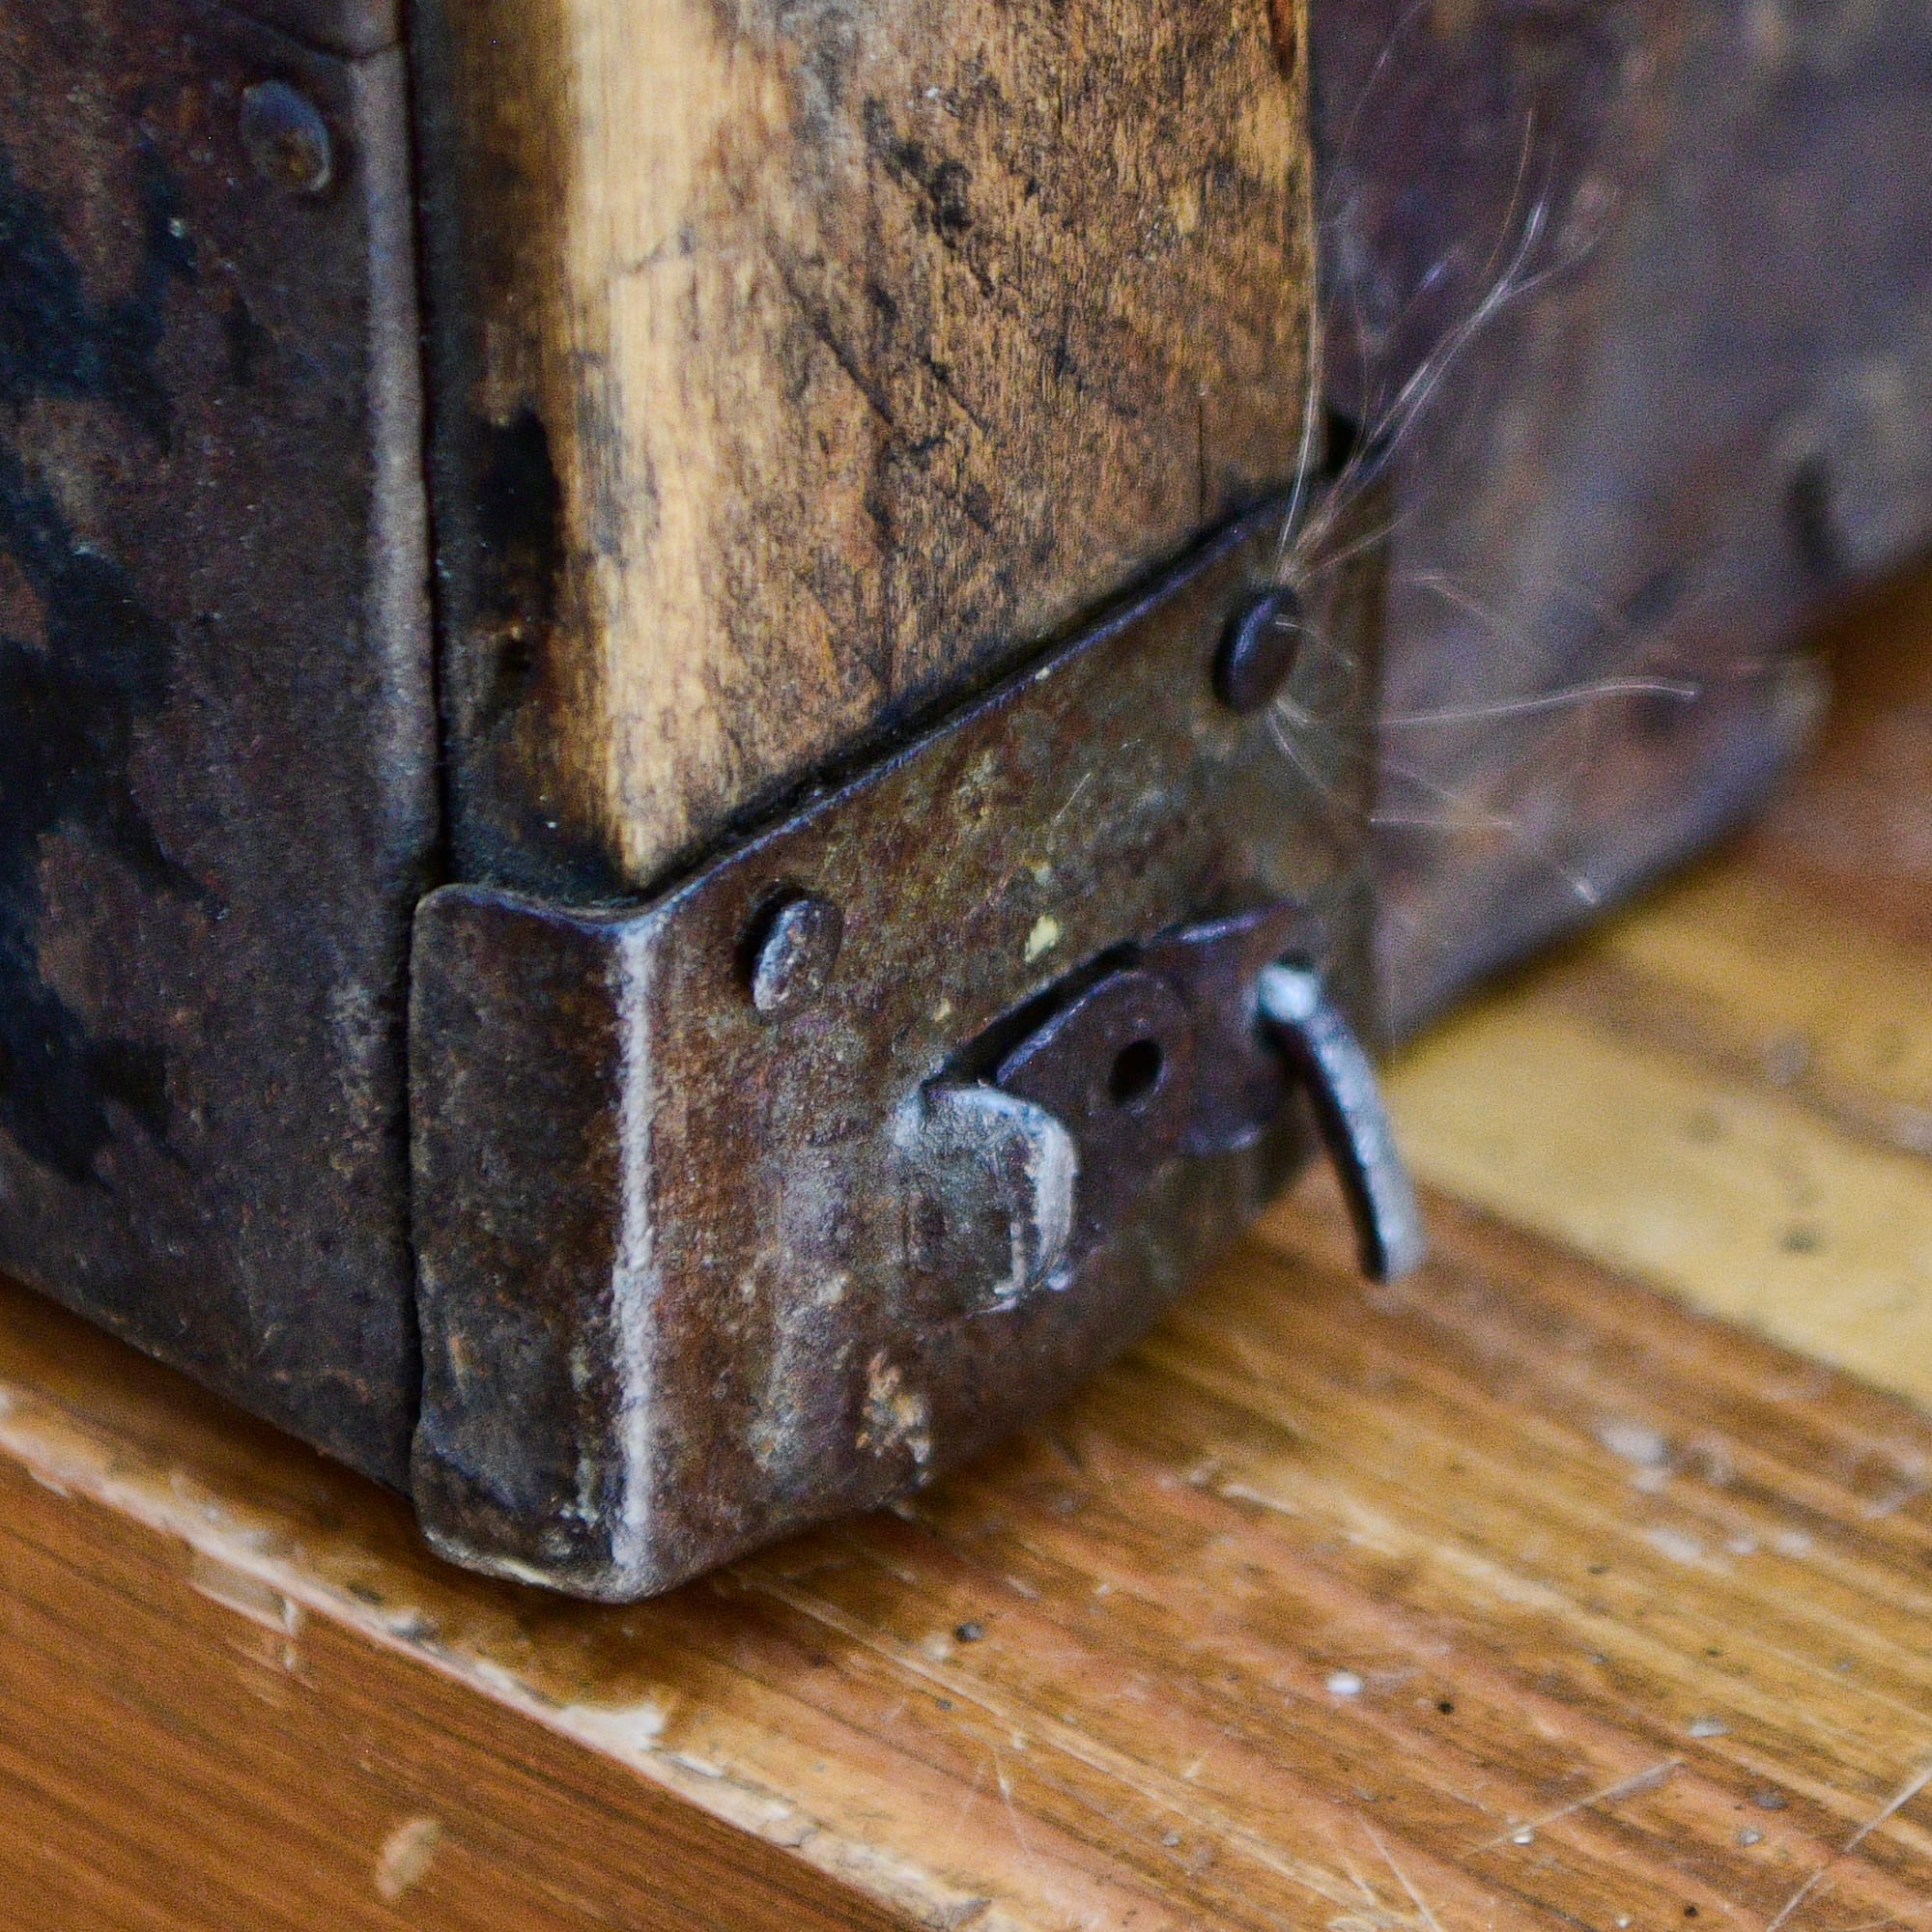
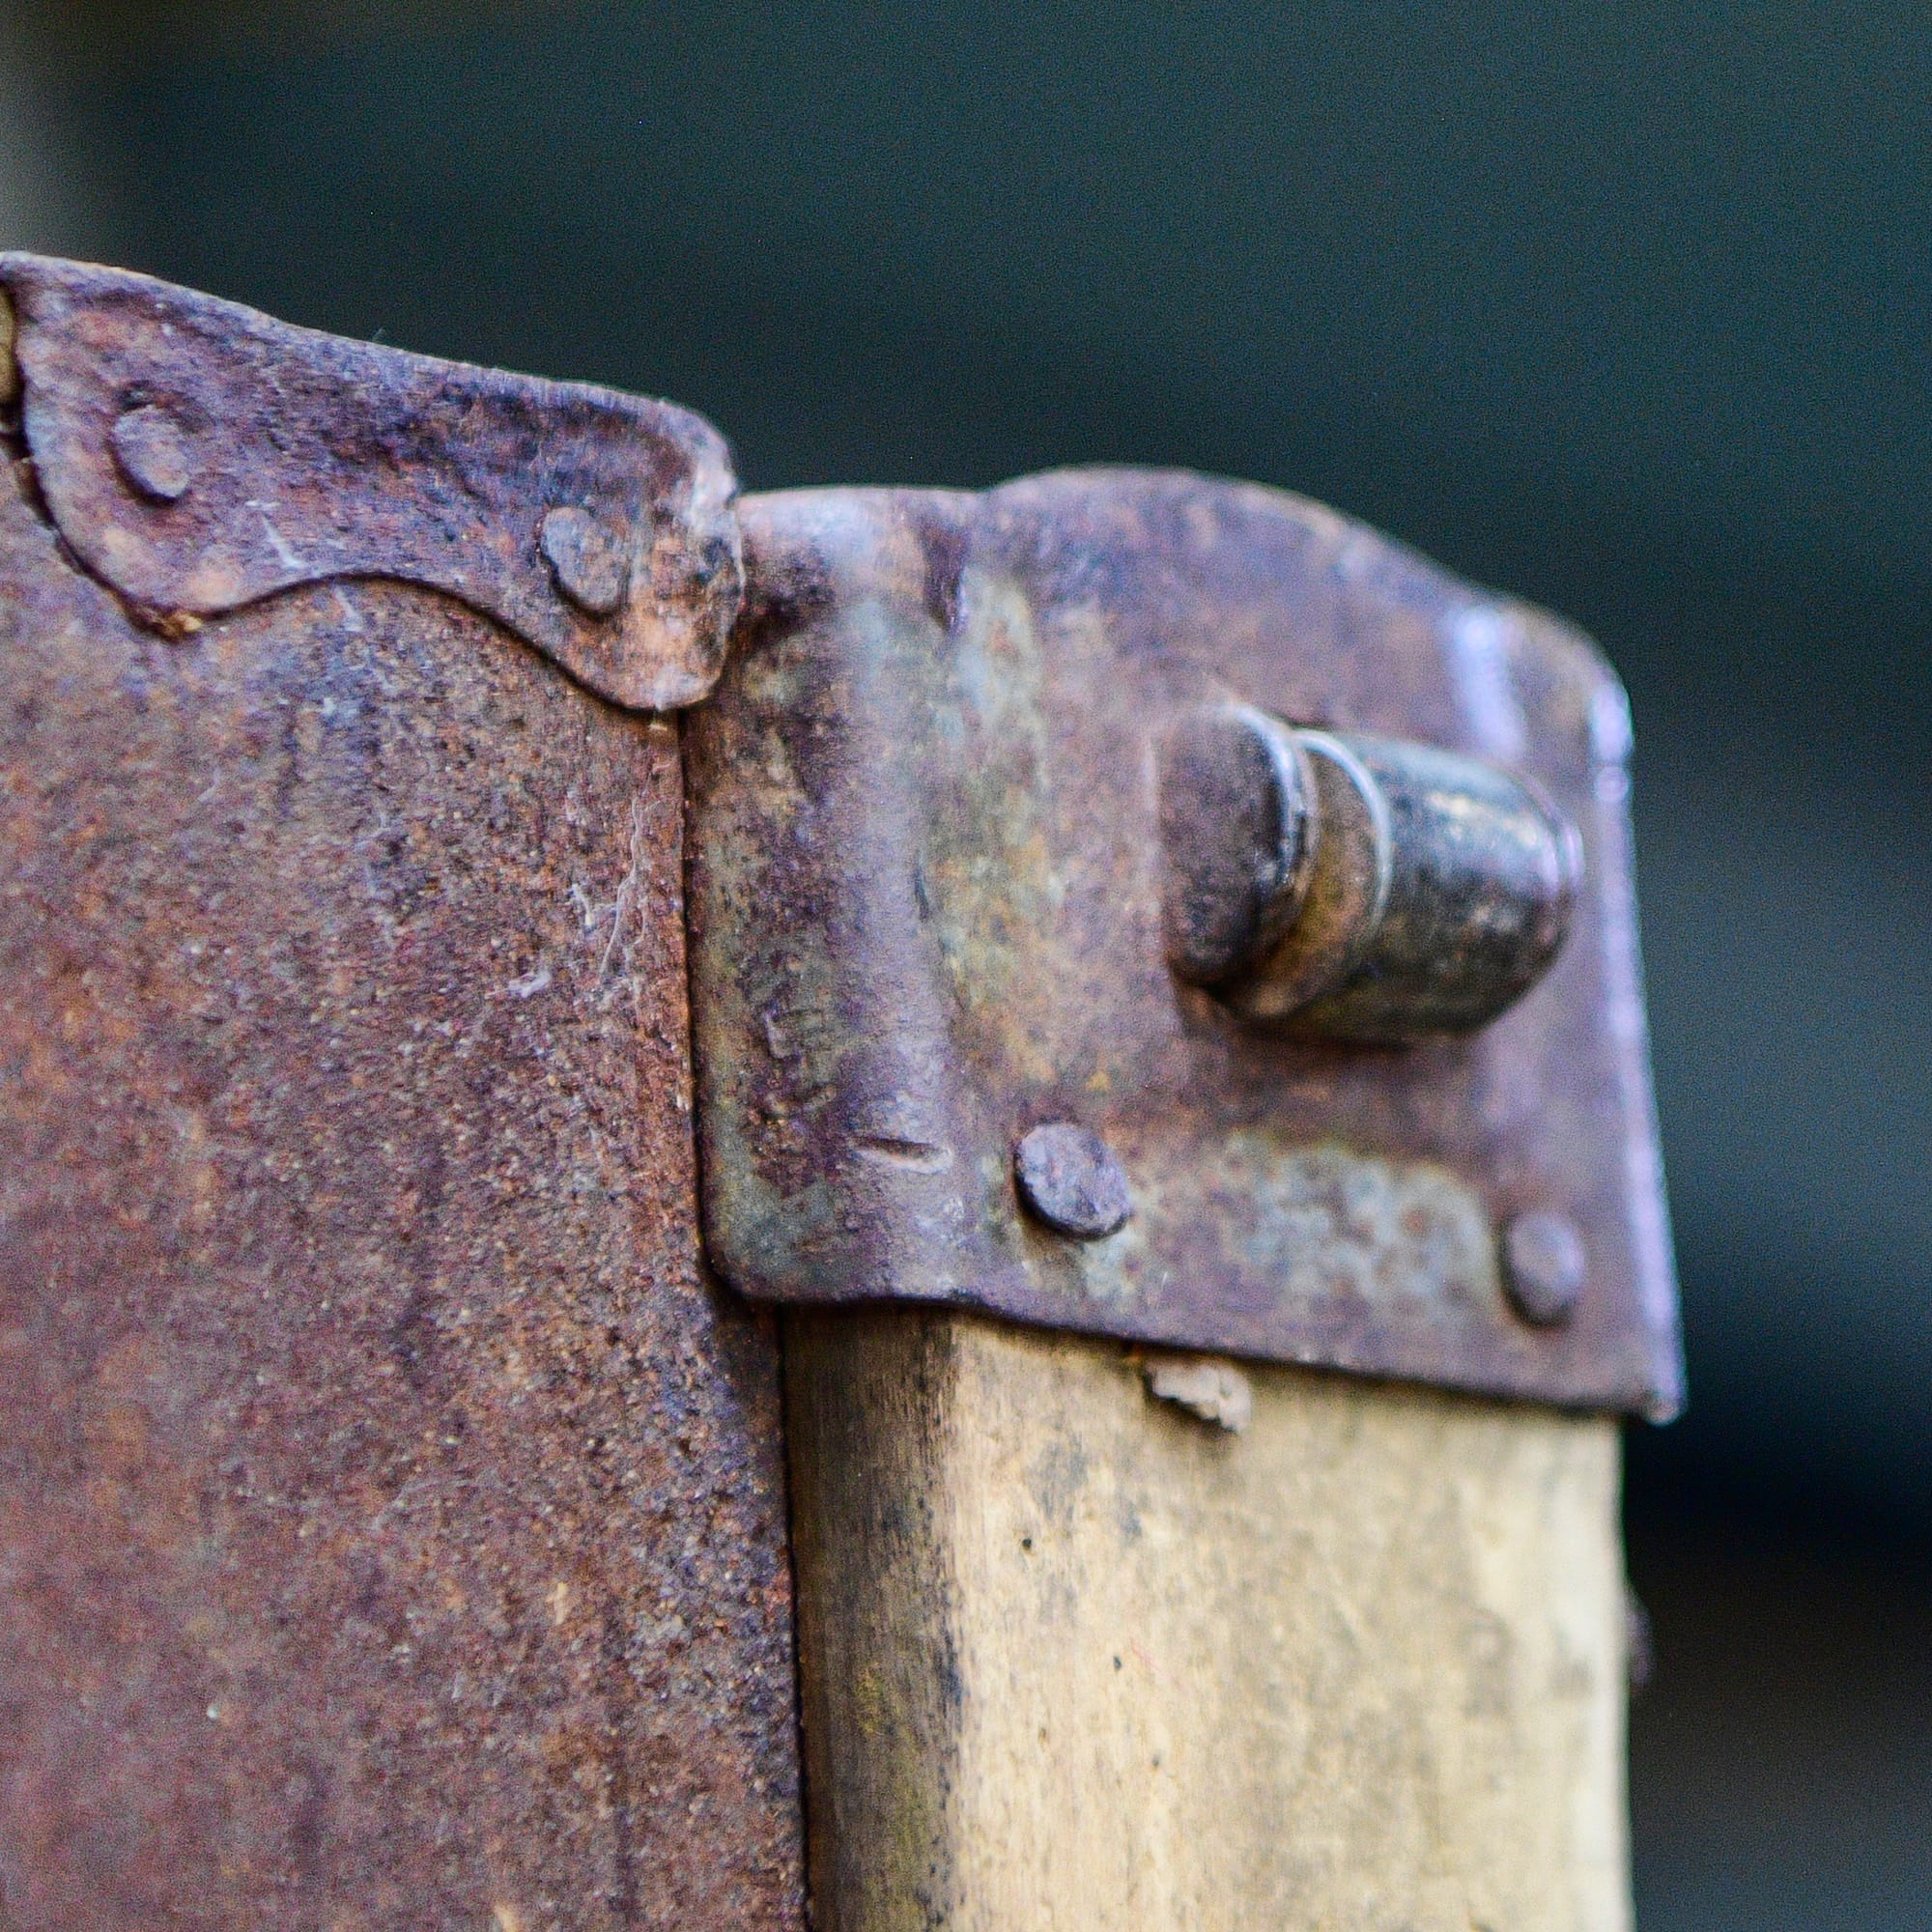
All of the hardware is secured with old-fashioned rounded-head square-tipped nails. Some of the nails are missing, and in some cases those spots have been repaired with modern flat-head nails as shown on the right. I found a small supply of the original style of nails on Ebay, so those are on the way and I'll use them to restore the original look to all the hardware.
I'm using many different tools and techniques to remove rust and paint. A small wire wheel on a hand drill does the bulk of the work, and I wore out several wire wheels while spraying rust particles all over the workshop. I'm also using an angle grinder with a paint stripper attachment on the big flat areas, and a Dremel tool with tiny wire brushes to clean out cracks and crevasses.
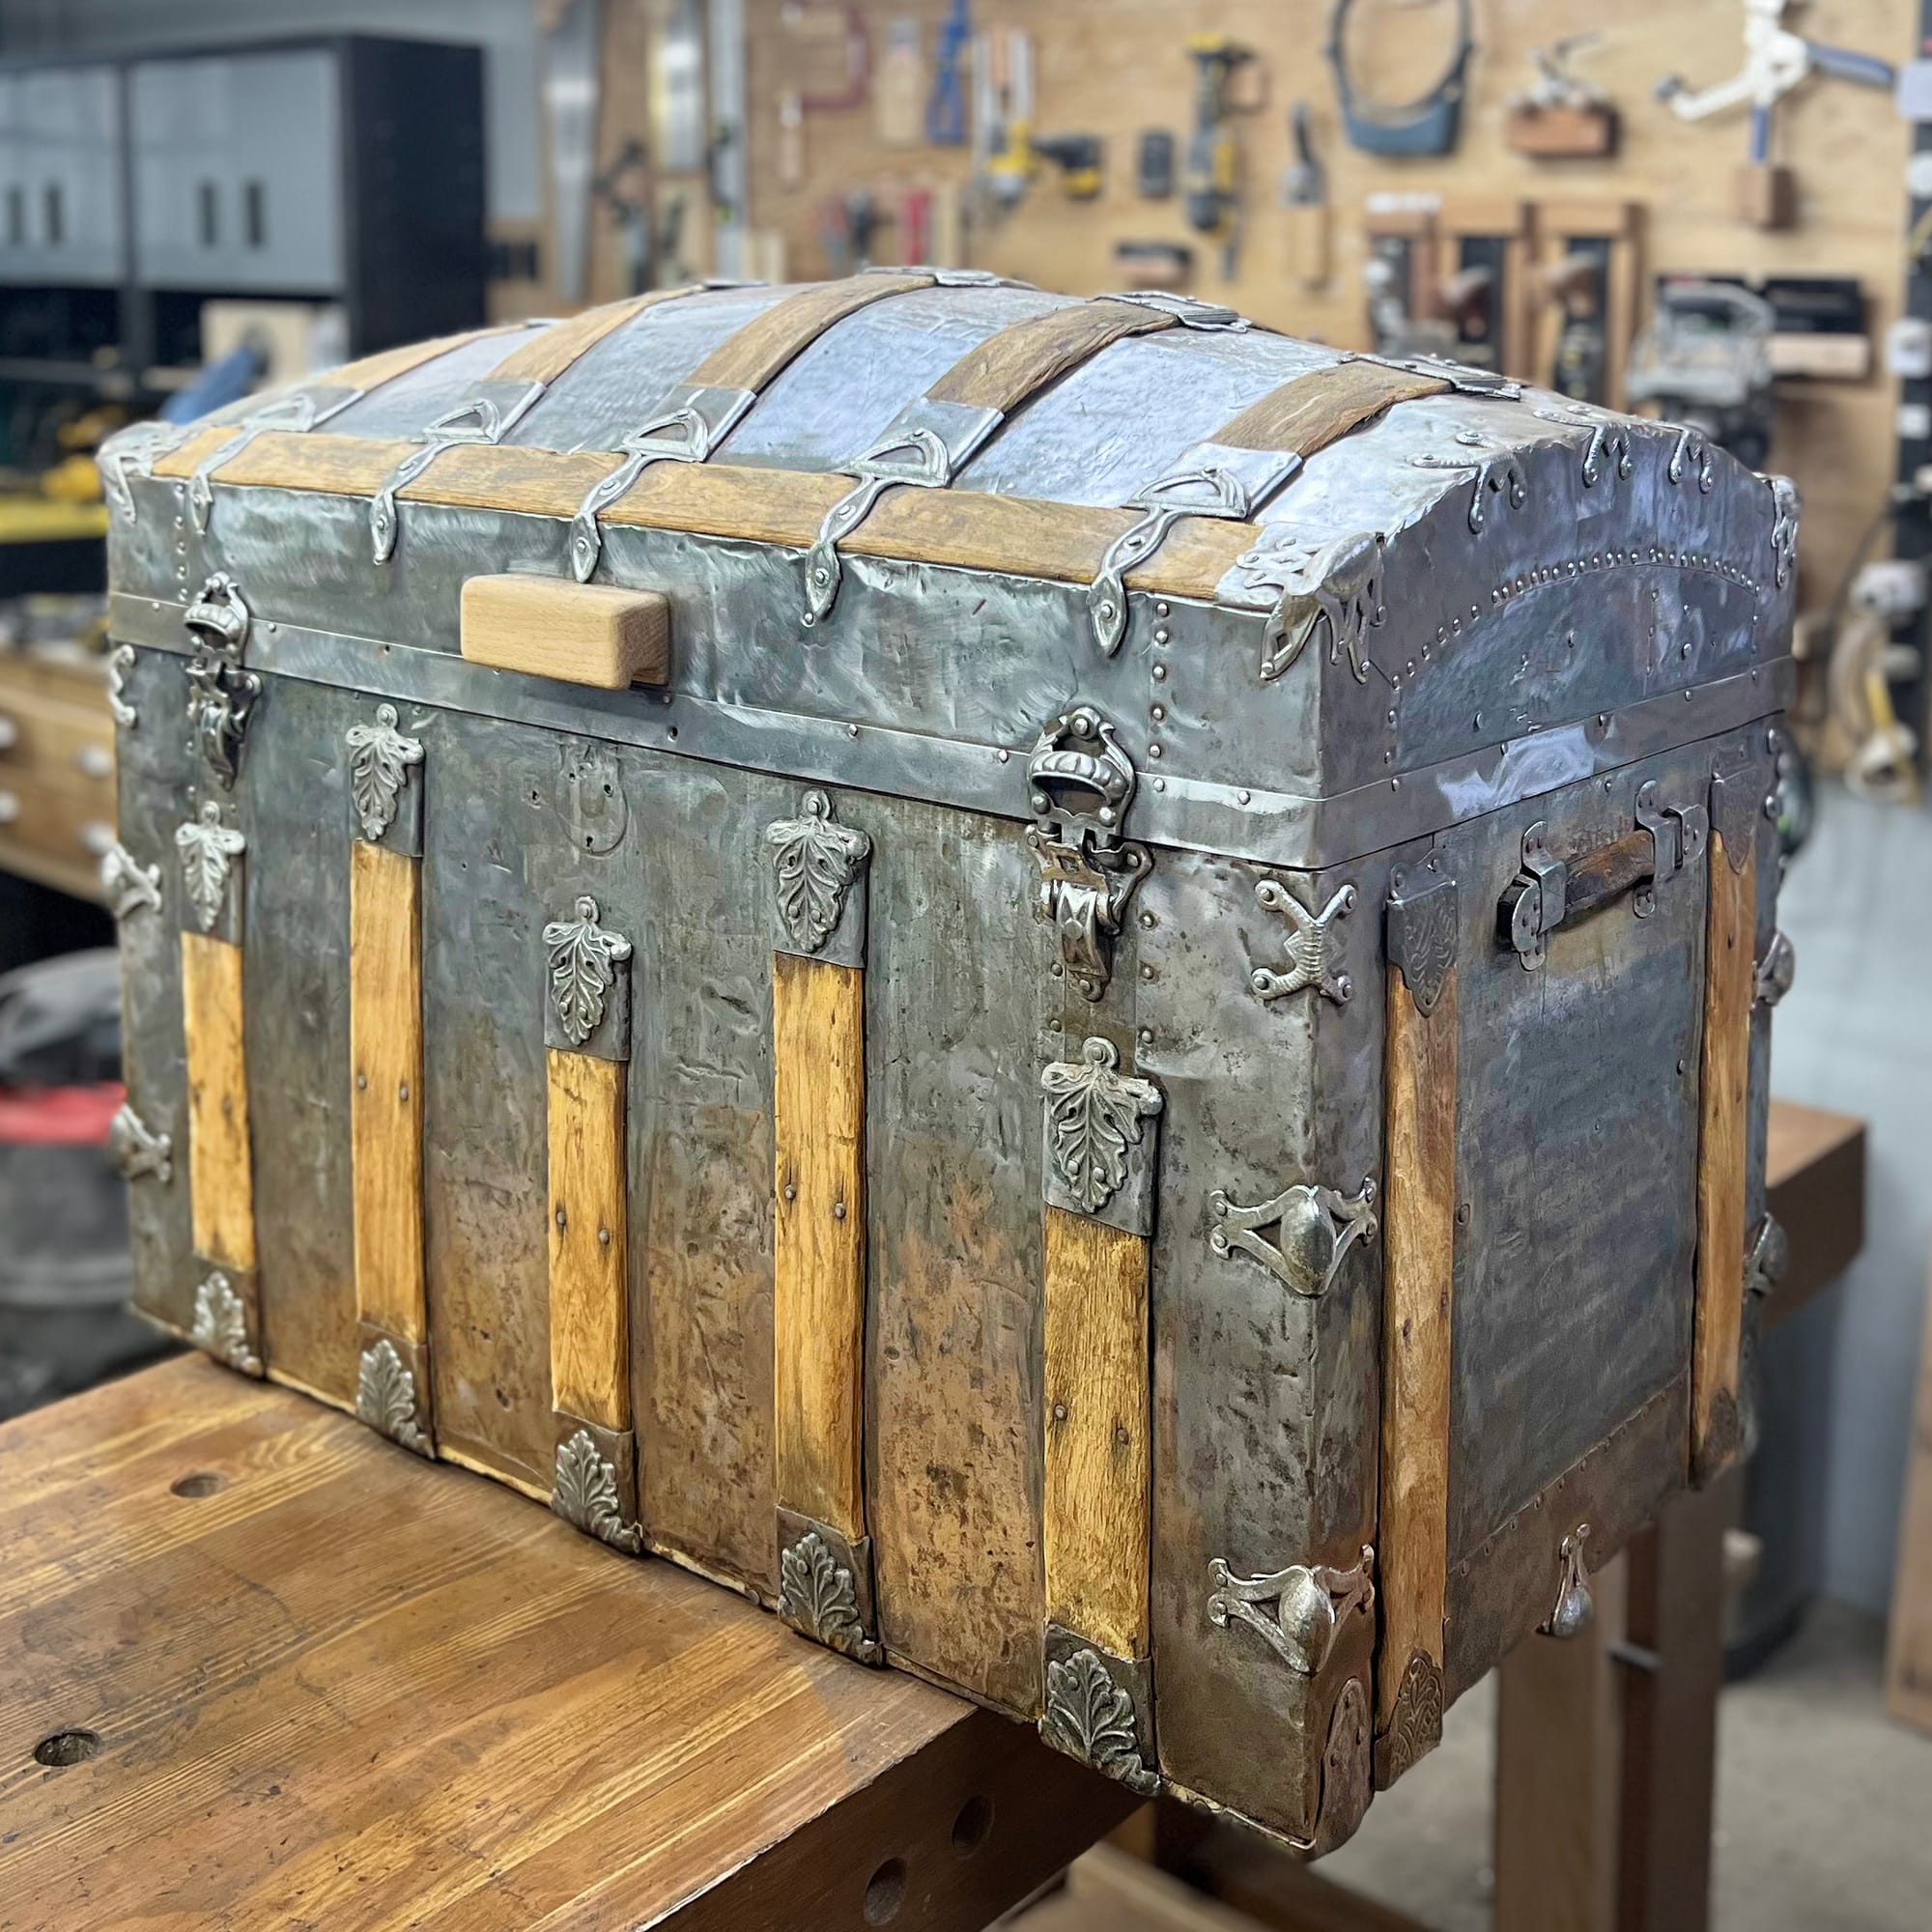
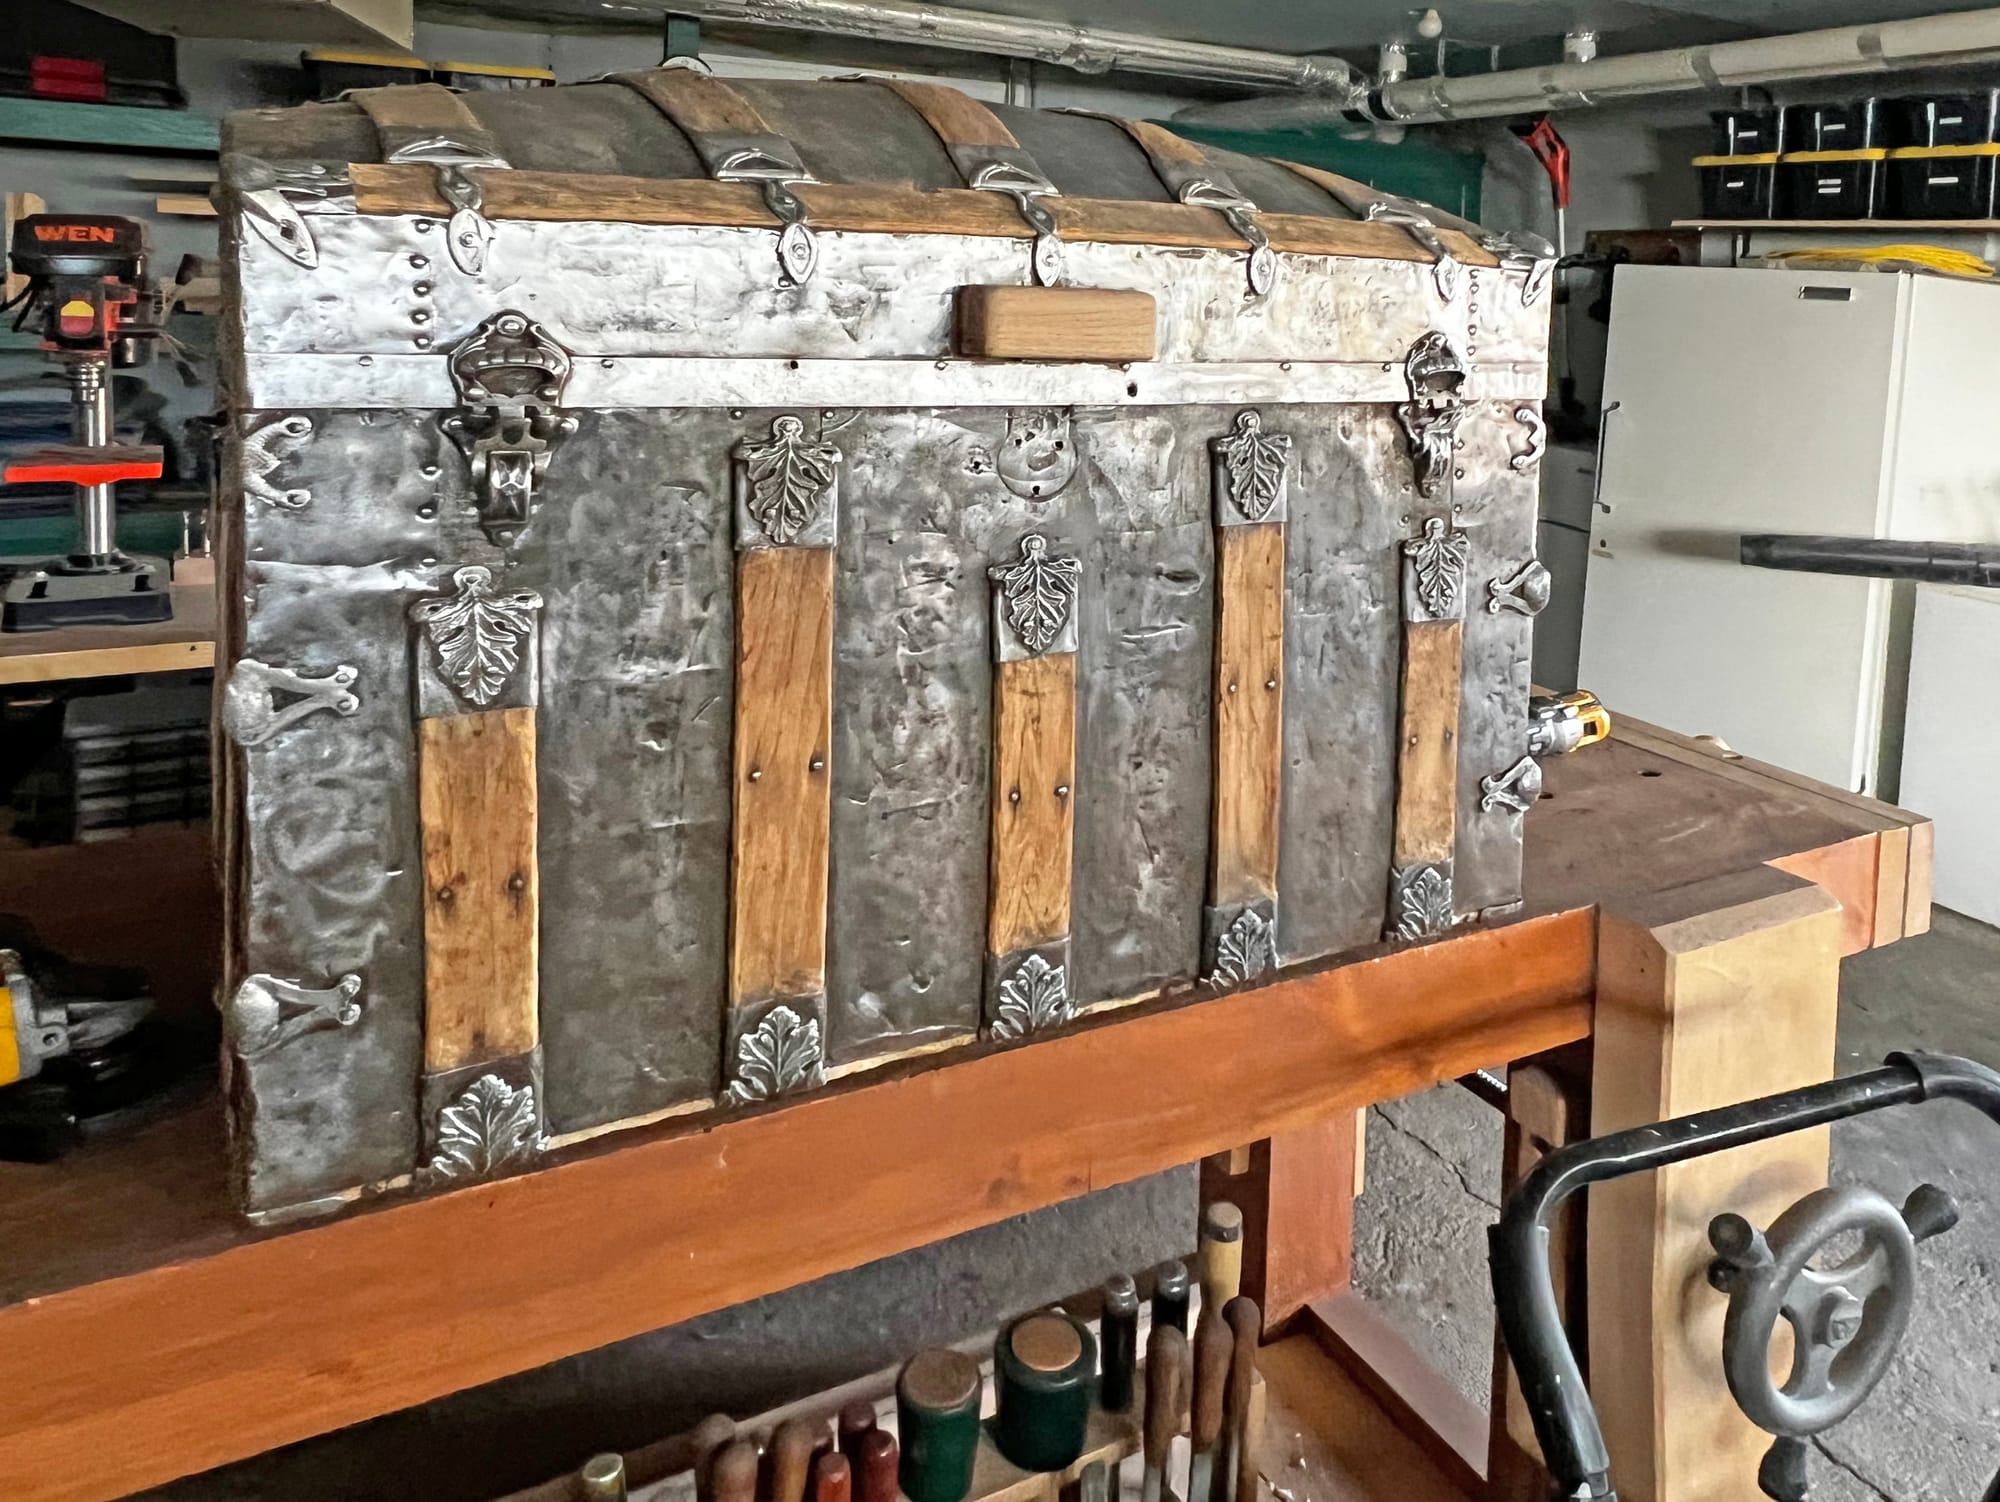
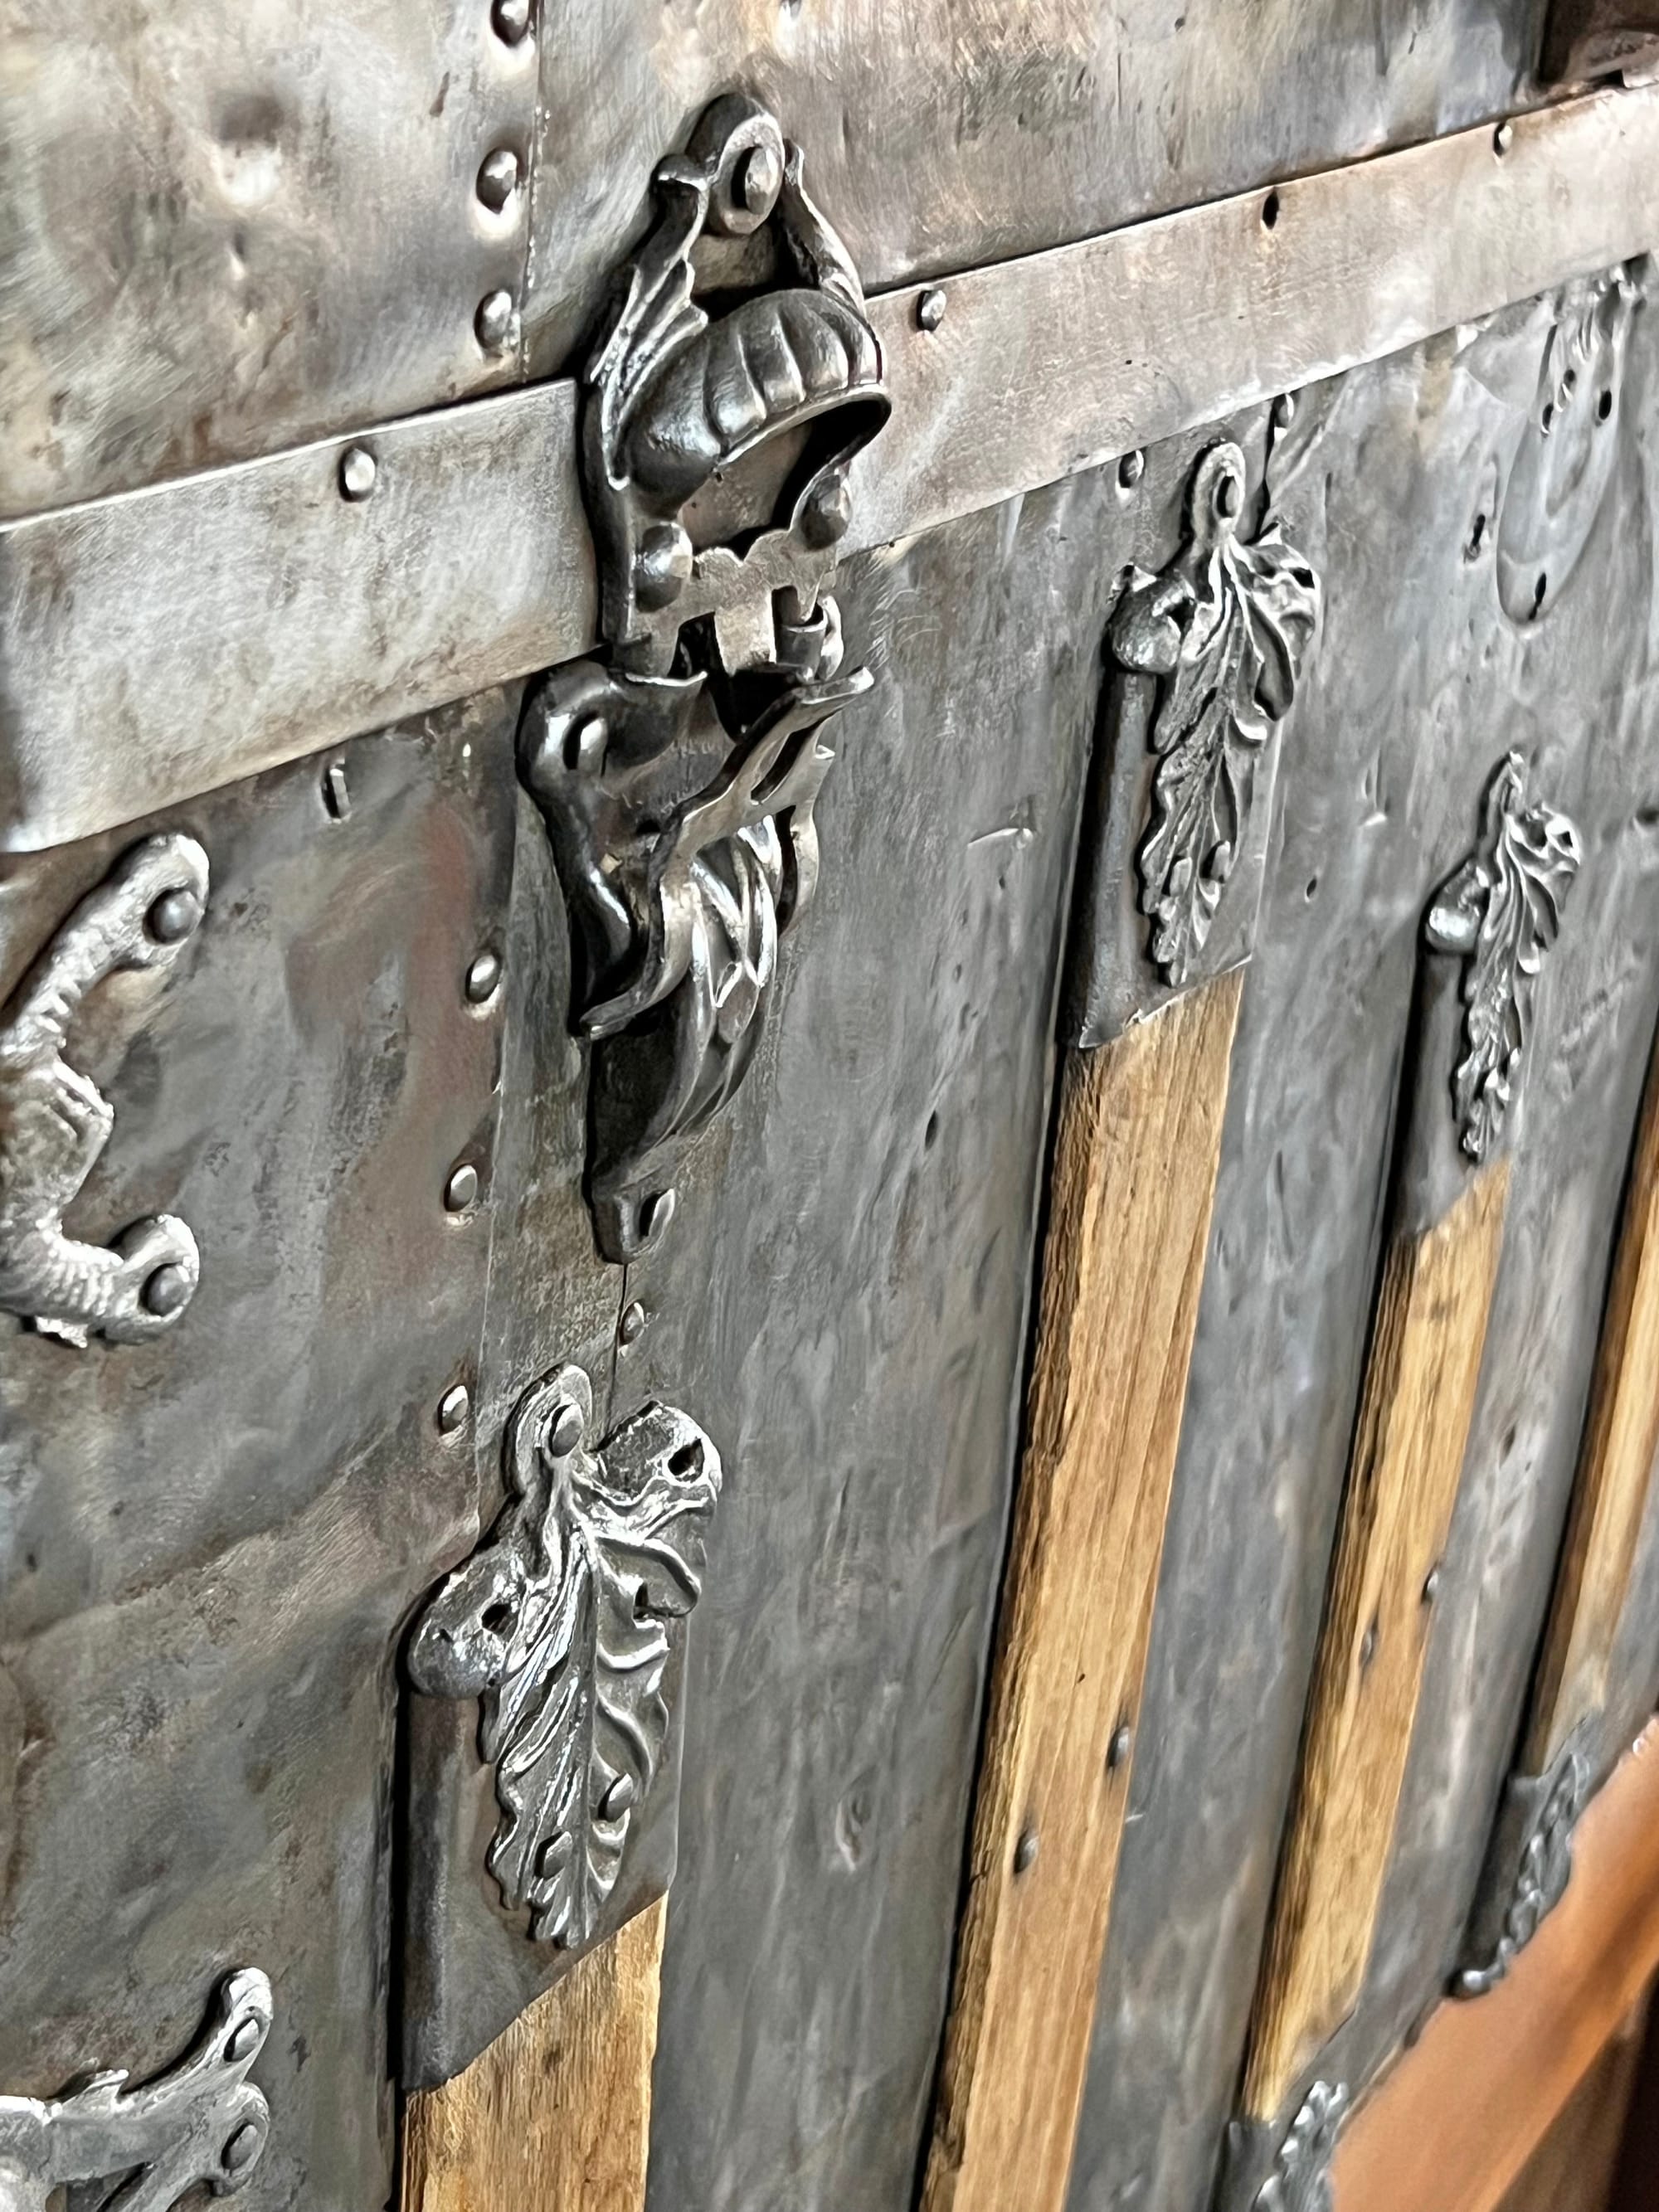
The rusty patina was nice in its way, and I considered just keeping it that way and covering everything with a durable clearcoat finish. But once I realized all of the repairs it's going to need, I decided I'd rather get rid of all the rust than have some shiny areas (where things had been repaired) and some rusty areas. The steel surfaces will still have thousands of dents and dings after I clean it up, and those are even more visible after removing the rust, so that will keep the rugged beat-up look intact.
My general plan of attack for this project is something like this:
- First do all the messy exterior cleanup, which involves a variety of harsh chemicals for removing rust and paint and is making a big mess of my workshop.
- Next will be dealing with the base: making it sturdy and sealing it up. To do that, I'm going to build a custom stand to hold the trunk upside-down without damaging the humpback top, and it will sit upside-down like that until the base is done.
- Then it will be time to deal with the interior: structural repairs, cleaning, scraping, and sanding, and then deciding on how to finish up the interior so that it smells and feels nice for storing blankets and quilts.
- The final piece of the puzzle will be applying finish to the exterior. I'll probably change my mind a few times as I work through things, but right now I'm thinking I'll use cold gun blue on the steel panels that were originally painted black, Rubio Monocoat on the basswood slats, and then put two or three coats of Flood Penetrol (a durable UV-resistant clear coat) on the exterior to make it smooth and shiny and easy to keep clean.
To be continued!